Page 242 of 394

8-38 Driving and Operating
For vehicles with a Driver
Information Center (DIC) an
“ECO Mode On”message displays.
See Fuel System Messages
on
page 4‑30for more information.
When Fuel Economy Mode is on:
.The transmission will upshift
sooner and downshift later.
.The torque converter clutch will
apply sooner and stay on longer.
.The gas pedal will be less
sensitive.
.The vehicle's computer will more
aggressively shut off fuel to the
engine under deceleration.
.The engine idle speed will be
lower.
.Driving performance is more
conservative.
Drive Systems
All-Wheel Drive
With this feature, engine power is
always sent to all four wheels. It is
fully automatic, and adjusts itself as
needed for road conditions.
When using a compact spare tire on
an AWD vehicle, the system
automatically detects the compact
spare and disables AWD. To restore
AWD operation and prevent
excessive wear on system, replace
the compact spare with a full-size
tire as soon as possible. See
Compact Spare Tire
on page 9‑68for more information.
Brakes
Antilock Brake
System (ABS)
This vehicle has the Antilock Brake
System (ABS), an advanced
electronic braking system that helps
prevent a braking skid.
When the engine is started and the
vehicle begins to drive away, ABS
checks itself. A momentary motor or
clicking noise might be heard while
this test is going on, and it might
even be noticed that the brake
pedal moves a little. This is normal.
Page 290 of 394

9-22 Vehicle Care
Some driving conditions or climates
can cause a brake squeal when the
brakes are first applied or lightly
applied. This does not mean
something is wrong with the brakes.
Properly torqued wheel nuts are
necessary to help prevent brake
pulsation. When tires are rotated,
inspect brake pads for wear and
evenly tighten wheel nuts in the
proper sequence to torque
specifications inCapacities and
Specifications on page 11‑2.
Brake linings should always be
replaced as complete axle sets.
Brake Pedal Travel
See your dealer if the brake pedal
does not return to normal height,
or if there is a rapid increase in
pedal travel. This could be a sign
that brake service might be
required.
Brake Adjustment
Every time the brakes are applied,
with or without the vehicle moving,
the brakes adjust for wear.
Replacing Brake System Parts
The braking system on a vehicle is
complex. Its many parts have to be
of top quality and work well together
if the vehicle is to have really good
braking. The vehicle was designed
and tested with top-quality brake
parts. When parts of the braking
system are replaced, be sure to get
new, approved replacement parts.
If this is not done, the brakes might
not work properly. For example,
installing disc brake pads that are
wrong for the vehicle, can change
the balance between the front and
rear brakes —for the worse. The
braking performance expected can
change in many other ways if the
wrong replacement brake parts are
installed.
Brake Fluid
The brake master cylinder reservoir
is filled with DOT 3 brake fluid as
indicated on the reservoir cap. See
Engine Compartment Overview
on
page 9‑6for the location of the
reservoir.
There are only two reasons why the
brake fluid level in the reservoir
might go down:
.The brake fluid level goes down
because of normal brake lining
wear. When new linings are
installed, the fluid level goes
back up.
Page 321 of 394

Vehicle Care 9-53
Reset the Tire Pressure Monitor
System. SeeTire Pressure
Monitor Operation
on page 9‑49.
Make certain that all wheel nuts
are properly tightened. See
“Wheel Nut Torque” under
Capacities and Specifications
on
page 11‑2
.
{WARNING
Rust or dirt on a wheel, or on the
parts to which it is fastened, can
make wheel nuts become loose
after time. The wheel could come
off and cause an accident. When
changing a wheel, remove any
rust or dirt from places where the
wheel attaches to the vehicle. In
an emergency, use a cloth or a
paper towel to do this; but be sure
to use a scraper or wire brush
later, if needed, to get all the rust
or dirt off. See If a Tire Goes Flat
on page 9‑59.
When It Is Time for New
Tires
Various factors, such as
maintenance, temperatures, driving
speeds, vehicle loading, and road
conditions influence when you need
new tires.
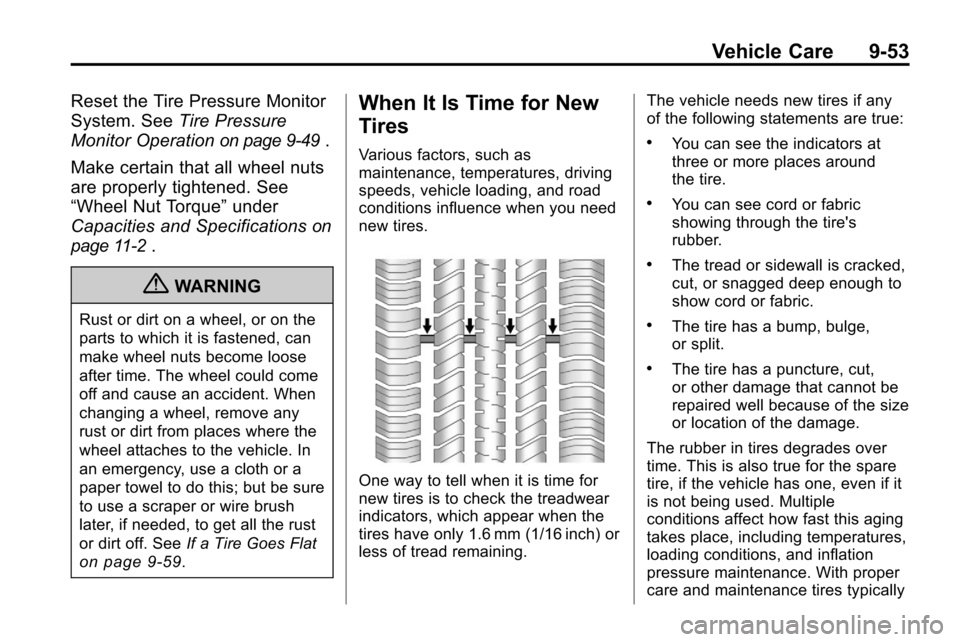
One way to tell when it is time for
new tires is to check the treadwear
indicators, which appear when the
tires have only 1.6 mm (1/16 inch) or
less of tread remaining. The vehicle needs new tires if any
of the following statements are true:
.You can see the indicators at
three or more places around
the tire.
.You can see cord or fabric
showing through the tire's
rubber.
.The tread or sidewall is cracked,
cut, or snagged deep enough to
show cord or fabric.
.The tire has a bump, bulge,
or split.
.The tire has a puncture, cut,
or other damage that cannot be
repaired well because of the size
or location of the damage.
The rubber in tires degrades over
time. This is also true for the spare
tire, if the vehicle has one, even if it
is not being used. Multiple
conditions affect how fast this aging
takes place, including temperatures,
loading conditions, and inflation
pressure maintenance. With proper
care and maintenance tires typically
Page 334 of 394

9-66 Vehicle Care
{WARNING
Wheel nuts that are improperly or
incorrectly tightened can cause
the wheels to become loose or
come off. The wheel nuts should
be tightened with a torque wrench
to the proper torque specification
after replacing. Follow the torque
specification supplied by the
aftermarket manufacturer when
using accessory locking wheel
nuts. SeeCapacities and
Specifications
on page 11‑2for
original equipment wheel nut
torque specifications.
Notice: Improperly tightened
wheel nuts can lead to brake
pulsation and rotor damage. To
avoid expensive brake repairs,
evenly tighten the wheel nuts in
the proper sequence and to the
proper torque specification. See
Capacities and Specifications
on
page 11‑2for the wheel nut
torque specification.
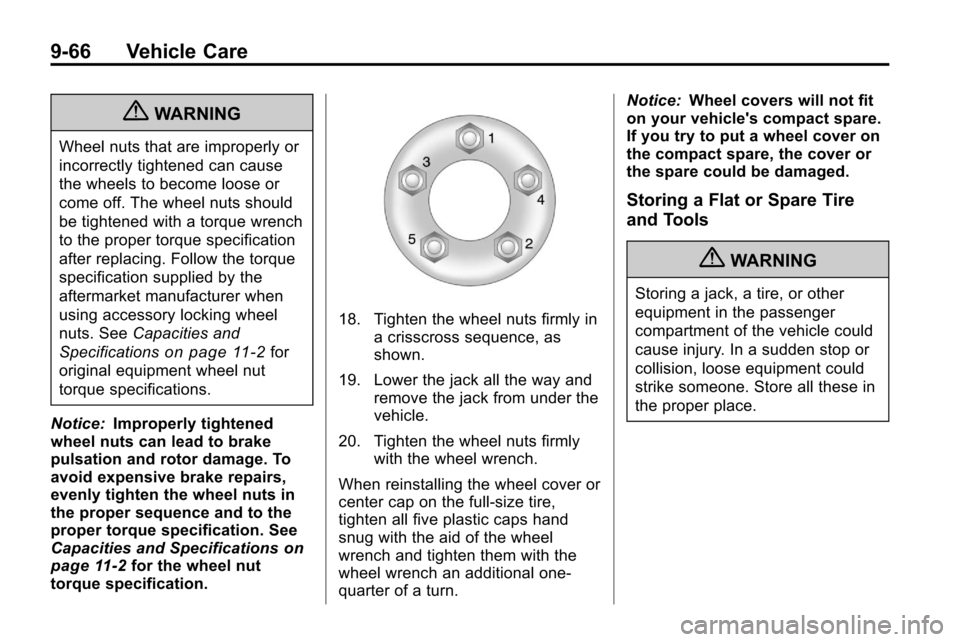
18. Tighten the wheel nuts firmly in a crisscross sequence, as
shown.
19. Lower the jack all the way and remove the jack from under the
vehicle.
20. Tighten the wheel nuts firmly with the wheel wrench.
When reinstalling the wheel cover or
center cap on the full-size tire,
tighten all five plastic caps hand
snug with the aid of the wheel
wrench and tighten them with the
wheel wrench an additional one‐
quarter of a turn. Notice:
Wheel covers will not fit
on your vehicle's compact spare.
If you try to put a wheel cover on
the compact spare, the cover or
the spare could be damaged.
Storing a Flat or Spare Tire
and Tools
{WARNING
Storing a jack, a tire, or other
equipment in the passenger
compartment of the vehicle could
cause injury. In a sudden stop or
collision, loose equipment could
strike someone. Store all these in
the proper place.
Page 365 of 394
Technical Data 11-3
ApplicationCapacities
Metric English
Transmission Fluid (Drain and Refill)
2.4L L4 6–Speed Automatic* 8.5 L 9.0 qt
3.0L V6 6–Speed Automatic* 9.0 L 9.5 qt
Wheel Nut Torque 170 Y125 ft lb
*See Automatic Transmission Fluid
on page 9‑12for information on checking fluid level.
All capacities are approximate. When adding, be sure to fill to the approximate level, as recommended in this
manual. Recheck fluid level after filling.
Engine Specifications
Engine VIN CodeTransmission Spark Plug Gap
2.4L L4 WAutomatic 0.9 mm (0.035 in)
3.0L V6 YAutomatic 1.1 mm (0.043 in)