2010 CHEVROLET EQUINOX stop start
[x] Cancel search: stop startPage 235 of 394
Driving and Operating 8-31
If the vehicle starts briefly but
then stops again, repeat the
procedure. This clears the extra
gasoline from the engine. Do not
race the engine immediately
after starting it. Operate the
engine and transmission gently
until the oil warms up and
lubricates all moving parts.
Notice: The engine is designed to
work with the electronics in the
vehicle. If you add electrical parts
or accessories, you could change
the way the engine operates.
Before adding electrical
equipment, check with your
dealer. If you do not, the engine
might not perform properly. Any
resulting damage would not be
covered by the vehicle warranty.Engine Coolant Heater
The engine coolant heater,
if available, can help in cold weather
conditions at or below −18°C (0°F)
for easier starting and better fuel
economy during engine warm-up.
Plug in the coolant heater at least
four hours before starting the
vehicle. An internal thermostat in
the plug-end of the cord will prevent
engine coolant heater operation at
temperatures above −18°C (0°F).
To Use The Engine Coolant
Heater
1. Turn off the engine.
2. Open the hood and unwrap the
electrical cord.
The electrical cord is located on
the passenger side of the engine
compartment, in front of the air
cleaner.
3. Plug it into a normal, grounded 110-volt AC outlet.
{WARNING
Plugging the cord into an
ungrounded outlet could cause an
electrical shock. Also, the wrong
kind of extension cord could
overheat and cause a fire. You
could be seriously injured. Plug
the cord into a properly grounded
three-prong 110-volt AC outlet.
If the cord will not reach, use a
heavy-duty three-prong extension
cord rated for at least 15 amps.
4. Before starting the engine, be sure to unplug and store the
cord as it was before to keep it
away from moving engine parts.
If you do not it could be
damaged.
The length of time the heater should
remain plugged in depends on
several factors. Ask a dealer in the
area where you will be parking the
vehicle for the best advice on this.
Page 240 of 394
8-36 Driving and Operating
the shift lever button before shifting
from P (Park) when the ignition key
is in ON/RUN. If you cannot shift out
of P (Park), ease pressure on the
shift lever, then push the shift lever
all the way into P (Park) as you
maintain brake application. Then
press the shift lever button and
move the shift lever into another
gear. SeeShifting Out of Park
on
page 8‑33.
R (Reverse): Use this gear to
back up.
Notice: Shifting to R (Reverse)
while the vehicle is moving
forward could damage the
transmission. The repairs would
not be covered by the vehicle
warranty. Shift to R (Reverse) only
after the vehicle is stopped.
To rock the vehicle back and forth to
get out of snow, ice or sand without
damaging the transmission, see If
the Vehicle is Stuck on page 8‑23. N (Neutral):
In this position the
engine and transmission do not
connect. Use N (Neutral) to restart a
vehicle that is already moving.
{WARNING
Shifting into a drive gear while the
engine is running at high speed is
dangerous. Unless your foot is
firmly on the brake pedal, the
vehicle could move very rapidly.
You could lose control and hit
people or objects. Do not shift
into a drive gear while the engine
is running at high speed.
Notice: Shifting out of P (Park) or
N (Neutral) with the engine
running at high speed may
damage the transmission. The
repairs would not be covered by
the vehicle warranty. Be sure the
engine is not running at high
speed when shifting the vehicle. D (Drive):
This position is for
normal driving. It provides the best
fuel economy. If you need more
power for passing, and you are:
.Going less than 56 km/h
(35 mph), push the accelerator
pedal about halfway down.
.Going about 56 km/h (35 mph) or
more, push the accelerator all
the way down.
Notice: If the vehicle seems to
accelerate slowly or not shift
gears when you go faster, and
you continue to drive the vehicle
that way, you could damage the
transmission. Have the vehicle
serviced right away. You can
drive in L (Low) when you are
driving less than 56 km/h (35 mph)
and D (Drive) for higher speeds
until then.
M (Manual Mode): Allows the
driver to select the range of gear
positions. If the vehicle has this
feature, see Manual Mode
on
page 8‑37.
Page 245 of 394
Driving and Operating 8-41
Hill Start Assist (HSA)
This vehicle has a Hill Start Assist
(HSA) feature, which may be useful
when the vehicle is stopped on a
grade. This feature is designed to
prevent the vehicle from rolling,
either forward or rearward, during
vehicle drive off. After driver
completely stops and holds the
vehicle in a complete standstill on a
grade, HSA will be automatically
activated. During the transition
period between when the driver
releases the brake pedal and starts
to accelerate to drive off on a grade,
HSA holds the braking pressure to
ensure that there is no rolling back.
The brakes will automatically
release when the accelerator pedal
is applied within the two second
window. It will not activate if the
vehicle is in a drive gear and facing
downhill or if the vehicle is facing
uphill and in R (Reverse).
Ride Control Systems
Traction Control
System (TCS)
The vehicle has a Traction Control
System (TCS) that limits wheel spin.
On a front-wheel-drive vehicle, the
system operates if it senses that
one or both of the front wheels are
spinning or beginning to lose
traction. On an All-Wheel-Drive
(AWD) vehicle, the system will
operate if it senses that any of the
wheels are spinning or beginning to
lose traction. When this happens,
the system brakes the spinning
wheel(s) and/or reduces engine
power to limit wheel spin.The system may be heard or felt
while it is working, but this is
normal.
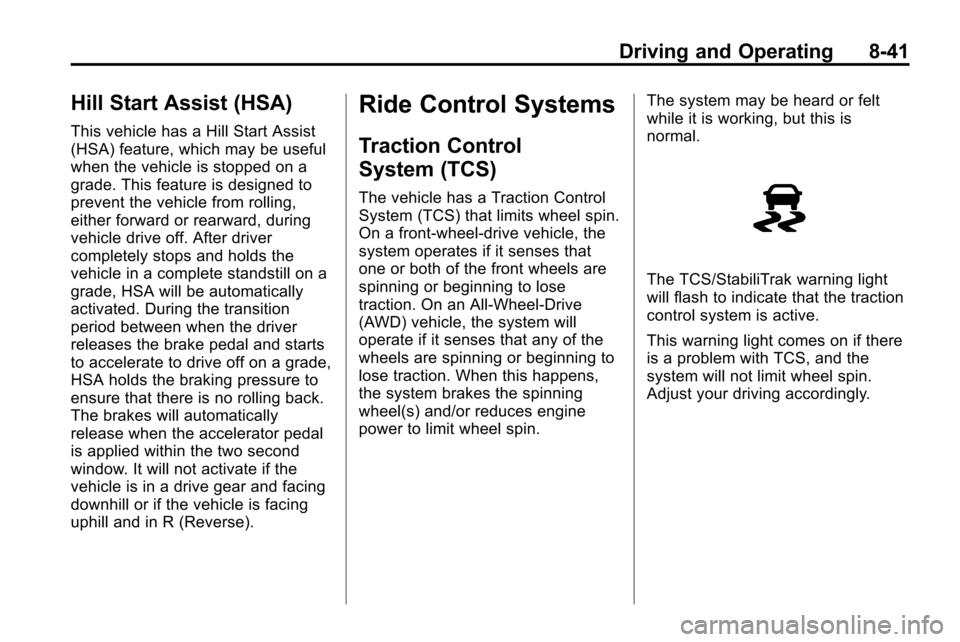
The TCS/StabiliTrak warning light
will flash to indicate that the traction
control system is active.
This warning light comes on if there
is a problem with TCS, and the
system will not limit wheel spin.
Adjust your driving accordingly.
Page 260 of 394
8-56 Driving and Operating
Filling the Tank
{WARNING
Fuel vapor burns violently and a
fuel fire can cause bad injuries.
To help avoid injuries to you and
others, read and follow all the
instructions on the fuel pump
island. Turn off the engine when
refueling. Do not smoke near fuel
or when refueling the vehicle. Do
not use cellular phones. Keep
sparks, flames, and smoking
materials away from fuel. Do not
leave the fuel pump unattended
when refueling the vehicle. This is
against the law in some places.
Do not re-enter the vehicle while
pumping fuel. Keep children away
from the fuel pump; never let
children pump fuel.The fuel cap is behind the fuel door
on the vehicle's passenger side.
Turn the fuel cap counterclockwise
to remove. Do not release the cap
too soon or it will spring back.
Reinstall the cap by turning it
clockwise until it clicks.
If the cap is not properly installed,
the Malfunction Indicator Lamp
come on. See
Malfunction Indicator
Lamp
on page 4‑16for more
information.
{WARNING
Fuel can spray out on you if you
open the fuel cap too quickly.
If you spill fuel and then
something ignites it, you could be
badly burned. This spray can
happen if the tank is nearly full,
and is more likely in hot weather.
Open the fuel cap slowly and wait
for any hiss noise to stop. Then
unscrew the cap all the way. Do not top off or overfill the tank and
wait a few seconds before removing
the nozzle. Clean fuel from painted
surfaces as soon as possible. See
Exterior Care on page 9‑75.
{WARNING
If a fire starts while you are
refueling, do not remove the
nozzle. Shut off the flow of fuel by
shutting off the pump or by
notifying the station attendant.
Leave the area immediately.
Notice: If a new fuel cap is
needed, be sure to get the right
type of cap from your dealer. The
wrong type fuel cap might not fit
properly, might cause the
malfunction indicator lamp to
light, and could damage the fuel
tank and emissions system. See
Malfunction Indicator Lamp
on
page 4‑16.
Page 264 of 394
8-60 Driving and Operating
Making Turns
Notice:Making very sharp turns
while trailering could cause the
trailer to come in contact with the
vehicle. The vehicle could be
damaged. Avoid making very
sharp turns while trailering.
When turning with a trailer, make
wider turns than normal so the
trailer will not strike soft shoulders,
curbs, road signs, trees or other
objects. Use the turn signal well in
advance and avoid jerky or sudden
maneuvers.
Turn Signals When Towing
a Trailer
The turn signal indicators on the
instrument panel flash whenever
signaling a turn or lane change.
Properly hooked up, the trailer
lamps also flash, telling other
drivers the vehicle is turning,
changing lanes or stopping.
When towing a trailer, the arrows
on the instrument panel flash for
turns even if the bulbs on the trailer are burned out. Check occasionally
to be sure the trailer bulbs are still
working.
Driving On Grades
Reduce speed and shift to a lower
gear before starting down a long or
steep downgrade. If the
transmission is not shifted down, the
brakes might have to be used so
much that they would get hot and no
longer work well.
The vehicle can tow in D (Drive).
Use a lower gear if the transmission
shifts too often.
When towing at high altitude on
steep uphill grades, engine coolant
will boil at a lower temperature than
at normal altitudes. If the engine is
turned off immediately after towing
at high altitude on steep uphill
grades, the vehicle may show signs
similar to engine overheating. To
avoid this, let the engine run while
parked, preferably on level ground,
with the transmission in P (Park) for
a few minutes before turning the
engine off. If the overheat warning
comes on, see
Engine Overheating
on page 9‑18.
Parking on Hills
{WARNING
Parking the vehicle on a hill with
the trailer attached can be
dangerous. If something goes
wrong, the rig could start to move.
People can be injured, and both
the vehicle and the trailer can be
damaged. When possible, always
park the rig on a flat surface.
If parking the rig on a hill:
1. Press the brake pedal, but do not shift into P (Park) yet. Turn
the wheels into the curb if facing
downhill or into traffic if facing
uphill.
2. Have someone place chocks under the trailer wheels.
Page 265 of 394
Driving and Operating 8-61
3. When the wheel chocks are inplace, release the brake pedal
until the chocks absorb the load.
4. Reapply the brake pedal. Then apply the parking brake and shift
into P (Park).
5. Release the brake pedal.
Leaving After Parking on a Hill
1. Apply and hold the brake pedal.
2. Start the engine.
3. Shift into a gear.
4. Release the parking brake.
5. Let up on the brake pedal.
6. Drive slowly until the trailer is clear of the chocks.
7. Stop and have someone pick up and store the chocks.
Maintenance When Trailer
Towing
The vehicle needs service more
often when pulling a trailer. See this
manual's Maintenance Schedule or
Index for more information. Things
that are especially important in
trailer operation are automatic
transmission fluid, engine oil, axle
lubricant, belts, cooling system and
brake system. Inspect these before
and during the trip.
Check periodically to see that all
hitch nuts and bolts are tight.
Engine Cooling When Trailer
Towing
The cooling system may temporarily
overheat during severe operating
conditions. See Engine Overheating
on page 9‑18.
Trailer Towing
Before pulling a trailer, there are
three important considerations that
have to do with weight:
.The weight of the trailer
.The weight of the trailer tongue
.The total weight on the vehicle's
tires
Weight of the Trailer
How heavy can a trailer safely be?
Speed, altitude, road grades,
outside temperature, special
equipment, and the amount of
tongue weight the vehicle can carry
must be considered. See “Weight of
the Trailer Tongue” later in this
section for more information.
Maximum trailer weight is calculated
assuming only the driver is in the
tow vehicle and it has all the
required trailering equipment.
The weight of additional optional
equipment, passengers and cargo in
the tow vehicle must be subtracted
from the maximum trailer weight.
Page 269 of 394
Vehicle Care 9-1
Vehicle Care
General Information
General Information . . . . . . . . . . . 9-3
California Proposition65 Warning . . . . . . . . . . . . . . . . . . 9-3
California Perchlorate Materials Requirements . . . . . . . . . . . . . . . 9-3
Accessories and Modifications . . . . . . . . . . . . . . . . 9-4
Vehicle Checks
Doing Your OwnService Work . . . . . . . . . . . . . . . . 9-4
Hood . . . . . . . . . . . . . . . . . . . . . . . . . . 9-5
Engine Compartment Overview . . . . . . . . . . . . . . . . . . . . 9-6
Engine Cover . . . . . . . . . . . . . . . . . 9-9
Engine Oil . . . . . . . . . . . . . . . . . . . 9-10
Engine Oil Life System . . . . . . . 9-11
Automatic Transmission Fluid . . . . . . . . . . . . . . . . . . . . . . . 9-12 Engine Air Cleaner/Filter . . . . . 9-13
Cooling System . . . . . . . . . . . . . . 9-14
Engine Coolant . . . . . . . . . . . . . . 9-15
Engine Overheating . . . . . . . . . 9-18
Power Steering Fluid (2.4L
L4 Engine) . . . . . . . . . . . . . . . . . 9-20
Power Steering Fluid (3.0L V6 Engine) . . . . . . . . . . . . . . . . . 9-20
Washer Fluid . . . . . . . . . . . . . . . . 9-21
Brakes . . . . . . . . . . . . . . . . . . . . . . . 9-21
Brake Fluid . . . . . . . . . . . . . . . . . . 9-22
Battery . . . . . . . . . . . . . . . . . . . . . . . 9-24
All-Wheel Drive . . . . . . . . . . . . . . 9-24
Starter Switch Check . . . . . . . . 9-25
Automatic Transmission Shift Lock Control System
Check . . . . . . . . . . . . . . . . . . . . . . 9-25
Ignition Transmission Lock Check . . . . . . . . . . . . . . . . . . . . . . 9-25
Park Brake and P (Park) Mechanism Check . . . . . . . . . 9-26
Wiper Blade Replacement . . . 9-26
Headlamp Aiming
Headlamp Aiming . . . . . . . . . . . . 9-27
Bulb Replacement
Bulb Replacement . . . . . . . . . . . 9-30
Headlamps, Front Turn Signal, Sidemarker, and Parking
Lamps . . . . . . . . . . . . . . . . . . . . . . 9-30
Fog Lamps . . . . . . . . . . . . . . . . . . 9-31
Taillamps, Turn Signal, Sidemarker, Stoplamps,
and Back-Up Lamps . . . . . . . 9-32
License Plate Lamp . . . . . . . . . . 9-33
Replacement Bulbs . . . . . . . . . . 9-34
Electrical System
Fuses . . . . . . . . . . . . . . . . . . . . . . . . 9-34
Engine Compartment Fuse Block . . . . . . . . . . . . . . . . . . . . . . . 9-34
Instrument Panel Fuse Block . . . . . . . . . . . . . . . . . . . . . . . 9-37
Page 282 of 394
9-14 Vehicle Care
How to Reinstall Engine Air
Cleaner/Filter
1. Install the air cleaner into the aircleaner housing. The outer air
cleaner filter seal must be fitted
properly in the air cleaner
housing.
2. Align the air cleaner housing cover tabs to the air cleaner
housing.
3. Install the air cleaner housing cover using the four screws.
{WARNING
Operating the engine with the air
cleaner/filter off can cause you or
others to be burned. The air
cleaner not only cleans the air; it
helps to stop flames if the engine
backfires. Use caution when
working on the engine and do not
drive with the air cleaner/filter off. Notice:
If the air cleaner/filter is
off, dirt can easily get into the
engine, which could damage it.
Always have the air cleaner/filter
in place when you are driving.
Cooling System
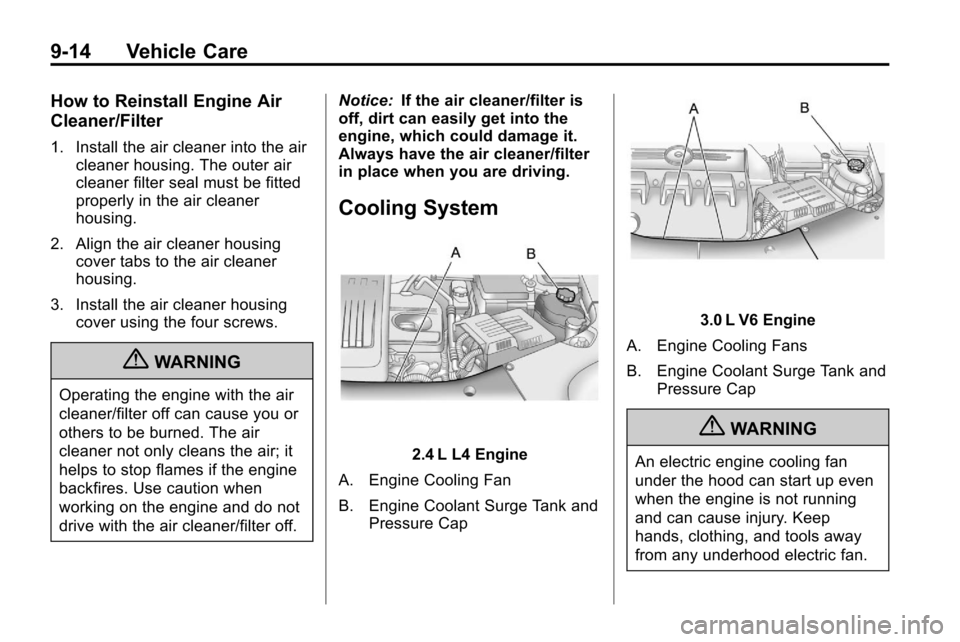
2.4 L L4 Engine
A. Engine Cooling Fan
B. Engine Coolant Surge Tank and Pressure Cap
3.0 L V6 Engine
A. Engine Cooling Fans
B. Engine Coolant Surge Tank and Pressure Cap
{WARNING
An electric engine cooling fan
under the hood can start up even
when the engine is not running
and can cause injury. Keep
hands, clothing, and tools away
from any underhood electric fan.