2010 CHEVROLET EQUINOX service
[x] Cancel search: servicePage 2 of 394

2010 Chevrolet Equinox Owner ManualM
Driving and Operating. . . . . . . . 8-1
Driving Information . . . . . . . . . . . . . 8-2
Starting and Operating . . . . . . . 8-28
Engine Exhaust . . . . . . . . . . . . . . 8-34
Automatic Transmission . . . . . . 8-35
Drive Systems . . . . . . . . . . . . . . . . 8-38
Brakes . . . . . . . . . . . . . . . . . . . . . . . 8-38
Ride Control Systems . . . . . . . . 8-41
Cruise Control . . . . . . . . . . . . . . . . 8-44
Object Detection Systems . . . . 8-46
Fuel . . . . . . . . . . . . . . . . . . . . . . . . . . 8-53
Towing . . . . . . . . . . . . . . . . . . . . . . . 8-57
Conversions and Add-Ons . . . 8-64 Vehicle Care
. . . . . . . . . . . . . . . . . . 9-1
General Information . . . . . . . . . . . . 9-3
Vehicle Checks . . . . . . . . . . . . . . . . 9-4
Headlamp Aiming . . . . . . . . . . . . 9-27
Bulb Replacement . . . . . . . . . . . . 9-30
Electrical System . . . . . . . . . . . . . 9-34
Wheels and Tires . . . . . . . . . . . . . 9-40
Jump Starting . . . . . . . . . . . . . . . . 9-69
Towing . . . . . . . . . . . . . . . . . . . . . . . 9-72
Appearance Care . . . . . . . . . . . . . 9-75
Service and Maintenance . . . 10-1
General Information . . . . . . . . . . 10-1
Scheduled Maintenance . . . . . . 10-2
Recommended Fluids,
Lubricants, and Parts . . . . . . . 10-7
Maintenance Records . . . . . . . 10-10 Technical Data
. . . . . . . . . . . . . . . 11-1
Vehicle Identification . . . . . . . . . . 11-1
Vehicle Data . . . . . . . . . . . . . . . . . . 11-2
Customer Information . . . . . . . 12-1
Customer Information . . . . . . . . 12-1
Reporting Safety Defects . . . . 12-13
Vehicle Data Recording and
Privacy . . . . . . . . . . . . . . . . . . . . 12-14
Index . . . . . . . . . . . . . . . . . . . . . i-1
Page 5 of 394
Introduction v
Notice:This means there is
something that could result in
property or vehicle damage. This
would not be covered by the
vehicle's warranty.
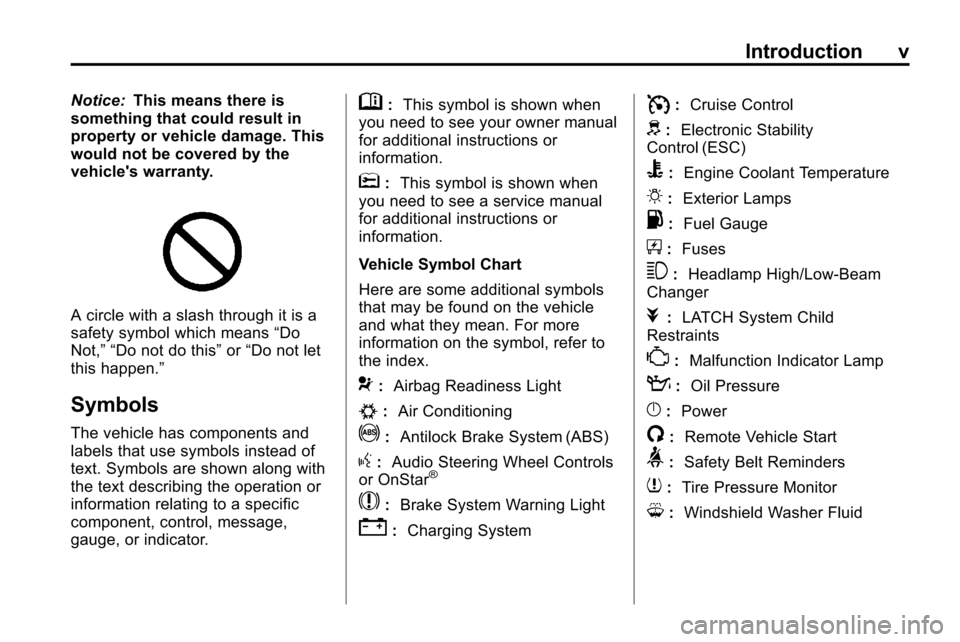
A circle with a slash through it is a
safety symbol which means “Do
Not,” “Do not do this” or“Do not let
this happen.”
Symbols
The vehicle has components and
labels that use symbols instead of
text. Symbols are shown along with
the text describing the operation or
information relating to a specific
component, control, message,
gauge, or indicator.
M: This symbol is shown when
you need to see your owner manual
for additional instructions or
information.
*: This symbol is shown when
you need to see a service manual
for additional instructions or
information.
Vehicle Symbol Chart
Here are some additional symbols
that may be found on the vehicle
and what they mean. For more
information on the symbol, refer to
the index.
9: Airbag Readiness Light
#:Air Conditioning
!:Antilock Brake System (ABS)
g:Audio Steering Wheel Controls
or OnStar®
$: Brake System Warning Light
":Charging System
I:Cruise Control
d:Electronic Stability
Control (ESC)
B: Engine Coolant Temperature
O:Exterior Lamps
.:Fuel Gauge
+:Fuses
3: Headlamp High/Low-Beam
Changer
j: LATCH System Child
Restraints
*: Malfunction Indicator Lamp
::Oil Pressure
}:Power
/:Remote Vehicle Start
>:Safety Belt Reminders
7:Tire Pressure Monitor
M:Windshield Washer Fluid
Page 9 of 394
Keys, Doors and Windows 1-3
Remote Keyless Entry
(RKE) System
SeeRadio Frequency Statementon
page 12‑16for information
regarding Part 15 of the Federal
Communications Commission (FCC)
Rules and RSS-210/211 of Industry
Canada.
Changes or modifications to
this system by other than an
authorized service facility could void
authorization to use this equipment.
If there is a decrease in the RKE
operating range:
.Check the distance. The
transmitter may be too far
from the vehicle.
.Check the location. Other
vehicles or objects may be
blocking the signal.
.Check the transmitter's battery.
See “Battery Replacement” later
in this section.
.If the transmitter is still not
working correctly, see your
dealer or a qualified technician
for service.
Remote Keyless Entry
(RKE) System Operation
The Remote Keyless Entry (RKE)
transmitter will work up to 60 m
(195 feet) away from the vehicle.
There are other conditions which
can affect the performance of the
transmitter. See Remote Keyless
Entry (RKE) System on page 1‑3.
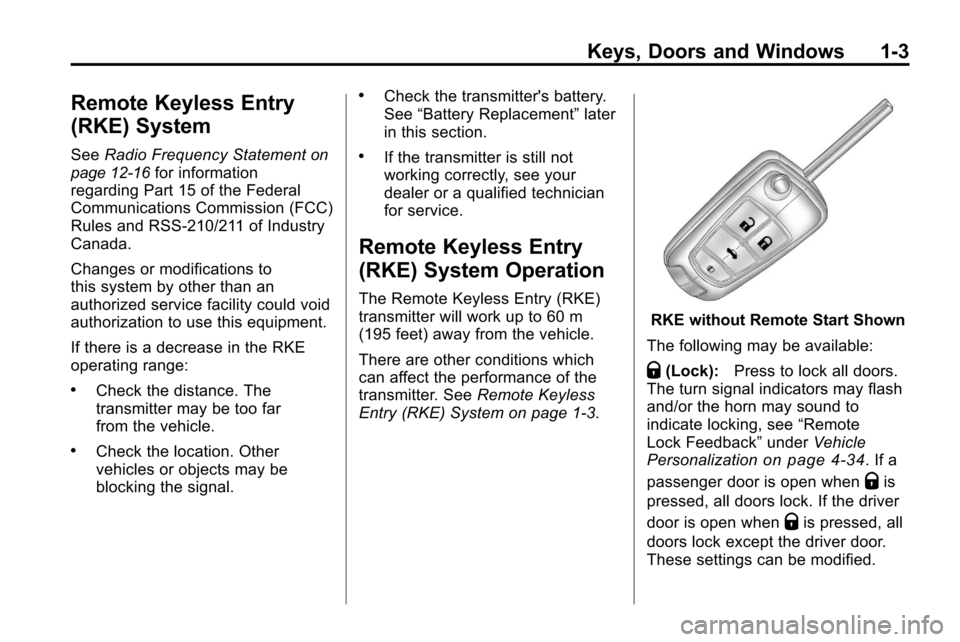
RKE without Remote Start Shown
The following may be available:
Q(Lock): Press to lock all doors.
The turn signal indicators may flash
and/or the horn may sound to
indicate locking, see “Remote
Lock Feedback” underVehicle
Personalization
on page 4‑34. If a
passenger door is open when
Qis
pressed, all doors lock. If the driver
door is open when
Qis pressed, all
doors lock except the driver door.
These settings can be modified.
Page 17 of 394
Keys, Doors and Windows 1-11
If you power open the liftgate and
the liftgate support struts have lost
pressure, the turn signals flash and
a chime sounds. The liftgate stays
open temporarily, then slowly
closes. See your dealer for service
before using the liftgate.
Obstacle Detection Features
If the liftgate encounters an obstacle
during a power open or close cycle,
a warning chime will sound and the
liftgate will automatically reverse
direction to the full closed or open
position. After removing the
obstruction, the power liftgate
operation can be used again. If the
liftgate encounters multiple
obstacles on the same power cycle,
the power function will deactivate.
The“Manually Close Power Liftgate”
warning message in the Driver
Information Center (DIC) will
display. After removing the
obstructions, the liftgate will resume
normal power operation. Your vehicle has pinch sensors
located on the side edges of the
liftgate. If an object is caught
between the liftgate and the body
and presses against this sensor, the
liftgate will reverse direction and
open fully. The liftgate will remain
open until it is activated again or
closed manually.Setting the Power Liftgate
3/4 Mode
To change the liftgate stop position:
1. Turn the liftgate switch to the
3/4 mode position and power
open the liftgate.
2. Stop the liftgate movement at the desired height by pressing
any switch.
3. Press and hold the button on the liftgate adjacent to the latch until
the turn signals flash and a beep
sounds to indicate that the new
setting is recorded. When power opened with the
3/4 mode selected, the liftgate
stops at the new set position.
There is a minimum that the power
liftgate must already be open for the
system to hold it open. The liftgate
cannot be set to stop below that
minimum.
Manual Operation of Power
Liftgate
To change the liftgate to manual
operation, turn the mode switch to
the OFF position.
With the power liftgate disabled and
all of the doors unlocked, the liftgate
can be manually opened and
closed. Manual operation of a
liftgate that also has power
operation requires more effort than
with a standard manual liftgate.
To open the liftgate, press the
touchpad on the handle on the
outside of the liftgate, and lift the
gate open. To close the liftgate, use
the pull cup to lower the liftgate
and close. With the power liftgate
Page 19 of 394
Keys, Doors and Windows 1-13
If the alarm has been activated, the
“Theft Attempted”message will
appear on the DIC. See Key and
Lock Messages
on page 4‑31for
additional information.
Immobilizer
See Radio Frequency Statementon
page 12‑16for information
regarding Part 15 of the Federal
Communications Commission (FCC)
Rules and RSS-210/211 of Industry
Canada.
Immobilizer Operation
This vehicle has a passive
theft-deterrent system.
The system does not have to be
manually armed or disarmed.
The vehicle is automatically
immobilized when the key is
removed from the ignition. The system is automatically
disarmed when the vehicle is
started with the correct key. The key
uses a transponder that matches
an immobilizer control unit in the
vehicle and automatically disarms
the system. Only the correct key
starts the vehicle. The vehicle may
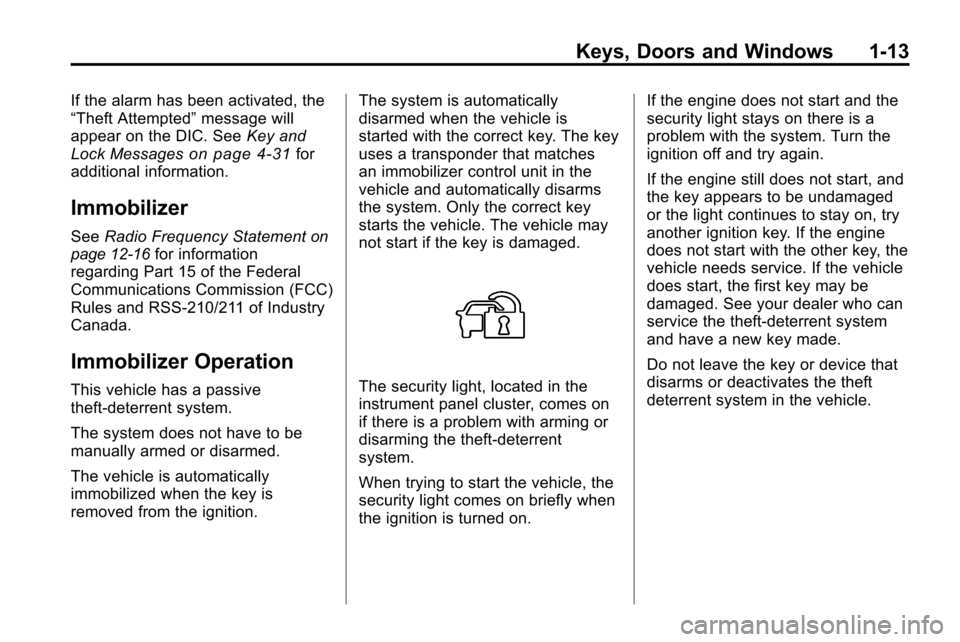
not start if the key is damaged.The security light, located in the
instrument panel cluster, comes on
if there is a problem with arming or
disarming the theft-deterrent
system.
When trying to start the vehicle, the
security light comes on briefly when
the ignition is turned on.If the engine does not start and the
security light stays on there is a
problem with the system. Turn the
ignition off and try again.
If the engine still does not start, and
the key appears to be undamaged
or the light continues to stay on, try
another ignition key. If the engine
does not start with the other key, the
vehicle needs service. If the vehicle
does start, the first key may be
damaged. See your dealer who can
service the theft-deterrent system
and have a new key made.
Do not leave the key or device that
disarms or deactivates the theft
deterrent system in the vehicle.
Page 21 of 394
Keys, Doors and Windows 1-15
Park Tilt Mirrors
If the vehicle has the memory
package, the outside mirrors have
a park tilt feature. This feature
autiomatically tilts the outside
mirrors to a preselected position
when the vehicle is in R (Reverse).
This allows the driver to view the
curb for parallel parking.
The passenger and driver mirrors
return to their original position
when the vehicle is shifted out of
R (Reverse), or the ignition is turned
off or to OFF/LOCK.
This feature can be turned on or
off through the Driver Information
Center (DIC). SeeVehicle
Personalization
on page 4‑34for
more information.
Interior Mirrors
Manual Rearview Mirror
Hold the inside rearview mirror in
the center to move it for a clearer
view of behind your vehicle. Adjust
the mirror to avoid glare from the
headlamps behind you. Push the
tab forward for daytime use and pull
it for nighttime use.
Vehicles with OnStar
®have three
additional control buttons located at
the bottom of the mirror. See your
dealer for more information on the
system and how to subscribe to
OnStar. See the OnStar owner's
guide for more information about the
services OnStar provides.
Automatic Dimming
Rearview Mirror
The vehicle may have an automatic
dimming inside rearview mirror.
Vehicles with OnStar
®have three
additional control buttons located at
the bottom of the mirror. See your
dealer for more information on the
system and how to subscribe to
OnStar. See the OnStar owner's
guide for more information about the
services OnStar provides.
O: Press to turn automatic
dimming on or off.
If the vehicle has a rear vision
camera (RVC) the
Obutton for
turning the automatic dimming
feature on or off will not be
available. See Rear Vision Camera
(RVC)
on page 8‑49for more
information.
Page 31 of 394
Seats and Restraints 2-5
To stop recall movement of the RKE
remote recall feature, press one of
the power seat controls, memory
buttons, or power mirror buttons.
Memory Seat recall may stop if
the seat is blocked. Remove the
obstruction and then press the
memory button again. If the memory
function does not work properly, see
your dealer for service.
Easy Exit Seat
If the easy exit seat feature is on in
the Driver Information Center (DIC),
automatic adjustment occurs when
the ignition is turned to LOCK/OFF
and the driver door is opened. The
driver seat moves back.
SeeVehicle Personalization
on
page 4‑34for more information.
Lumbar Adjustment
Power Lumbar
Seats with power lumbar have
controls located on the outboard
side of the seat. See Power Seat
Adjustment
on page 2‑3for more
information.
Adjust lumbar support by using the
rocker switch (D) on the outboard
side of the driver seat.
Release the switch when the
seatback reaches the desired level
of lumbar support.
Reclining Seatbacks
Manual Reclining Seatbacks
{WARNING
You can lose control of the
vehicle if you try to adjust a
manual driver's seat while the
vehicle is moving. The sudden
(Continued)
WARNING (Continued)
movement could startle and
confuse you, or make you push a
pedal when you do not want to.
Adjust the driver's seat only when
the vehicle is not moving.
{WARNING
If either seatback is not locked, it
could move forward in a sudden
stop or crash. That could cause
injury to the person sitting there.
Always push and pull on the
seatbacks to be sure they are
locked.
Vehicles with manual reclining
seatbacks have a lever on the
outboard side of the seat. Lift the
lever and move the seatback to the
desired position, then release the
lever. The seatback should not
move when pushed or pulled.
Page 55 of 394
Seats and Restraints 2-29
The parts of the airbag that come
into contact with you may be warm,
but not too hot to touch. There may
be some smoke and dust coming
from the vents in the deflated
airbags. Airbag inflation does not
prevent the driver from seeing out of
the windshield or being able to steer
the vehicle, nor does it prevent
people from leaving the vehicle.
{WARNING
When an airbag inflates, there
may be dust in the air. This dust
could cause breathing problems
for people with a history of
asthma or other breathing trouble.
To avoid this, everyone in the
vehicle should get out as soon as
it is safe to do so. If you have
breathing problems but cannot
get out of the vehicle after an
airbag inflates, then get fresh air
by opening a window or a door.
If you experience breathing(Continued)
WARNING (Continued)
problems following an airbag
deployment, you should seek
medical attention.
The vehicle has a feature that may
automatically unlock the doors, turn
on the interior lamps and hazard
warning flashers, and shut off the
fuel system after the airbags inflate.
You can lock the doors, turn off the
interior lamps and hazard warning
flashers by using the controls for
those features.
{WARNING
A crash severe enough to inflate
the airbags may have also
damaged important functions in
the vehicle, such as the fuel
system, brake and steering
systems, etc. Even if the vehicle
appears to be drivable after a
moderate crash, there may be (Continued)
WARNING (Continued)
concealed damage that could
make it difficult to safely operate
the vehicle.
Use caution if you should attempt
to restart the engine after a crash
has occurred.
In many crashes severe enough to
inflate the airbag, windshields are
broken by vehicle deformation.
Additional windshield breakage may
also occur from the right front
passenger airbag.
.Airbags are designed to inflate
only once. After an airbag
inflates, you will need some new
parts for the airbag system.
If you do not get them, the
airbag system will not be there
to help protect you in another
crash. A new system will include
airbag modules and possibly
other parts. The service manual
for your vehicle covers the need
to replace other parts.