Page 22 of 394
1-16 Keys, Doors and Windows
Automatic Dimming Mirror
Operation
Automatic dimming reduces the
glare from the headlamps of the
vehicle behind you. The dimming
feature comes on and the indicator
light comes on each time the vehicle
is started.
Cleaning the Mirror
Do not spray glass cleaner directly
on the mirror. Use a soft towel
dampened with water.
Windows
{WARNING
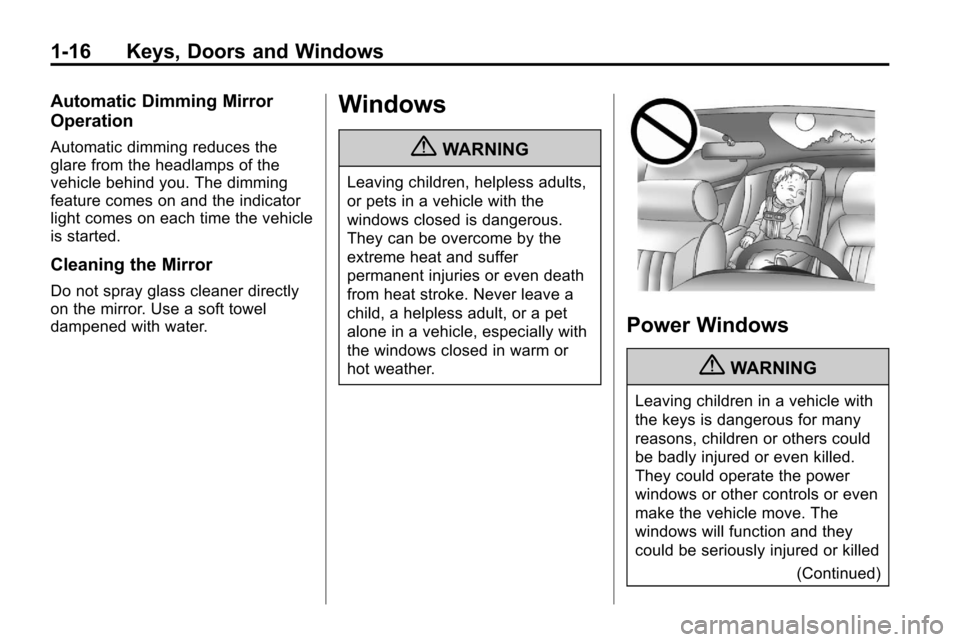
Leaving children, helpless adults,
or pets in a vehicle with the
windows closed is dangerous.
They can be overcome by the
extreme heat and suffer
permanent injuries or even death
from heat stroke. Never leave a
child, a helpless adult, or a pet
alone in a vehicle, especially with
the windows closed in warm or
hot weather.
Power Windows
{WARNING
Leaving children in a vehicle with
the keys is dangerous for many
reasons, children or others could
be badly injured or even killed.
They could operate the power
windows or other controls or even
make the vehicle move. The
windows will function and they
could be seriously injured or killed(Continued)
Page 23 of 394
Keys, Doors and Windows 1-17
WARNING (Continued)
if caught in the path of a closing
window. Do not leave keys in a
vehicle with children.
When there are children in the
rear seat use the window lockout
button to prevent unintentional
operation of the windows.
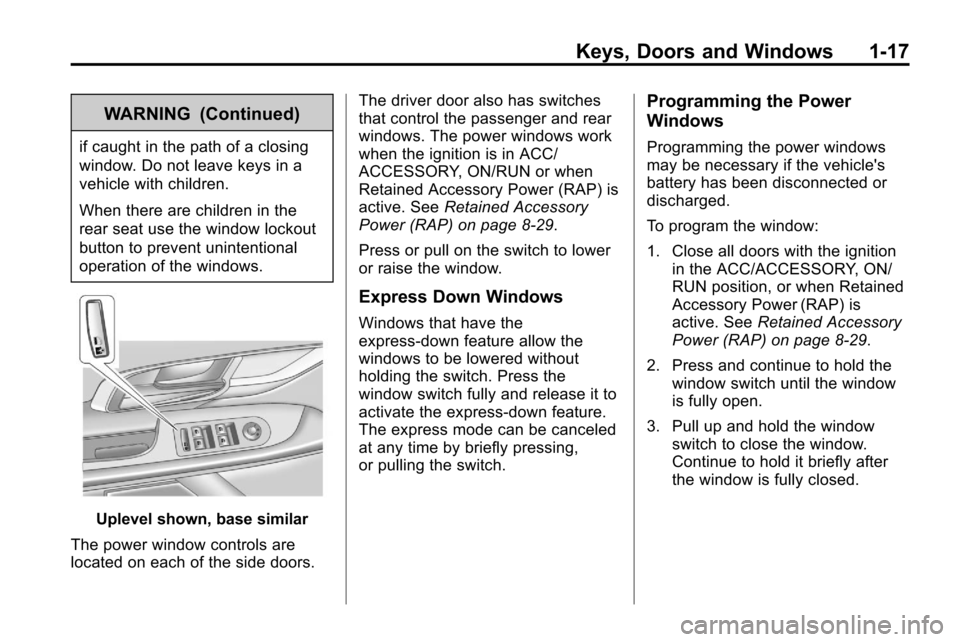
Uplevel shown, base similar
The power window controls are
located on each of the side doors. The driver door also has switches
that control the passenger and rear
windows. The power windows work
when the ignition is in ACC/
ACCESSORY, ON/RUN or when
Retained Accessory Power (RAP) is
active. See
Retained Accessory
Power (RAP) on page 8‑29.
Press or pull on the switch to lower
or raise the window.
Express Down Windows
Windows that have the
express‐down feature allow the
windows to be lowered without
holding the switch. Press the
window switch fully and release it to
activate the express‐down feature.
The express mode can be canceled
at any time by briefly pressing,
or pulling the switch.
Programming the Power
Windows
Programming the power windows
may be necessary if the vehicle's
battery has been disconnected or
discharged.
To program the window:
1. Close all doors with the ignition in the ACC/ACCESSORY, ON/
RUN position, or when Retained
Accessory Power (RAP) is
active. See Retained Accessory
Power (RAP) on page 8‑29.
2. Press and continue to hold the window switch until the window
is fully open.
3. Pull up and hold the window switch to close the window.
Continue to hold it briefly after
the window is fully closed.
Page 24 of 394
1-18 Keys, Doors and Windows
Window Lockout
o(Window Lockout): The window
lockout switch is located on the
driver door. This feature prevents
the rear passenger windows from
operating, except from the driver
position. Press the switch to turn
the lockout feature on or off. An
indicator light shows the feature
is on.
Sun Visors
Pull the sun visor down to block
glare. Detach the sun visor from the
center mount and slide it along the
rod from side-to-side to cover the
driver or passenger side of the front
window. Swing the sun visor to the
side to cover the side window. It can
be moved along the rod from
side-to-side in this position also.
Roof
Sunroof
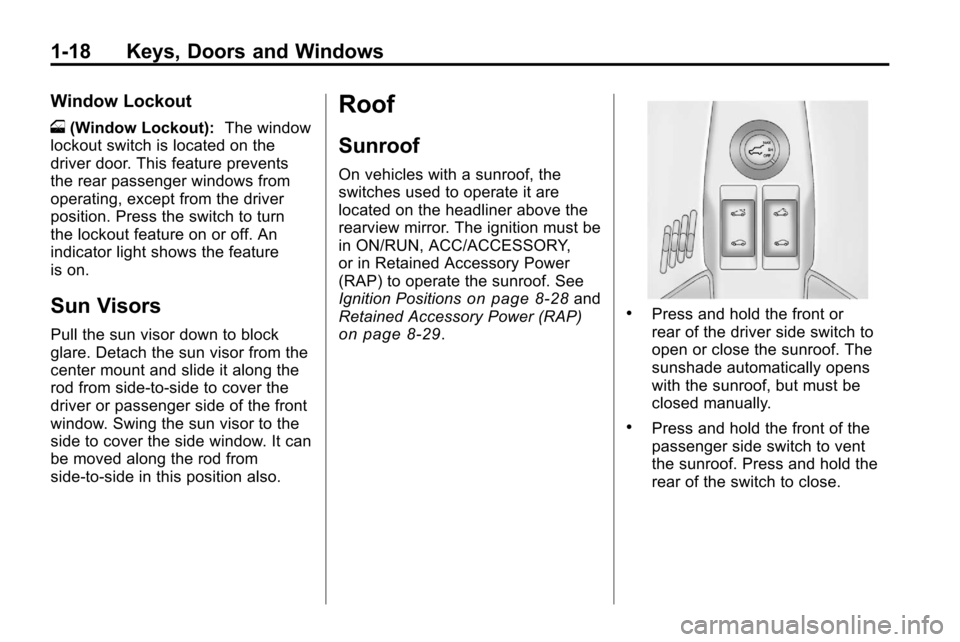
On vehicles with a sunroof, the
switches used to operate it are
located on the headliner above the
rearview mirror. The ignition must be
in ON/RUN, ACC/ACCESSORY,
or in Retained Accessory Power
(RAP) to operate the sunroof. See
Ignition Positions
on page 8‑28and
Retained Accessory Power (RAP)
on page 8‑29.
.Press and hold the front or
rear of the driver side switch to
open or close the sunroof. The
sunshade automatically opens
with the sunroof, but must be
closed manually.
.Press and hold the front of the
passenger side switch to vent
the sunroof. Press and hold the
rear of the switch to close.
Page 25 of 394
Keys, Doors and Windows 1-19
Express-open/Express-close
Press and release the front or rear
of the driver side switch to
express-open or express-close the
sunroof.
Anti-Pinch Feature
If an object is in the path of the
sunroof when it is closing, the
anti-pinch feature detects the object
and stops the sunroof from closing
at the point of the obstruction. The
sunroof then returns to the full-open
position.Dirt and debris may collect on the
sunroof seal or in the tracks that
could cause an issue with sunroof
operation, noise or plug the water
drainage system. Periodically open
the sunroof and remove any
obstacles or loose debris. Wipe the
sunroof seal and roof sealing area
using a clean cloth, mild soap, and
water. Do not remove grease from
sunroof.
Page 26 of 394
1-20 Keys, Doors and Windows
2NOTES
Page 30 of 394
2-4 Seats and Restraints
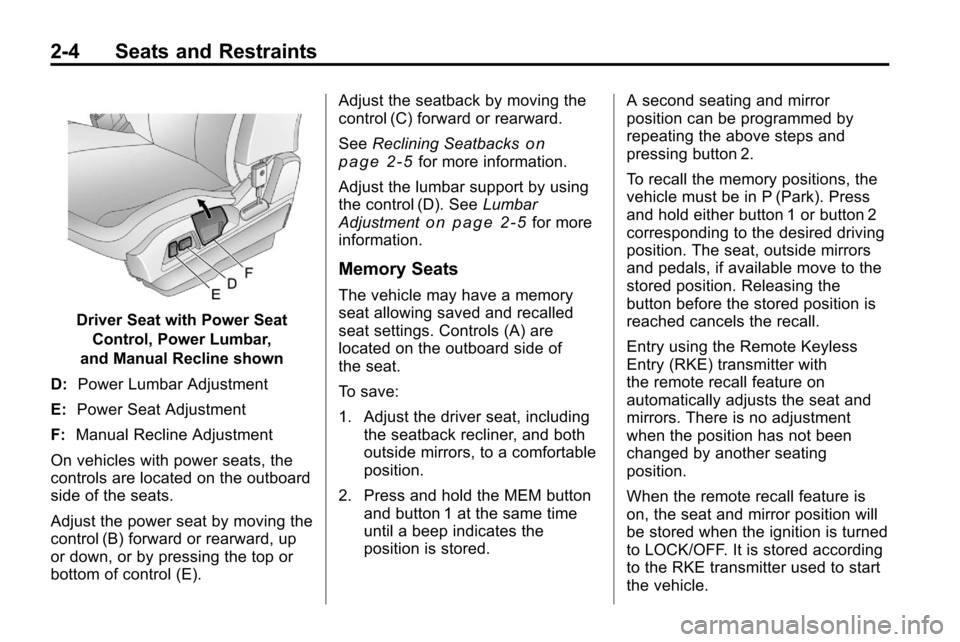
Driver Seat with Power SeatControl, Power Lumbar,
and Manual Recline shown
D: Power Lumbar Adjustment
E: Power Seat Adjustment
F: Manual Recline Adjustment
On vehicles with power seats, the
controls are located on the outboard
side of the seats.
Adjust the power seat by moving the
control (B) forward or rearward, up
or down, or by pressing the top or
bottom of control (E). Adjust the seatback by moving the
control (C) forward or rearward.
See
Reclining Seatbacks
on
page 2‑5for more information.
Adjust the lumbar support by using
the control (D). See Lumbar
Adjustment
on page 2‑5for more
information.
Memory Seats
The vehicle may have a memory
seat allowing saved and recalled
seat settings. Controls (A) are
located on the outboard side of
the seat.
To save:
1. Adjust the driver seat, including the seatback recliner, and both
outside mirrors, to a comfortable
position.
2. Press and hold the MEM button and button 1 at the same time
until a beep indicates the
position is stored. A second seating and mirror
position can be programmed by
repeating the above steps and
pressing button 2.
To recall the memory positions, the
vehicle must be in P (Park). Press
and hold either button 1 or button 2
corresponding to the desired driving
position. The seat, outside mirrors
and pedals, if available move to the
stored position. Releasing the
button before the stored position is
reached cancels the recall.
Entry using the Remote Keyless
Entry (RKE) transmitter with
the remote recall feature on
automatically adjusts the seat and
mirrors. There is no adjustment
when the position has not been
changed by another seating
position.
When the remote recall feature is
on, the seat and mirror position will
be stored when the ignition is turned
to LOCK/OFF. It is stored according
to the RKE transmitter used to start
the vehicle.
Page 47 of 394
Seats and Restraints 2-21
Safety Belt Use During
Pregnancy
Safety belts work for everyone,
including pregnant women. Like all
occupants, they are more likely to
be seriously injured if they do not
wear safety belts.
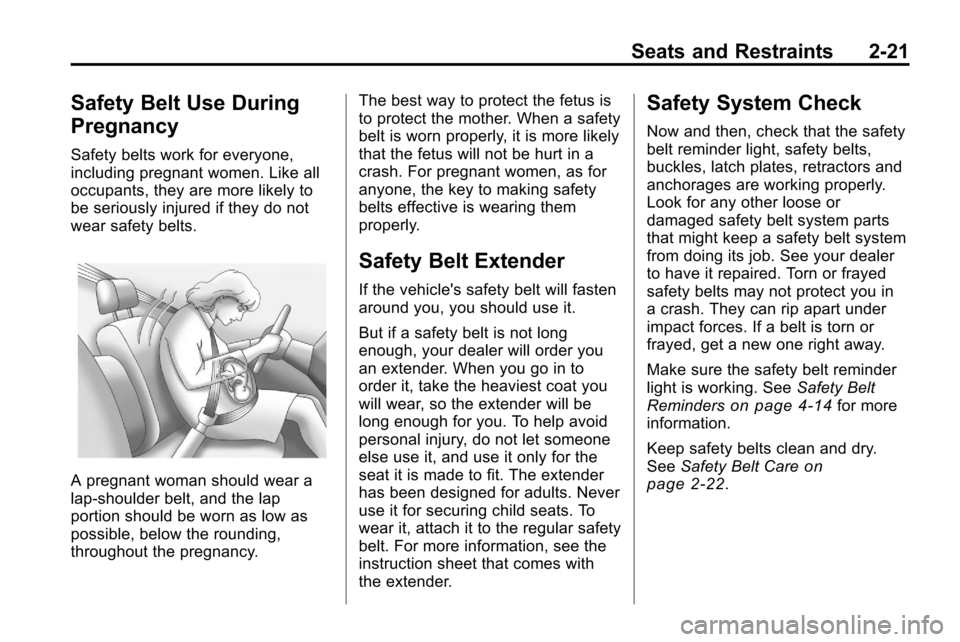
A pregnant woman should wear a
lap-shoulder belt, and the lap
portion should be worn as low as
possible, below the rounding,
throughout the pregnancy.The best way to protect the fetus is
to protect the mother. When a safety
belt is worn properly, it is more likely
that the fetus will not be hurt in a
crash. For pregnant women, as for
anyone, the key to making safety
belts effective is wearing them
properly.
Safety Belt Extender
If the vehicle's safety belt will fasten
around you, you should use it.
But if a safety belt is not long
enough, your dealer will order you
an extender. When you go in to
order it, take the heaviest coat you
will wear, so the extender will be
long enough for you. To help avoid
personal injury, do not let someone
else use it, and use it only for the
seat it is made to fit. The extender
has been designed for adults. Never
use it for securing child seats. To
wear it, attach it to the regular safety
belt. For more information, see the
instruction sheet that comes with
the extender.
Safety System Check
Now and then, check that the safety
belt reminder light, safety belts,
buckles, latch plates, retractors and
anchorages are working properly.
Look for any other loose or
damaged safety belt system parts
that might keep a safety belt system
from doing its job. See your dealer
to have it repaired. Torn or frayed
safety belts may not protect you in
a crash. They can rip apart under
impact forces. If a belt is torn or
frayed, get a new one right away.
Make sure the safety belt reminder
light is working. See
Safety Belt
Reminders
on page 4‑14for more
information.
Keep safety belts clean and dry.
See Safety Belt Care
on
page 2‑22.
Page 88 of 394
4-2 Instruments and Controls
Vehicle Messages
Vehicle Messages . . . . . . . . . . . 4-27
Battery Voltage and ChargingMessages . . . . . . . . . . . . . . . . . . 4-28
Brake System Messages . . . . 4-28
Compass Messages . . . . . . . . . 4-28
Cruise Control Messages . . . . 4-28
Door Ajar Messages . . . . . . . . . 4-29
Engine Cooling System Messages . . . . . . . . . . . . . . . . . . 4-29
Engine Oil Messages . . . . . . . . 4-30
Engine Power Messages . . . . 4-30
Fuel System Messages . . . . . . 4-30
Key and Lock Messages . . . . . 4-31 Object Detection System
Messages . . . . . . . . . . . . . . . . . . 4-31
Ride Control System Messages . . . . . . . . . . . . . . . . . . 4-31
Airbag System Messages . . . . 4-32
Safety Belt Messages . . . . . . . 4-32
Anti-Theft Alarm System
Messages . . . . . . . . . . . . . . . . . . 4-32
Service Vehicle Messages . . . 4-32
Tire Messages . . . . . . . . . . . . . . . 4-33
Transmission Messages . . . . . 4-33
Vehicle Reminder Messages . . . . . . . . . . . . . . . . . . 4-34
Vehicle Personalization
Vehicle Personalization . . . . . . 4-34
OnStar®System
OnStar®System . . . . . . . . . . . . . 4-39