2010 CHEVROLET CORVETTE automatic transmission
[x] Cancel search: automatic transmissionPage 237 of 472
TRANSMISSION HOT IDLE ENGINE
This message displays and four chimes sound if the
transmission fluid temperature rises above 132°C
(270°F) or rises rapidly. The transmission may shift
gears or apply the torque converter clutch to reduce the
fluid temperature. Driving aggressively or driving on
long hills can cause the transmission fluid temperature
to be higher than normal. If this message appears, you
may continue to drive at a slower speed. Monitor the
transmission fluid temperature and allow it to cool to at
least 110°C (230°F). The transmission fluid temperature
can be monitored with the gauges button on the DIC.
See DIC Operation and Displays
on page 4‑47and
Automatic Transmission Fluidon page 6‑31. Also
check the engine coolant temperature. If it is also hot,
see Engine Overheating on page 6‑38.
If this message is displayed during normal vehicle
operation on flat roads, the vehicle may need service.
See your dealer/retailer for an inspection.
If driving in a performance or competitive manner, the
use of (S) Sport Automatic Mode or (S) Sport Manual
Paddle Shift gear selection is recommended. See
Automatic Transmission Operation
on page 3‑26for
more information. To acknowledge the message, press the RESET button.
The message reappears every 10 minutes until this
condition changes. If you do not press the RESET
button, the message remains on the display until the
condition changes.
TURN SIGNAL ON
This message displays and a sound will be heard if a
turn signal is left on for 1.2 km (three-quarters of a mile).
Move the turn signal/multifunction lever to the off
position.
To acknowledge this message, press the RESET
button.
UNLATCH HEADER TO MOVE TOP
This message displays and a sound will be heard if you
try to lower the convertible top without first unlocking
the top. Move the latch handle to unlock the convertible
top. See
Convertible Top (Manual)
on page 3‑59or
Convertible Top (Power) on page 3‑66.
4-69
Page 240 of 472
Entering the Personal Options Menu
To enter the personal options menu, use the following
steps: 1. If you have an automatic transmission vehicle, turn the vehicle on with the shift lever in P (Park).
If you have a manual transmission vehicle, turn the
vehicle on with the parking brake set.
To avoid excessive drain on the battery, it is
recommended that the headlamps are turned off.
2. Press the OPTION button and you will enter the PERSONAL OPTIONS menu.
The DIC will display the current driver
number (1 or 2) for a few seconds and then will
display instructions on which buttons to use for
setting the personalizations. The RESET button
is used to select a setting for a particular feature.
The OPTION button is used to move to the next
feature.
3. Press the OPTION button while the instruction screen is displayed to enter the first
personalization menu item.
4. Once you have cycled through all of the personal options, pressing the OPTION button a final time
exits the personal options menu. In addition, if no
button is pressed within 45 seconds, the DIC will
exit the personal options menu.
Personal Options
The following options are available for programming:
Display Units : This option allows you to choose the
measurement units.
Press the OPTION button until DISPLAY UNITS
appears on the display, then press the RESET button
to scroll through the following modes:
.ENGLISH (default)
.METRIC
If you choose ENGLISH, all information will be
displayed in English units.
If you choose METRIC, all information will be displayed
in metric units.
When the mode you want is selected, press the
OPTION button to set your choice and advance to the
next personal option.
Auto Memory Recall (Automatic Transmission
only) : If your automatic transmission vehicle has the
memory package, you may have this option. This option
allows the driver's seat, the telescopic steering column,
if your vehicle has this feature, and the outside rearview
mirrors to automatically move to the current driver's set
position when the engine starts.
4-72
Page 241 of 472
Press the OPTION button until AUTO MEMORY
RECALL appears on the display, then press the RESET
button to scroll through the following modes:
.YES
.NO (default)
If you choose YES, the driver's seat, the outside
rearview mirrors and the telescopic steering column,
if your vehicle has this feature, positions are recalled
when you turn the ignition on.
If you choose NO, this option will turn off.
When the mode you want is selected, press the
OPTION button to set your choice and advance
to the next personal option.
Auto Exit Recall : If your vehicle has the memory
package, you may have this option. This option allows
the driver's seat and telescopic steering column, if your
vehicle has this feature, to automatically move to the
current driver's exit position when one of the following
occurs:
.The vehicle is turned off or in Retained Accessory
Power (RAP) or accessory mode and the driver's
door is opened.
.The vehicle is turned off or in RAP and the unlock
button on the keyless access transmitter is
pressed. In order for the Auto Exit Recall feature to work on an
automatic transmission vehicle, the vehicle must be in
P (Park). On a manual transmission vehicle, the parking
brake must be set.
Press the OPTION button until AUTO EXIT RECALL
appears on the display, then press the RESET button to
scroll through the following modes:
.YES
.NO (default)
If you choose YES, when you turn the ignition off and
open the driver's door or press the unlock button on the
keyless access transmitter, the seat and the telescopic
steering wheel, if your vehicle has this feature, will
return to their stored exit positions for an easy exit
or an easy entrance when returning to the vehicle.
The seat and steering wheel will only return to the
stored driving position if you press the appropriate
memory button or activate the auto memory recall
feature.
If you choose NO, this option will turn off.
When the mode you want is selected, press the
OPTION button to set your choice and advance
to the next personal option.
4-73
Page 245 of 472
If you choose HORN, the doors will automatically lock
and the horn will sound a short time after you remove a
keyless access transmitter from the interior of the
vehicle and close both doors.
If you are parking in a quiet area and do not want the
horn to sound when the doors lock, press the lock
button on the keyless access transmitter immediately
after removing it from the interior and closing the doors.
This will lock the doors and cancel the passive locking
for this ignition cycle.
When the mode you want is selected, press the
OPTION button to set your choice and advance to the
next personal option.
Passive Door Unlock : This option allows you to
select which doors will automatically unlock when you
approach and open the driver's door with the keyless
access transmitter. See Door Locks
on page 3‑10for
more information.
Press the OPTION button until PASSIVE DOOR
UNLOCK appears on the display, then press the
RESET button to scroll through the following modes:
.DRIVER
.BOTH (default)
If you choose DRIVER, only the driver's door will
automatically unlock when you approach and open
the driver's door with the keyless access transmitter. If you choose BOTH, both doors will automatically
unlock when you approach and open the driver's door
with the keyless access transmitter.
Auto Unlock :
This option allows you to select
whether the driver's door, both doors or neither door
automatically unlocks when the shift lever is moved into
P (Park) for automatic transmission vehicles or when
the ignition is turned off or is in RAP for manual
transmission vehicles.
Press the OPTION button until AUTO UNLOCK appears
on the display, then press the RESET button to scroll
through the following modes:
.OFF
.DRIVER
.BOTH (default)
If you choose OFF, this option will turn off.
If you choose DRIVER, on automatic transmission
vehicles, the driver's door will automatically unlock
when the shift lever is moved into P (Park). On
manual transmission vehicles, the driver's door will
automatically unlock when the ignition is turned
off or is in RAP.
If you choose BOTH, on automatic transmission
vehicles, both doors will automatically unlock when
the shift lever is moved into P (Park). On manual
transmission vehicles, both doors will automatically
unlock when the ignition is turned off or is in RAP.
4-77
Page 285 of 472
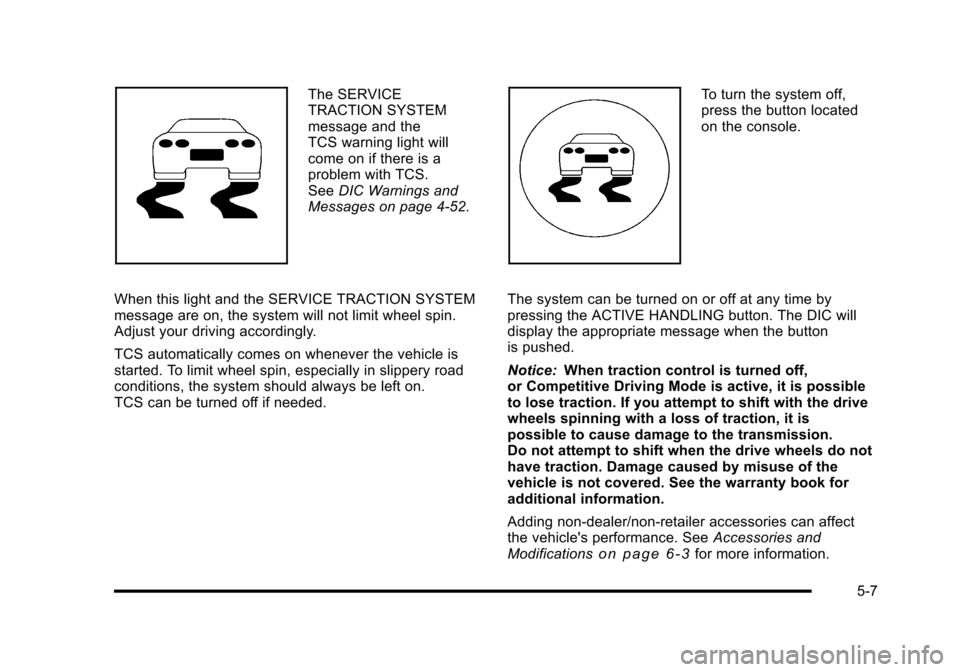
The SERVICE
TRACTION SYSTEM
message and the
TCS warning light will
come on if there is a
problem with TCS.
See DIC Warnings and
Messages on page 4‑52.
When this light and the SERVICE TRACTION SYSTEM
message are on, the system will not limit wheel spin.
Adjust your driving accordingly.
TCS automatically comes on whenever the vehicle is
started. To limit wheel spin, especially in slippery road
conditions, the system should always be left on.
TCS can be turned off if needed. To turn the system off,
press the button located
on the console.
The system can be turned on or off at any time by
pressing the ACTIVE HANDLING button. The DIC will
display the appropriate message when the button
is pushed.
Notice: When traction control is turned off,
or Competitive Driving Mode is active, it is possible
to lose traction. If you attempt to shift with the drive
wheels spinning with a loss of traction, it is
possible to cause damage to the transmission.
Do not attempt to shift when the drive wheels do not
have traction. Damage caused by misuse of the
vehicle is not covered. See the warranty book for
additional information.
Adding non‐dealer/non-retailer accessories can affect
the vehicle's performance. See Accessories and
Modifications
on page 6‑3for more information.
5-7
Page 287 of 472

If the Tire Pressure Monitor (TPM) system detects a flat
tire and the Driver Information Center (DIC) displays
TIRE FLAT, or if the TPM system is malfunctioning and
the DIC displays SERVICE TIRE MONITOR, the Active
Handling System will be affected as follows:
.The Active Handling System cannot be turned off
by the driver.
.If the Active Handling System is off, it will be
turned on automatically.
.Competitive Driving Mode or Performance Traction
Management is unavailable.
.The Active Handling System will feel different in
aiding and maintaining directional control.
Competitive Driving Mode
Competitive Driving Mode, Performance Traction
Management, and Launch Control are systems
designed to allow increased performance while
accelerating and/or cornering. This is accomplished by
regulating and optimizing the engine, brakes, and
suspension performance. These modes are for use at a closed course race track and are not intended for use
on public roads. They will not compensate for a driver
’s
inexperience or lack of familiarity with the race track.
Drivers who prefer to allow the system to have more
control of the engine, brake, and suspension are
advised to turn the normal traction control and active
handling systems on. See Racing or Other Competitive
Driving
on page 5‑19for more information.
Notice: Do not attempt to shift when the drive
wheels are spinning and do not have traction. This
may cause damage to the transmission. Damage
caused by misuse of the vehicle is not covered by
the vehicle warranty. See the warranty book for
additional information.
Competitive Driving Mode (Except ZR1)
Competitive Driving Mode allows full engine power
while the Active Handling System helps maintain
directional control of the vehicle by selective brake
application. In this mode, TCS is off and Launch Control
is available. Adjust your driving style to account for the
available engine power. See Launch Control later in
this section.
5-9
Page 313 of 472
Section 6 Service and Appearance Care
Service. . . . . . . . . . . . . . . . . . . . . . . . . . . . . . . . . . . . . . . . . . . . . 6-3
Accessories and Modifications . . . . . . . . . . . . . . . . . . 6-3
California Proposition 65 Warning . . . . . . . . . . . . . . . 6-4
California Perchlorate Materials Requirements . . . . . . . . . . . . . . . . . . . . . . . . . . . . . . . . . 6-4
Doing Your Own Service Work . . . . . . . . . . . . . . . . . . 6-5
Adding Equipment to the Outside of the Vehicle . . . . . . . . . . . . . . . . . . . . . . . . . . . . . . . . . . . . . . . . 6-5
Fuel . . . . . . . . . . . . . . . . . . . . . . . . . . . . . . . . . . . . . . . . . . . . . . . . . 6-6
Gasoline Octane . . . . . . . . . . . . . . . . . . . . . . . . . . . . . . . . 6-7
Gasoline Specifications . . . . . . . . . . . . . . . . . . . . . . . . . 6-7
California Fuel . . . . . . . . . . . . . . . . . . . . . . . . . . . . . . . . . . 6-7
Additives . . . . . . . . . . . . . . . . . . . . . . . . . . . . . . . . . . . . . . . . 6-8
Fuels in Foreign Countries . . . . . . . . . . . . . . . . . . . . . . 6-9
Filling the Tank . . . . . . . . . . . . . . . . . . . . . . . . . . . . . . . . . . 6-9
Filling a Portable Fuel Container . . . . . . . . . . . . . . . 6-12
Checking Things Under the Hood . . . . . . . . . . . . . . . 6-12
Hood Release . . . . . . . . . . . . . . . . . . . . . . . . . . . . . . . . . 6-13
Engine Compartment Overview . . . . . . . . . . . . . . . . 6-14
Engine Oil . . . . . . . . . . . . . . . . . . . . . . . . . . . . . . . . . . . . . 6-19
Engine Oil Life System . . . . . . . . . . . . . . . . . . . . . . . . 6-25
Engine Air Cleaner/Filter . . . . . . . . . . . . . . . . . . . . . . . 6-27
Automatic Transmission Fluid . . . . . . . . . . . . . . . . . . 6-31
Manual Transmission Fluid . . . . . . . . . . . . . . . . . . . . 6-31
Hydraulic Clutch . . . . . . . . . . . . . . . . . . . . . . . . . . . . . . . 6-31
Cooling System (Engine) . . . . . . . . . . . . . . . . . . . . . . 6-32 Cooling System (Intercooler) . . . . . . . . . . . . . . . . . . . 6-33
Engine Coolant . . . . . . . . . . . . . . . . . . . . . . . . . . . . . . . . 6-34
Engine Overheating . . . . . . . . . . . . . . . . . . . . . . . . . . . 6-38
Overheated Engine Protection
Operating Mode . . . . . . . . . . . . . . . . . . . . . . . . . . . . . 6-41
Power Steering Fluid . . . . . . . . . . . . . . . . . . . . . . . . . . 6-41
Windshield Washer Fluid . . . . . . . . . . . . . . . . . . . . . . 6-42
Brakes . . . . . . . . . . . . . . . . . . . . . . . . . . . . . . . . . . . . . . . . . 6-43
Battery . . . . . . . . . . . . . . . . . . . . . . . . . . . . . . . . . . . . . . . . . 6-49
Jump Starting . . . . . . . . . . . . . . . . . . . . . . . . . . . . . . . . . . 6-50
Rear Axle . . . . . . . . . . . . . . . . . . . . . . . . . . . . . . . . . . . . . . . . . 6-55
Headlamp Aiming . . . . . . . . . . . . . . . . . . . . . . . . . . . . . . . . 6-55
Bulb Replacement . . . . . . . . . . . . . . . . . . . . . . . . . . . . . . . . 6-56
High Intensity Discharge (HID) Lighting . . . . . . . . 6-56
Halogen Bulbs . . . . . . . . . . . . . . . . . . . . . . . . . . . . . . . . . 6-56
Headlamps, Front Turn Signal, and Parking Lamps . . . . . . . . . . . . . . . . . . . . . . . . . . . . . . . . . . . . . . . 6-56
Taillamps, Turn Signal, and Stoplamps . . . . . . . . 6-58
Replacement Bulbs . . . . . . . . . . . . . . . . . . . . . . . . . . . . 6-58
Windshield Replacement . . . . . . . . . . . . . . . . . . . . . . . . . 6-59
Windshield Wiper Blade Replacement . . . . . . . . . . . 6-59
Tires . . . . . . . . . . . . . . . . . . . . . . . . . . . . . . . . . . . . . . . . . . . . . . . 6-62
Winter Tires . . . . . . . . . . . . . . . . . . . . . . . . . . . . . . . . . . . . 6-63
Tire Sidewall Labeling . . . . . . . . . . . . . . . . . . . . . . . . . 6-64
Tire Terminology and Definitions . . . . . . . . . . . . . . . 6-66
6-1
Page 343 of 472
Automatic Transmission Fluid
How to Check Automatic Transmission
Fluid
It is not necessary to check the transmission fluid level.
A transmission fluid leak is the only reason for fluid
loss. If a leak occurs, take the vehicle to your dealer/
retailer service department and have it repaired as soon
as possible.
There is a special procedure for checking and changing
the transmission fluid. Because this procedure is
difficult, you should have this done at your dealer/
retailer service department. Contact your dealer/retailer
for additional information or the procedure can be found
in the service manual. To purchase a service manual,
see Service Publications Ordering Information
on
page 8‑16.
Notice: Use of the incorrect automatic transmission
fluid may damage the vehicle, and the damages may
not be covered by the vehicle's warranty. Always
use the automatic transmission fluid listed in
Recommended Fluids and Lubricants on page 7‑10. Change the fluid and filter at the intervals listed in
Scheduled Maintenance
on page 7‑3, and be sure
to use the fluid listed in Recommended Fluids and
Lubricants on page 7‑10.
Manual Transmission Fluid
It is not necessary to check the manual transmission
fluid level. A transmission fluid leak is the only reason
for fluid loss. If a leak occurs, take the vehicle to your
dealer/retailer service department and have it repaired
as soon as possible. See Recommended Fluids and
Lubricants
on page 7‑10for the proper fluid to use.
Hydraulic Clutch
It is not necessary to regularly check clutch fluid unless
you suspect there is a leak in the system. Adding fluid
will not correct a leak. A fluid loss in this system could
indicate a problem. Have the system inspected and
repaired.
6-31