2010 CHEVROLET CORVETTE parking brake
[x] Cancel search: parking brakePage 241 of 472
Press the OPTION button until AUTO MEMORY
RECALL appears on the display, then press the RESET
button to scroll through the following modes:
.YES
.NO (default)
If you choose YES, the driver's seat, the outside
rearview mirrors and the telescopic steering column,
if your vehicle has this feature, positions are recalled
when you turn the ignition on.
If you choose NO, this option will turn off.
When the mode you want is selected, press the
OPTION button to set your choice and advance
to the next personal option.
Auto Exit Recall : If your vehicle has the memory
package, you may have this option. This option allows
the driver's seat and telescopic steering column, if your
vehicle has this feature, to automatically move to the
current driver's exit position when one of the following
occurs:
.The vehicle is turned off or in Retained Accessory
Power (RAP) or accessory mode and the driver's
door is opened.
.The vehicle is turned off or in RAP and the unlock
button on the keyless access transmitter is
pressed. In order for the Auto Exit Recall feature to work on an
automatic transmission vehicle, the vehicle must be in
P (Park). On a manual transmission vehicle, the parking
brake must be set.
Press the OPTION button until AUTO EXIT RECALL
appears on the display, then press the RESET button to
scroll through the following modes:
.YES
.NO (default)
If you choose YES, when you turn the ignition off and
open the driver's door or press the unlock button on the
keyless access transmitter, the seat and the telescopic
steering wheel, if your vehicle has this feature, will
return to their stored exit positions for an easy exit
or an easy entrance when returning to the vehicle.
The seat and steering wheel will only return to the
stored driving position if you press the appropriate
memory button or activate the auto memory recall
feature.
If you choose NO, this option will turn off.
When the mode you want is selected, press the
OPTION button to set your choice and advance
to the next personal option.
4-73
Page 294 of 472
Steering
Power Steering
If power steering assist is lost because the engine stops
or the system is not functioning, the vehicle can be
steered but it will take more effort.
Magnetic Speed Variable Assist
Steering System
This system continuously adjusts the effort felt when
steering at all vehicle speeds. It provides ease when
parking, yet a firm, solid feel at highway speeds.
Steering Tips
It is important to take curves at a reasonable speed.
Traction in a curve depends on the condition of the tires
and the road surface, the angle at which the curve is
banked, and vehicle speed. While in a curve, speed is
the one factor that can be controlled.
If there is a need to reduce speed, do it before entering
the curve, while the front wheels are straight. Try to adjust the speed so you can drive through the
curve. Maintain a reasonable, steady speed. Wait to
accelerate until out of the curve, and then accelerate
gently into the straightaway.
Steering in Emergencies
There are times when steering can be more effective
than braking. For example, you come over a hill and
find a truck stopped in your lane, or a car suddenly pulls
out from nowhere, or a child darts out from between
parked cars and stops right in front of you. These
problems can be avoided by braking
—if you can stop
in time. But sometimes you cannot stop in time because
there is no room. That is the time for evasive
action —steering around the problem.
The vehicle can perform very well in emergencies
like these. First apply the brakes. See Braking
on
page 5‑4. It is better to remove as much speed as
possible from a collision. Then steer around the
problem, to the left or right depending on the
space available.
5-16
Page 313 of 472
Section 6 Service and Appearance Care
Service. . . . . . . . . . . . . . . . . . . . . . . . . . . . . . . . . . . . . . . . . . . . . 6-3
Accessories and Modifications . . . . . . . . . . . . . . . . . . 6-3
California Proposition 65 Warning . . . . . . . . . . . . . . . 6-4
California Perchlorate Materials Requirements . . . . . . . . . . . . . . . . . . . . . . . . . . . . . . . . . 6-4
Doing Your Own Service Work . . . . . . . . . . . . . . . . . . 6-5
Adding Equipment to the Outside of the Vehicle . . . . . . . . . . . . . . . . . . . . . . . . . . . . . . . . . . . . . . . . 6-5
Fuel . . . . . . . . . . . . . . . . . . . . . . . . . . . . . . . . . . . . . . . . . . . . . . . . . 6-6
Gasoline Octane . . . . . . . . . . . . . . . . . . . . . . . . . . . . . . . . 6-7
Gasoline Specifications . . . . . . . . . . . . . . . . . . . . . . . . . 6-7
California Fuel . . . . . . . . . . . . . . . . . . . . . . . . . . . . . . . . . . 6-7
Additives . . . . . . . . . . . . . . . . . . . . . . . . . . . . . . . . . . . . . . . . 6-8
Fuels in Foreign Countries . . . . . . . . . . . . . . . . . . . . . . 6-9
Filling the Tank . . . . . . . . . . . . . . . . . . . . . . . . . . . . . . . . . . 6-9
Filling a Portable Fuel Container . . . . . . . . . . . . . . . 6-12
Checking Things Under the Hood . . . . . . . . . . . . . . . 6-12
Hood Release . . . . . . . . . . . . . . . . . . . . . . . . . . . . . . . . . 6-13
Engine Compartment Overview . . . . . . . . . . . . . . . . 6-14
Engine Oil . . . . . . . . . . . . . . . . . . . . . . . . . . . . . . . . . . . . . 6-19
Engine Oil Life System . . . . . . . . . . . . . . . . . . . . . . . . 6-25
Engine Air Cleaner/Filter . . . . . . . . . . . . . . . . . . . . . . . 6-27
Automatic Transmission Fluid . . . . . . . . . . . . . . . . . . 6-31
Manual Transmission Fluid . . . . . . . . . . . . . . . . . . . . 6-31
Hydraulic Clutch . . . . . . . . . . . . . . . . . . . . . . . . . . . . . . . 6-31
Cooling System (Engine) . . . . . . . . . . . . . . . . . . . . . . 6-32 Cooling System (Intercooler) . . . . . . . . . . . . . . . . . . . 6-33
Engine Coolant . . . . . . . . . . . . . . . . . . . . . . . . . . . . . . . . 6-34
Engine Overheating . . . . . . . . . . . . . . . . . . . . . . . . . . . 6-38
Overheated Engine Protection
Operating Mode . . . . . . . . . . . . . . . . . . . . . . . . . . . . . 6-41
Power Steering Fluid . . . . . . . . . . . . . . . . . . . . . . . . . . 6-41
Windshield Washer Fluid . . . . . . . . . . . . . . . . . . . . . . 6-42
Brakes . . . . . . . . . . . . . . . . . . . . . . . . . . . . . . . . . . . . . . . . . 6-43
Battery . . . . . . . . . . . . . . . . . . . . . . . . . . . . . . . . . . . . . . . . . 6-49
Jump Starting . . . . . . . . . . . . . . . . . . . . . . . . . . . . . . . . . . 6-50
Rear Axle . . . . . . . . . . . . . . . . . . . . . . . . . . . . . . . . . . . . . . . . . 6-55
Headlamp Aiming . . . . . . . . . . . . . . . . . . . . . . . . . . . . . . . . 6-55
Bulb Replacement . . . . . . . . . . . . . . . . . . . . . . . . . . . . . . . . 6-56
High Intensity Discharge (HID) Lighting . . . . . . . . 6-56
Halogen Bulbs . . . . . . . . . . . . . . . . . . . . . . . . . . . . . . . . . 6-56
Headlamps, Front Turn Signal, and Parking Lamps . . . . . . . . . . . . . . . . . . . . . . . . . . . . . . . . . . . . . . . 6-56
Taillamps, Turn Signal, and Stoplamps . . . . . . . . 6-58
Replacement Bulbs . . . . . . . . . . . . . . . . . . . . . . . . . . . . 6-58
Windshield Replacement . . . . . . . . . . . . . . . . . . . . . . . . . 6-59
Windshield Wiper Blade Replacement . . . . . . . . . . . 6-59
Tires . . . . . . . . . . . . . . . . . . . . . . . . . . . . . . . . . . . . . . . . . . . . . . . 6-62
Winter Tires . . . . . . . . . . . . . . . . . . . . . . . . . . . . . . . . . . . . 6-63
Tire Sidewall Labeling . . . . . . . . . . . . . . . . . . . . . . . . . 6-64
Tire Terminology and Definitions . . . . . . . . . . . . . . . 6-66
6-1
Page 362 of 472
Jump Starting
If your battery has run down, you may want to use
another vehicle and some jumper cables to start your
vehicle. Be sure to use the following steps to do it
safely.
{WARNING:
Batteries can hurt you. They can be dangerous
because:
.They contain acid that can burn you.
.They contain gas that can explode or ignite.
.They contain enough electricity to burn you.
If you do not follow these steps exactly, some or
all of these things can hurt you.
Notice: If you try to start your vehicle by pushing or
pulling it, you could damage your vehicle. Do not
push or pull your vehicle to start it; instead, use the
jump starting procedure in this manual to start your
vehicle when the battery has run down.
1. Check the other vehicle. It must have a 12-volt battery with a negative ground system. Notice:
If the other vehicle's system is not a 12-volt
system with a negative ground, both vehicles can
be damaged. Only use vehicles with 12-volt systems
with negative grounds to jump start your vehicle.
2. Get the vehicles close enough so the jumper cables can reach, but be sure the vehicles are not
touching each other. If they are, it could cause a
ground connection you do not want. You would
not be able to start your vehicle, and the bad
grounding could damage the electrical systems.
To avoid the possibility of the vehicles rolling, set
the parking brake firmly on both vehicles involved
in the jump start procedure. Put an automatic
transmission in P (Park) or a manual transmission
in Neutral before setting the parking brakes.
Notice: If you leave the radio or other accessories
on during the jump starting procedure, they could
be damaged. The repairs would not be covered by
the warranty. Always turn off the radio and other
accessories when jump starting the vehicle.
3. Turn off the ignition on both vehicles. Unplug unnecessary accessories plugged into the
cigarette lighter or the accessory power outlet.
Turn off the radio and all lamps that are not
needed. This will avoid sparks and help save
both batteries. And it could save the radio!
6-50
Page 396 of 472
Tire Chains
{WARNING:
Do not use tire chains. There is not enough
clearance. Tire chains used on a vehicle without
the proper amount of clearance can cause
damage to the brakes, suspension, or other
vehicle parts. The area damaged by the tire
chains could cause you to lose control of the
vehicle and you or others may be injured in a
crash. Use another type of traction device only
if its manufacturer recommends it for use on
the vehicle and tire size combination and
road conditions. Follow that manufacturer's
instructions. To help avoid damage to the vehicle,
drive slowly, re‐adjust or remove the device if
it is contacting the vehicle, and do not spin the
wheels. If you do find traction devices that will fit,
install them on the rear tires.
Lifting the Vehicle
{WARNING:
Lifting a vehicle can cause an injury. The vehicle
can slip off the jack and roll over you or other
people. You and they could be badly injured.
Find a level place to lift your vehicle. To help
prevent the vehicle from moving: 1. Set the parking brake firmly.
2. Put an automatic transmission shift lever in P (Park), or shift a manual transmission to
1 (First) or R (Reverse).
3. Turn off the engine.
To be even more certain the vehicle won't move,
you can put blocks in front of and behind the
wheels.
6-84
Page 418 of 472
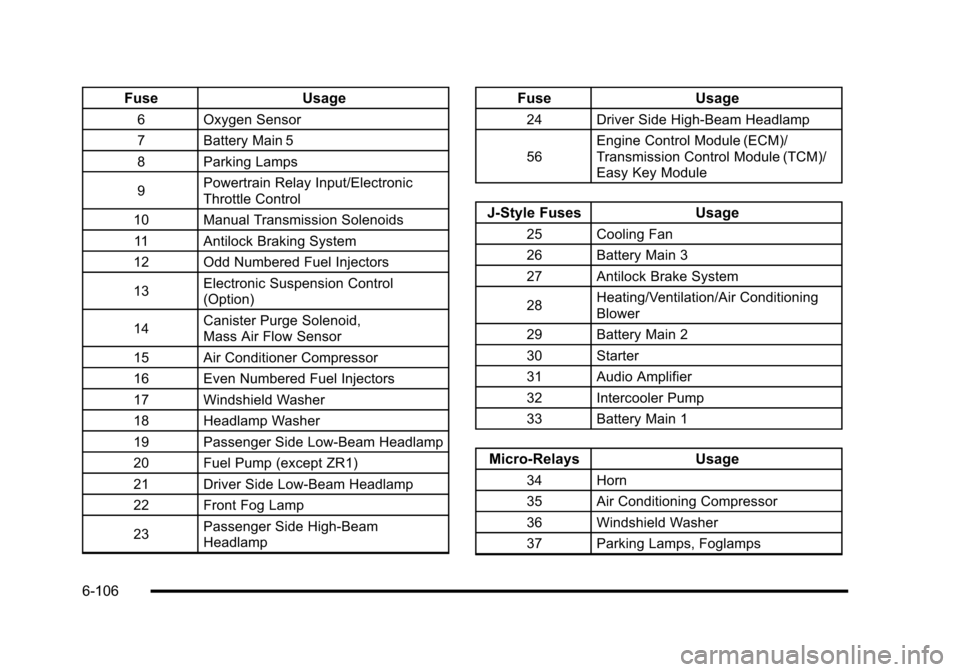
FuseUsage
6Oxygen Sensor
7 Battery Main 5
8 Parking Lamps
9 Powertrain Relay Input/Electronic
Throttle Control
10 Manual Transmission Solenoids
11 Antilock Braking System
12 Odd Numbered Fuel Injectors
13 Electronic Suspension Control
(Option)
14 Canister Purge Solenoid,
Mass Air Flow Sensor
15 Air Conditioner Compressor
16 Even Numbered Fuel Injectors
17 Windshield Washer
18 Headlamp Washer
19 Passenger Side Low-Beam Headlamp
20 Fuel Pump (except ZR1)
21 Driver Side Low-Beam Headlamp
22 Front Fog Lamp
23 Passenger Side High-Beam
Headlamp
Fuse
Usage
24Driver Side High-Beam Headlamp
56 Engine Control Module (ECM)/
Transmission Control Module (TCM)/
Easy Key Module
J-Style Fuses
Usage
25Cooling Fan
26 Battery Main 3
27 Antilock Brake System
28 Heating/Ventilation/Air Conditioning
Blower
29 Battery Main 2
30 Starter
31 Audio Amplifier
32 Intercooler Pump
33 Battery Main 1
Micro-Relays Usage
34Horn
35 Air Conditioning Compressor
36 Windshield Washer
37 Parking Lamps, Foglamps
6-106
Page 427 of 472
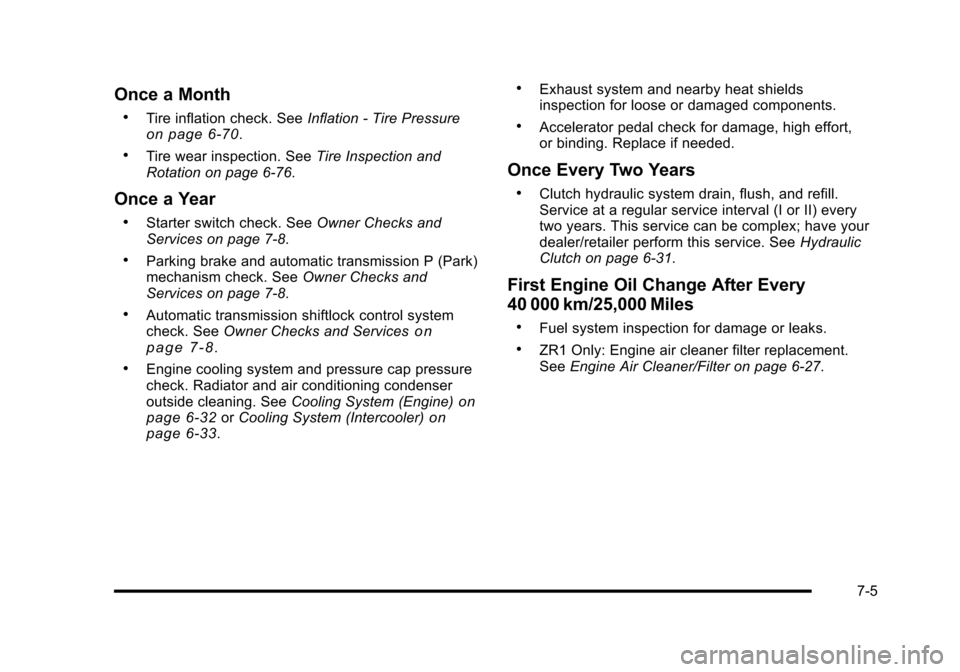
Once a Month
.Tire inflation check. SeeInflation - Tire Pressureon page 6‑70.
.Tire wear inspection. See Tire Inspection and
Rotation on page 6‑76.
Once a Year
.Starter switch check. See Owner Checks and
Services on page 7‑8.
.Parking brake and automatic transmission P (Park)
mechanism check. See Owner Checks and
Services on page 7‑8.
.Automatic transmission shiftlock control system
check. See Owner Checks and Serviceson
page 7‑8.
.Engine cooling system and pressure cap pressure
check. Radiator and air conditioning condenser
outside cleaning. See Cooling System (Engine)
on
page 6‑32or Cooling System (Intercooler)on
page 6‑33.
.Exhaust system and nearby heat shields
inspection for loose or damaged components.
.Accelerator pedal check for damage, high effort,
or binding. Replace if needed.
Once Every Two Years
.Clutch hydraulic system drain, flush, and refill.
Service at a regular service interval (I or II) every
two years. This service can be complex; have your
dealer/retailer perform this service. See Hydraulic
Clutch on page 6‑31.
First Engine Oil Change After Every
40 000 km/25,000 Miles
.Fuel system inspection for damage or leaks.
.ZR1 Only: Engine air cleaner filter replacement.
See Engine Air Cleaner/Filter on page 6‑27.
7-5
Page 430 of 472
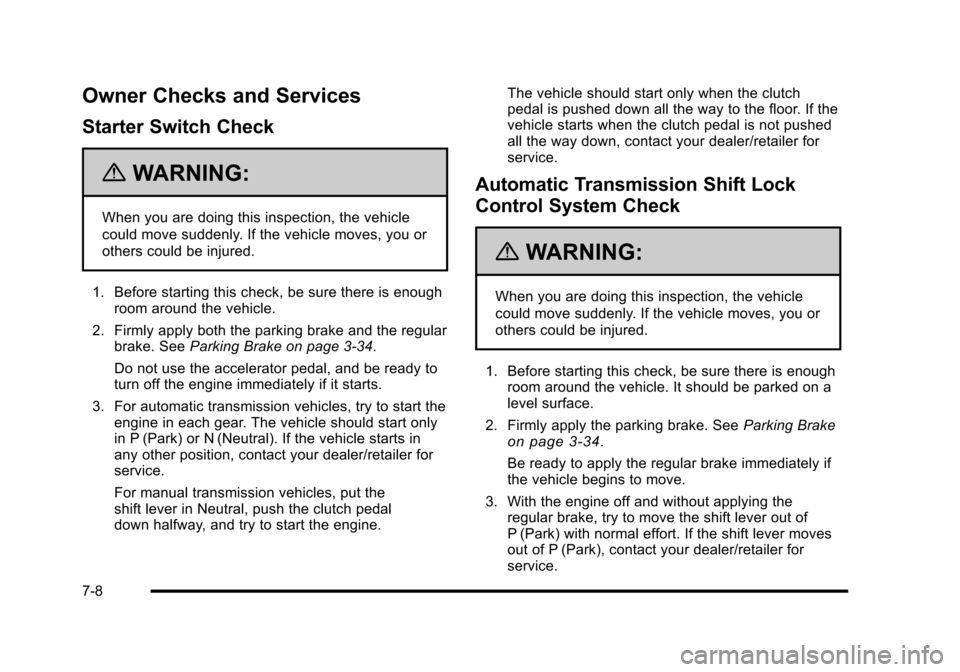
Owner Checks and Services
Starter Switch Check
{WARNING:
When you are doing this inspection, the vehicle
could move suddenly. If the vehicle moves, you or
others could be injured.
1. Before starting this check, be sure there is enough room around the vehicle.
2. Firmly apply both the parking brake and the regular brake. See Parking Brake on page 3‑34.
Do not use the accelerator pedal, and be ready to
turn off the engine immediately if it starts.
3. For automatic transmission vehicles, try to start the engine in each gear. The vehicle should start only
in P (Park) or N (Neutral). If the vehicle starts in
any other position, contact your dealer/retailer for
service.
For manual transmission vehicles, put the
shift lever in Neutral, push the clutch pedal
down halfway, and try to start the engine. The vehicle should start only when the clutch
pedal is pushed down all the way to the floor. If the
vehicle starts when the clutch pedal is not pushed
all the way down, contact your dealer/retailer for
service.
Automatic Transmission Shift Lock
Control System Check
{WARNING:
When you are doing this inspection, the vehicle
could move suddenly. If the vehicle moves, you or
others could be injured.
1. Before starting this check, be sure there is enough room around the vehicle. It should be parked on a
level surface.
2. Firmly apply the parking brake. See Parking Brake
on page 3‑34.
Be ready to apply the regular brake immediately if
the vehicle begins to move.
3. With the engine off and without applying the regular brake, try to move the shift lever out of
P (Park) with normal effort. If the shift lever moves
out of P (Park), contact your dealer/retailer for
service.
7-8