2010 CHEVROLET CORVETTE parking brake
[x] Cancel search: parking brakePage 164 of 472
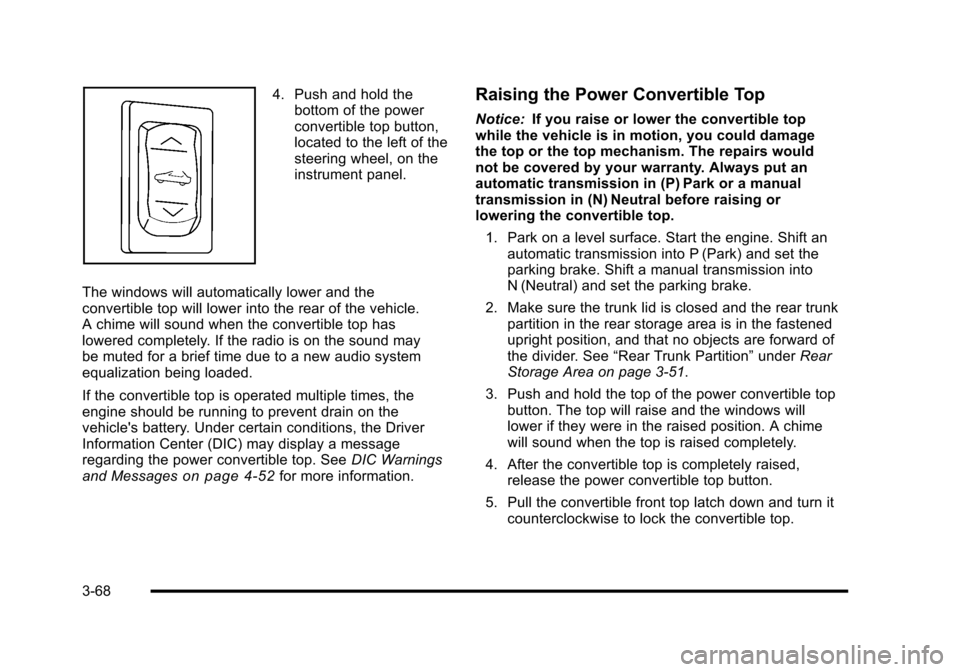
4. Push and hold the bottom of the power
convertible top button,
located to the left of the
steering wheel, on the
instrument panel.
The windows will automatically lower and the
convertible top will lower into the rear of the vehicle.
A chime will sound when the convertible top has
lowered completely. If the radio is on the sound may
be muted for a brief time due to a new audio system
equalization being loaded.
If the convertible top is operated multiple times, the
engine should be running to prevent drain on the
vehicle's battery. Under certain conditions, the Driver
Information Center (DIC) may display a message
regarding the power convertible top. See DIC Warnings
and Messages
on page 4‑52for more information.
Raising the Power Convertible Top
Notice: If you raise or lower the convertible top
while the vehicle is in motion, you could damage
the top or the top mechanism. The repairs would
not be covered by your warranty. Always put an
automatic transmission in (P) Park or a manual
transmission in (N) Neutral before raising or
lowering the convertible top.
1. Park on a level surface. Start the engine. Shift an automatic transmission into P (Park) and set the
parking brake. Shift a manual transmission into
N (Neutral) and set the parking brake.
2. Make sure the trunk lid is closed and the rear trunk partition in the rear storage area is in the fastened
upright position, and that no objects are forward of
the divider. See “Rear Trunk Partition” underRear
Storage Area on page 3‑51.
3. Push and hold the top of the power convertible top button. The top will raise and the windows will
lower if they were in the raised position. A chime
will sound when the top is raised completely.
4. After the convertible top is completely raised, release the power convertible top button.
5. Pull the convertible front top latch down and turn it counterclockwise to lock the convertible top.
3-68
Page 175 of 472
{WARNING:
In freezing weather, do not use your washer until
the windshield is warmed. Otherwise the washer
fluid can form ice on the windshield, blocking your
vision.
If the fluid in the windshield washer fluid reservoir is low,
the message CHECK WASHER FLUID will appear on
the Driver Information Center (DIC) display. It will take
15 seconds after the bottle is refilled for this message to
turn off. For information on the correct washer fluid to
use, see Windshield Washer Fluid
on page 6‑42and
Recommended Fluids and Lubricants on page 7‑10.
Cruise Control
With cruise control, a speed of about 40 km/h (25 mph)
or more can be maintained without keeping your foot on
the accelerator. Cruise control does not work at speeds
below about 40 km/h (25 mph).
Cruise control will not work if the parking brake is set,
or if the master cylinder brake fluid level is low.
{WARNING:
Cruise control can be dangerous where you
cannot drive safely at a steady speed. So, do not
use the cruise control on winding roads or in
heavy traffic.
Cruise control can be dangerous on slippery
roads. On such roads, fast changes in tire traction
can cause excessive wheel slip, and you could
lose control. Do not use cruise control on slippery
roads.
If the vehicle is in cruise control, and has the Traction
Control System (TCS), and it begins to limit wheel
spin, the cruise control automatically disengages.
See Traction Control System (TCS)
on page 5‑6.
When road conditions allow the cruise control to be
safely used again, it can be turned back on.
4-7
Page 179 of 472
Exterior Lamps
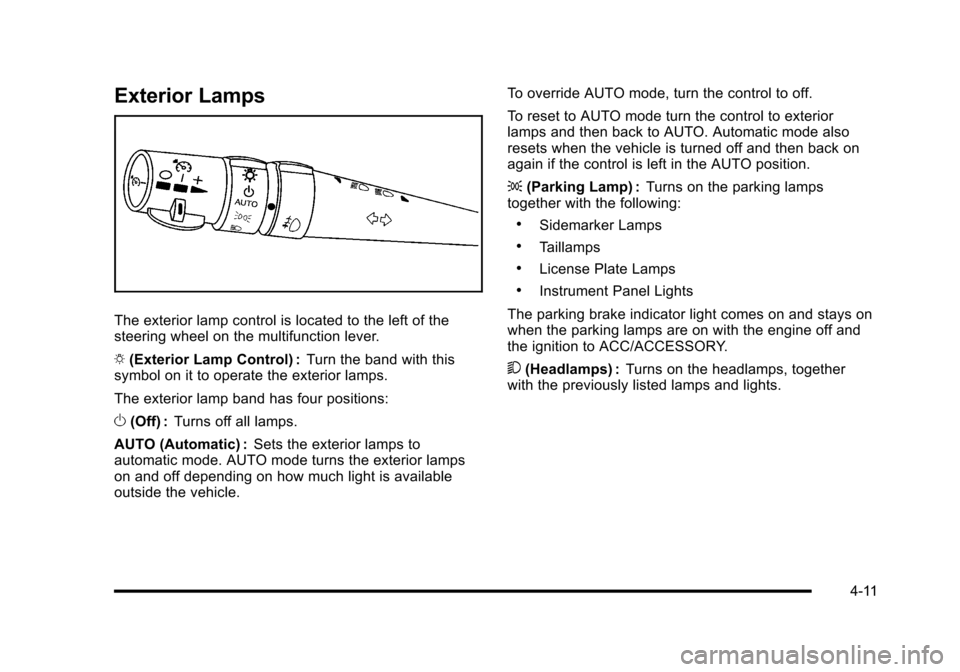
The exterior lamp control is located to the left of the
steering wheel on the multifunction lever.
O (Exterior Lamp Control) : Turn the band with this
symbol on it to operate the exterior lamps.
The exterior lamp band has four positions:
O (Off) : Turns off all lamps.
AUTO (Automatic) : Sets the exterior lamps to
automatic mode. AUTO mode turns the exterior lamps
on and off depending on how much light is available
outside the vehicle. To override AUTO mode, turn the control to off.
To reset to AUTO mode turn the control to exterior
lamps and then back to AUTO. Automatic mode also
resets when the vehicle is turned off and then back on
again if the control is left in the AUTO position.
;
(Parking Lamp) : Turns on the parking lamps
together with the following:
.Sidemarker Lamps
.Taillamps
.License Plate Lamps
.Instrument Panel Lights
The parking brake indicator light comes on and stays on
when the parking lamps are on with the engine off and
the ignition to ACC/ACCESSORY.
5 (Headlamps) : Turns on the headlamps, together
with the previously listed lamps and lights.
4-11
Page 180 of 472

Wiper Activated Headlamps
This feature activates the headlamps and parking
lamps after the windshield wipers have been in use for
approximately 15 seconds and deactivates and returns
to ambient lighting conditions 15 seconds after the
wipers are turned off.
If the exterior lamp control has been turned off or is in
the parking lamp position while the wiper control is
active in any position, the HEADLAMPS SUGGESTED
message appears on the Driver Information Center
(DIC). See DIC Warnings and Messages on page 4‑52.
When the ignition is turned off, the wiper-activated
headlamps will immediately turn off.
Headlamps on Reminder
A warning chime will sound if the exterior lamp control
is left on in either the headlamp or parking lamp position
and the driver's door is opened with the ignition off.
Daytime Running Lamps (DRL)
Daytime Running Lamps (DRL) can make it easier for
others to see the front of your vehicle during the day.
Fully functional daytime running lamps are required on
all vehicles first sold in Canada.
The DRL system makes the front turn signal lamps
come on when the following conditions are met:
.It is still daylight and the ignition is on.
.The exterior lamp control is in the AUTO position.
.The transmission is not in P (Park) or the parking
brake is off.
.The parking brake is off or the vehicle speed is
greater than 8 mph (13 km/h).
When DRL are on, only the front turn signal lamps will
be on. The parking lamps, taillamps, instrument panel
lights, or other exterior lamps will not be on when the
DRL are being used.
When it is dark enough outside, the front turn signal
lamps turn off and the normal low-beam headlamps
turn on.
4-12
Page 205 of 472
This light comes on briefly while starting the engine. If it
does not come on, have it fixed so it is ready to warn if
there is a problem.
{WARNING:
The brake system might not be working properly if
the brake system warning light is on. Driving with
the brake system warning light on can lead to a
crash. If the light is still on after the vehicle has
been pulled off the road and carefully stopped,
have the vehicle towed for service.
If this warning light stays on after the engine is started,
the parking brake may still be set or there could be a
brake problem. Refer to Parking Brake
on page 3‑34to
see if it is set. If the parking brake is not set, have the
brake system inspected right away.
If the light comes on while driving and a CHECK
BRAKE FLUID message shows on the DIC, pull off the
road and stop carefully. The pedal may be harder to
push or the pedal may go closer to the floor. It may take
longer to stop. If the light is still on, have the vehicle
towed for service. See Towing Your Vehicle
on
page 5‑33and DIC Warnings and Messageson
page 4‑52for more information.
Antilock Brake System (ABS)
Warning Light
For vehicles with the
Antilock Brake System
(ABS), this light comes on
briefly when the engine is
started.
If it does not, have the vehicle serviced by your dealer/
retailer. If the system is working normally the indicator
light then goes off.
If the ABS light stays on, turn the ignition off. If the light
comes on while driving, stop as soon as it is safely
possible and turn the ignition off. Then start the engine
again to reset the system. If the ABS light stays on,
or comes on again while driving, the vehicle needs
service. If the regular brake system warning light is not
on, the vehicle still has brakes, but not antilock brakes.
If the regular brake system warning light is also on, the
vehicle does not have antilock brakes and there is a
problem with the regular brakes. See Brake System
Warning Light on page 4‑36.
For vehicles with a Driver Information Center (DIC), see
DIC Warnings and Messages
on page 4‑52for all
brake related DIC messages.
4-37
Page 233 of 472
SERVICE TRACTION SYSTEM
If this message displays when you are driving, there is a
problem with the Traction Control System (TCS) and the
vehicle is in need of service. See your dealer/retailer.
When this message is displayed, the system will not
limit wheel spin. Adjust your driving accordingly.
The traction control system (TCS) warning light on the
instrument panel cluster will also turn on and a sound
will be heard.
When this message is displayed, the computer
controlled systems will not assist the driver in controlling
the vehicle. Have the system repaired by your dealer/
retailer as soon as possible. Adjust your driving
accordingly. See Traction Control System (TCS)
on
page 5‑6for more information.
To acknowledge the message, press the RESET button.
SERVICE TRANSMISSION
This message displays when there is a problem with the
transmission. See your dealer/retailer for service.
SERVICE VEHICLE SOON
This message displays and a sound will be heard when
there may be an electrical or another system problem
with the vehicle. Have your vehicle checked by your
dealer/retailer if this message keeps appearing.
SET PARK BRAKE FOR SEAT RECALL
If the vehicle has a manual transmission, this message
displays if you try to recall the memory positions when
the ignition is on and the parking brake is not set. If the
vehicle is on, you must set the parking brake in order
for the memory positions to recall. See Memory Seat,
Mirrors and Steering Wheel
on page 2‑4for more
information.
SET PARK BRAKE TO MOVE TOP
If the vehicle has a manual transmission, this message
displays and a sound will be heard if you try to operate
the power convertible top without first setting the
parking brake. Set the parking brake before trying to
operate the power convertible top. See Convertible Top
(Manual)
on page 3‑59or Convertible Top (Power)on
page 3‑66for more information.
SHIFT TO PARK
If the vehicle has an automatic transmission, this
message displays if the vehicle is not in P (Park) when
the engine is being turned off. The vehicle will be in
ACCESSORY Once the shift lever is moved to P (Park),
the vehicle will turn off.
4-65
Page 234 of 472
The vehicle will remain in ACCESSORY, without the
20 minute time-out period, until the shift lever is moved
to P (Park) or until the driver presses the pushbutton to
restart the vehicle. See Ignition Positions
on page 3‑23for more information.
SHIFT TO PARK OR SET PARK BRAKE
FOR TOP
If the vehicle has an automatic transmission, this
message displays and a sound will be heard if you
try to operate the power convertible top without first
shifting into P (Park) or setting the parking brake.
Either shift the vehicle into P (Park) or set the parking
brake before trying to operate the power convertible
top. See Convertible Top (Manual)
on page 3‑59or
Convertible Top (Power)on page 3‑66for more
information.
SHOCKS INOPERATIVE
This message displays when a malfunction is present in
the Selective Ride Control system which is causing the
shocks to be in their full soft mode. This is a warning to
the driver that the vehicle handling may be affected.
Have the vehicle serviced by your dealer/retailer as
soon as possible.
To acknowledge the message, press the RESET button.
The message reappears every 10 minutes until this
condition changes.
TIRE FLAT
{WARNING:
When the LOW TIRE PRESSURE or TIRE FLAT
message is displayed on the Driver Information
Center, your vehicle's handling capabilities will
be reduced during severe maneuvers. If you drive
too fast, you could lose control of your vehicle.
You or others could be injured. Do not drive
over 55 mph (90 km/h) when the LOW TIRE
PRESSURE or TIRE FLAT message is displayed.
Drive cautiously and check your tire pressures as
soon as you can.
This message displays when one or more of the tires is
flat. This message also displays LEFT FRONT, RIGHT
FRONT, LEFT REAR, or RIGHT REAR to indicate
which tire is affected. Multiple chimes sound and the tire
pressure light on the instrument panel cluster comes on
when this message is displayed. See Tire Pressure
Light
on page 4‑40.
4-66
Page 240 of 472
Entering the Personal Options Menu
To enter the personal options menu, use the following
steps: 1. If you have an automatic transmission vehicle, turn the vehicle on with the shift lever in P (Park).
If you have a manual transmission vehicle, turn the
vehicle on with the parking brake set.
To avoid excessive drain on the battery, it is
recommended that the headlamps are turned off.
2. Press the OPTION button and you will enter the PERSONAL OPTIONS menu.
The DIC will display the current driver
number (1 or 2) for a few seconds and then will
display instructions on which buttons to use for
setting the personalizations. The RESET button
is used to select a setting for a particular feature.
The OPTION button is used to move to the next
feature.
3. Press the OPTION button while the instruction screen is displayed to enter the first
personalization menu item.
4. Once you have cycled through all of the personal options, pressing the OPTION button a final time
exits the personal options menu. In addition, if no
button is pressed within 45 seconds, the DIC will
exit the personal options menu.
Personal Options
The following options are available for programming:
Display Units : This option allows you to choose the
measurement units.
Press the OPTION button until DISPLAY UNITS
appears on the display, then press the RESET button
to scroll through the following modes:
.ENGLISH (default)
.METRIC
If you choose ENGLISH, all information will be
displayed in English units.
If you choose METRIC, all information will be displayed
in metric units.
When the mode you want is selected, press the
OPTION button to set your choice and advance to the
next personal option.
Auto Memory Recall (Automatic Transmission
only) : If your automatic transmission vehicle has the
memory package, you may have this option. This option
allows the driver's seat, the telescopic steering column,
if your vehicle has this feature, and the outside rearview
mirrors to automatically move to the current driver's set
position when the engine starts.
4-72