2010 CHEVROLET CORVETTE maintenance
[x] Cancel search: maintenancePage 209 of 472
When the Light Flashes First and Then is
On Steady
This indicates that there may be a problem with the Tire
Pressure Monitor System. The light flashes for about a
minute and stays on steady for the remainder of the
ignition cycle. This sequence repeats with every ignition
cycle. See Tire Pressure Monitor Operation
on
page 6‑74for more information.
Malfunction Indicator Lamp
Check Engine Light
A computer system called OBD II (On-Board
Diagnostics-Second Generation) monitors operation
of the fuel, ignition, and emission control systems.
It makes sure that emissions are at acceptable levels
for the life of the vehicle, helping to produce a cleaner
environment.
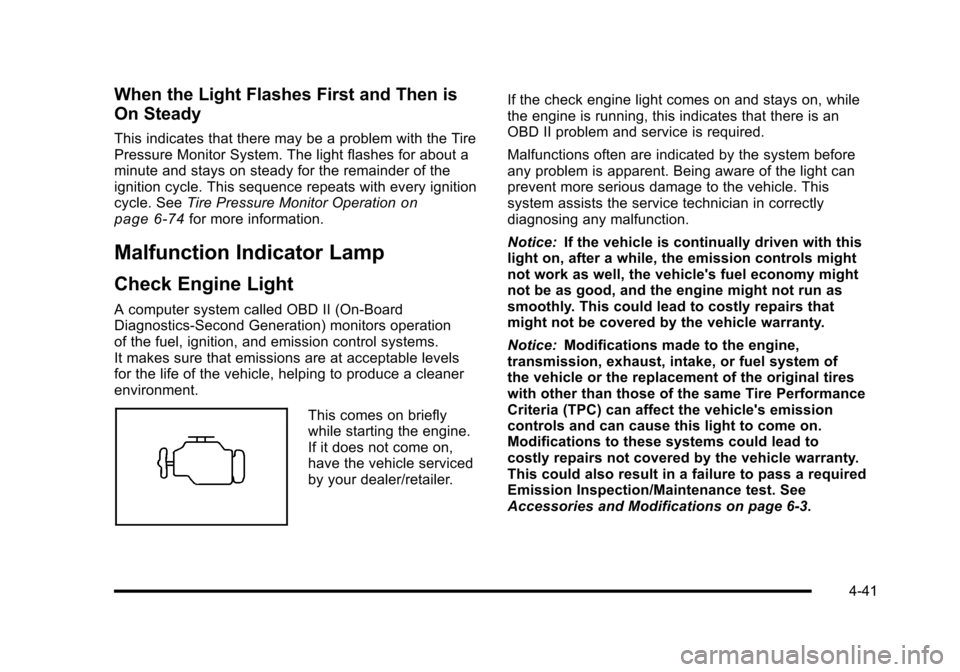
This comes on briefly
while starting the engine.
If it does not come on,
have the vehicle serviced
by your dealer/retailer. If the check engine light comes on and stays on, while
the engine is running, this indicates that there is an
OBD II problem and service is required.
Malfunctions often are indicated by the system before
any problem is apparent. Being aware of the light can
prevent more serious damage to the vehicle. This
system assists the service technician in correctly
diagnosing any malfunction.
Notice:
If the vehicle is continually driven with this
light on, after a while, the emission controls might
not work as well, the vehicle's fuel economy might
not be as good, and the engine might not run as
smoothly. This could lead to costly repairs that
might not be covered by the vehicle warranty.
Notice: Modifications made to the engine,
transmission, exhaust, intake, or fuel system of
the vehicle or the replacement of the original tires
with other than those of the same Tire Performance
Criteria (TPC) can affect the vehicle's emission
controls and can cause this light to come on.
Modifications to these systems could lead to
costly repairs not covered by the vehicle warranty.
This could also result in a failure to pass a required
Emission Inspection/Maintenance test. See
Accessories and Modifications on page 6‑3.
4-41
Page 211 of 472
If none of the above have made the light turn off, your
dealer/retailer can check the vehicle. The dealer/retailer
has the proper test equipment and diagnostic tools to fix
any mechanical or electrical problems that might have
developed.
Emissions Inspection and Maintenance
Programs
Some state/provincial and local governments have
or might begin programs to inspect the emission
control equipment on the vehicle. Failure to pass this
inspection could prevent getting a vehicle registration.
Here are some things to know to help the vehicle pass
an inspection:
.The vehicle will not pass this inspection if the
check engine light is on with the engine running.
To perform a check engine light bulb check with
the keyless ignition, make sure the transmitter fob
is in the passenger compartment. See Ignition
Positions
on page 3‑23. Press the bottom of the
Acc. button on the instrument panel and hold the button down for five seconds. The instrument
panel, including the check engine light, will light up
and the ignition will be on, but the engine will not
start
—press the bottom of the Acc. button only
briefly, less than five seconds, the accessory
power mode will be turned on, but not the ignition.
After the bulb check, press and release the Acc.
button again to turn the ignition off and avoid
draining the vehicle's battery.
.The vehicle will not pass this inspection if the
OBD II (on-board diagnostic) system determines
that critical emission control systems have not
been completely diagnosed by the system.
The vehicle would be considered not ready for
inspection. This can happen if the battery has
recently been replaced or if the battery has run
down. The diagnostic system is designed to
evaluate critical emission control systems during
normal driving. This can take several days of
routine driving. If this has been done and the
vehicle still does not pass the inspection for lack
of OBD II system readiness, your dealer/retailer
can prepare the vehicle for inspection.
4-43
Page 212 of 472
Engine Oil Pressure Gauge
United StatesCanada
United States—Z06 and
ZR1 Models Canada —Z06 and ZR1
Models
{WARNING:
Do not keep driving if the oil pressure is low.
The engine can become so hot that it catches fire.
Someone could be burned. Check the oil as soon
as possible and have the vehicle serviced.
Notice: Lack of proper engine oil maintenance
can damage the engine. The repairs would not be
covered by the vehicle warranty. Always follow the
maintenance schedule in this manual for changing
engine oil.
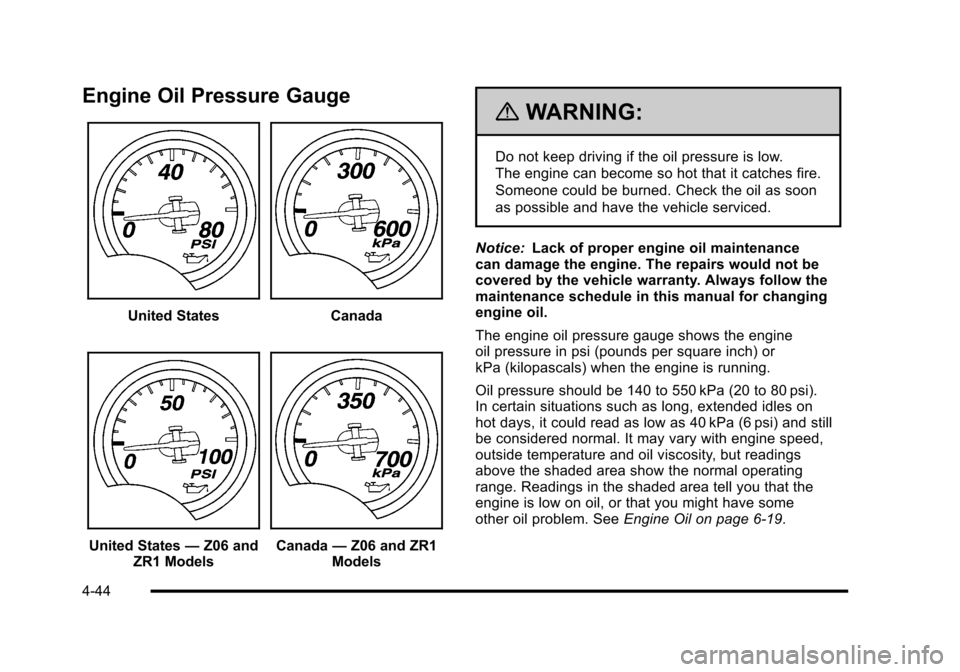
The engine oil pressure gauge shows the engine
oil pressure in psi (pounds per square inch) or
kPa (kilopascals) when the engine is running.
Oil pressure should be 140 to 550 kPa (20 to 80 psi).
In certain situations such as long, extended idles on
hot days, it could read as low as 40 kPa (6 psi) and still
be considered normal. It may vary with engine speed,
outside temperature and oil viscosity, but readings
above the shaded area show the normal operating
range. Readings in the shaded area tell you that the
engine is low on oil, or that you might have some
other oil problem. See Engine Oil on page 6‑19.
4-44
Page 220 of 472
Press and hold the RESET button to reset to
0.0 km/h (mph).
Engine Oil Life : Press the TRIP button until the engine
oil life is displayed, such as OIL LIFE REMAINING 89%.
This is an estimate of the engine oil's remaining useful
life. It will show 100% when the system is reset after
an oil change. It will alert you to change the oil on a
schedule consistent with your driving conditions.
When the remaining oil life is low, the system will alert
you with the message CHANGE ENGINE OIL.
Remember, you must reset the engine oil life system
yourself after each oil change. It will not reset itself.
To reset the system, see Engine Oil Life System
on
page 6‑25. Be careful not to reset the engine oil life
system accidentally at any time other than when the oil
has just been changed. It cannot be reset accurately
until the next oil change.
See Scheduled Maintenance
on page 7‑3andEngine
Oilon page 6‑19for more information.
OPTION Button
The OPTION button allows you to access the
PERSONAL OPTIONS menu and customize the
personalization settings on your vehicle. See DIC
Vehicle Personalization
on page 4‑71for more
information.
RESET Button
The RESET button, used along with other buttons, will
reset system functions and turn off or acknowledge
messages on the DIC.
DIC Warnings and Messages
Messages are displayed on the DIC to notify the driver
that the status of the vehicle has changed and that
some action may be needed by the driver to correct the
condition. Multiple messages may appear one after
another. You can scroll through the messages that
may have been sent at the same time. The DIC is
continuously updated with the vehicle performance
status.
Some messages may not require immediate action, but
you can press the RESET button to acknowledge that
you received the messages and to clear them from the
display.
Some messages cannot be cleared from the DIC
display because they are more urgent. These
messages require action before they can be cleared.
You should take any messages that appear on the
display seriously and remember that clearing the
messages will only make the messages disappear,
not correct the problem.
The following are the possible messages that can be
displayed and some information about them.
4-52
Page 222 of 472
BUCKLE PASSENGER
This message reminds you to buckle the passenger's
safety belt.
This message displays and a sound will be heard when
the ignition is on, the driver's safety belt is buckled, the
passenger's safety belt is unbuckled with the passenger
airbag enabled, and the vehicle is in motion. You should
have the passenger buckle their safety belt.
The reminder will be repeated if the ignition is on, the
vehicle is in motion, the driver is buckled and the
passenger is still unbuckled, and the passenger airbag
is enabled. If the passenger's safety belt is already
buckled, this message will not come on.
BUCKLE SEATBELT
This message reminds you to buckle the driver's
safety belt.
This message displays and a sound will be heard when
the ignition is on, the driver's safety belt is unbuckled,
and the vehicle is in motion. You should buckle your
safety belt.
If the driver remains unbuckled when the ignition is
on and the vehicle is in motion, the reminder will be
repeated. If the driver's safety belt is already buckled,
this message will not come on. This message is an additional reminder to the safety
belt reminder light in the instrument panel cluster.
See
Safety Belt Reminders
on page 4‑32for more
information.
CHANGE BRAKE PADS
On vehicles with electronic brake pad wear sensors,
this message will be displayed when the pads are worn.
See your dealer/retailer for service.
CHANGE ENGINE OIL
This message displays when the life of the engine
oil has expired. See Scheduled Maintenanceon
page 7‑3. After an oil change, the engine oil life
system must be reset. See “Engine Oil Life”under
DIC Operation and Displays
on page 4‑47. Also, see
Engine Oilon page 6‑19and Engine Oil Life Systemon page 6‑25for more information.
CHECK BRAKE FLUID
This message displays, a sound will be heard, and the
brake system warning light on the instrument panel
cluster turns on if the ignition is on to inform the driver
that the brake fluid level is low. See Brake System
Warning Light
on page 4‑36. Have the brake system
serviced by your dealer/retailer as soon as possible.
See Brakes on page 6‑43.
4-54
Page 277 of 472
XM™Satellite Radio Service
XM Satellite Radio Service gives digital radio reception
from coast-to-coast in the 48 contiguous United States,
and in Canada. Just as with FM, tall buildings or hills
can interfere with satellite radio signals, causing the
sound to fade in and out. In addition, traveling or
standing under heavy foliage, bridges, garages,
or tunnels may cause loss of the XM signal for a
period of time.
Cellular Phone Usage
Cellular phone usage may cause interference
with the vehicle's radio. This interference may occur
when making or receiving phone calls, charging the
phone's battery, or simply having the phone on. This
interference causes an increased level of static while
listening to the radio. If static is received while listening
to the radio, unplug the cellular phone and turn it off.
Diversity Antenna System
The AM-FM antenna is a hidden self tuning system.
It optimizes the AM and FM signals relative to
the vehicle's position and radio station source.
No maintenance or adjustments are needed.
XM™ Satellite Radio Antenna
System
For vehicles with XM Satellite Radio Service, the
antenna is located on the roof or on the trunk lid of the
vehicle. Keep the antenna clear of obstructions for clear
radio reception.
4-109
Page 298 of 472
After conversion to the high performance brake fluid,
follow the brake fluid service recommendations outlined
by the fluid manufacturer. Do not use silicone or
DOT‐5 brake fluids.
If the vehicle is a Z06, ZR1, or Grand Sport model, it
has greaseable outer ends on both of the rear toe‐links.
Under normal use, lubrication should be performed as
described in the maintenance schedule. See Scheduled
Maintenance
on page 7‑3and Recommended Fluids
and Lubricantson page 7‑10. If using the vehicle for
racing, lubrication should be performed at the end of
each racing day. See your dealer/retailer for lubrication
and make sure any needed repairs are made at once.
Proper procedures for performing these services can be
found in the service manual. See Service Publications
Ordering Information on page 8‑16.
If the vehicle is used for racing or other competitive
driving, the rear axle fluid temperatures may be higher
than would occur in normal driving. We recommend that
the rear axle fluid be drained and refilled with new fluid
after every 24 hours of racing or competitive driving.
See Recommended Fluids and Lubricants
on
page 7‑10for what fluid to use.
ZR1 Brake Burnish Procedure
Notice: These procedures are specific to the ZR1
with ceramic brake rotors. These procedures should
not be run on other Corvette models as damage
may result.
Notice: The new vehicle break‐in period should be
completed before performing the brake burnish
procedure or damage may occur to the powertrain/
engine. See New Vehicle Break-In on page 3‑21.
When performed as instructed, these procedures will
not damage the brakes. During the burnishing
procedure, the brake pads will smoke and produce an
odor. The braking force and pedal travel may increase.
After the procedure is complete, the brake pads may
appear white at the rotor contact.
5-20
Page 314 of 472
Section 6 Service and Appearance Care
Run-Flat Tires . . . . . . . . . . . . . . . . . . . . . . . . . . . . . . . . . 6-69
Inflation - Tire Pressure . . . . . . . . . . . . . . . . . . . . . . . . 6-70
High-Speed Operation . . . . . . . . . . . . . . . . . . . . . . . . . 6-72
Tire Pressure Monitor System . . . . . . . . . . . . . . . . . 6-72
Tire Pressure Monitor Operation . . . . . . . . . . . . . . . 6-74
Tire Inspection and Rotation . . . . . . . . . . . . . . . . . . . 6-76
When It Is Time for New Tires . . . . . . . . . . . . . . . . . 6-76
Buying New Tires . . . . . . . . . . . . . . . . . . . . . . . . . . . . . . 6-77
Different Size Tires and Wheels . . . . . . . . . . . . . . . 6-79
Uniform Tire Quality Grading . . . . . . . . . . . . . . . . . . . 6-79
Wheel Alignment and Tire Balance . . . . . . . . . . . . 6-81
Wheel Replacement . . . . . . . . . . . . . . . . . . . . . . . . . . . 6-81
Tire Chains . . . . . . . . . . . . . . . . . . . . . . . . . . . . . . . . . . . . 6-84
Lifting the Vehicle . . . . . . . . . . . . . . . . . . . . . . . . . . . . . . 6-84
If a Tire Goes Flat . . . . . . . . . . . . . . . . . . . . . . . . . . . . . 6-89
Appearance Care . . . . . . . . . . . . . . . . . . . . . . . . . . . . . . . . . 6-90
Interior Cleaning . . . . . . . . . . . . . . . . . . . . . . . . . . . . . . 6-90
Fabric/Carpet . . . . . . . . . . . . . . . . . . . . . . . . . . . . . . . . . . 6-91
Coated Moldings . . . . . . . . . . . . . . . . . . . . . . . . . . . . . . . 6-92
Leather . . . . . . . . . . . . . . . . . . . . . . . . . . . . . . . . . . . . . . . . 6-92
Instrument Panel, Vinyl, and Other Plastic Surfaces . . . . . . . . . . . . . . . . . . . . . . . . . . . . . . . . . . . . . 6-93
Cargo Cover and Convenience Net . . . . . . . . . . . . 6-93
Care of Safety Belts . . . . . . . . . . . . . . . . . . . . . . . . . . . 6-93
Weatherstrips . . . . . . . . . . . . . . . . . . . . . . . . . . . . . . . . . . 6-93
Washing Your Vehicle . . . . . . . . . . . . . . . . . . . . . . . . . 6-94 Cleaning Exterior Lamps/Lenses . . . . . . . . . . . . . . 6-94
Finish Care . . . . . . . . . . . . . . . . . . . . . . . . . . . . . . . . . . . . 6-95
Windshield and Wiper Blades . . . . . . . . . . . . . . . . . . 6-96
Removable Roof Panel . . . . . . . . . . . . . . . . . . . . . . . . 6-96
Convertible Top . . . . . . . . . . . . . . . . . . . . . . . . . . . . . . . . 6-97
Aluminum or Chrome-Plated Wheels
and Trim . . . . . . . . . . . . . . . . . . . . . . . . . . . . . . . . . . . . . 6-97
Tires . . . . . . . . . . . . . . . . . . . . . . . . . . . . . . . . . . . . . . . . . . . 6-98
Finish Damage . . . . . . . . . . . . . . . . . . . . . . . . . . . . . . . . 6-98
Underbody Maintenance . . . . . . . . . . . . . . . . . . . . . . . 6-98
Fiberglass Springs (Composite Springs) . . . . . . . 6-99
Chemical Paint Spotting . . . . . . . . . . . . . . . . . . . . . . . 6-99
Vehicle Identification . . . . . . . . . . . . . . . . . . . . . . . . . . . . . 6-99
Vehicle Identification Number (VIN) . . . . . . . . . . . . 6-99
Service Parts Identification Label . . . . . . . . . . . . . 6-100
Electrical System . . . . . . . . . . . . . . . . . . . . . . . . . . . . . . . . 6-100
Add-On Electrical Equipment . . . . . . . . . . . . . . . . . 6-100
Headlamp Wiring . . . . . . . . . . . . . . . . . . . . . . . . . . . . . 6-100
Windshield Wiper Fuses . . . . . . . . . . . . . . . . . . . . . . 6-100
Power Windows and Other Power Options . . . 6-100
Fuses and Circuit Breakers . . . . . . . . . . . . . . . . . . . 6-101
Instrument Panel Fuse Block . . . . . . . . . . . . . . . . . 6-101
Engine Compartment Fuse Block . . . . . . . . . . . . . 6-104
Capacities and Specifications . . . . . . . . . . . . . . . . . . 6-108
6-2