Page 113 of 384

Warm and cold ------------------J
Air outlets
Air distribution determines the air flow to the individual
vents.
Fi g. 1 24 In str um ent pan el: a ir outl et locatio ns and a irflo w dir ections
Air outlets ® and ©
- Turn the vertical thumbwheel beside the ou tlet to
increase , reduce or shut down t he airflow from that
outlet .
- To adjust the direction of the airflow from the outlet,
move the tab in the center of the outlet in the des ired
direction. The direction of the air de livered from t he vents
ca n be adjusted horizontally and vertically.
The air outlets are actuated e ither automatically or manually
depending on t he operat ing mode selected . Heated or unheated
fresh air, or cooled air flows from the vents .
Contro ls a nd e quip
m en t Vehicle
OP-eration
(I) Tips
• Whe n climate contro l is working, coo led a ir will flow p rimarily
from outlets @ and @. To assure adequate cooling, outlets@ and
@ should never be completely closed.
• T he airflow com ing from the vents@ can be adjusted to be colder
or wa rmer than the sele cted set temperatu re. •
Air outlets in the rear
Outlets in the center console
- Rotate the thumb whee l located nex t to the outlet to open
o r close it.
- To adjust the direction of the a irflow f rom the outlet,
move t he tab in t he cen ter o f th e outlet in the des ired
direction . T he direction of the a ir delive red from the vents
can be adjusted horizontally and ver tica lly.
Outlets in the door pillars
- R otate the t humb whee l located next to the outlet to open
o r close it.
- To adjust the direction of the a irf low f rom the o utlet ,
move t he tab in t he center o f the out let in the des ired
direction. The d irection of the air delivered from the vents
can be adjusted horizontally and vertica lly.
Th e air outlets are actuated either automatically or manually
depend ing on the ope rat ing mode se lected . Heated or unheated
fresh a ir, or cooled air flows from the vents .
Th e ai r outle ts to heat the rea r footwell are loca ted under the fro nt
seats.
tJl>
Vehicle care Do-it-yourselt service iTechnical data
Page 114 of 384

-Warm and cold .,.,..__ ______________ _
(I) Tips
If the climate control system is operating in cooling mode , air flows
p rima rily from th e outlets in the center console and in the door
pillars . T o ach ieve adequa te cooling, you should never close the
ou tle ts completely. •
Using climate controls economically
Using the climate controls prudently can help save fuel.
When you use the a ir conditioner, e ngine power is reduced
and fuel consumption increa ses. To save fu el, you should use
the air co nditioner o nly when necessary. Also please note the
following points :
If you want to save fuel , activate ECON .
If you are going to drive with the wi ndows open, use ECO N.
~ For the sake of the environment
By reducing t he amount of fuel you use, you also reduce the amou nt
of pollutants emitted into the air .•
A ppli es to vehicl es : w ith sola r sliding /til tin g sunroof
Solar blower fan /solar roof
With sufficient sunlight, the blower fan continues to
operate with solar energy to bring in fresh air after the
ignition has been switched off
The fan motor is operated by solar energy throug h the solar roof after
t he ignition is tur ned off . P lease make certai n that vents @ and ©
are ope n to ach ieve op timal ventilation =:,
page 111, fig. 124.
The venti lation operates on ly with the sunroof closed or in the ti lted
position. If the veh
icle was switched off in the rec irculat ion mode, the air
condi tioning au tomatically sw itches to fresh a ir operation .
Solar operation is not activated at low outside temperatures .•
Windshield defogging/defrosting
A pp lie s t o v eh icles: w it h win dshie ld defo gger/ defrost er
Windshield defogger/defroster ®
The windshield defogger removes humidity from the
windshield .
Fig. 12 5 Wi ndshie ld
def ogger switch
- Press the~ button to turn the wi ndsh ield defogger on
and off=> fig. 125.
T he windsh ield defogger works only when the engine is runn ing . T he
ind icator light in the button illum inates when the windshield
defogger is turned on.
With a cold engine at outside temperatures below 41 °F (+5 °C) and i n
( AU TO] operation, the windshield defogger turns on automati
cally . Depend ing o n outside temperat ure, the w indshie ld is heated
for a maximum of 4 m inutes. The temperature for the climate control
must be selected so tha t it is ope ra ting in the heat ing mode . .,_
Page 115 of 384

Warm and cold -_______________ __.
When selecting the program setting®, the windshield
defogger/defroster is switched on automatically at outside tempera
tures below 41
°F (+5 °(). Depending on outside temperature, the
windshield is heated from 2 up to a maximum of 4 minutes .
Th e windshield defogger is deactivated in ECON mode.
(I] Tips
• If a crack forms in the windshie ld due to a foreign object (e.g. a
stone chip), the defogger/defroster is not turned on. This prevents
the crack from spreading.
• We recommend that you locate an Audi dealership immediately to
have the windshie ld replaced. •
Rear window defogger QuJ
Fig. 126 Switch for
rear window defogger
- Press the (ffi) switch to turn the rear window defogger on
and off=> fig. 126 .
The rear window defogger works only when the engine is running. The
ind icator light in the button illum inates when the rear w indow
defogger is turned on.
Con tro ls a nd e quip
m en t Vehicle
OP-eration
The rear window defogger will switch off automatically after a short
time. The time the rear window defogger remains on will vary
depending on the outs ide temperature.
At very low outside temperatures, the rear window defogger can be
switched on continuously by push ing the
CiiiJ button for more than 2
seconds. This rema ins stored until the ignition is switched off.
A rear window defogger that was switched on also remains stored for
15 m inutes after the ignition is switched off . If the engine is
restarted within these 15 minutes, the rear window defogger is a lso
act ivated, depending on outside temperature . W ith a vehicle that is
parked for a short time, the rear window defogger does not need to
be manually activated again.
<£> For the sake of the environment
T urn the defogger off when the rear w indow is clear. When you save
electricity, you save fuel. •
Vehicle care Do-it-yourselt service iTechnical data
Page 116 of 384

llffl..__w __ a _r _m __ a_n _ d_ c_ o_ ld ________________________________________________ _
Rear climate controls
Applies to vehicle s: with rear a ir conditioning
Controls
This overview is to assist you in familiarizing yourself with
the air conditioning controls.
F ig . 127 Air condi
t io nin g cont rols
The left side of the display shows the temperature selected for the
rear passenger on the left, the right side shows the temperature
selected for the rear passenger on the right .
If the air conditioning
sett ings are changed, th is appea rs briefly in the cor respond ing a rea
of the display.
Functions a re t urned on and off by touching the buttons. The LED in
the switch illuminates when the function is turned on .
By pressing the
safety s wit ch ® in the driver's door~ page 54 the
climate contro ls in the rear are deactivated. The message
PASSIVE
appears in the display. In this mode the rear climate control can only
be operated by the driver th rough the controls in the front compa rt
ment.
ION/OFF I Tu rning on and off
The air conditioning can be turned on and off by pressing the
I ON/OFF I button. W it h the ignition Off, the residua l heat funct ion
can be activated by pressing the button. The residual heat from the coolant can
be used to heat the vehicle interior. The residual heat
function is turned off a utomatically after 30 minu tes.
Set ting the temperature
Temperat ure c an be adjusted over a range from 64 ° F (+18 °C) to 80
Of (+ 26 °()
® Air distribution
You can adjust the air circulation so that air flows from specific vents.
• In the
I !setting, all the air flows from the vents in the center
conso le and the out lets in the door pillars.
• In the
-0 setti ng, a ir f lows from the ou tlets u nder the front seats.
• In the~ setting, air flows from outlets in the center console and
t he door pilla rs as we ll as from the outlets under the front seats.
To regulate air distribution automatically, switc h to
[AUTO] .
~ Heated se a ts *
In position O the heating for the seats is turned off. The range of
adjustment is from 1 to 6.
The seats can be pre-heated for about 10 minutes using the heat ing .
However, the heating is turned off if the seat sensors do not detect
the weight of an occupant during th is period .
l'tJ] Ventilated sea ts*
The seat cushion and the seat back surfaces of the front seats can be
ventila ted. In pos it ion O the sea t ventilation is t urned off . The range
of adjustment is from 1 to 6.
!AU TO I Automatic operation
Air temperature, volume of air and air distribution are automatically
reg ulated to ach ieve or ma inta in t he desired temperatures as qu ickly
as possible . •
Page 117 of 384

Warm and cold Ill
----------------
0 Note
To avoid damage to the heating elements in the seats, do not kneel
on the seats or place heavy loads on a small area of the seat. •
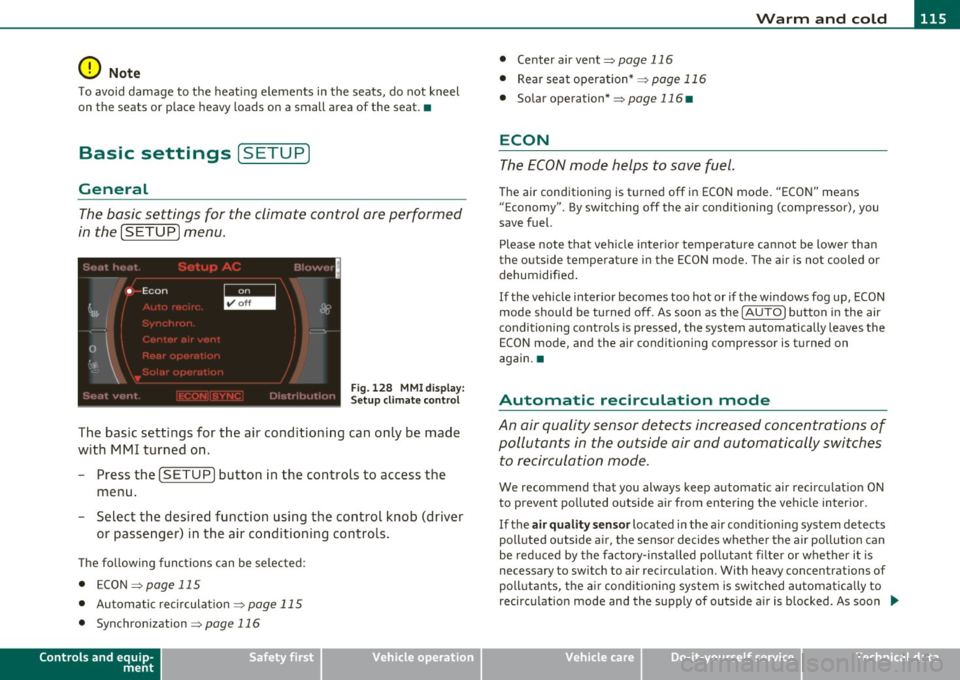
Basic settings [SETUP ]
General
The basic settings for the climate control are performed
in the
[SETUP] menu.
Fig . 128 MMI display:
Setup climate control
The bas ic sett ings for the air conditioning can only be made
with MMI turned on.
- Press the [SETUP] button in the controls to access the
menu .
- Select the desired function using the control knob (driver
or passenger) in the air conditioning controls.
Th e fo llowing funct ions can be se lec ted :
• ECON~
page 115
• Automatic rec irculat ion
~ page 115
• Synchronization ~
page 116
Controls and equip
ment Safety first
•
Center air vent~ page 116
• Rear seat operation* ~
page 116
• Solar operation*
~ page 116 •
ECON
The ECON mode helps to save fuel .
The air conditioning is turned off in ECON mode. "ECON" means
" E conomy". By switching off the air conditioning (compressor), you
save fuel.
Please note that vehicle interior temperature cannot be lower than
the outside temperature in the ECON mode. The air is not cooled or dehumidified .
If the vehicle inter ior becomes too hot or if the windows fog up, ECON
mode should be turned off. As soon as the
( AUTO] button in the air
conditioning controls is pressed, the system automatically leaves the
ECON mode, and the air conditioning compressor is turned on
again. •
Automatic recirculation mode
An air quality sensor detects increased concentrations of
pollutants in the outside air and automatically switches
to recirculation mode .
We recommend that you always keep automat ic air recirculat ion ON
to prevent polluted outside air from entering the vehicle interior.
If the
air quality sensor located in the air conditioning system detects
polluted outside air, the sensor decides whether the air pollution can
be reduced by the facto ry-insta lled pollutant fi lter or whe ther it is
necessary to switch to air recirculation. With heavy concentrations of
pollutants, the air conditioning system is switched a utomat ically to
recirculation mode and the supply of outside air is blocked . As soon .,.
Vehicle care Technical data
Page 118 of 384

lffll.___w __ a _r_ m __ a_n_ d_ c_ o _ l_d _______________________________________________ _
as the concentration of pollutants in the outside air drops, fresh air is
supplied to the vehicle interior again.
In the event that the windows fog up during automatic air recircula
tion, you must press th e@ button immediately.
Under certain operating conditions, automatic air recirculation is
switched off automatically. With outside temperatures below about
-8 °C and in the ECON mode, automatic air recirculation is limited to
15 seconds. •
Synchronization
One climate control setting for all seats.
With synchronization active, the driver's or the passenger's settings
are adopted for the other seats. All the other settings that were made
are transferred to the other seats. This includes all the climate
control settings right down to the heated seats.
If a different setting is selected at a "synchronized seat", synchroni
zation is cancelled. •
Center air vent
The temperature of the air leaving the center vents can be
changed to differ from the temperature setting.
Fig. 129 MMI display:
Center air vent
The air flow coming from the center vents can be adjusted to be
colder or warmer than the selected set temperature.
In this way you have the opportunity to have the air flow from the
center vents a little warmer or cooler, depending on the time of year.
A little cooler in the summer and a little warmer in the winter. •
Applies to veh icles: w ith rear air conditioning
Rear seat operation
The rear climate controls can be operated from the
driver's area.
With active rear seat operation, the driver or the passenger can
operate the rear climate control system from
his/her controls. •
Applies to veh icles: with solar roof
Solar operation
Depending on the solar irradiation in the vehicle, the fan
will run using solar power to keep fresh air circulating
inside the vehicle, even a~er you switch off the ignition.
-Switch the solar operation to on.
After you switch off the ignition, the fan is operated using so lar
power from the solar roof. Make sure outlets ® and © are open for
maximum ventilation=::;,
page 111, fig. 124.
The ventilation works only if the sunroof is closed or tilted up.
If you turn off the engine while the air recircu lation is on, the air
conditioning automatically switches to fresh air mode.
Solar operation is not activated at low outside temperatures. •
Page 119 of 384

_________________________________________________ O_ n_ t_ h_ e_ r _o_ a_d _ __.fflll
On the road
Steering
Adjusting steering wheel position
The steering wheel position can be adjusted for height
and reach.
First, adjust t he driver's se at correct ly.
Height adjustment
Fig . 13 0 Swit ch f or
steering whee l adjust
m ent
- P ush t he swi tch © up or down ~ fig. 130. The st e e ring
whe el h eig ht chang es f or as l ong as y ou press t he swi tch .
Reach adjustment
- Push the switc h@ forward or backward~ fig. 130 . T he
steering w heel reach changes for as long as you press the
switch .
There m ust be at least 10 inches (25 cm) between your chest and the
center of the steering whee l.
If you cannot sit more than 10 inches
(25 cm) from the steer ing wheel, see if adaptive equ ipment is ava il-
Cont rols a nd e quip
m en t Vehicle
OP-eration
able to help you reach the pedals and increase the d istanc e from the
stee ring wheel.
F or detailed info rmation on how to adjus t the d river' s se at, see
~ page 77.
Th e stee ring wheel ca n be adjusted even when the ign ition is turned
Off . For veh icles with seat memory, the individual pos it io ns for the
steering wheel can be stored along with the seat pos ition.
& WARNING
Improper use of steering wheel adjustment and improper seating
position can cause serious personal injury .
• Adjust the steering wheel column only when the vehicle is not
moving to prevent loss of vehicle control. • Adjust the driver 's seat or steering wheel so that th ere is a
minimum of 10 inches (25 cm ) between your chest and the
steering wheel~
page 188, fig. 198. If you cannot maintain this
m inimum distance, the airbag system cannot protect you prop
erly.
• If physical l imitations p revent you from sitting 10 inches (25
c m ) or more from the steering wheel, che ck with your authorized
Audi dealer to see if adapt ive equipment is a vailable.
• If the steering wheel is aligned with your face, the supp le
mental dri ver 's ai rbag cannot prov ide as much protection in an
accident . Always make sure that the steering wheel i s aligned with
your chest.
• Always hold the steering wheel with your hands at the 9 o 'clock
and 3 o 'clock posit ions to reduce the risk of personal injury if the
driver's airbag deploys .
• Never hold the steering wheel at the 12 o'clock position or with
your hands inside the steering wheel rim or on the steering wheel
hub. Holding the stee ring wheel the wrong way can cause serious
~
Vehicle care Do-it-yourselt service iTechnical data
Page 120 of 384

llffl..__O_ n_ t_h _e_ r_o _ a_ d _________________________________________________ _
& WARN ING (con tinu ed)
inju ries to the hands, arms and head if the d river 's airbag
deploy s.•
Easy entry feature
The easy entry feature makes it easier to enter and exit
the vehicle by autom atically adjusting the steering
w heel .
Press the button @=> page 11 7, fig. 130 to turn t he easy
en try featur e on or off.
W hen the easy entry fea ture is tu rned on ( button depre ssed) , the
steering wheel moves up to the parked position w hen the ignition is
tu rned off. After you ente r the vehicle, the steerin g wheel moves to
the stored pos ition as soon as you turn on the ign ition .•
Ignition Lock and ignition switch
Ignition key positions
The e ngine can be started or turned off with the ignition
key .
Fig . 131 Ig nition
swit ch posit ions
Position @
The ig nit io n key can be inserted into the ignition switc h in this posi
ti on . This automatically unloc ks the steer ing co lumn lock. When the
ig nition key is removed, the steer ing colum n lock is a utomat ically
locked~ &-
Ignition on (D
Turn t he ignit ion key to this position and re lease it.
Starting the engine@
The engine starts w ith the key in this position . Major electr ical loads
are te mpora rily tur ned off .
Ignition off 0
Turn the ignit ion key to this position and re lease i t.
& WARNING
• Never remove the key from the ignition lock while the vehicle
is moving . The steering wheel will lock , causing loss of control.
• If you have to leave your vehicle, even for just a minute, always
remove the ignition key and take it with you. This is especially
important if you are going to leave children unattended in the
vehicle. The children could start the engine or use other vehicle
controls . Unsupervised use of vehicle controls (for example, power
windows ) can cause serious personal injuries.
(D Note
• If the i symbol in the display blinks, there is a mal function in t he
elec tronic s tee ring co lumn lock. Follow the in struc tions in
~ page 31 , "Steer ing malfunction~" .
• If th e ~ sy m bol in the d is pla y blink s, t here i s a m alf unc tion in the
electronic ignition lock. Follow t he inst ru ctions in =>
page 31, "Igni-
t io n lock mal fu nctio n
.:2.". .,