Page 89 of 162

AUTOMATIC TRANSMISSION
Fault finding - Interpretation of faults
23A
23A - 89V3 MR-372-J84-23A000$495.mif
AJ0 BVA
Vdiag No.: 04, 05
DF300
CONTINUED 1
Look for any damage to the wiring harness, and check the condition and connection of the automatic
transmission computer and the hydraulic distributor.
If the circuit is faulty and there is a repair procedure (see Technical Note 6015A, Electrical wiring repair, Wiring:
Precautions for repair), repair the wiring, otherwise replace it.
Check for + after ignition feed on connection 5LW of component 754.
Is the + after ignition feed still present?
If YES, move on to step 1.
If NO, move on to step 8.
Step 1:
Disconnect the connector from component 119, measure the resistance of brake 2 solenoid valve
(on the connector of component 119) between the following connections:
●Connection code 5R.
●Connection code 5LW.
The resistance must be 5.3 ΩΩ Ω Ω
± 0.5 ΩΩ Ω Ω
at 20 ˚C.
Is the resistance correct?
If YES, contact the Techline.
If NO, move on to step 2.
Step 2:
Disconnect connector R22 and check the continuity and insulation of the following connections:
●Connection code 5R.
●Connection code 5LW.
Between components 119 and R22.
If the connection or connections are faulty and there is a repair procedure (see Technical Note 6015A, Electrical
wiring repair, Wiring: Precautions for repair), repair the wiring, otherwise replace it.
Are the continuity and insulation correct?
If YES, move on to step 3.
If NO, replace the external wiring harness on the automatic transmission.
AFTER REPAIRDeal with any other faults. Clear the fault memory.
Switch off the ignition, wait 1 minute and carry out a road test followed by another
check with the diagnostic tool.
Page 90 of 162

AUTOMATIC TRANSMISSION
Fault finding - Interpretation of faults
23A
23A - 90V3 MR-372-J84-23A000$495.mif
AJ0 BVA
Vdiag No.: 04, 05
DF300
CONTINUED 2
Stage 3:
Measure the resistance of brake 2 solenoid valve (on connector R22) between the following connections:
●Connection code 5R.
●Connection code 5LW.
The resistance must be 5.3 ΩΩ Ω Ω
± 0.5 ΩΩ Ω Ω
at 20 ˚C.
Is the resistance correct?
If YES, and if the fault is still present, contact the Techline.
If NO, move on to step 4.
Stage 4:
Drain the automatic transmission (see, MR 370, Mechanical, 23A Automatic transmission, Oil change)
and remove the transmission housing (see, MR 370, Mechanical, 23A Automatic transmission, Hydraulic
distributor).
Disconnect the connector from component 754, measure the resistance of brake 2 solenoid valve
(on the connector of the internal wiring harness of the transmission) between the following connections:
●Connection code 5R.
●Connection code 5LW.
The resistance must be 5.3 ΩΩ Ω Ω
± 0.5 ΩΩ Ω Ω
at 20 ˚C.
Is the resistance correct?
If YES, move on to step 5.
If NO, move on to step 6.
Stage 5:
Measure the continuity and insulation of the following connections:
●Connection code 5R,
●Connection code 5LW.
Between components R22 and the internal connector in the transmission.
Are the continuity and insulation correct?
If YES, contact the Techline.
If NO, replace the intermediate wiring harness between connector R22 and the internal connector in the
transmission.
AFTER REPAIRDeal with any other faults. Clear the fault memory.
Switch off the ignition, wait 1 minute and carry out a road test followed by another
check with the diagnostic tool.
Page 91 of 162

AUTOMATIC TRANSMISSION
Fault finding - Interpretation of faults
23A
23A - 91V3 MR-372-J84-23A000$495.mif
AJ0 BVA
Vdiag No.: 04, 05
DF300
CONTINUED 3
Stage 6:
Disconnect the connector from brake 2 solenoid valve, measure the resistance of brake 2 solenoid valve
between the following connections:
●Connection code 5R.
●Connection code 5LW.
The resistance must be 5.3 ΩΩ Ω Ω
± 0.5 ΩΩ Ω Ω
at 20 ˚C.
Is the resistance correct?
If YES, move on to step 7.
If NO, replace the hydraulic distributor.
Step 7:
Measure the continuity and insulation of the following connections:
●Connection code 5R.
●Connection code 5LW.
Between brake 2 solenoid valve and the internal connector on the transmission.
Are the continuity and insulation correct?
If YES, contact the Techline.
If NOT, replace the internal wiring harness on the automatic transmission.
Step 8:
Check the continuity and insulation of the following connection:
●Connection code 5LW between components 119 and 754.
If the connection is faulty and there is a repair procedure (see Technical Note 6015A, Electrical wiring repair,
Wiring: Precautions for repair), repair the wiring, otherwise replace it.
If + after ignition feed is not present after checking feeds and earths on the transmission computer, contact the
Techline.
AFTER REPAIRDeal with any other faults. Clear the fault memory.
Switch off the ignition, wait 1 minute and carry out a road test followed by another
check with the diagnostic tool.
Page 92 of 162

AUTOMATIC TRANSMISSION
Fault finding - Interpretation of faults
23A
23A - 92V3 MR-372-J84-23A000$495.mif
AJ0 BVA
Vdiag No.: 04, 05
DF301
PRESENT
OR
STOREDCLUTCH 1 PRESSURE SWITCH CIRCUIT
1.DEF: Open circuit or short circuit
NOTESConditions for applying fault finding procedures to stored faults:
The fault appears after:
Lever in "Drive" position, Gear engaged = 1, 2, 3, 4,
and accelerator pedal > 0 %, vehicle speed > 6 mph (10 km/h),
and for each gear, the status of clutch 1 pressure switch does not correspond to the
solenoid control status.
After engaging 4th gear, switch off the ignition and remove card from its drive. Reinsert
the card in the card reader, start up the vehicle then repeat the previous operation.
Check (engine running) status ET261 "Clutch 1" (consult interpretation of status
ET261 "Clutch 1" (see Interpretation of statuses)).
Use the Wiring Diagrams Technical Note, SCENIC II ph2.
Look for any damage to the wiring and check the condition and connection of the connectors for components 119
and 754.
If the circuit is faulty and there is a repair procedure (see Technical Note 6015A, Electrical wiring repair, Wiring:
Precautions for repair), repair the wiring, otherwise replace it.
Check the continuity and insulation of the following connections on the external wiring harness:
●Connection code 5CZ.
●Connection code 5LW.
Between components 119 and 754.
If the connection or connections are faulty and there is a repair procedure (see Technical Note 6015A, Electrical
wiring repair, Wiring: Precautions for repair), repair the wiring, otherwise replace it.
Are the continuity and insulation correct?
If YES, move on to step 1.
If NO, replace the external wiring harness.
AFTER REPAIRDeal with any other faults. Clear the fault memory.
Switch off the ignition, wait 1 minute and carry out a road test followed by another
check with the diagnostic tool.
AJ0_V04_DF301/AJ0_V05_DF301
Page 93 of 162

AUTOMATIC TRANSMISSION
Fault finding - Interpretation of faults
23A
23A - 93V3 MR-372-J84-23A000$495.mif
AJ0 BVA
Vdiag No.: 04, 05
DF301
CONTINUED
Step 1:
Drain the automatic transmission (see, MR 370, Mechanical, 23A Automatic transmission, Oil change) and
remove the transmission housing (see, MR 370, Mechanical, 23A Automatic transmission, Hydraulic
distributor).
Check the continuity and insulation of the following connections on the internal wiring harness:
●Connection code 5CZ, between components 119 and the pressure switch on clutch 1.
If the connection or connections are faulty and there is a repair procedure (see Technical Note 6015A, Electrical
wiring repair, Wiring: Precautions for repair), repair the wiring, otherwise replace it.
Are the continuity and insulation correct?
If YES, replace the pressure switch on clutch 1.
If NO, replace the internal wiring harness.
AFTER REPAIRDeal with any other faults. Clear the fault memory.
Switch off the ignition, wait 1 minute and carry out a road test followed by another
check with the diagnostic tool.
Page 94 of 162

AUTOMATIC TRANSMISSION
Fault finding - Interpretation of faults
23A
23A - 94V3 MR-372-J84-23A000$495.mif
AJ0 BVA
Vdiag No.: 04, 05
DF302
PRESENT
OR
STOREDCLUTCH 2 PRESSURE SWITCH CIRCUIT
1.DEF: Open circuit or short circuit
NOTESConditions for applying fault finding procedures to stored faults:
The fault appears after:
Lever in "Drive" position, gear engaged = 3, 5 OR Reverse position,
and accelerator pedal > 0 %, vehicle speed > 6 mph (10 km/h),
and for each gear, the status of clutch 2 pressure switch does not correspond to the
solenoid control status.
After engaging 4th gear, switch off the ignition and remove card from its drive. Reinsert
the card in the card reader, start up the vehicle then repeat the previous operation.
Use the Wiring Diagrams Technical Note, SCENIC II ph2.
Look for any damage to the wiring and check the condition and connection of the connectors for components 119
and 754.
If the circuit is faulty and there is a repair procedure (see Technical Note 6015A, Electrical wiring repair, Wiring:
Precautions for repair), repair the wiring, otherwise replace it.
Manipulate the wiring harness in order to observe any change in the fault status (Present → stored).
Check the continuity and insulation of the following connections on the external wiring harness:
●Connection code 5LM.
●Connection code 5LW.
Between components 119 and 754.
If the connection or connections are faulty and there is a repair procedure (see Technical Note 6015A, Electrical
wiring repair, Wiring: Precautions for repair), repair the wiring, otherwise replace it.
Are the continuity and insulation correct?
If YES, move on to step 1.
If NO, replace the external wiring harness.
AFTER REPAIRDeal with any other faults. Clear the fault memory.
Switch off the ignition, wait 1 minute and carry out a road test followed by another
check with the diagnostic tool.
AJ0_V04_DF302/AJ0_V05_DF302
Page 95 of 162

AUTOMATIC TRANSMISSION
Fault finding - Interpretation of faults
23A
23A - 95V3 MR-372-J84-23A000$495.mif
AJ0 BVA
Vdiag No.: 04, 05
DF302
CONTINUED
Step 1:
Drain the automatic transmission (see, MR 370, Mechanical, 23A Automatic transmission, Oil change) and
remove the transmission housing (see, MR 370, Mechanical, 23A Automatic transmission, Hydraulic
distributor).
Check the continuity and insulation of the following connections on the internal wiring harness:
●Connection code 5LM, between components 119 and the pressure switch on clutch 2.
If the connection is faulty and there is a repair procedure (see Technical Note 6015A, Electrical wiring repair,
Wiring: Precautions for repair), repair the wiring, otherwise replace it.
Are the continuity and insulation correct?
If YES, replace the pressure switch on clutch 2.
If NO, replace the internal wiring harness.
AFTER REPAIRDeal with any other faults. Clear the fault memory.
Switch off the ignition, wait 1 minute and carry out a road test followed by another
check with the diagnostic tool.
Page 96 of 162

AUTOMATIC TRANSMISSION
Fault finding - Interpretation of faults
23A
23A - 96V3 MR-372-J84-23A000$495.mif
AJ0 BVA
Vdiag No.: 04, 05
DF303
PRESENT
OR
STOREDCLUTCH 3 PRESSURE SWITCH CIRCUIT
1.DEF: Open circuit or short circuit
NOTESConditions for applying fault finding procedures to stored faults:
The fault appears after:
Lever in "Drive" position, Gear engaged = 4, 5, 6
and accelerator pedal > 0 %, vehicle speed > 6 mph (10 km/h),
and for each gear, the status of clutch 3 pressure switch does not correspond to the
solenoid control status.
After engaging 4th gear, switch off the ignition and remove card from its drive. Reinsert
the card in the card reader, start up the vehicle then repeat the previous operation.
Use the Wiring Diagrams Technical Note, SCENIC II ph2.
Look for any damage to the wiring and check the condition and connection of the connectors for components 119
and 754.
If the connection is faulty and there is a repair procedure (see Technical Note 6015A, Electrical wiring repair,
Wiring: Precautions for repair), repair the wiring, otherwise replace it.
Manipulate the wiring harness in order to observe any change in the fault status (Present → stored).
Check the continuity and insulation of the following external wiring harness connections on the transmission:
●Connection code 5LH.
●Connection code 5LW.
Between components 119 and 754.
If the connection or connections are faulty and there is a repair procedure (see Technical Note 6015A, Electrical
wiring repair, Wiring: Precautions for repair), repair the wiring, otherwise replace it.
Are the continuity and insulation correct?
If YES, move on to step 1.
If NO, replace the external wiring harness.
AFTER REPAIRDeal with any other faults. Clear the fault memory.
Switch off the ignition, wait 1 minute and carry out a road test followed by another
check with the diagnostic tool.
AJ0_V04_DF303/AJ0_V05_DF303
 1
1 2
2 3
3 4
4 5
5 6
6 7
7 8
8 9
9 10
10 11
11 12
12 13
13 14
14 15
15 16
16 17
17 18
18 19
19 20
20 21
21 22
22 23
23 24
24 25
25 26
26 27
27 28
28 29
29 30
30 31
31 32
32 33
33 34
34 35
35 36
36 37
37 38
38 39
39 40
40 41
41 42
42 43
43 44
44 45
45 46
46 47
47 48
48 49
49 50
50 51
51 52
52 53
53 54
54 55
55 56
56 57
57 58
58 59
59 60
60 61
61 62
62 63
63 64
64 65
65 66
66 67
67 68
68 69
69 70
70 71
71 72
72 73
73 74
74 75
75 76
76 77
77 78
78 79
79 80
80 81
81 82
82 83
83 84
84 85
85 86
86 87
87 88
88 89
89 90
90 91
91 92
92 93
93 94
94 95
95 96
96 97
97 98
98 99
99 100
100 101
101 102
102 103
103 104
104 105
105 106
106 107
107 108
108 109
109 110
110 111
111 112
112 113
113 114
114 115
115 116
116 117
117 118
118 119
119 120
120 121
121 122
122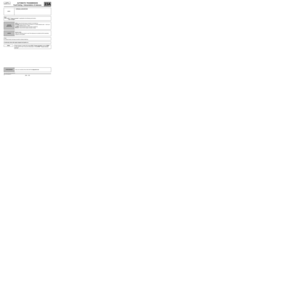 123
123 124
124 125
125 126
126 127
127 128
128 129
129 130
130 131
131 132
132 133
133 134
134 135
135 136
136 137
137 138
138 139
139 140
140 141
141 142
142 143
143 144
144 145
145 146
146 147
147 148
148 149
149 150
150 151
151 152
152 153
153 154
154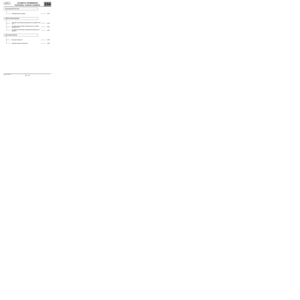 155
155 156
156 157
157 158
158 159
159 160
160 161
161


