2009 NISSAN LATIO open hood
[x] Cancel search: open hoodPage 477 of 4331

Removal and Installation " .
2. Remove crash zone sensor. Refer to SRS-42, " Removal and Installation " .
3. Remove bolts, and the hood lock reinforcement.
Hood Lock Cable
1. Remove front grille (LH/RH). Refer to EI-21, " Removal and Installation " .
2. Remove fender protector (LH). Refer to EI-24, " Component " .
3. Remove hood lock, and remove hood lock cable from hood lock.
4. Remove radiator core upper support, hood ledge, and then remove hood lock cable.
5. Remove hood opener on bottom left of instrument panel, and then remove hood lock cable.
6. Remove grommet on lower dashboard, and pull out hood lock cable from passenger room side.
CAUTION:
While pulling the cable, be car eful not to damage (peel)
hood opener cable outer surface on edges of body through
hole.
INSTALLATION
Installation is in the reverse order of removal.
• Perform hood fitting adjustment. Refer to BL-13, " Fitting Adjustment " .
Hood Lock Reinforcement
When installing hood lock reinforcement, loosen hood bolts, and
then tighten bolts in the order as shown.
Hood Lock Cable
1. Pull the hood lock cable through the panel hole to the engine compartment. CAUTION: 23.6 N·m (2.4 kg-m, 17 ft-lb)
LIIA2667E
Page 478 of 4331

HOOD
BL-17
< SERVICE INFORMATION >
C
D E
F
G H
J
K L
M A
B BL
N
O P
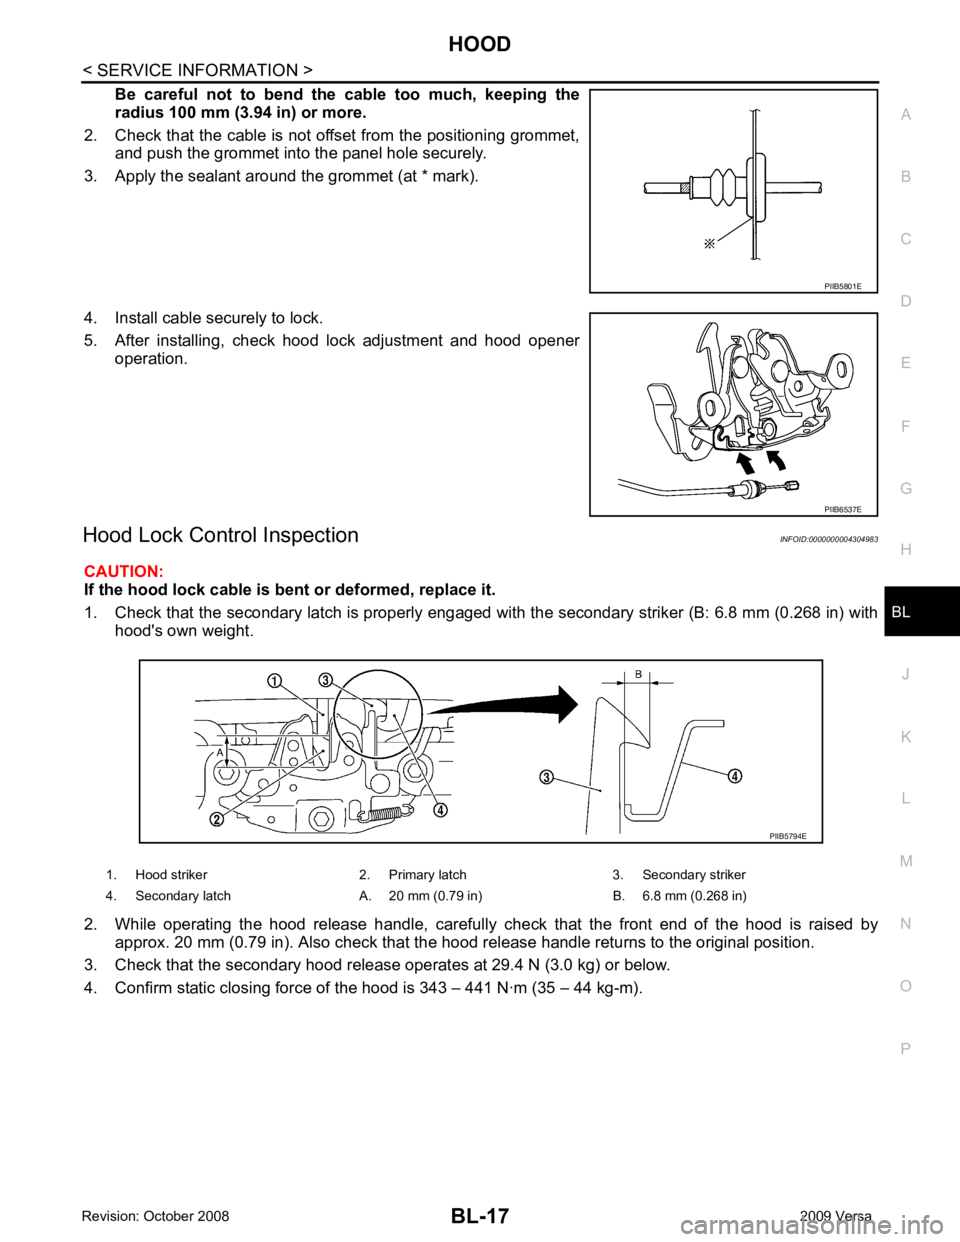
Be careful not to bend the cable too much, keeping the
radius 100 mm (3.94 in) or more.
2. Check that the cable is not of fset from the positioning grommet,
and push the grommet into the panel hole securely.
3. Apply the sealant around the grommet (at * mark).
4. Install cable securely to lock.
5. After installing, check hood lock adjustment and hood opener operation.
Hood Lock Control Inspection INFOID:0000000004304983
CAUTION:
If the hood lock cable is bent or deformed, replace it.
1. Check that the secondary latch is properly engaged with the secondary striker (B: 6.8 mm (0.268 in) with
hood's own weight.
2. While operating the hood release handle, carefully check that the front end of the hood is raised by
approx. 20 mm (0.79 in). Also check that the hood release handle returns to the original position.
3. Check that the secondary hood release operates at 29.4 N (3.0 kg) or below.
4. Confirm static closing force of the hood is 343 – 441 N·m (35 – 44 kg-m). PIIB5801E
PIIB6537E
1. Hood striker 2. Primary
latch 3. Secondary striker
4. Secondary latch A. 20 mm (0.79 in) B. 6.8 mm (0.268 in) PIIB5794E
Page 1561 of 4331

EC
NP
O
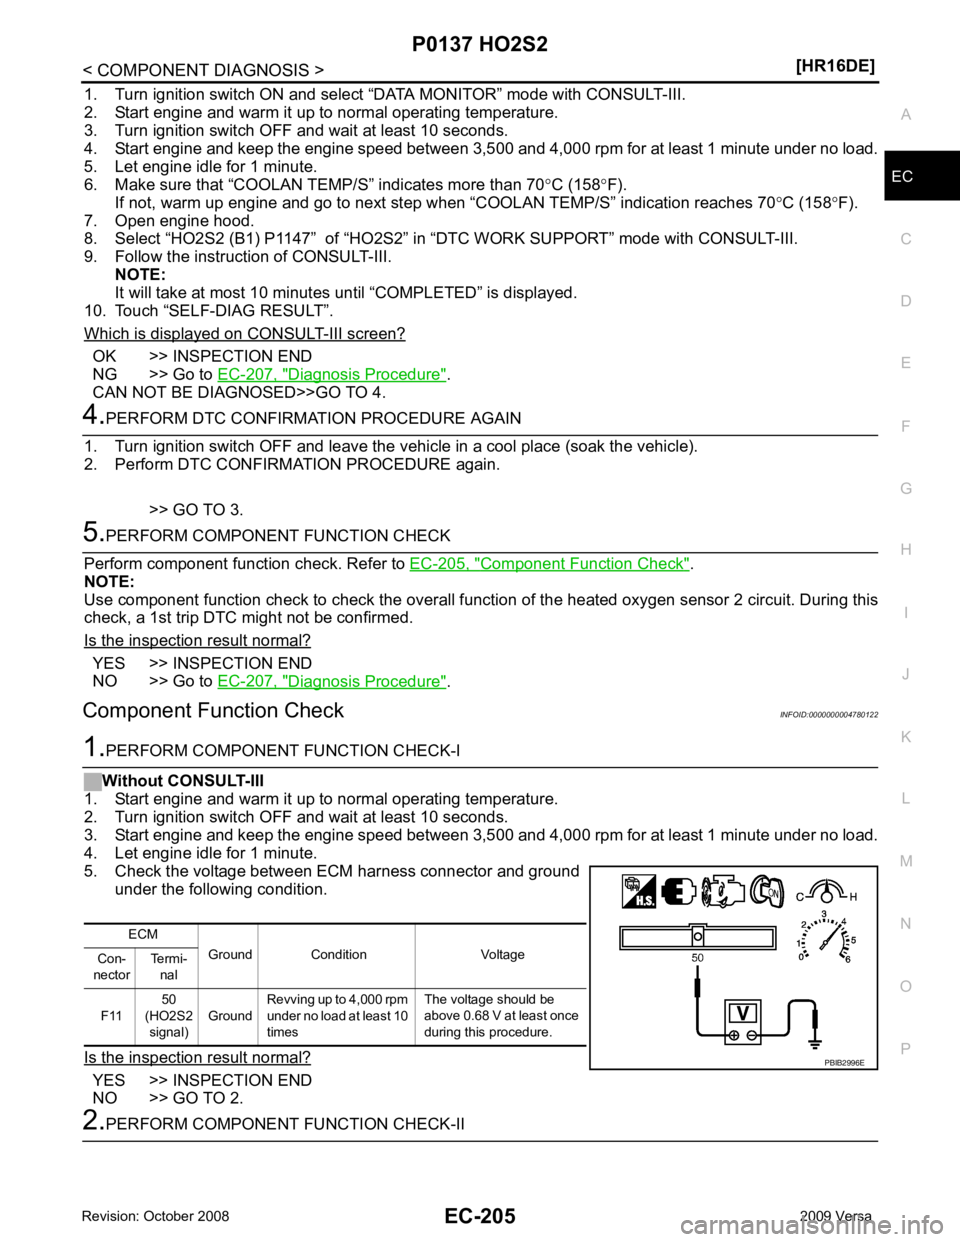
1. Turn ignition switch ON and select “DATA MONITOR” mode with CONSULT-III.
2. Start engine and warm it up to normal operating temperature.
3. Turn ignition switch OFF and wait at least 10 seconds.
4. Start engine and keep the engine speed between 3,500 and 4,000 rpm for at least 1 minute under no load.
5. Let engine idle for 1 minute.
6. Make sure that “COOLAN TEMP/S” indicates more than 70 °C (158 °F).
If not, warm up engine and go to next step w hen “COOLAN TEMP/S” indication reaches 70 °C (158 °F).
7. Open engine hood.
8. Select “HO2S2 (B1) P1147” of “HO2S2” in “DTC WORK SUPPORT” mode with CONSULT-III.
9. Follow the instruction of CONSULT-III. NOTE:
It will take at most 10 minutes until “COMPLETED” is displayed.
10. Touch “SELF-DIAG RESULT”.
Which is displayed on CONSULT-III screen? OK >> INSPECTION END
NG >> Go to EC-207, " Diagnosis Procedure " .
CAN NOT BE DIAGNOSED>>GO TO 4. Component Function Check " .
NOTE:
Use component function check to check the overall function of the heated oxygen sensor 2 circuit. During this
check, a 1st trip DTC might not be confirmed.
Is the inspection result normal? YES >> INSPECTION END
NO >> Go to EC-207, " Diagnosis Procedure " .
Component Function Check INFOID:0000000004780122YES >> INSPECTION END
NO >> GO TO 2.
Page 1578 of 4331
![NISSAN LATIO 2009 Service Repair Manual EC-222< COMPONENT DIAGNOSIS >
[HR16DE]
P0139 HO2S2
3. Start engine and keep the engine speed between 3,500 and 4,000 rpm for at least 1 minute under no load.
4. Let engine idle for 1 minute.
5. Open NISSAN LATIO 2009 Service Repair Manual EC-222< COMPONENT DIAGNOSIS >
[HR16DE]
P0139 HO2S2
3. Start engine and keep the engine speed between 3,500 and 4,000 rpm for at least 1 minute under no load.
4. Let engine idle for 1 minute.
5. Open](/manual-img/5/57359/w960_57359-1577.png)
EC-222< COMPONENT DIAGNOSIS >
[HR16DE]
P0139 HO2S2
3. Start engine and keep the engine speed between 3,500 and 4,000 rpm for at least 1 minute under no load.
4. Let engine idle for 1 minute.
5. Open engine hood.
6. Select “HO2S2 (B1) P0139” of “HO2S2” in “DTC WORK SUPPORT” mode with CONSULT-III.
7. Follow the instruction of CONSULT-III. NOTE:
It will take at most 10 minutes until “COMPLETED” is displayed.
8. Touch “SELF-DIAG RESULT”.
Which is displayed on CONSULT-III? OK >> INSPECTION END
NG >> GO TO 4.
CAN NOT BE DIAGNOSED>>GO TO 4. 4.
PERFORM THE RESULT OF DTC CONFIRMATION PROCEDURE
1. Turn ignition switch OFF and leave the vehi cle in a cool place (soak the vehicle).
2. Perform DTC CONFIRMATION PROCEDURE again.
>> GO TO 3. 5.
PERFORM COMPONENT FUNCTION CHECK
Perform component function check. Refer to EC-222, " Component Function Check " .
NOTE:
Use component function check to check the overall func tion of the heated oxygen sensor 2 circuit. During this
check, a 1st trip DTC might not be confirmed.
Is the inspection result normal? YES >> INSPECTION END
NO >> Go to EC-224, " Diagnosis Procedure " .
Component Function Check INFOID:00000000047801321.
PERFORM COMPONENT FUNCTION CHECK-I
Without CONSULT-III
1. Start engine and warm it up to normal operating temperature.
2. Turn ignition switch OFF and wait at least 10 seconds.
3. Start engine and keep the engine speed between 3,500 and 4,000 rpm for at least 1 minute under no load.
4. Let engine idle for 1 minute.
5. Check the voltage between ECM harness connector and ground under the following condition.
Is the inspection result normal? YES >> INSPECTION END
NO >> GO TO 2. 2.
PERFORM COMPONENT FUNCTION CHECK-IIECM
Ground Condition Voltage
Con-
nector Terminal
F11 50
(HO2S2
signal) Ground
Revving up to 4,000
rpm under no load at
least 10 times The voltage should be above
0.30 V at least once during
this procedure. PBIB2996E
Page 1630 of 4331
![NISSAN LATIO 2009 Service Repair Manual EC-274< COMPONENT DIAGNOSIS >
[HR16DE]
P0420 THREE WAY CATALYST FUNCTION
CMPLT >> GO TO 6.
INCMP >> GO TO 4. 4.
PERFORM DTC CONFIRMATION PROCEDURE-II
1. Wait 5 seconds at idle.
2. Rev engine up to 2,0 NISSAN LATIO 2009 Service Repair Manual EC-274< COMPONENT DIAGNOSIS >
[HR16DE]
P0420 THREE WAY CATALYST FUNCTION
CMPLT >> GO TO 6.
INCMP >> GO TO 4. 4.
PERFORM DTC CONFIRMATION PROCEDURE-II
1. Wait 5 seconds at idle.
2. Rev engine up to 2,0](/manual-img/5/57359/w960_57359-1629.png)
EC-274< COMPONENT DIAGNOSIS >
[HR16DE]
P0420 THREE WAY CATALYST FUNCTION
CMPLT >> GO TO 6.
INCMP >> GO TO 4. 4.
PERFORM DTC CONFIRMATION PROCEDURE-II
1. Wait 5 seconds at idle.
2. Rev engine up to 2,000 to 3,000 rpm and maintain it unt il “INCMP” of “CATALYST” changes to “CMPLT” (It
will take approximately 5 minutes).
Does the indication change to “ CMPLT ” ?
YES >> GO TO 6.
NO >> GO TO 5. 5.
PERFORM DTC CONFIRMATION PROCEDURE AGAIN
1. Stop engine and cool it down to less than 70 °C (158 °F).
2. Perform DTC CONFIRMATION PROCEDURE again.
>> GO TO 3. 6.
PERFORM DTC CONFIRMATION PROCEDURE-III
Check 1st trip DTC.
Is 1st trip DTC detected? YES >> Go to
EC-275, " Diagnosis Procedure " .
NO >> INSPECTION END 7.
PERFORM COMPONENT FUNCTION CHECK
Perform component function check. Refer to EC-274, " Component Function Check " .
NOTE:
Use component function check to check the overall functi on of the three way catalyst (manifold). During this
check, a 1st trip DTC might not be confirmed.
Is the inspection result normal? YES >> INSPECTION END
NO >> Go to EC-275, " Diagnosis Procedure " .
Component Function Check INFOID:00000000047801671.
PERFORM COMPONENT FUNCTION CHECK
Without CONSULT-III
1. Start engine and warm it up to normal operating temperature.
2. Turn ignition switch OFF and wait at least 10 seconds.
3. Start engine and keep the engine speed between 3,500 and 4,000 rpm for at least 1 minute under no load.
4. Let engine idle for 1 minute.
5. Open engine hood.
6. Check the voltage between ECM harness connector and ground under the following condition.
Is the inspection result normal? YES >> INSPECTION END
NO >> Go to EC-275, " Diagnosis Procedure " .
ECM
Ground Condition Voltage
Con-
nector Terminal
F11 50
(HO2S2 signal) GroundKeeping engine speed
at 2,500 rpm constant
under no load The voltage fluctuation cy-
cle takes more than 5 sec-
onds.
1 cycle: 0.6 - 1.0 → 0 - 0.3
→ 0.6 - 1.0 PBIB2996E
Page 1922 of 4331
![NISSAN LATIO 2009 Service Repair Manual EC-566< SERVICE INFOMATION >
[MR TYPE 1]
BASIC SERVICE PROCEDURE
BASIC SERVICE PROCEDURE
Basic Inspection INFOID:00000000045370431.
INSPECTION START
1. Check service records for any recent repairs tha NISSAN LATIO 2009 Service Repair Manual EC-566< SERVICE INFOMATION >
[MR TYPE 1]
BASIC SERVICE PROCEDURE
BASIC SERVICE PROCEDURE
Basic Inspection INFOID:00000000045370431.
INSPECTION START
1. Check service records for any recent repairs tha](/manual-img/5/57359/w960_57359-1921.png)
EC-566< SERVICE INFOMATION >
[MR TYPE 1]
BASIC SERVICE PROCEDURE
BASIC SERVICE PROCEDURE
Basic Inspection INFOID:00000000045370431.
INSPECTION START
1. Check service records for any recent repairs that ma y indicate a related malfunction, or a current need for
scheduled maintenance.
2. Open engine hood and check the following:
- Harness connectors for improper connections
- Wiring harness for improper connections, pinches and cut
- Vacuum hoses for splits, kinks and improper connections
- Hoses and ducts for leaks
- Air cleaner clogging
- Gasket
3. Confirm that electrical or mechanical loads are not applied.
- Headlamp switch is OFF.
- Air conditioner switch is OFF.
- Rear window defogger switch is OFF.
- Steering wheel is in the straight-ahead position, etc.
4. Start engine and warm it up until engine coolant temperature indicator points the middle of gauge.
Ensure engine stays below 1,000 rpm.
5. Run engine at about 2,000 rpm for about 2 minutes under no load.
6. Make sure that no DTC is displayed with CONSULT-III or GST.
OK or NG OK >> GO TO 3.
NG >> GO TO 2. 2.
REPAIR OR REPLACE
Repair or replace components as necessary according to corresponding Diagnostic Procedure.
>> GO TO 3. 3.
CHECK TARGET IDLE SPEED
With CONSULT-III
1. Run engine at about 2,000 rpm for about 2 minutes under no load. SEF983U
SEF976U
SEF977U
Page 2074 of 4331
![NISSAN LATIO 2009 Service Repair Manual EC-718< SERVICE INFOMATION >
[MR TYPE 1]
DTC P0137 HO2S2
1. Turn ignition switch ON and select “DATA MONITOR” mode with CONSULT-III.
2. Start engine and warm it up to the normal operating temperat NISSAN LATIO 2009 Service Repair Manual EC-718< SERVICE INFOMATION >
[MR TYPE 1]
DTC P0137 HO2S2
1. Turn ignition switch ON and select “DATA MONITOR” mode with CONSULT-III.
2. Start engine and warm it up to the normal operating temperat](/manual-img/5/57359/w960_57359-2073.png)
EC-718< SERVICE INFOMATION >
[MR TYPE 1]
DTC P0137 HO2S2
1. Turn ignition switch ON and select “DATA MONITOR” mode with CONSULT-III.
2. Start engine and warm it up to the normal operating temperature.
3. Turn ignition switch OFF and wait at least 10 seconds.
4. Start engine and keep the engine speed between 3,500 and 4,000 rpm for at least 1 minute under no load.
5. Let engine idle for 1 minute.
6. Make sure that “COOLAN TEMP/S” indicates more than 70 °C (158 °F).
If not, warm up engine and go to next step when “C OOLAN TEMP/S” indication reaches to 70°C (158 °F).
7. Open engine hood.
8. Select “HO2S2 (B1) P1147” of “HO2S2” in “DTC WORK SUPPORT” mode with CONSULT-III.
9. Start engine and following the instruction of CONSULT-III. NOTE:
It will take at most 10 minutes until “COMPLETED” is displayed.
10. Make sure that “OK” is display ed after touching “SELF-DIAG RESULTS”.
If “NG” is displayed, refer to EC-720, " Diagnosis Procedure " .
If “CAN NOT BE DIAG NOSED” is displayed, perform the following.
a. Turn ignition switch OFF and leave the vehi cle in a cool place (soak the vehicle).
b. Return to step 1.
Overall Function Check INFOID:0000000004537201
Use this procedure to check the overall function of the heated oxygen sensor 2 circuit. During this check, a 1st
trip DTC might not be confirmed.
WITH GST
1. Start engine and warm it up to the normal operating temperature.
2. Turn ignition switch OFF and wait at least 10 seconds.
3. Start engine and keep the engine speed between 3,500 and 4,000 rpm for at least 1 minute under no load.
4. Let engine idle 1 minute.
5. Set voltmeter probes between ECM terminal 50 (HO2S2 signal) and ground.
6. Check the voltage when revving up to 4,000 rpm under no load at least 10 times.
(Depress and release accelerator pedal as soon as possible.)
The voltage should be above 0. 68V at least once during this
procedure.
If the voltage can be confirmed in step 6, step 7 is not nec-
essary.
7. Keep vehicle idling for 10 minutes, then check the voltage. Or check the voltage when coasting from 80 km/h (50 MPH) in D
position with OD OFF (A/T), D position (CVT) or 3rd gear posi-
tion (M/T).
The voltage should be above 0. 68V at least once during this
procedure.
8. If NG, go to EC-720, " Diagnosis Procedure " . PBIB2996E
Page 2081 of 4331

EC
NP
O
DTC Confirmation Procedure
INFOID:0000000004537209
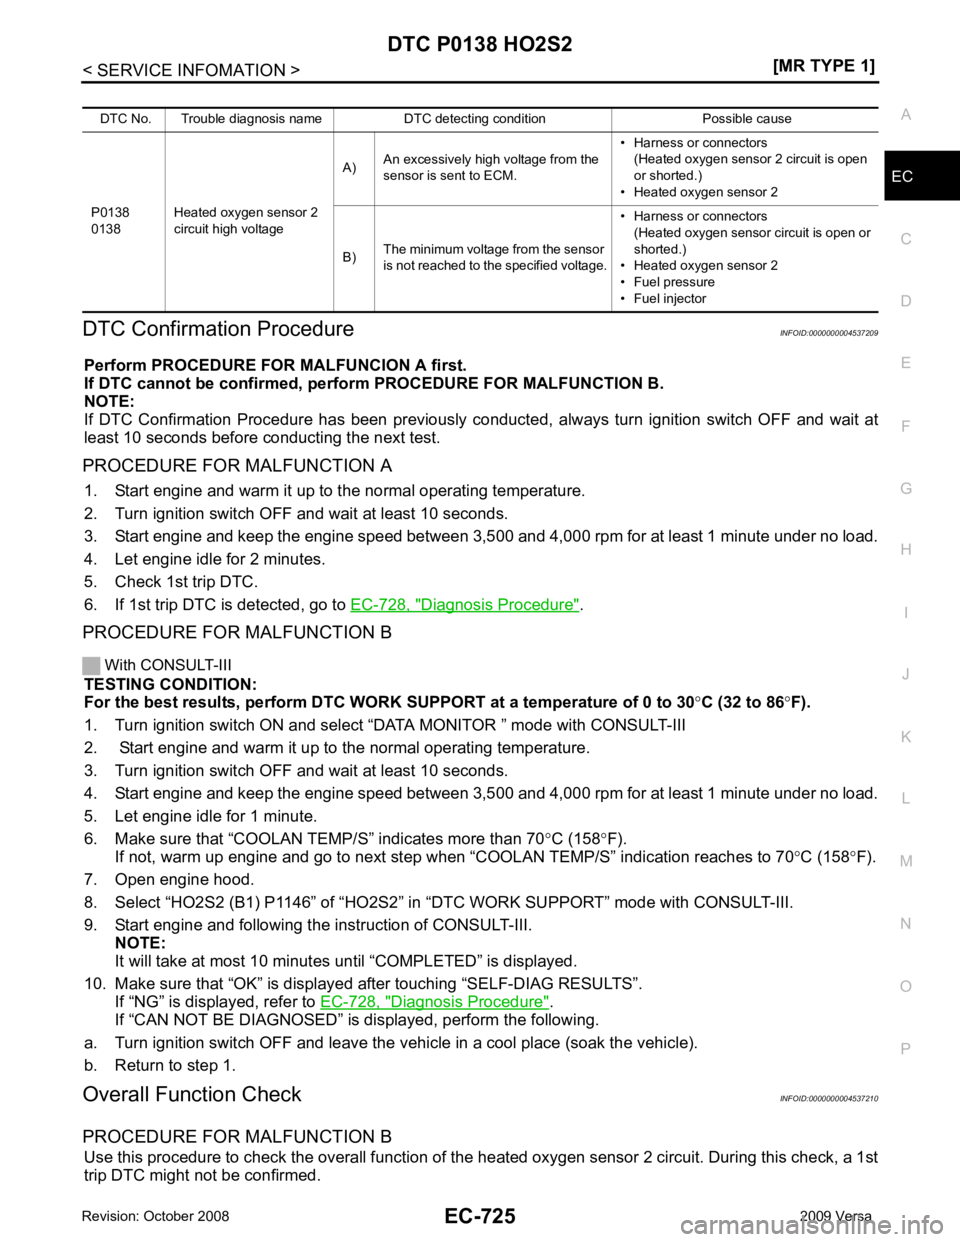
Perform PROCEDURE FOR MALFUNCION A first.
If DTC cannot be confirmed, perform PROCEDURE FOR MALFUNCTION B.
NOTE:
If DTC Confirmation Procedure has been previously conduc ted, always turn ignition switch OFF and wait at
least 10 seconds before conducting the next test.
PROCEDURE FOR MALFUNCTION A 1. Start engine and warm it up to the normal operating temperature.
2. Turn ignition switch OFF and wait at least 10 seconds.
3. Start engine and keep the engine speed between 3,500 and 4,000 rpm for at least 1 minute under no load.
4. Let engine idle for 2 minutes.
5. Check 1st trip DTC.
6. If 1st trip DTC is detected, go to EC-728, " Diagnosis Procedure " .
PROCEDURE FOR MALFUNCTION B
With CONSULT-III
TESTING CONDITION:
For the best results, perform DTC WORK SUPPORT at a temperature of 0 to 30°C (32 to 86 °F).
1. Turn ignition switch ON and select “DATA MONITOR ” mode with CONSULT-III
2. Start engine and warm it up to the normal operating temperature.
3. Turn ignition switch OFF and wait at least 10 seconds.
4. Start engine and keep the engine speed between 3,500 and 4,000 rpm for at least 1 minute under no load.
5. Let engine idle for 1 minute.
6. Make sure that “COOLAN TEMP/S” indicates more than 70 °C (158 °F).
If not, warm up engine and go to next step when “COOLAN TEMP/S” indication reaches to 70°C (158 °F).
7. Open engine hood.
8. Select “HO2S2 (B1) P1146” of “HO2S2” in “DTC WORK SUPPORT” mode with CONSULT-III.
9. Start engine and following the instruction of CONSULT-III. NOTE:
It will take at most 10 minutes until “COMPLETED” is displayed.
10. Make sure that “OK” is display ed after touching “SELF-DIAG RESULTS”.
If “NG” is displayed, refer to EC-728, " Diagnosis Procedure " .
If “CAN NOT BE DIAGNOSED” is displayed, perform the following.
a. Turn ignition switch OFF and leave the vehicle in a cool place (soak the vehicle).
b. Return to step 1.
Overall Function Check INFOID:0000000004537210
PROCEDURE FOR MALFUNCTION B Use this procedure to check the overall function of the heated oxygen sensor 2 circuit. During this check, a 1st
trip DTC might not be confirmed. DTC No. Trouble diagnosis name DTC detecting condition Possible cause
P0138
0138 Heated oxygen sensor 2
circuit high voltage A)
An excessively high voltage from the
sensor is sent to ECM. • Harness or connectors
(Heated oxygen sensor 2 circuit is open
or shorted.)
• Heated oxygen sensor 2
B) The minimum voltage from the sensor
is not reached to the specified voltage. • Harness or connectors
(Heated oxygen sensor circuit is open or
shorted.)
• Heated oxygen sensor 2
• Fuel pressure
• Fuel injector