2009 MITSUBISHI ASX display
[x] Cancel search: displayPage 55 of 368
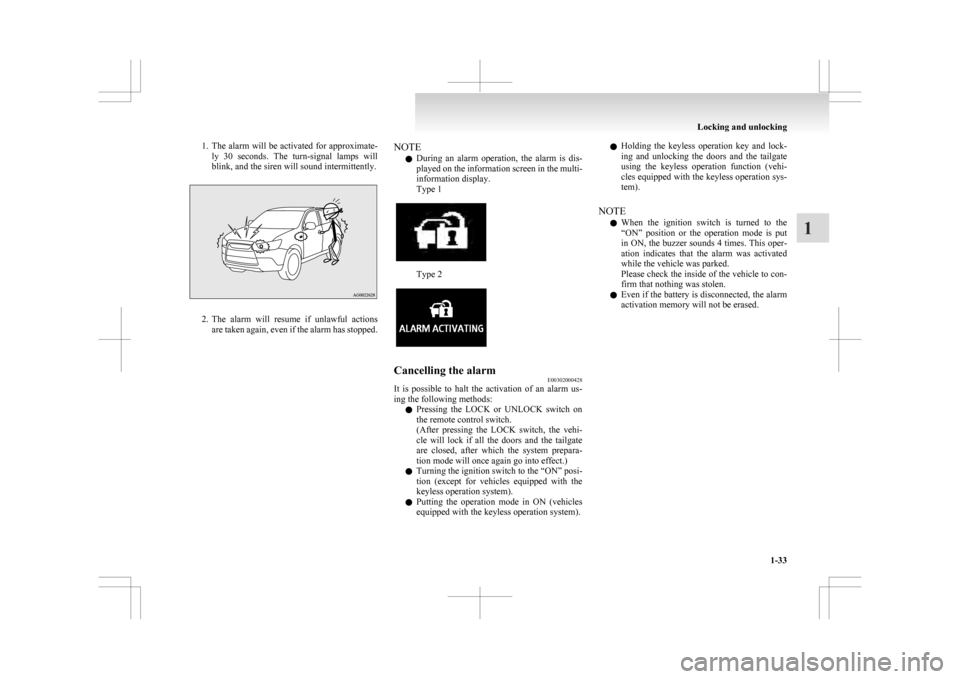
1. The alarm will be activated for approximate-
ly 30 seconds. The turn-signal lamps will
blink, and the siren will sound intermittently. 2. The
alarm will resume if unlawful actions
are taken again, even if the alarm has stopped. NOTE
l During
an alarm operation, the alarm is dis-
played on the information screen in the multi-
information display.
Type 1 Type 2
Cancelling the alarm
E00302000428
It is possible to halt the activation of an alarm us-
ing the following methods:
l Pressing
the LOCK or UNLOCK switch on
the remote control switch.
(After pressing the LOCK switch, the vehi-
cle will lock if all the doors and the tailgate
are closed, after which the system prepara-
tion mode will once again go into effect.)
l Turning the ignition switch to the “ON” posi-
tion (except for vehicles equipped with the
keyless operation system).
l Putting the operation mode in ON (vehicles
equipped with the keyless operation system). l
Holding
the keyless operation key and lock-
ing and unlocking the doors and the tailgate
using the keyless operation function (vehi-
cles equipped with the keyless operation sys-
tem).
NOTE l When the ignition switch is turned to the
“ON” position or the operation mode is put
in ON, the buzzer sounds 4 times. This oper-
ation indicates that the alarm was activated
while the vehicle was parked.
Please check the inside of the vehicle to con-
firm that nothing was stolen.
l Even if the battery is disconnected, the alarm
activation memory will not be erased. Locking and unlocking
1-33 1
Page 69 of 368
WARNING
l The seat belts must not be twisted when
worn.
3. Pull
the belt slightly to adjust slackness as de- sired.
To unfasten
Hold the latch plate and push the button on the buck-
le. NOTE
l As
the belt retracts automatically, keep hold-
ing the latch plate while retracting so that the
belt stows slowly. Failure to do this could
damage the vehicle. Driver’s seat belt warning lamp and
display
E00409800833
Warning lamp Warning display type 1
Warning display type 2
A tone and warning lamp are used to remind the
driver to fasten the seat belt.
If
the ignition switch is turned to the “ON” position
or the operation mode is put in ON while a seat
belt is not fastened, the warning lamp illuminates
and the tone sounds for about 6 seconds to remind
the driver to fasten the seat belt.
If the vehicle is driven without fastening the seat
belt, approximately 1 minute after the ignition
switch is turned to the “ON” position, the warning
lamp illuminates and flashes repeatedly, and the
tone sounds continuously. In addition, the warning
display will be displayed on the information screen
in the multi-information display. The warning lamp goes off and the tone stops after
approximately 90 seconds.
Subsequently,
if the seat belt is still not fastened,
the warning lamp and tone will be activated to re-
mind the driver to fasten the seat belt whenever the
vehicle is stopped and started again. The warning
will operate in the same way if the seat belt is re-
moved while driving the vehicle. The warning will
stop when the seat belt is fastened.
Front passenger seat belt warning lamp E00411600186
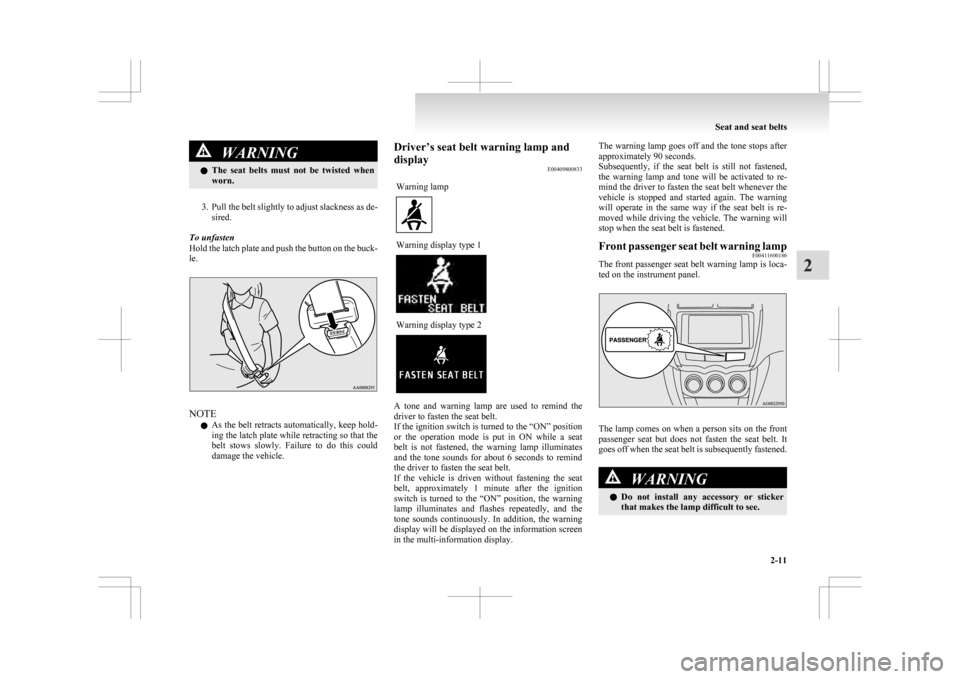
The front passenger seat belt warning lamp is loca-
ted on the instrument panel. The lamp comes on when a person sits on the front
passenger
seat but does not fasten the seat belt. It
goes off when the seat belt is subsequently fastened. WARNING
l Do
not install any accessory or sticker
that makes the lamp difficult to see. Seat and seat belts
2-11 2
Page 72 of 368
Pregnant women restraint
E00405600077WARNING
l Seat belts work for everyone, including
pregnant women. Pregnant women
should use the available seat belts. This
will reduce the likelihood of injury to
both the woman and the unborn child.
The lap belt should be worn across the
thighs and as snug against the hips as pos-
sible, but not across the waist. Consult
your doctor if you have any additional
questions or concerns. Seat belt pretensioner system and
force limiter system E00405700166
The
driver’s seat and front passenger’s seat each
have a seat belt equipped with a pretensioner system.
Pretensioner system E00405801135
When the ignition switch or the operation mode is
under
the following conditions, if there is a frontal
impact or a side impact (vehicles equipped with
SRS side airbags and SRS curtain airbags) severe
enough to injure the driver and/or front passenger,
the pretensioner system will retract their respective
seat belts instantaneously, thus maximizing the seat
belt’s effectiveness.
[Except for vehicles equipped with keyless opera-
tion system]
The ignition switch is in the “ON” or “START” po-
sition.
[Vehicles equipped with keyless operation system]
The operation mode is in ON. WARNING
l To
obtain the best results from your pre-
tensioner seat belt, make sure you have ad-
justed your seat correctly and wear your
seat belt properly. CAUTION
l
Installation
of audio equipment or re-
pairs in the vicinity of the pretensioner
seat belts or floor console must be per-
formed in line with MITSUBISHI
MOTORS guidelines. It is important to
do so because the work could affect the
pretensioner systems.
l If you need to scrap the vehicle, please con-
sult a MITSUBISHI MOTORS Author-
ized Service Point.
It is important to do so because unexpec-
ted activation of the pretensioner seat
belts could cause injuries.
NOTE l The
pretensioner seat belts will be activated
if the vehicle suffers a severe frontal impact
or a severe side impact (vehicles equipped
with SRS side airbags and SRS curtain air-
bags), even if the seat belts are not worn.
l The pretensioner seat belts are designed to
work only once. After the pretensioner seat
belts have been activated, we recommend
you have it replaced by a MITSUBISHI
MOTORS Authorized Service Point.
SRS warning E00405900243
The same warning lamp/display is shared by the
SRS airbags and the pretensioner seat belts.
Refer
to “SRS warning lamp/display” on page
2-34. Seat and seat belts
2-14
2
Page 92 of 368
WARNING
l Do not put a hanger or any heavy or poin-
ted object on the coat hook. If the curtain
airbag was activated, any such item could
be propelled away with great force and
could prevent the curtain airbag from in-
flating correctly. Hang clothes directly on
the coat hook (without using a hanger).
Make sure there are no heavy or sharp ob-
jects in the pockets of clothes that you
hang on the coat hook.
l Never install a rearward facing child re-
straint in the front passenger seat. A for-
ward facing child restraint should be
used in the rear seat whenever possible. If
a forward facing child restraint must be
used in the front passenger seat, adjust
the seat to the most rearward position,
and ensure that the child stays in the
child restraint and away from the door.
l Do not allow a child to lean against or
close to the front door even if the child is
seated in a child restraint system.
The child’s head should also not be
leaned against or be close to the area
where the side airbags and curtain air-
bags are located. It is dangerous if the
side airbags and curtain airbags inflate.
Failure to follow all of these instructions
could lead to serious or fatal injury to the
child.
l We recommend work around and on the
side airbags and curtain airbags system
to be done by a MITSUBISHI MOTORS
Authorized Service Point. SRS warning lamp/display
E00407801546
Warning lamp Warning display type 1
Warning display type 2
The warning lamp/display illuminates when there
is
a fault with the system. In addition, the warning
display will be displayed on the information screen
in the multi-information display.
Normally, when the ignition switch is turned to the
“ON” position or the operation mode is put in ON,
the warning lamp should illuminate for several sec-
onds and then should go out.
In addition, if an SRS airbag and the pretensioner
system operate, the warning lamp illuminates and
stays on.
The SRS warning lamp is shared by the Supplemen-
tal Restraint System (SRS) and the seat belt preten-
sioner system. WARNING
l When
the warning lamp/display behaves
as follows, the system could be faulty.
The SRS airbag or pretensioner seat belt
might not operate normally during a col-
lision, etc., resulting in injury, so have
them inspected by a MITSUBISHI
MOTORS Authorized Service Point. • The warning lamp does not illuminateor stays illuminated when the ignition
switch is turned to the “ON” position
or the operation mode is put in ON.
• The warning lamp illuminates while driving.
• The warning display operates while driving.
SRS servicing E00407901521 WARNING
l We
recommend any maintenance per-
formed on or near the components of the
SRS to be performed by a MITSUBISHI
MOTORS Authorized Service Point.
Improper work on the SRS components
or wiring could result in inadvertent de-
ployment of the airbags, or could render
the SRS inoperative; either situation
could result in serious injury. Seat and seat belts
2-34
2
Page 95 of 368

Instruments...................................................................................
3-02
Multi-information display .............................................................3-03
Indication lamp, warning lamp, and information screen display list.................................................................................3-25
Indication lamps ........................................................................... 3-40
Warning lamps .............................................................................. 3-41
Information screen display ........................................................... 3-42
Combination headlamps and dipper switch ..................................3-44
Headlamp levelling ....................................................................... 3-48
Turn-signal lever...........................................................................3-49
Hazard warning flasher switch ..................................................... 3-50
Fog lamp switch............................................................................3-50
Wiper and washer switch .............................................................. 3-51
Headlamp washer switch* ............................................................ 3-56
Rear window demister switch.......................................................3-57
Horn switch...................................................................................3-57 Instruments and controls
3
Page 96 of 368
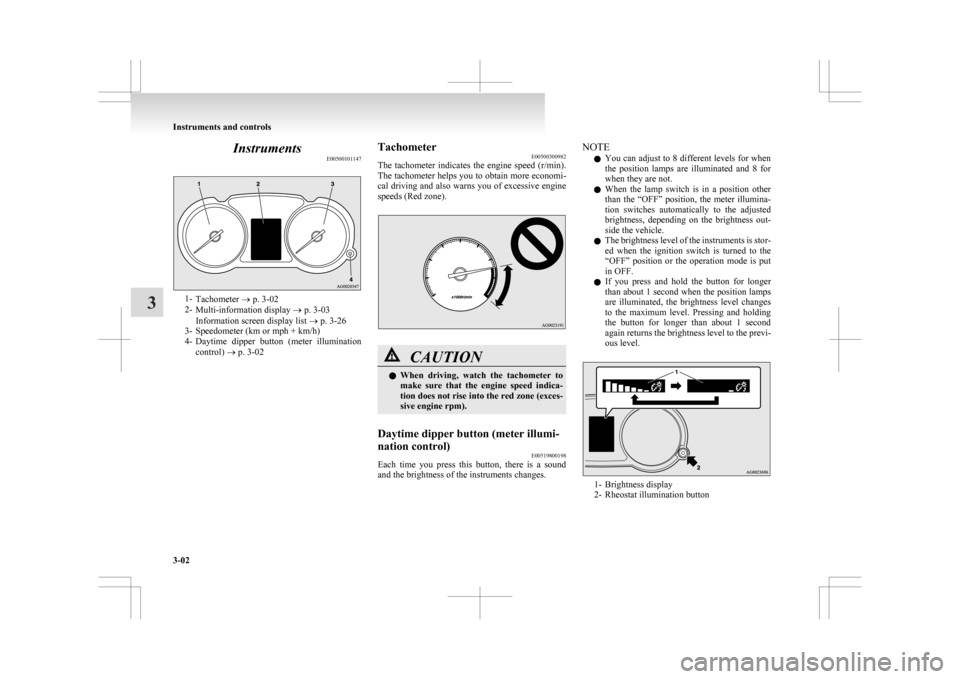
Instruments
E005001011471-
Tachometer ® p. 3-02
2- Multi-information display ® p. 3-03
Information screen display list ® p. 3-26
3- Speedometer (km or mph + km/h)
4- Daytime dipper button (meter illumination
control) ® p. 3-02 Tachometer
E00500300982
The
tachometer indicates the engine speed (r/min).
The tachometer helps you to obtain more economi-
cal driving and also warns you of excessive engine
speeds (Red zone). CAUTION
l
When
driving, watch the tachometer to
make sure that the engine speed indica-
tion does not rise into the red zone (exces-
sive engine rpm).
Daytime dipper button (meter illumi-
nation control) E00519800198
Each time you press this button, there is a sound
and the brightness of the instruments changes. NOTE
l You
can adjust to 8 different levels for when
the position lamps are illuminated and 8 for
when they are not.
l When the lamp switch is in a position other
than the “OFF” position, the meter illumina-
tion switches automatically to the adjusted
brightness, depending on the brightness out-
side the vehicle.
l The brightness level of the instruments is stor-
ed when the ignition switch is turned to the
“OFF” position or the operation mode is put
in OFF.
l If you press and hold the button for longer
than about 1 second when the position lamps
are illuminated, the brightness level changes
to the maximum level. Pressing and holding
the button for longer than about 1 second
again returns the brightness level to the previ-
ous level. 1- Brightness display
2-
Rheostat illumination button Instruments and controls
3-02
3
Page 97 of 368
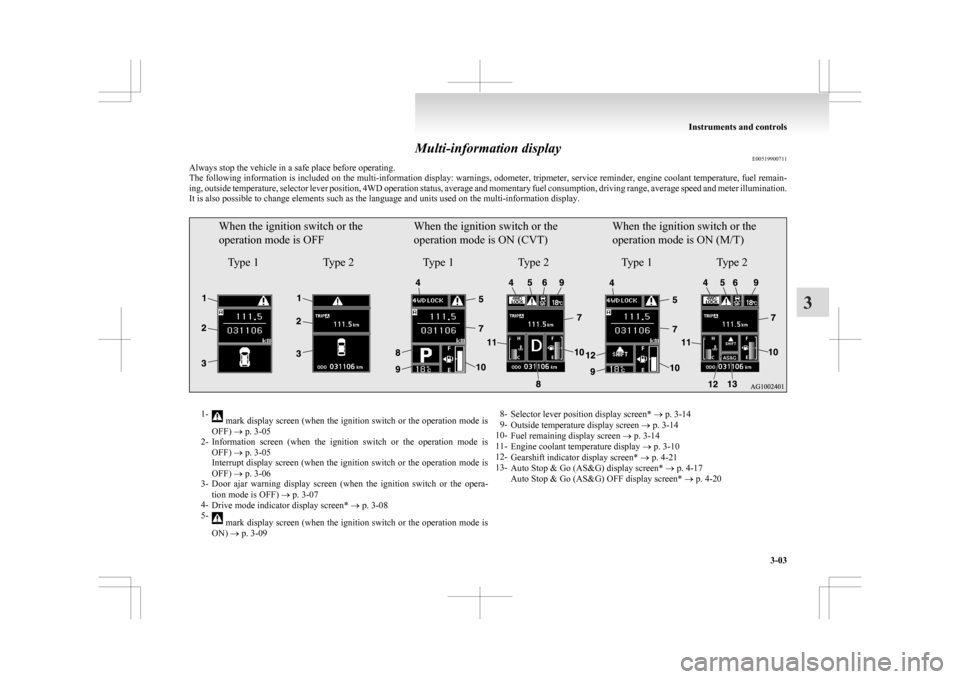
Multi-information display
E00519900711
Always stop the vehicle in a safe place before operating.
The
following information is included on the multi-information display: warnings, odometer, tripmeter, service reminder, engine coolant temperature, fuel remain-
ing, outside temperature, selector lever position, 4WD operation status, average and momentary fuel consumption, driving range, average speed and meter illumination.
It is also possible to change elements such as the language and units used on the multi-information display.
When the ignition switch or the
operation mode is OFF
Type 1 Type 2When the ignition switch or the
operation mode is ON (CVT)
Type 1 Type 2When the ignition switch or the
operation mode is ON (M/T)
Type 1 Type 21-
mark display screen (when the ignition switch or the operation mode is
OFF) ® p. 3-05
2- Information
screen (when the ignition switch or the operation mode is
OFF) ® p. 3-05
Interrupt display screen (when the ignition switch or the operation mode is
OFF) ® p. 3-06
3- Door ajar warning display screen (when the ignition switch or the opera-
tion mode is OFF) ® p. 3-07
4- Drive mode indicator display screen* ® p. 3-08
5- mark display screen (when the ignition switch or the operation mode is
ON) ® p. 3-09 8-
Selector lever position display screen* ® p. 3-14
9- Outside temperature display screen ® p. 3-14
10- Fuel remaining display screen ® p. 3-14
11- Engine coolant temperature display ® p. 3-10
12- Gearshift indicator display screen* ® p. 4-21
13- Auto Stop & Go (AS&G) display screen* ® p. 4-17
Auto Stop & Go (AS&G) OFF display screen* ® p. 4-20 Instruments and controls
3-03 3
Page 98 of 368

6-
Active Stability Control (ASC) OFF display screen* ® p. 3-09
7- Information screen (when the ignition switch or the operation mode is
ON) ® p. 3-09
Interrupt display screen (when the ignition switch or the operation mode is
ON) ® p. 3-13
NOTE l The fuel units, temperature units, display language, and other settings can be changed.
Refer to “Changing the function settings (when the ignition switch or the operation mode is ON)” on page
3-17.
l The display screen is different depending on whether the ignition switch or the operation mode is OFF or ON.
Refer to “Information screen (when the ignition switch or the operation mode is OFF)” on page
3-05.
Refer to “Warning display list (when the ignition switch or the operation mode is OFF)” on page 3-27.
Refer to “Information screen (when the ignition switch is turned from the “LOCK” position to the “ON” position or the operation mode is changed from OFF
to ON)” on page 3-08.
Refer to “Information screen (when the ignition switch or the operation mode is ON)” on page 3-09.
Refer to “Warning display list (when the ignition switch or the operation mode is ON)” on page 3-30.Instruments and controls
3-04
3