2009 MERCEDES-BENZ GL SUV service
[x] Cancel search: servicePage 79 of 309
result in severe or even fatal injuries to the
child and other occupants.
R Persons less than 1.50 m tall cannot wear
the seat belts correctly. For this reason,
secure persons less than 1.50 m tall in spe-
cially designed, suitable restraint systems.
R Children less than 1.50 m tall or under
12 years of age cannot wear the seat belts
properly. Therefore, they always should be
secured in a suitable child restraint system
on a suitable vehicle seat. You can find
more information under "Children in the
vehicle" in the "Safety" section of the Own-
er's Manual. Follow the manufacturer's
installation instructions when fitting the
child restraint system.
R Do not secure any objects with a seat belt
if the seat belt is also being used by one of
the vehicle's occupants. G
Risk of injury
If the backrest is not almost vertical, the seat
belt does not offer the intended level of pro-
tection. Under certain circumstances, this
could cause severe or even fatal injuries.
Before starting a journey, make sure that the
seat is properly adjusted and that the back-
rest is almost vertical. G
Risk of injury
A dirty or damaged seat belt or a seat belt that
has been subjected to a load in an accident
or which has been modified no longer offers
the intended level of protection. Under certain
circumstances, this could cause severe or
even fatal injuries.
For this reason, check regularly that the seat
belts are not damaged or dirty.
Always have damaged seat belts or seat belts
that have been subjected to a load in an acci-
dent replaced at a qualified specialist work-
shop. Consult a qualified specialist workshop
which has the necessary specialist knowledge
and tools to carry out the work required.
Mercedes-Benz recommends that you use a Mercedes-Benz Service Centre for this pur-
pose.
For safety reasons, Mercedes-Benz recom-
mends that you only use seat belts which have
been approved by Mercedes-Benz for your
vehicle. Fastening the belt
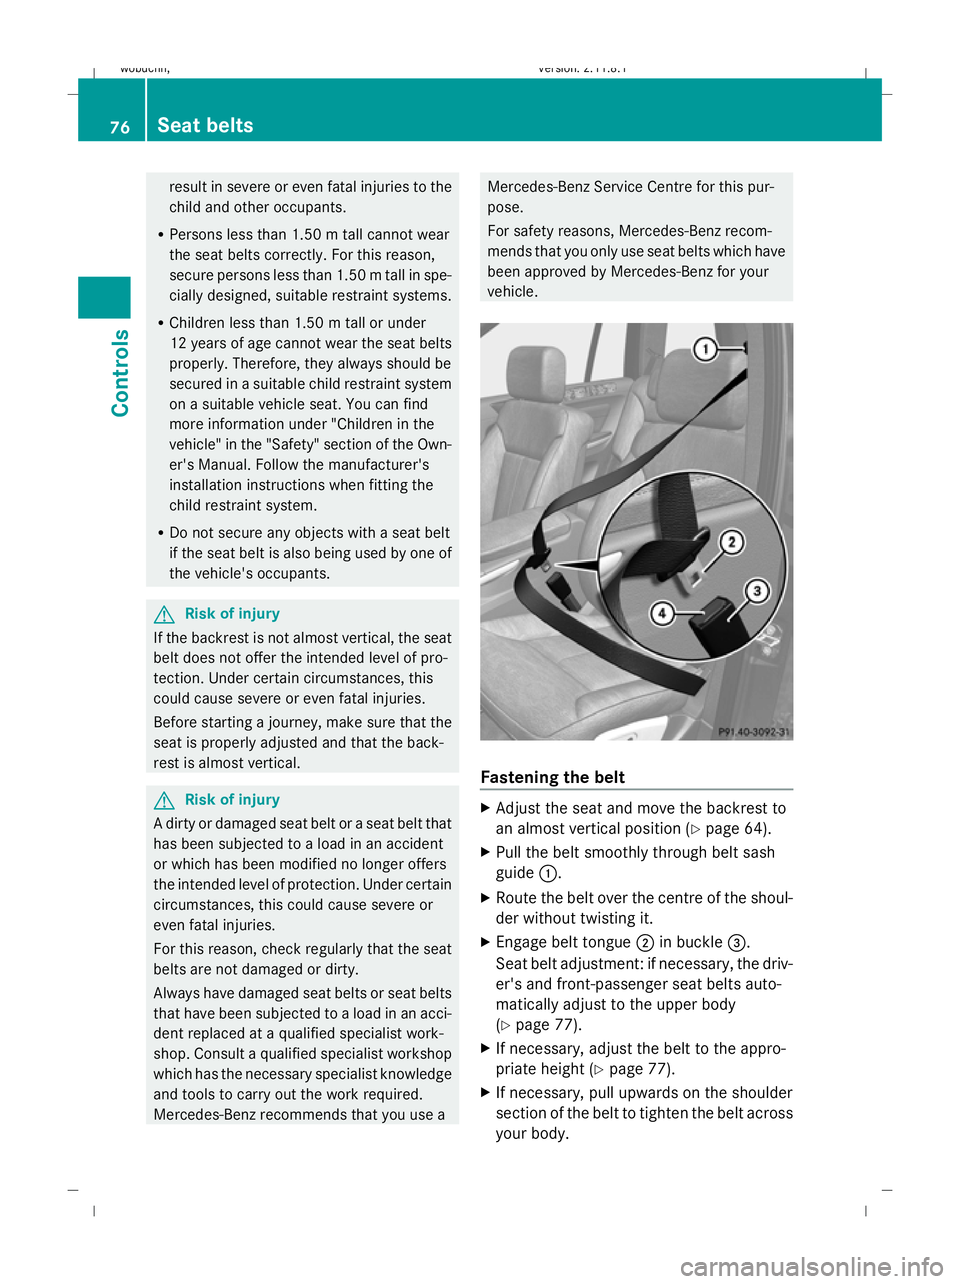
X
Adjust the seat and move the backrest to
an almost vertical position (Y page 64).
X Pull the belt smoothly through belt sash
guide :.
X Route the belt over the centre of the shoul-
der without twisting it.
X Engage belt tongue ;in buckle =.
Seat belt adjustment: if necessary, the driv-
er's and front-passenger seat belts auto-
matically adjust to the upper body
(Y page 77).
X If necessary, adjust the belt to the appro-
priate height (Y page 77).
X If necessary, pull upwards on the shoulder
section of the belt to tighten the belt across
your body. 76
Seat beltsControls
X164_AKB; 2; 3, en-GB
wobuchh,
Version: 2.11.8.1 2009-03-31T14:14:58+02:00 - Seite 76
Dateiname: 6515431202_buchblock.pdf; erzeugt am 01. Apr 2009 00:17:05; WK
Page 82 of 309
tries, daytime operation of headlamps varies
due to legal and voluntary requirements. In
these countries, daytime driving lights are
automatically switched on when the engine is
started.
The exterior lighting (except the side lamp/
parking lamp) switches off automatically if
you:
R remove the key from the ignition lock
R open the driver's door when the ignition is
switched off (key in position 0in the igni-
tion lock)
! Switch off the side lamps and parking
lamp when you leave the vehicle. This pre-
vents the battery from discharging.
Notes on driving abroad Converting to symmetrical dipped beam
when driving abroad:
switch the headlamps
to symmetrical dipped beam in countries in which traffic drives on the opposite side of the
road to the country where the vehicle is reg-
istered. This prevents oncoming traffic from
being dazzled
Have the headlamps converted at a qualified
specialist workshop, e.g. a Mercedes-Benz
Service Centre, as close to the border as pos-
sible before driving in these countries. Sym-
metrical lights do not illuminate as large an
area of the edge of the carriageway.
Converting to asymmetrical dipped beam
after returning: have the headlamps conver-
ted back to asymmetrical dipped beam at a
qualified specialist workshop, e.g. a
Mercedes-Benz Service Centre, as soon as
possible after crossing the border and return-
ing to the original country.
Vehicles with Intelligent Light System*: if
the headlamps are converted to symmetrical
dipped beam, not all light functions are avail-
able. "Motorway mode" and the "extended
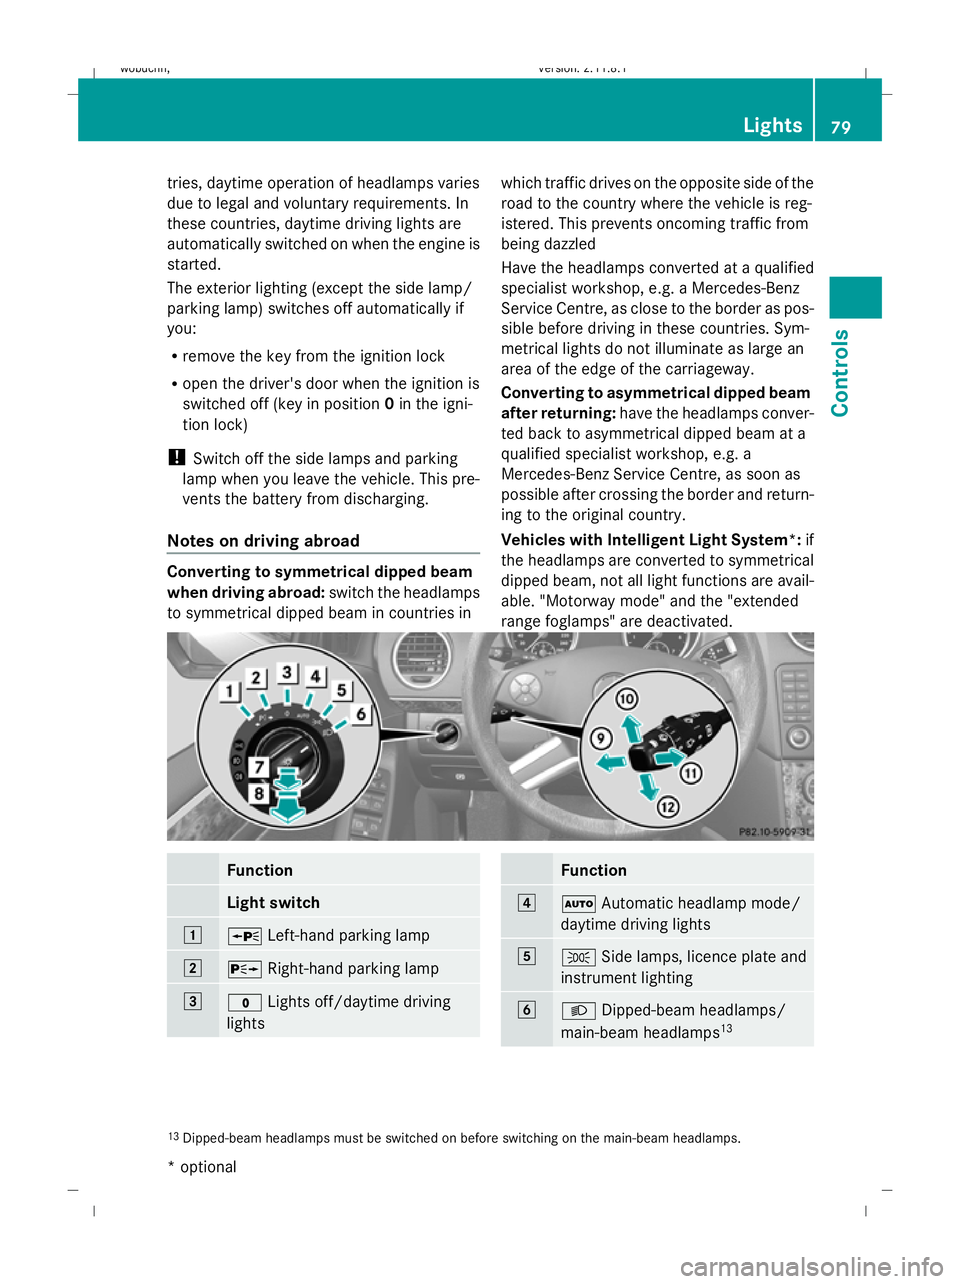
range foglamps" are deactivated. Function
Light switch
1
W
Left-hand parking lamp 2
X
Right-hand parking lamp 3
$
Lights off/daytime driving
lights Function
4
Ã
Automatic headlamp mode/
daytime driving lights 5
T
Side lamps, licence plate and
instrument lighting 6
L
Dipped-beam headlamps/
main-beam headlamps 13 13
Dipped-beam headlamps must be switched on before switching on the main-beam headlamps. Lights
79Controls
* optional
X164_AKB; 2; 3, en-GB
wobuchh
,V ersion: 2.11.8.1
2009-03-31T14:14:58+02:00 - Seite 79 Z
Dateiname: 6515431202_buchblock.pdf; erzeugt am 01. Apr 2009 00:17:06; WK
Page 99 of 309
Drive program
Sis characterised by the fol-
lowing:
R sporty engine and suspension configura-
tion
R the vehicle pulling away in first gear
R the automatic transmission shifting up
later
R the late shift point of the automatic trans-
mission can lead to higher fuel consump-
tion
If you have selected transmission position D,
you can activate the manual drive program
and shift up or down through the individual
gears. The gear currently selected and
engaged is shown in the multi-function dis-
play.
X To deactivate: press program selector
button :repeatedly until Sor Mappears
in the multi-function display.
or
X Restart the engine.
The automatic transmission then switches
to the automatic drive program.
Upshifting
X Pull right-hand steering wheel gearshift
paddle (Y page 94).
The automatic transmission shifts up to the
next gear.
Downshifting G
Risk of accident
Do not change down for additional engine
braking on a slippery road surface. This could
cause the drive wheels to lose their grip and
the vehicle could skid.
X Pull left-hand steering wheel gearshift pad-
dle (Y page 95).
The automatic transmission shifts down to
the next gear.
i If you brake the vehicle or stop without
shifting down, the automatic transmission will shift down to a gear that will allow the
vehicle to accelerate or pull away again.
Kickdown
You can also use kickdown for maximum
acceleration in manual drive program M.
X Depress the accelerator pedal beyond the
pressure point.
The transmission shifts to a lower gear
depending on the engine speed.
X Shift back up once the desired speed is
reached.
i If you apply full throttle, the automatic
transmission shifts up to the next gear
when the maximum engine speed is
reached. This prevents the engine from
overrevving. Instrument cluster
Points to remember
You will find an illustration of the instrument
cluster in the "At a glance" section
(Y page 25). G
Risk of accident
No further messages can be displayed if the
instrument cluster and/or the multi-function
display fails.
This means that you will not see information
about the driving situation, such as the speed,
outside temperature, warning/indicator
lamps, display messages or system failures.
The vehicle's handling characteristics may be
affected. Adjust your driving style and speed
accordingly.
Immediately consult a qualified specialist
workshop which has the necessary specialist
knowledge and tools to carry out the work
required. Mercedes-Benz recommends that
you use a Mercedes-Benz Service Centre for
this purpose. In particular, work relevant to
safety or on safety-related systems must be
carried out at a qualified specialist workshop. 96
Instrument clusterControls
X164_AKB; 2; 3, en-GB
wobuchh
,V ersion: 2.11.8.1
2009-03-31T14:14:58+02:00 - Seite 96
Dateiname: 6515431202_buchblock.pdf; erzeugt am 01. Apr 2009 00:17:13; WK
Page 102 of 309

Menus and submenus
Function
:
Standard display
menu
(Y page 99)
R tyre pressure loss warning
(Y page 182) or tyre pressure mon-
itor* (Y page 183)
R ASSYST PLUS service interval dis-
play
R checking engine oil level*
(Y page 176) ;
Audio/TV*/DVD*
menu
(Y page 100) =
Navigation*
menu (Ypage 102) ?
Off-road*
menu (Ypage 102)
R off-road level (Y page 129)
R compass display (Y page 166)
R differential locks (status indicator)
(Y page 116) A
Distronic*
menu (Ypage 119) Function
B
Message memory
menu19
(Y page 211) C
Settings
menu (Ypage 103) D
Additional functions
menu
(Y page 109) E
Trip computer
menu (Ypage 110) F
Telephone
menu (Ypage 111) The number of menus shown depends on the
optional equipment in the vehicle.
Depending on the audio system fitted, the
Audio, Navigation* and Telephonemenus
are slightly different. The examples given in
this Owner's Manual apply to vehicles equip-
ped with COMAND APS*. Standard display menu
Use the buttons on the multi-function steer-
ing wheel.
19 The menu is only visible when there is a display message. On-board computer
99Controls
* optional
X164_AKB; 2; 3, en-GB
wobuchh,
Version: 2.11.8.1 2009-03-31T14:14:58+02:00 - Seite 99 Z
Dateiname: 6515431202_buchblock.pdf; erzeugt am 01. Apr 2009 00:17:15; WK
Page 103 of 309

X
Press the VorU button to select the
standard display. Standard display
:
Trip meter
; Total distance
You can select the following functions in the
Standard display menu using the&or
* button:
R tyre pressure loss warning (Y page 182) or
tyre pressure monitor* (Y page 183)
R coolant temperature (Y page 100)
R digital speedometer or outside tempera-
ture (Y page 104)
R ASSYST PLUS service interval display
R engine oil level* (Y page 176)
X To reset the trip meter: press and hold
the .reset button in the instrument clus-
ter until the trip meter is reset.
Displaying the coolant temperature X
Press the VorU button to select the
standard display.
X Press the &or* button to select the
coolant temperature. Under normal driving conditions, with the cor-
rect anti-corrosion and antifreeze additive concentration, the reading may rise to
120 †.
Displaying the digital speedometer or
outside temperature If you have selected the digital speedometer
as the status line (Y
page 104), select the
outside temperature display here 20
.
X Press the VorU button to select the
standard display.
X Press the &or* button to select
digital speedometer or the outside temper-
ature. Digital speedometer
Outside temperature
Audio/TV*/DVD* menu
Use the functions in the Audio/TV/DVD
menu to operate the audio equipment or
COMAND APS*.
Selecting a radio station You can only store new stations using the
audio system or COMAND APS* (see the sep-
arate operating instructions).
20 Vehicles for the United Kingdom: the outside temperature is always displayed. 100
On-board computerControls
* optional
X164_AKB; 2; 3, en-GB
wobuchh,
Version: 2.11.8.1 2009-03-31T14:14:58+02:00 - Seite 100
Dateiname: 6515431202_buchblock.pdf; erzeugt am 01. Apr 2009 00:17:15; WK
Page 114 of 309
Calling up the range
X
Press VorU on the steering wheel
to select the trip computer menu.
X Press &or* to select Range:
The multi-function display shows the esti-
mated range of the vehicle, based on the
current driving style and the fuel level. If
there is only a small amount of fuel remain-
ing in the fuel tank, a vehicle refuelling
C appears instead of the range.
Displaying current fuel consumption X
Press VorU to select the Trip com-
puter menu.
X Press &or* to select Consump‐
tion.
The current fuel consumption is displayed. Telephone menu
Functions and displays depend on the
optional equipment installed in your vehicle.
You can place your mobile phone in the
mobile phone bracket* (Y page 164), or set
up a Bluetooth connection to the audio sys-
tem or to COMAND APS* (see separate oper-
ating instructions). G
Risk of accident
Observe the legal requirements of the country
in which you are currently driving regarding
the use of mobile phones in the vehicle.
If it is permitted to use mobile phones while
the vehicle is in motion, you should only use
them when the road and traffic conditions
allow. Otherwise, you may be distracted from the traffic conditions, cause an accident and
injure yourself and others.
Use the buttons on the multi-function steer-
ing wheel.
X Switch on the mobile phone and audio
equipment or COMAND APS*; see the sep-
arate operating instructions.
X Press the VorU button to select the
Telephone menu.
Mobile phone on PIN code not yet entered
Once you have inserted the mobile phone into
the mobile phone bracket*, the multi-func-
tion display shows the Please enter PIN
message.
X Enter the PIN using the mobile phone, Lin-
guatronic*, the audio system or COMAND
APS*.
The mobile phone will search for a network.
Mobile phone operational
You will see Readyor the name of the mobile
phone network provider in the multi-function
display. If the mobile phone operational read-
iness symbol goes out, your vehicle is outside
of the transmission and reception range. In
this case you will see No Servicein the
multi-function display.
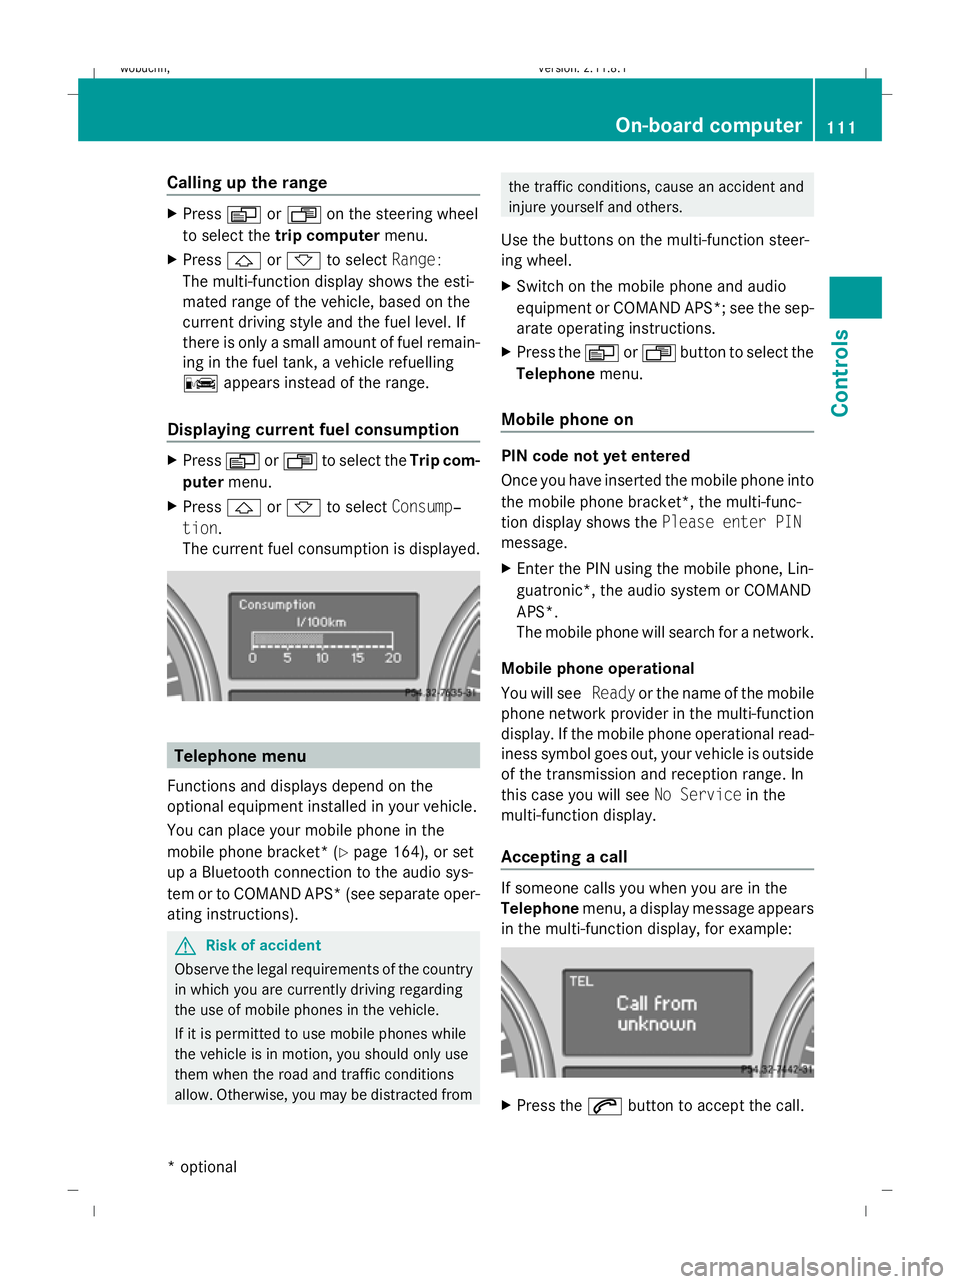
Accepting a call If someone calls you when you are in the
Telephone
menu, a display message appears
in the multi-function display, for example: X
Press the 6button to accept the call. On-board computer
111Controls
* optional
X164_AKB; 2; 3, en-GB
wobuchh,
Version: 2.11.8.1 2009-03-31T14:14:58+02:00 - Seite 111 Z
Dateiname: 6515431202_buchblock.pdf; erzeugt am 01. Apr 2009 00:17:18; WK
Page 116 of 309
0
or 1in the ignition. Failure to do this can
cause damage to the drive train or the
brake system.
! A function or performance test should
only be carried out on a twin-axle dyna-
mometer. If you wish to operate the vehicle
on such a dynamometer, please consult a
Mercedes-Benz Service Centre in advance.
You could otherwise damage the drive train
or the brake system. DSR (Downhill Speed Regulation)
You will find information about driving off-
road in the "Operation" section
(Y page 188).
DSR is an aid to assist you when driving down-
hill. It keeps the speed of travel at the speed
set on the on-board computer (Y page 109).
The steeper the downhill gradient, the greater
the DSR braking effect on the vehicle. When
driving on flat stretches of road or on an uphill
gradient, the DSR braking effect is minimal or
non-existent. G
Risk of accident
DSR is only an aid designed to assist you when
driving downhill. You are responsible for keep-
ing control of the vehicle and for assessing
whether the downhill gradient can be man-
aged.
When activating DSR the vehicle may brake
suddenly due to DSR intervening. This is
dependent on the downhill gradient and the
difference between the current speed and the
speed set. DSR may not always be able to
keep to the set speed, depending on road sur-
face and tyre conditions. You could lose con-
trol of the vehicle and cause an accident.
Select a set speed suitable for the prevailing
conditions and when necessary, apply the
brakes manually.
DSR controls the vehicle’s speed when
DIRECT SELECT lever positions D,Rand Nare
selected. You can drive at a higher or a lower speed than that set on the on-board computer
at any time by braking or accelerating. G
Risk of accident
If you depress the accelerator pedal with DSR
activated, then the set speed can be excee-
ded. Drive downhill with special care and
always keep in mind that DSR brakes the vehi-
cle as soon as you remove your foot from the
accelerator pedal. The vehicle may be heavily
braked by DSR depending on the gradient and
the difference between the vehicle's road
speed and the set speed. You could lose con-
trol of the vehicle and cause an accident.
The speed is set to 6 km/h at the factory.
Activating/deactivating DSR Activating
You can only activate DSR when driving at a
speeds below 30 km/h.
X
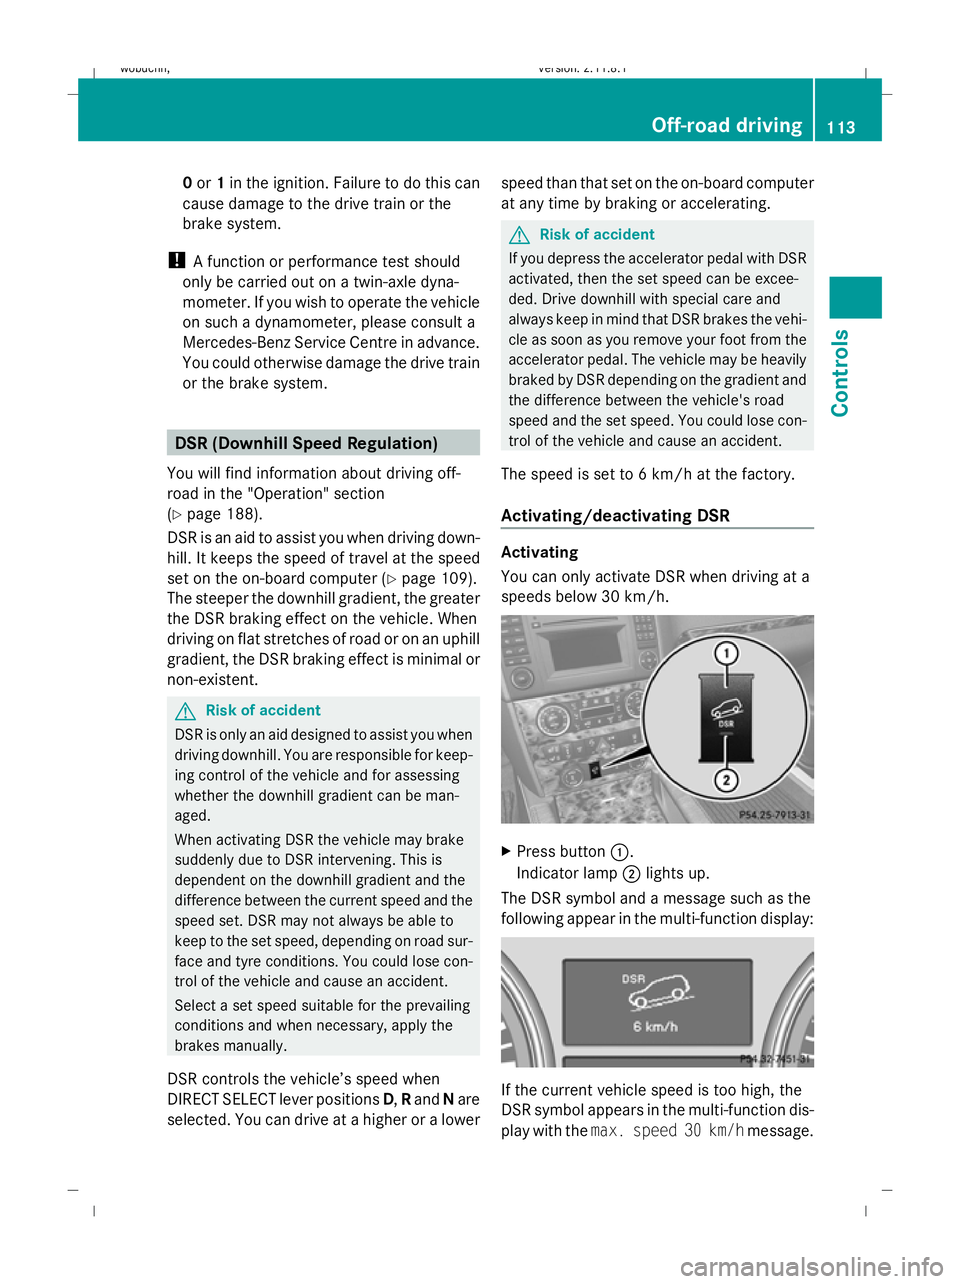
Press button :.
Indicator lamp ;lights up.
The DSR symbol and a message such as the
following appear in the multi-function display: If the current vehicle speed is too high, the
DSR symbol appears in the multi-function dis-
play with the
max. speed 30 km/h message. Off-road driving
113Controls
X164_AKB; 2; 3, en-GB
wobuchh, Version: 2.11.8.1 2009-03-31T14:14:58+02:00 - Seite 113 Z
Dateiname: 6515431202_buchblock.pdf; erzeugt am 01. Apr 2009 00:17:18; WK
Page 139 of 309
the responsibility to pay attention. The cam-
era cannot show objects:
R very near to the rear bumper
R below the rear bumper
R that are located above the tailgate handle
recess
You are always responsible for safety and
must continue to pay attention to your imme-
diate surroundings when parking and
manoeuvring. This applies to the areas
behind, in front of and next to the vehicle. You
could otherwise endanger yourself and oth-
ers. G
Risk of accident
Under the following circumstances, the
reversing camera will not function, or function
in a limited manner:
R if the tailgate is open
R in heavy rain, snow or fog
R at night or in very dark places
R if the camera is exposed to very bright light R
if the area is lit by fluorescent light (the dis-
play may flicker)
R if there is a sudden change in temperature,
e.g. when driving into a heated garage in
winter
R if the camera lens is dirty or obstructed
R if the rear of your vehicle is damaged. In this
event have the camera position and setting
checked at a qualified specialist workshop.
Mercedes-Benz recommends that you use
a Mercedes-Benz Service Centre for this
purpose.
Do not use the reversing camera in these
types of situation. You could, otherwise,
injure others or damage objects and your
vehicle while you are parking.
Activating the reversing camera X
Make sure that the key is in position 2in
the ignition lock.
X Engage reverse gear.
The area behind the vehicle is shown in the
COMAND APS display. Air conditioning
Overview of air-conditioning systems
The vehicle is equipped with one of the following air-conditioning systems: Thermatic 2-zone automatic climate control
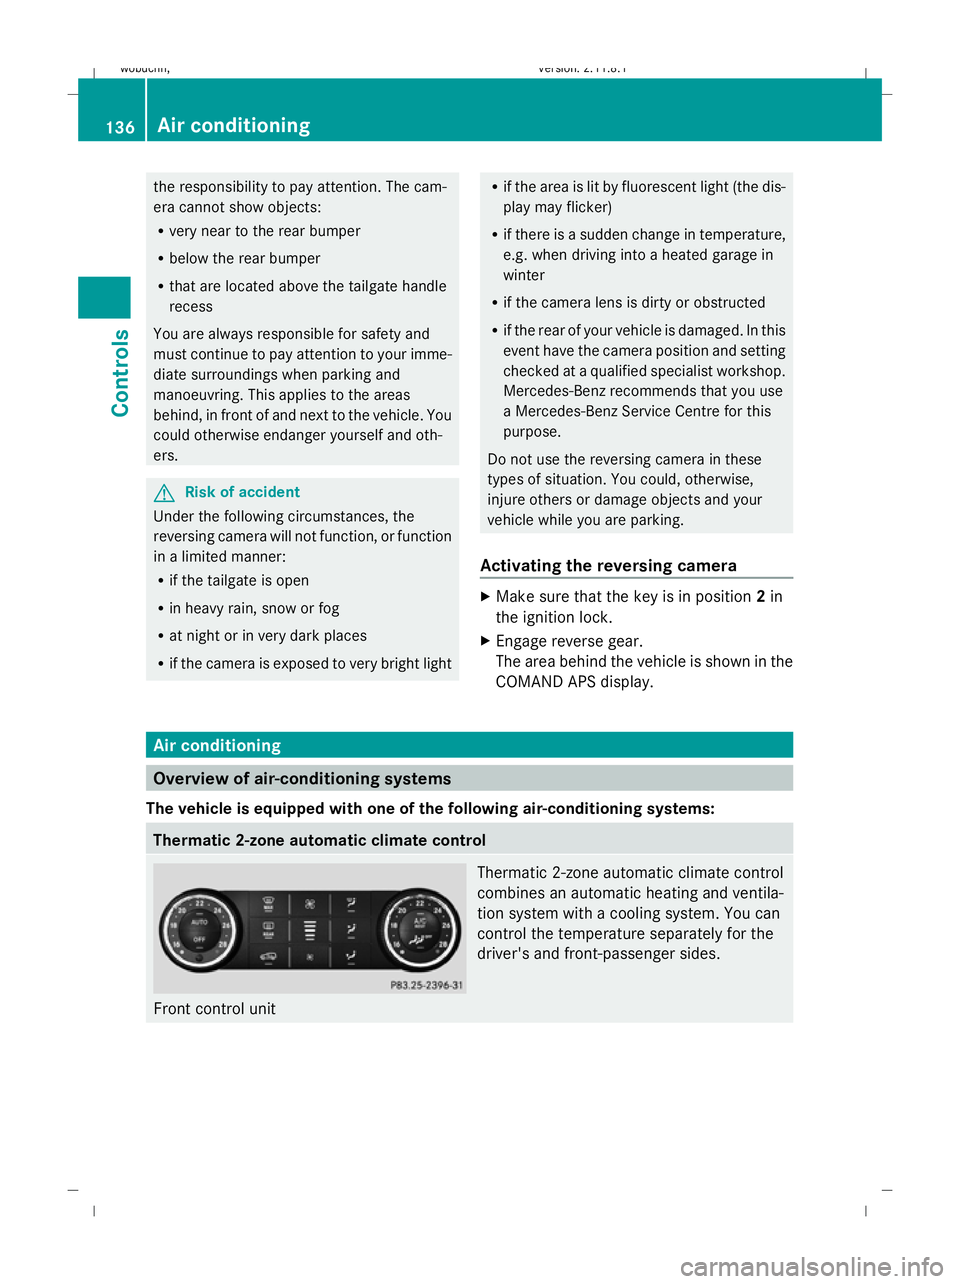
Front control unit Thermatic 2-zone automatic climate control
combines an automatic heating and ventila-
tion system with a cooling system. You can
control the temperature separately for the
driver's and front-passenger sides.136
Air conditioningControls
X164_AKB; 2; 3, en-GB
wobuchh
,V ersion: 2.11.8.1
2009-03-31T14:14:58+02:00 - Seite 136
Dateiname: 6515431202_buchblock.pdf; erzeugt am 01. Apr 2009 00:17:27; WK