2009 MERCEDES-BENZ GL SUV change wheel
[x] Cancel search: change wheelPage 99 of 309
Drive program
Sis characterised by the fol-
lowing:
R sporty engine and suspension configura-
tion
R the vehicle pulling away in first gear
R the automatic transmission shifting up
later
R the late shift point of the automatic trans-
mission can lead to higher fuel consump-
tion
If you have selected transmission position D,
you can activate the manual drive program
and shift up or down through the individual
gears. The gear currently selected and
engaged is shown in the multi-function dis-
play.
X To deactivate: press program selector
button :repeatedly until Sor Mappears
in the multi-function display.
or
X Restart the engine.
The automatic transmission then switches
to the automatic drive program.
Upshifting
X Pull right-hand steering wheel gearshift
paddle (Y page 94).
The automatic transmission shifts up to the
next gear.
Downshifting G
Risk of accident
Do not change down for additional engine
braking on a slippery road surface. This could
cause the drive wheels to lose their grip and
the vehicle could skid.
X Pull left-hand steering wheel gearshift pad-
dle (Y page 95).
The automatic transmission shifts down to
the next gear.
i If you brake the vehicle or stop without
shifting down, the automatic transmission will shift down to a gear that will allow the
vehicle to accelerate or pull away again.
Kickdown
You can also use kickdown for maximum
acceleration in manual drive program M.
X Depress the accelerator pedal beyond the
pressure point.
The transmission shifts to a lower gear
depending on the engine speed.
X Shift back up once the desired speed is
reached.
i If you apply full throttle, the automatic
transmission shifts up to the next gear
when the maximum engine speed is
reached. This prevents the engine from
overrevving. Instrument cluster
Points to remember
You will find an illustration of the instrument
cluster in the "At a glance" section
(Y page 25). G
Risk of accident
No further messages can be displayed if the
instrument cluster and/or the multi-function
display fails.
This means that you will not see information
about the driving situation, such as the speed,
outside temperature, warning/indicator
lamps, display messages or system failures.
The vehicle's handling characteristics may be
affected. Adjust your driving style and speed
accordingly.
Immediately consult a qualified specialist
workshop which has the necessary specialist
knowledge and tools to carry out the work
required. Mercedes-Benz recommends that
you use a Mercedes-Benz Service Centre for
this purpose. In particular, work relevant to
safety or on safety-related systems must be
carried out at a qualified specialist workshop. 96
Instrument clusterControls
X164_AKB; 2; 3, en-GB
wobuchh
,V ersion: 2.11.8.1
2009-03-31T14:14:58+02:00 - Seite 96
Dateiname: 6515431202_buchblock.pdf; erzeugt am 01. Apr 2009 00:17:13; WK
Page 100 of 309
Speedometer with segments
The segments in the speedometer indicate
which speed range is available.
Distronic* mode:
One or two segments around the stored
speed light up. Rev counter
The red band in the rev counter indicates the
engine's overrevving range. The fuel supply is
interrupted to protect the engine when the
red band is reached.
! Do not drive in the overrevving range.
Doing so will damage the engine. Outside temperature display
G
Risk of accident
At temperatures just above freezing point, the
road could be icy, particularly in wooded areas
or on bridges. The vehicle could start skidding
if you fail to adapt your driving style. You
should therefore always adapt your driving
style and speed to suit the weather condi-
tions.
Changes in the outside temperature are dis-
played after a short delay. On-board computer
Points to remember
The on-board computer is activated as soon
as you turn the key to position 1in the ignition
lock. G
Risk of accident
Only use the on-board computer when road
and traffic conditions permit. You would oth-
erwise be distracted and unable to concen-
trate properly on driving, and could cause an
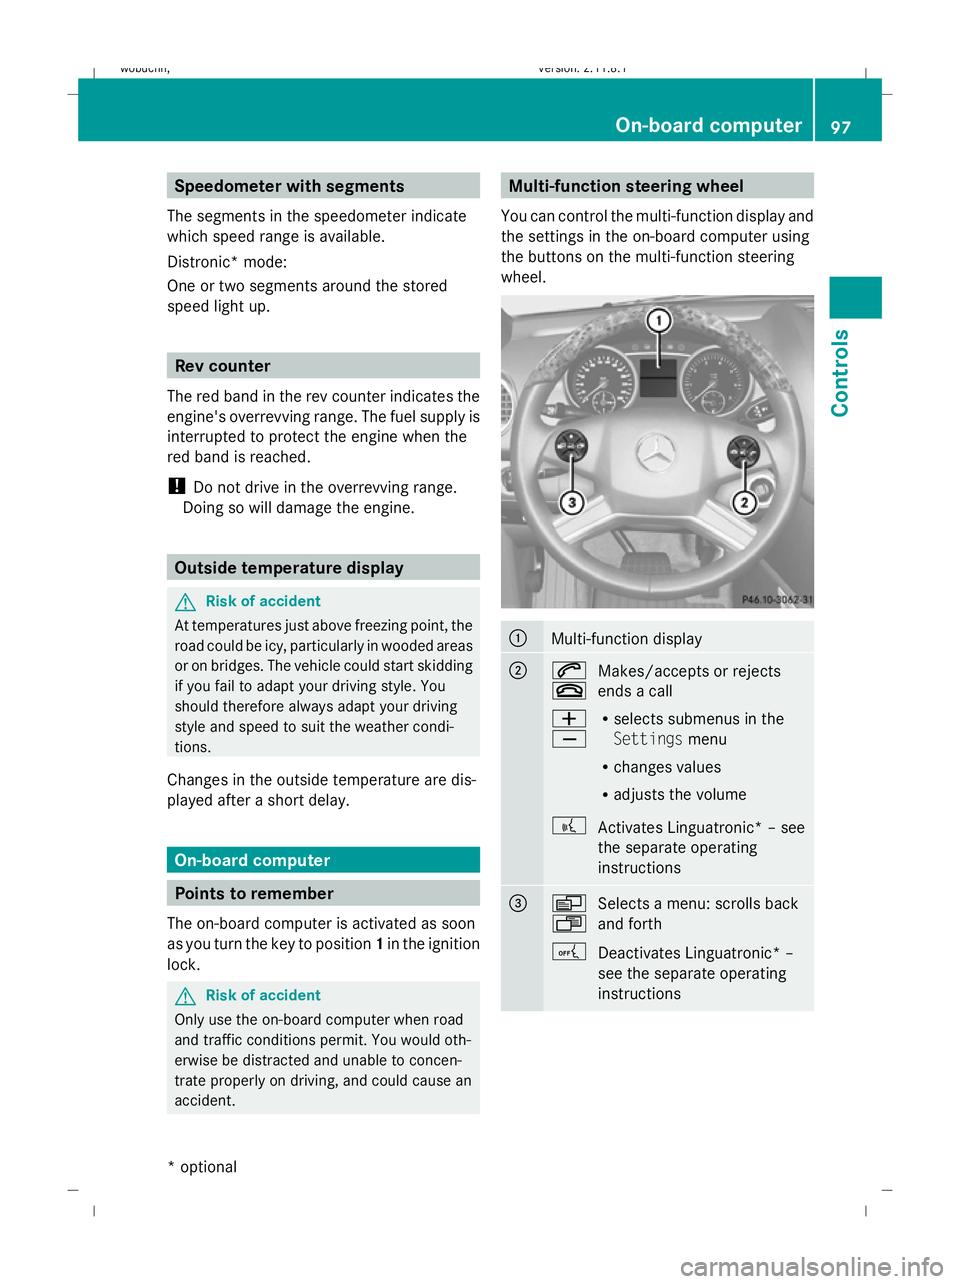
accident. Multi-function steering wheel
You can control the multi-function display and
the settings in the on-board computer using
the buttons on the multi-function steering
wheel. :
Multi-function display
;
6
~
Makes/accepts or rejects
ends a call
W
X R
selects submenus in the
Settings menu
R changes values
R adjusts the volume
? Activates Linguatronic* – see
the separate operating
instructions =
V
U
Selects a menu: scrolls back
and forth
A Deactivates Linguatronic* –
see the separate operating
instructions On-board computer
97Controls
* optional
X164_AKB; 2; 3, en-GB
wobuchh,
Version: 2.11.8.1 2009-03-31T14:14:58+02:00 - Seite 97 Z
Dateiname: 6515431202_buchblock.pdf; erzeugt am 01. Apr 2009 00:17:14; WK
Page 104 of 309
X
Switch on the audio system or COMAND
APS* and select the radio; see the separate
operating instructions.
X Press VorU on the steering wheel
to select the Audio/TV/DVD menu. :
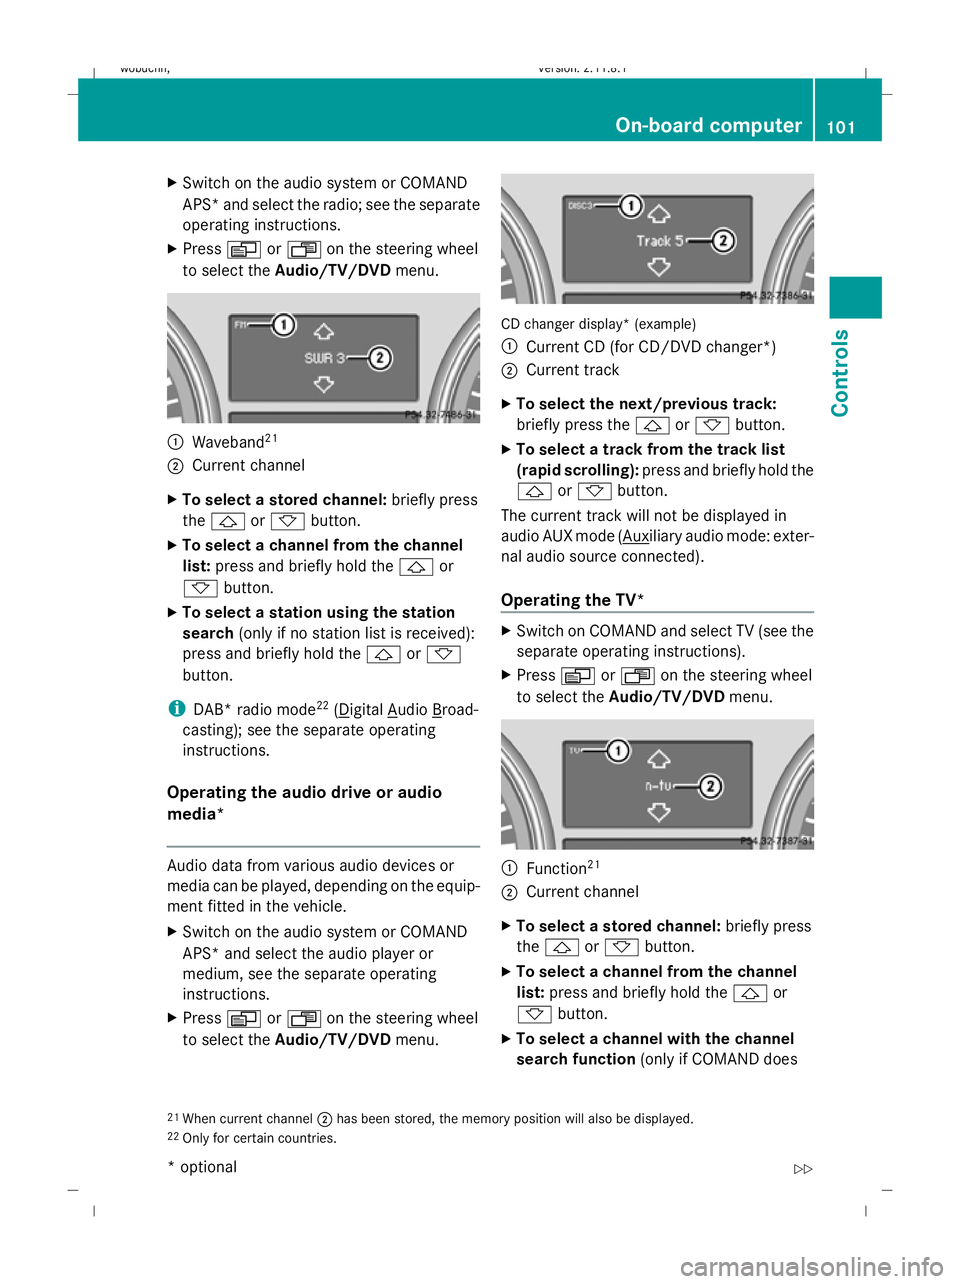
Waveband 21
; Current channel
X To select a stored channel: briefly press
the & or* button.
X To select a channel from the channel
list: press and briefly hold the &or
* button.
X To select a station using the station
search (only if no station list is received):
press and briefly hold the &or*
button.
i DAB* radio mode 22
( Digital Audio Broad-
casting); see the separate operating
instructions.
Operating the audio drive or audio
media* Audio data from various audio devices or
media can be played, depending on the equip-
ment fitted in the vehicle.
X Switch on the audio system or COMAND
APS* and select the audio player or
medium, see the separate operating
instructions.
X Press VorU on the steering wheel
to select the Audio/TV/DVD menu. CD changer display* (example)
:
Current CD (for CD/DVD changer *)
; Current track
X To select the next/previous track:
briefly press the &or* button.
X To select a track from the track list
(rapid scrolling): press and briefly hold the
& or* button.
The current track will not be displayed in
audio AUX mode ( Auxiliary audio mode: exter-
nal audio source connected).
Operating the TV* X
Switch on COMAND and select TV (see the
separate operating instructions).
X Press VorU on the steering wheel
to select the Audio/TV/DVD menu. :
Function 21
; Current channel
X To select a stored channel: briefly press
the & or* button.
X To select a channel from the channel
list: press and briefly hold the &or
* button.
X To select a channel with the channel
search function (only if COMAND does
21 When current channel ;has been stored, the memory position will also be displayed.
22 Only for certain countries. On-board computer
101Controls
* optional
X164_AKB; 2; 3, en-GB
wobuchh,
Version: 2.11.8.1 2009-03-31T14:14:58+02:00 - Seite 101 Z
Dateiname: 6515431202_buchblock.pdf; erzeugt am 01. Apr 2009 00:17:15; WK
Page 105 of 309
not receive channel lists): press and briefly
hold the &or* button.
Operating the DVD video* X
Switch on COMAND and select video DVD
(see the separate operating instructions).
X Press VorU on the steering wheel
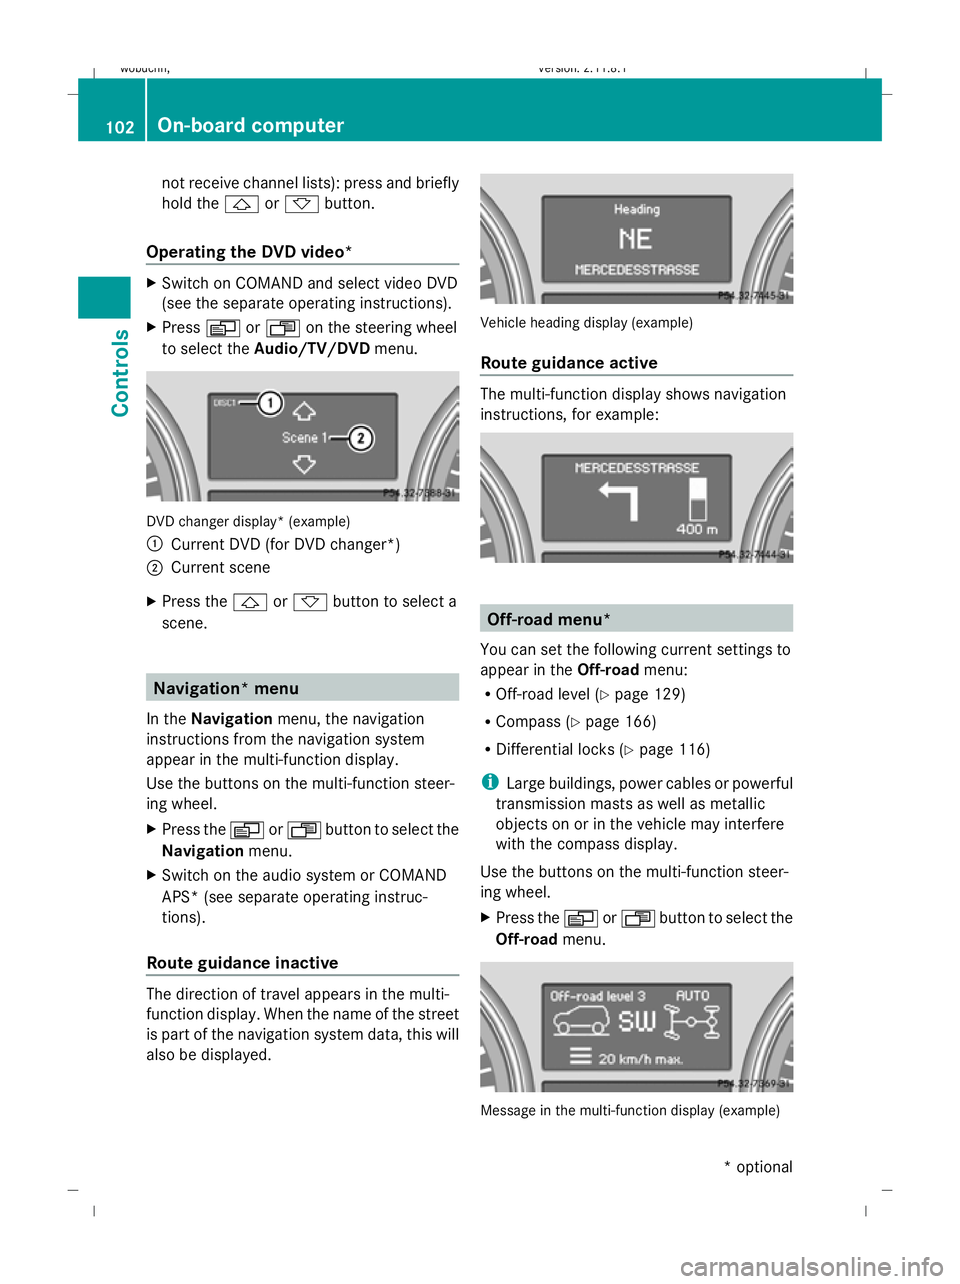
to select the Audio/TV/DVD menu. DVD changer display* (example)
:
Current DVD (for DVD changer*)
; Current scene
X Press the &or* button to select a
scene. Navigation* menu
In the Navigation menu, the navigation
instructions from the navigation system
appear in the multi-function display.
Use the buttons on the multi-function steer-
ing wheel.
X Press the VorU button to select the
Navigation menu.
X Switch on the audio system or COMAND
APS* (see separate operating instruc-
tions).
Route guidance inactive The direction of travel appears in the multi-
function display. When the name of the street
is part of the navigation system data, this will
also be displayed. Vehicle heading display (example)
Route guidance active
The multi-function display shows navigation
instructions, for example:
Off-road menu*
You can set the following current settings to
appear in the Off-roadmenu:
R Off-road level (Y page 129)
R Compass (Y page 166)
R Differential locks (Y page 116)
i Large buildings, power cables or powerful
transmission masts as well as metallic
objects on or in the vehicle may interfere
with the compass display.
Use the buttons on the multi-function steer-
ing wheel.
X Press the VorU button to select the
Off-road menu. Message in the multi-function display (example)102
On-board computerControls
* optional
X164_AKB; 2; 3, en-GB
wobuchh
,V ersion: 2.11.8.1
2009-03-31T14:14:58+02:00 - Seite 102
Dateiname: 6515431202_buchblock.pdf; erzeugt am 01. Apr 2009 00:17:16; WK
Page 106 of 309
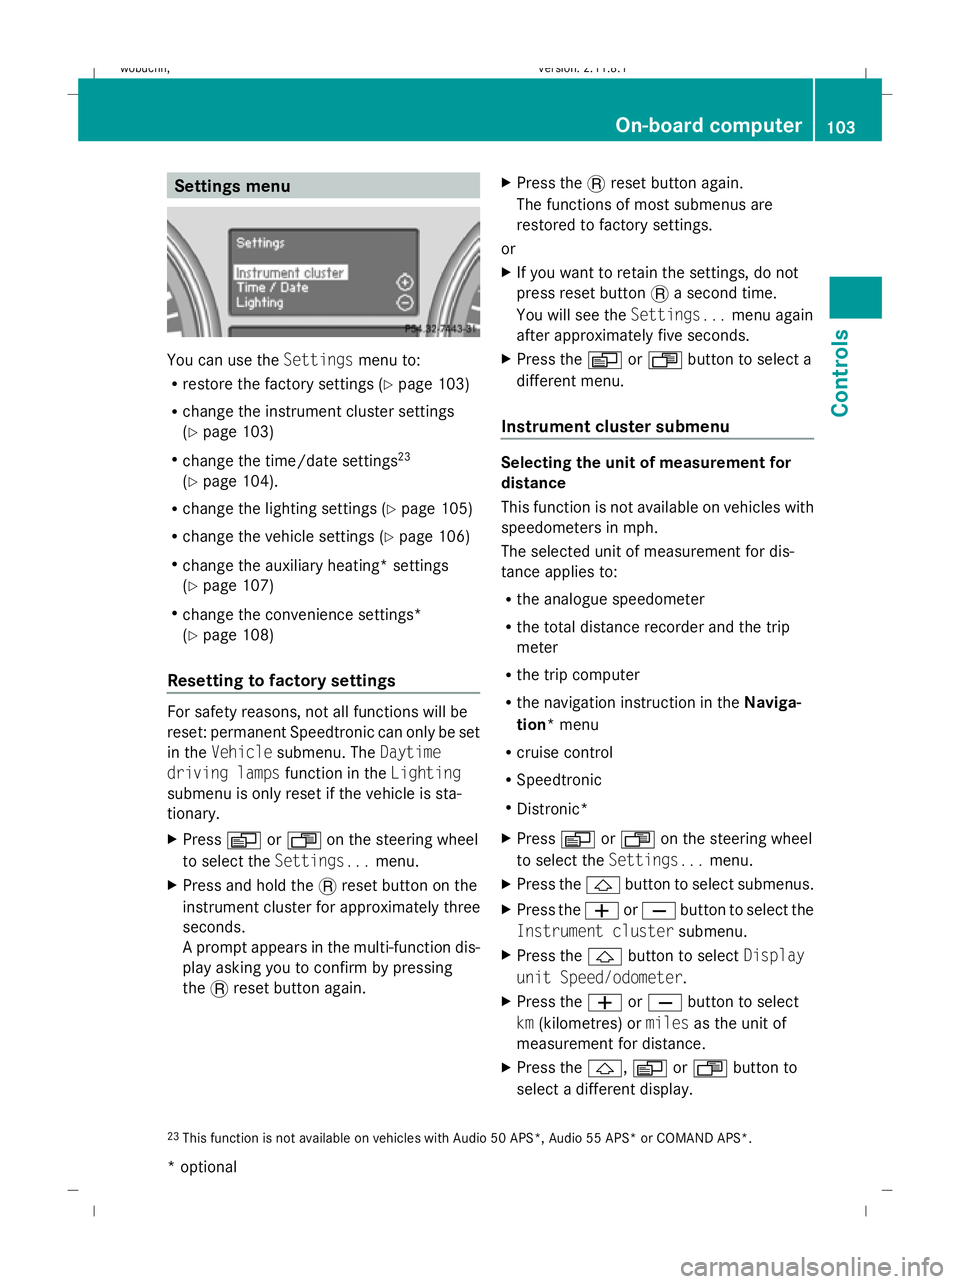
Settings menu
You can use the
Settingsmenu to:
R restore the factory settings (Y page 103)
R change the instrument cluster settings
(Y page 103)
R change the time/date settings 23
(Y page 104).
R change the lighting settings (Y page 105)
R change the vehicle settings (Y page 106)
R change the auxiliary heating* settings
(Y page 107)
R change the convenience settings*
(Y page 108)
Resetting to factory settings For safety reasons, not all functions will be
reset: permanent Speedtronic can only be set
in the Vehicle submenu. The Daytime
driving lamps function in theLighting
submenu is only reset if the vehicle is sta-
tionary.
X Press VorU on the steering wheel
to select the Settings... menu.
X Press and hold the .reset button on the
instrument cluster for approximately three
seconds.
A prompt appears in the multi-function dis-
play asking you to confirm by pressing
the .reset button again. X
Press the .reset button again.
The functions of most submenus are
restored to factory settings.
or
X If you want to retain the settings, do not
press reset button .a second time.
You will see the Settings...menu again
after approximately five seconds.
X Press the VorU button to select a
different menu.
Instrument cluster submenu Selecting the unit of measurement for
distance
This function is not available on vehicles with
speedometers in mph.
The selected unit of measurement for dis-
tance applies to:
R
the analogue speedometer
R the total distance recorder and the trip
meter
R the trip computer
R the navigation instruction in the Naviga-
tion* menu
R cruise control
R Speedtronic
R Distronic*
X Press VorU on the steering wheel
to select the Settings... menu.
X Press the &button to select submenus.
X Press the WorX button to select the
Instrument cluster submenu.
X Press the &button to select Display
unit Speed/odometer.
X Press the WorX button to select
km (kilometres) or milesas the unit of
measurement for distance.
X Press the &,VorU button to
select a different display.
23 This function is not available on vehicles with Audio 50 APS*, Audio 55 APS* or COMAND APS*. On-board computer
103Controls
* optional
X164_AKB; 2; 3, en-GB
wobuchh,
Version: 2.11.8.1 2009-03-31T14:14:58+02:00 - Seite 103 Z
Dateiname: 6515431202_buchblock.pdf; erzeugt am 01. Apr 2009 00:17:16; WK
Page 110 of 309
Setting the display when the ignition is
switched off
The
Display when ignition off function
allows you to set which display you see in the
multi-function display after removing the key
from the ignition lock.
X Press VorU on the steering wheel
to select the Settings... menu.
X Press the &button to select submenus.
X Press the WorX button to select the
Vehicle submenu.
X Press the &button to select Display
when ignition off.
X Press the WorX button to select
Interior motion sensor, Tow-away
protection orMiles/km.
X Press the &,VorU button to
select a different display.
Activating/deactivating the automatic
door locking feature
When you activate the Automatic door
locking function, your vehicle will be cen-
trally locked above a speed of approximately
15 km/h.
i For more information on the automatic
door locking feature, see (Y page 60).
X Press VorU on the steering wheel
to select the Settings... menu.
X Press the &button to select submenus.
X Press the WorX button to select the
Vehicle submenu.
X Press the &button to select Auto‐
matic door locking.
X Press the WorX button to activate
or deactivate the Automatic door lock‐
ing feature.
X Press the &,VorU button to
select a different display. Heating submenu Auxiliary heating* departure time
Only vehicles with auxiliary heating have this
function.
The
Aux.heating departure time function
allows you to select a stored departure time
or change the departure time for which the
vehicle with auxiliary heating is preheated.
The auxiliary heating timer function calcu-
lates the switch-on time according to the out-
side temperature so that the vehicle is pre-
heated by the departure time. When the
departure time is reached, the auxiliary heat-
ing continues to heat for a further five
minutes and then switches off. The auxiliary
heating adopts the temperature settings
selected for Thermatic 2-zone automatic cli-
mate control or Thermotronic luxury multi-
zone automatic climate control*.
You can switch off the auxiliary heating by
using the remote control or the auxiliary heat-
ing button on the centre console. G
Risk of poisoning
Exhaust fumes are produced when the auxili-
ary heating is in operation. Inhaling these
exhaust fumes can be poisonous. You should
therefore switch off the auxiliary heating in
confined spaces without an extraction sys-
tem, e.g. a garage. G
Risk of fire
When the auxiliary heating is in operation,
parts of the vehicle can become very hot.
Make sure that the exhaust system does
not under any circumstances come into con-
tact with highly flammable materials such as
dry grass or fuels. The highly flammable mate-
rial could otherwise ignite and set the vehicle
alight. Select your parking space accordingly.
Operating the auxiliary heating is therefore
prohibited at filling stations or when your vehi-
cle is being refuelled. Always switch off the
auxiliary heating at filling stations. On-board computer
107Controls
* optional
X164_AKB; 2; 3, en-GB
wobuchh,
Version: 2.11.8.1 2009-03-31T14:14:58+02:00 - Seite 107 Z
Dateiname: 6515431202_buchblock.pdf; erzeugt am 01. Apr 2009 00:17:17; WK
Page 111 of 309
Selecting the departure time or deactivat-
ing a selected departure time
You can call up the Aux.heating depar‐
ture time function directly.
X Turn the key to position 1or 2in the ignition
lock.
X Press the button for the auxiliary heating on
the centre console (Y page 147).
or
X Press VorU on the steering wheel
to select the Settings... menu.
X Press the &button to select submenus.
X Press the WorX button to select the
Heater submenu.
X Press the &button to select Aux.heat‐
ing departure time.
You will see the selected setting.
X Press the WorX button to select
one of the three departure times or Timer
off (no timer active).
When a switch-on time is selected, the yel-
low indicator lamp lights up in the auxiliary
heating button.
Changing the departure time
X Press VorU on the steering wheel
to select the Settings... menu.
X Press the &button to select submenus.
X Press the WorX button to select the
Heater submenu.
X Press the &button to select Aux.heat‐
ing departure time.
X Press WorX to select Time 1,
Time 2 orTime 3 to be changed.
X Press &to select Departure time
X Set hour.
X Press the WorX button to set the
hour.
X Press the &button to select Depar‐
ture time X Set minutes. X
Press the WorX button to set the
minutes.
X Press the *button to select a different
display.
After changing from one menu to another,
the new time setting is stored. The yellow
indicator lamp lights up on the button for
the auxiliary heating on the centre console.
Convenience submenu* Activating or deactivating the easy-entry/
exit feature*
G
Risk of injury
The steering wheel moves when the EASY-
ENTRY/EXIT feature is active. There is a risk
of occupants becoming trapped. Before acti-
vating the EASY-ENTRY/EXIT feature, make
sure that nobody can become trapped.
Do not leave children unsupervised in the
vehicle, even if they are secured in a child
restraint system. The children could open the
driver's door and thereby unintentionally acti-
vate the EASY-ENTRY/EXIT feature and
become trapped.
X Press VorU on the steering wheel
to select the Settings... menu.
X Press the &button to select submenus.
X Press the WorX button to select the
Convenience submenu.
X Press the &button to select the EASY-
ENTRY feature.
X Press the WorX button to activate
or deactivate the EASY-ENTRY system.
X Press the &,VorU button to
select a different display.
Switching the belt adjustment on/off
X Press VorU on the steering wheel
to select the Settings... menu.
X Press the WorX button to select the
Convenience submenu. 108
On-board computerControls
* optional
X164_AKB; 2; 3, en-GB
wobuchh,
Version: 2.11.8.1 2009-03-31T14:14:58+02:00 - Seite 108
Dateiname: 6515431202_buchblock.pdf; erzeugt am 01. Apr 2009 00:17:17; WK
Page 117 of 309
Deactivating
X
Press button :.
Indicator lamp ;goes out.
The DSR symbol appears in the multi-func-
tion display with the Offmessage.
DSR switches off automatically if you drive
faster than 35 km/h. The DSR symbol
appears in the multi-function display with the
Off message. You also hear a warning tone.
Changing the set speed while the vehi-
cle is in motion When DSR is activated, you can change the
set speed to a value between 4 km/h and
18 km/h while the vehicle is in motion. X
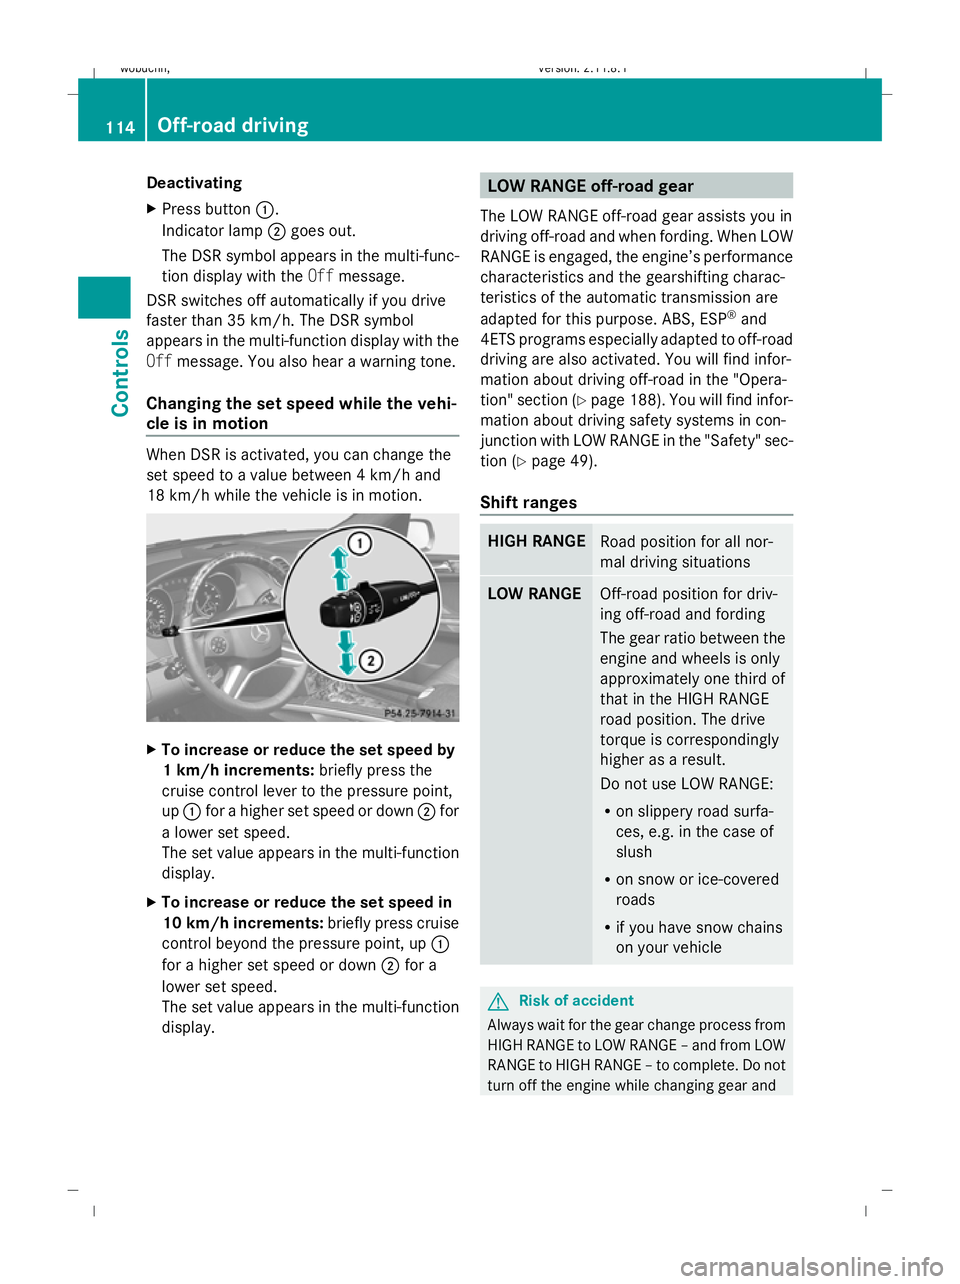
To increase or reduce the set speed by
1 km/h increments: briefly press the
cruise control lever to the pressure point,
up : for a higher set speed or down ;for
a lower set speed.
The set value appears in the multi-function
display.
X To increase or reduce the set speed in
10 km/h increments: briefly press cruise
control beyond the pressure point, up :
for a higher set speed or down ;for a
lower set speed.
The set value appears in the multi-function
display. LOW RANGE off-road gear
The LOW RANGE off-road gear assists you in
driving off-road and when fording. When LOW
RANGE is engaged, the engine’s performance
characteristics and the gearshifting charac-
teristics of the automatic transmission are
adapted for this purpose. ABS, ESP ®
and
4ETS programs especially adapted to off-road
driving are also activated. You will find infor-
mation about driving off-road in the "Opera-
tion" section (Y page 188). You will find infor-
mation about driving safety systems in con-
junction with LOW RANGE in the "Safety" sec-
tion (Y page 49).
Shift ranges HIGH RANGE
Road position for all nor-
mal driving situations
LOW RANGE
Off-road position for driv-
ing off-road and fording
The gear ratio between the
engine and wheels is only
approximately one third of
that in the HIGH RANGE
road position. The drive
torque is correspondingly
higher as a result.
Do not use LOW RANGE:
R on slippery road surfa-
ces, e.g. in the case of
slush
R on snow or ice-covered
roads
R if you have snow chains
on your vehicle G
Risk of accident
Always wait for the gear change process from
HIGH RANGE to LOW RANGE – and from LOW
RANGE to HIGH RANGE – to complete. Do not
turn off the engine while changing gear and 114
Off-road drivingCont
rols
X164_AKB; 2; 3, en-GB
wobuchh, Version: 2.11.8.1 2009-03-31T14:14:58+02:00 - Seite 114
Dateiname: 6515431202_buchblock.pdf; erzeugt am 01. Apr 2009 00:17:19; WK