Page 291 of 371
67
In case of an emergency
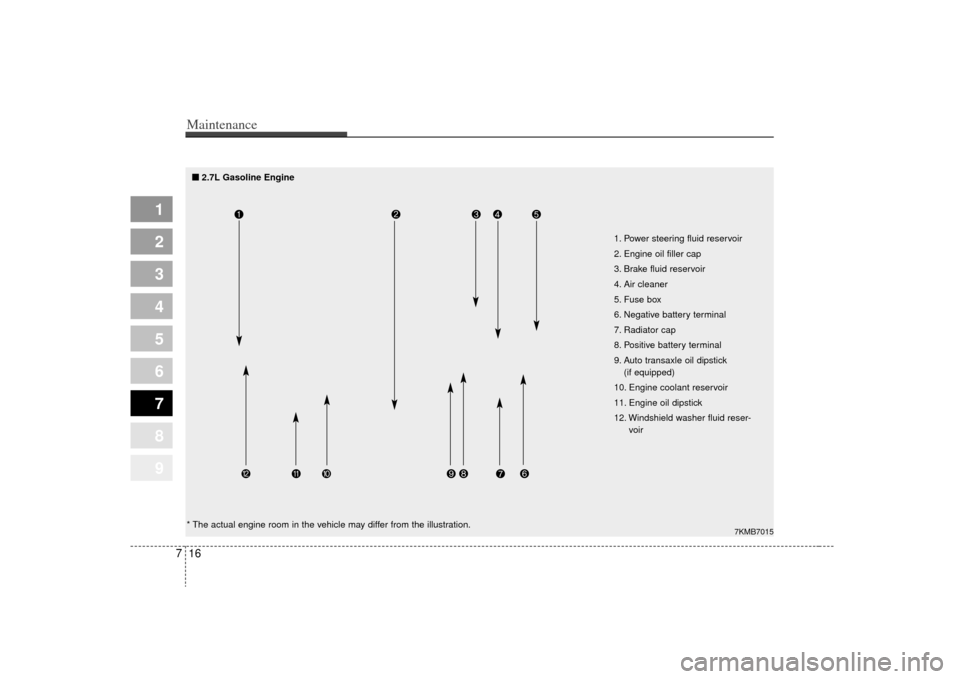
ELECTRICAL CIRCUIT PROTECTION Fuses A vehicle’s electrical system is pro-
tected from electrical overload dam-
age by fuses.
This vehicle has two fuse panels,
one located in the driver's side panel
bolster, the other in the engine com-
partment near the battery.If any of your vehicle’s lights, acces-
sories, or controls do not work, check
the appropriate circuit fuse. If a fuse
has blown, the element inside the
fuse will be melted.
If the electrical system does not
work, first check the driver’s side
fuse panel.
Always replace a blown fuse with
one of the same rating.
If the replacement fuse blows, this
indicates an electrical problem. Avoid
using the system involved and imme-
diately consult an Authorized Kia
Dealer.
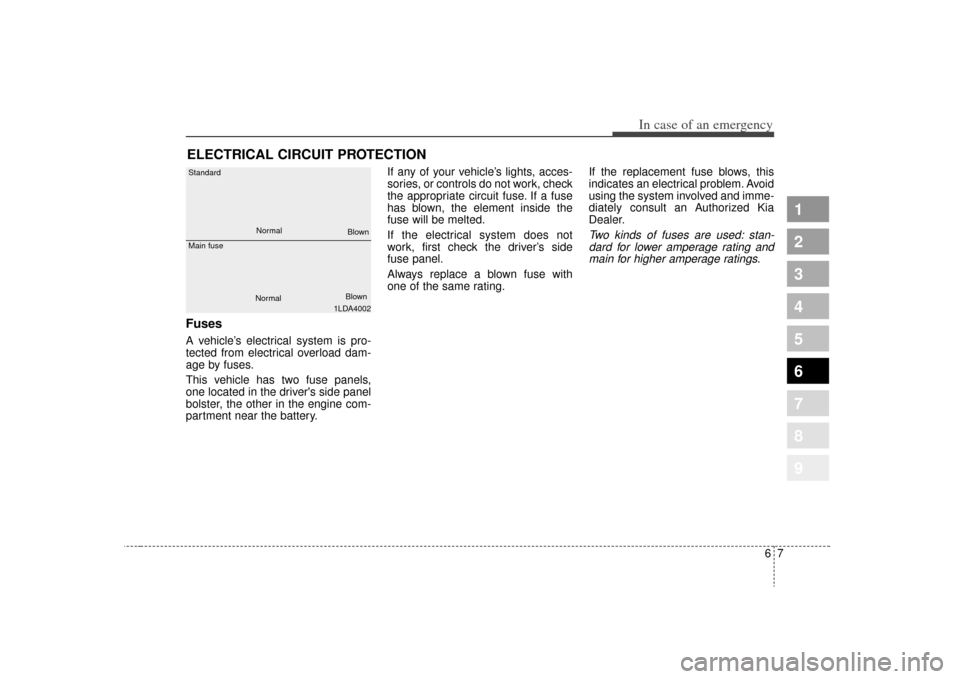
Two kinds of fuses are used: stan-
dard for lower amperage rating andmain for higher amperage ratings.
1
2
3
4
5
6
7
8
9
1LDA4002
Standard
Main fuse
NormalNormal
Blown
Blown
Page 293 of 371
69
In case of an emergency
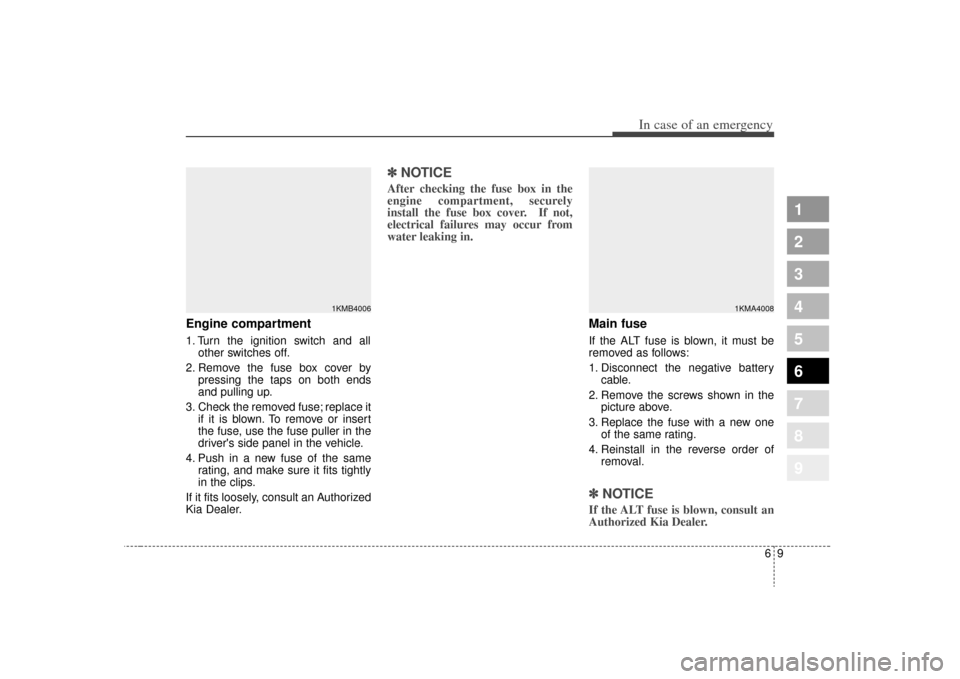
Engine compartment1. Turn the ignition switch and allother switches off.
2. Remove the fuse box cover by pressing the taps on both ends
and pulling up.
3. Check the removed fuse; replace it if it is blown. To remove or insert
the fuse, use the fuse puller in the
driver's side panel in the vehicle.
4. Push in a new fuse of the same rating, and make sure it fits tightly
in the clips.
If it fits loosely, consult an Authorized
Kia Dealer.
✽ ✽ NOTICEAfter checking the fuse box in the
engine compartment, securely
install the fuse box cover. If not,
electrical failures may occur from
water leaking in.
Main fuseIf the ALT fuse is blown, it must be
removed as follows:
1. Disconnect the negative battery
cable.
2. Remove the screws shown in the picture above.
3. Replace the fuse with a new one of the same rating.
4. Reinstall in the reverse order of removal.✽ ✽NOTICEIf the ALT fuse is blown, consult an
Authorized Kia Dealer.
1
2
3
4
5
6
7
8
9
1KMB4006
1KMA4008
Page 297 of 371
613
In case of an emergency
1
2
3
4
5
6
7
8
9
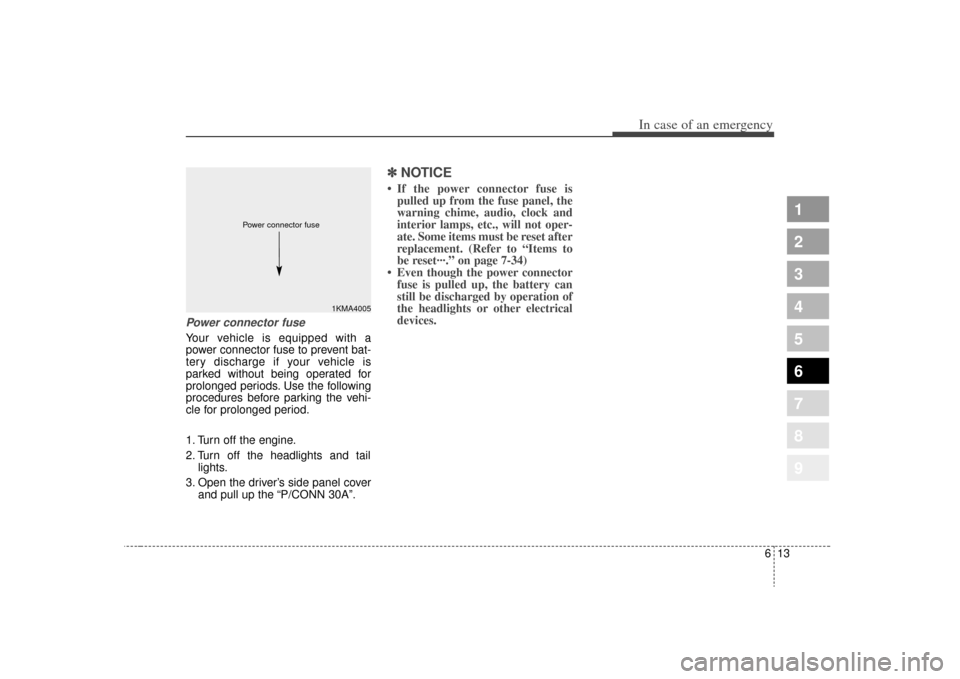
Power connector fuseYour vehicle is equipped with a
power connector fuse to prevent bat-
tery discharge if your vehicle is
parked without being operated for
prolonged periods. Use the following
procedures before parking the vehi-
cle for prolonged period.
1. Turn off the engine.
2. Turn off the headlights and taillights.
3. Open the driver’s side panel cover and pull up the “P/CONN 30A”.
✽ ✽NOTICE• If the power connector fuse is
pulled up from the fuse panel, the
warning chime, audio, clock and
interior lamps, etc., will not oper-
ate. Some items must be reset after
replacement. (Refer to “Items to
be reset···.” on page 7-34)
• Even though the power connector fuse is pulled up, the battery can
still be discharged by operation of
the headlights or other electrical
devices.
1KMA4005
Power connector fuse
Page 310 of 371
1
2
3
4
5
6
7
8
9
Maintenance services / 7-3
Maintenance schedule / 7-4
Explanation of scheduled maintenance items / 7-8
Owner maintenance / 7-12
Engine compartment / 7-15
Engine oil and oil filter / 7-17
Engine cooling system / 7-19
Brakes and clutch / 7-22
Parking brake / 7-23
Power steering / 7-24
Automatic transaxle / 7-25
Rear differential (4WD) / 7-27
Transfer case (4WD) / 7-27
Lubricants and fluids / 7-28
Air cleaner / 7-29
Climate control air filter / 7-30
Wiper blades / 7-31
Battery / 7-33
Tires and wheels / 7-36
Maintenance
Page 322 of 371
713
Maintenance
1
2
3
4
5
6
7
8
9
At least monthly: Check coolant level in the coolantrecovery reservoir.
Check the operation of all exterior lights, including the stoplights, turn
signals and hazard warning flash-
ers.
Check the inflation pressures of all tires including the spare.
At least twice a year
(i.e., every Spring and Fall) : Check radiator, heater and air con- ditioning hoses for leaks or da-
mage.
Check windshield washer spray and wiper operation. Clean wiper
blades with clean cloth dampened
with washer fluid.
Check headlight alignment.
Check muffler, exhaust pipes, shields and clamps.
Check the lap/shoulder belts for wear and function.
Check for worn tires and loose wheel lug nuts.
At least once a year : Clean body and door drain holes.
Lubricate door hinges and checks,and hood hinges.
Lubricate door and hood locks and latches.
Lubricate door rubber weather- strips.
Check the air conditioning system before the warm weather season.
Check the power steering fluid level.
Inspect and lubricate automatic transaxle linkage and controls.
Clean battery and terminals.
Check the brake fluid level.
Page 324 of 371
715
Maintenance
1
2
3
4
5
6
7
8
9
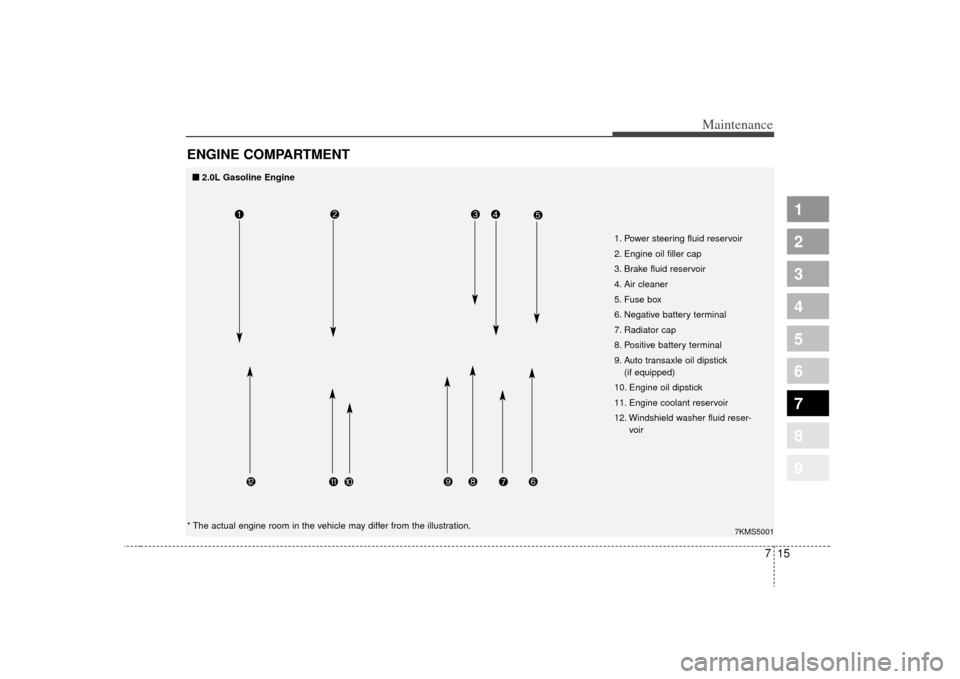
ENGINE COMPARTMENT
7KMS5001
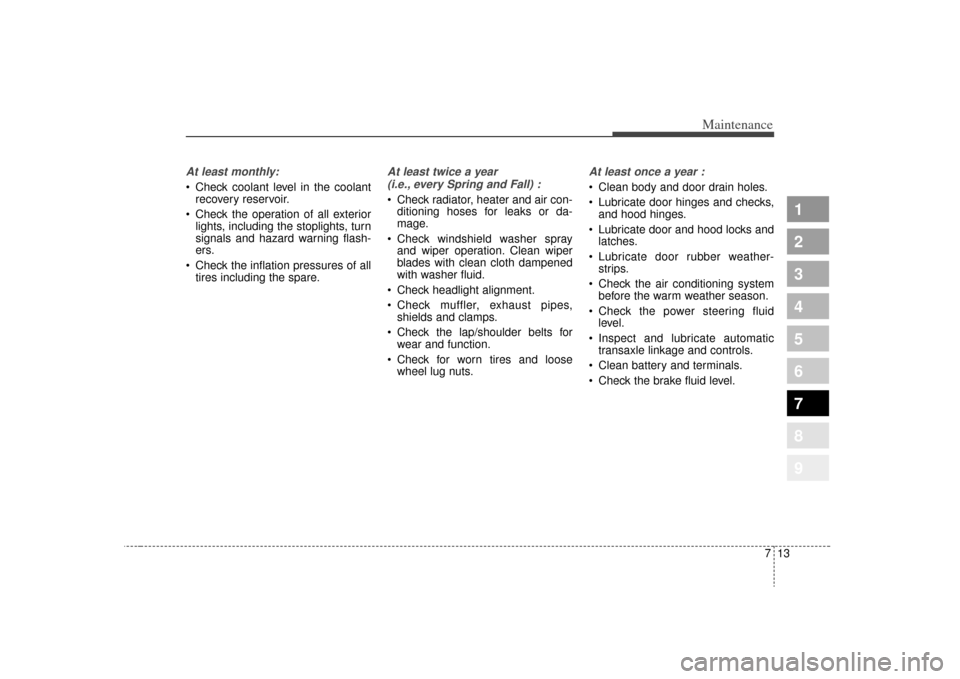
1. Power steering fluid reservoir
2. Engine oil filler cap
3. Brake fluid reservoir
4. Air cleaner
5. Fuse box
6. Negative battery terminal
7. Radiator cap
8. Positive battery terminal
9. Auto transaxle oil dipstick (if equipped)
10. Engine oil dipstick
11. Engine coolant reservoir
12. Windshield washer fluid reser- voir
■ ■
2.0L Gasoline Engine
* The actual engine room in the vehicle may differ from the illustration.
Page 325 of 371
Maintenance16
7
1
2
3
4
5
6
7
8
9
7KMB7015
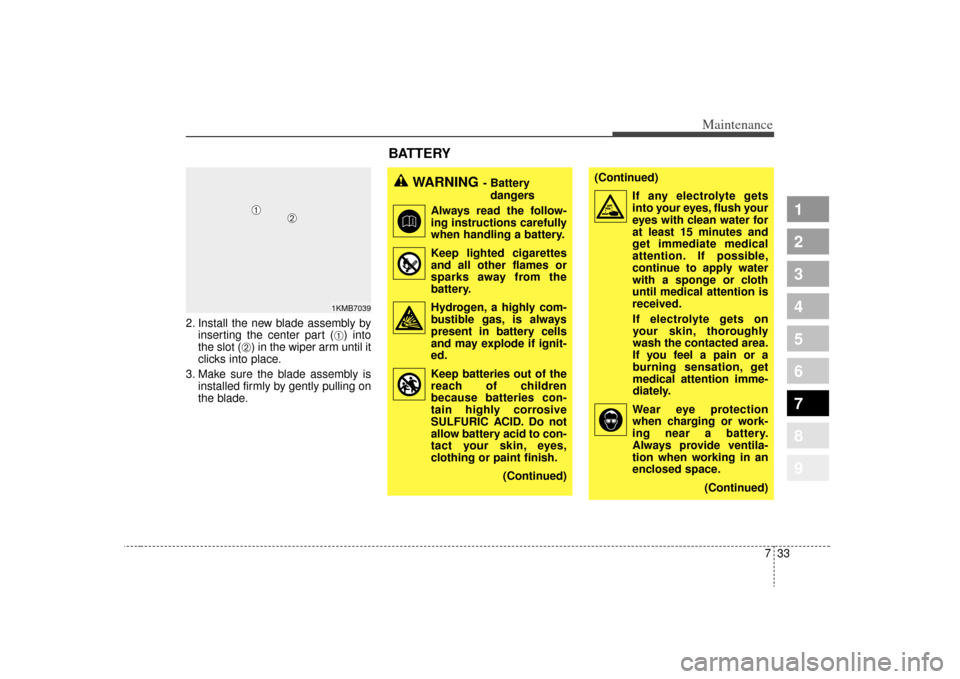
1. Power steering fluid reservoir
2. Engine oil filler cap
3. Brake fluid reservoir
4. Air cleaner
5. Fuse box
6. Negative battery terminal
7. Radiator cap
8. Positive battery terminal
9. Auto transaxle oil dipstick
(if equipped)
10. Engine coolant reservoir
11. Engine oil dipstick
12. Windshield washer fluid reser- voir
■ ■
2.7L Gasoline Engine
* The actual engine room in the vehicle may differ from the illustration.
Page 342 of 371
733
Maintenance
1
2
3
4
5
6
7
8
9
2. Install the new blade assembly byinserting the center part (
➀) into
the slot (
➁) in the wiper arm until it
clicks into place.
3. Make sure the blade assembly is installed firmly by gently pulling on
the blade.
WARNING
- Battery
dangers
Always read the follow-
ing instructions carefully
when handling a battery.
Keep lighted cigarettes
and all other flames or
sparks away from the
battery.
Hydrogen, a highly com-
bustible gas, is always
present in battery cells
and may explode if ignit-
ed.
Keep batteries out of the
reach of children
because batteries con-
tain highly corrosive
SULFURIC ACID. Do not
allow battery acid to con-
tact your skin, eyes,
clothing or paint finish.
(Continued)
(Continued)If any electrolyte gets
into your eyes, flush your
eyes with clean water for
at least 15 minutes and
get immediate medical
attention. If possible,
continue to apply water
with a sponge or cloth
until medical attention is
received.If electrolyte gets on
your skin, thoroughly
wash the contacted area.
If you feel a pain or a
burning sensation, get
medical attention imme-
diately.
Wear eye protection
when charging or work-
ing near a battery.
Always provide ventila-
tion when working in an
enclosed space. (Continued)
1KMB7039
BATTERY
➀
➁