Page 179 of 532
Whentheplus-oneseatisinthe
center position, store the f loor mat
under the passenger’s side bucket
seat as shown above.When the passenger’s side bucket
seat is in the outside position, and
theplus-oneseatisnotused,install
the f loor mat and the cover over the
f loor anchors.
Make sure the seats are securely
locked in place bef ore driving. A seat
thatisnotlockedinplacecouldfly
around and cause injury in a sudden
stop or crash.
To return the seat to the outside
position, remove the seat, reinstall
the cover, then reinstall the seat.
Seats and Floor Mats
Seats
176
�\f���—�\f���—���
�y�
�
�����������y���
�(���������\f�y�\f�
���
�y
2009 Odyssey
Page 180 of 532
Both seats can be removed to give
more cargo capacity.
Toinstallthefloormatinanouter
position or the center position, insert
thetabsintotheslitsonthefloor,
then snap the two buttons in place.
Ref er to the illustrations above.
Do not remove the seats while
driving.
To remove a second row seat:
Pull up the seat-back angle
adjustment lever, and fold the
seat-back forward.
1.
CONT INUED
Removing the Bucket Seats in the
Second Row
Seats
Inst rument s and Cont rols
177
SLITS
Outer position
SLIT
Center position
SEAT-BACK LEVER
TABS
TAB TABS
BUTTONS
BUTTONSTAB
LOCK RELEASE LEVER
�\f���—�\f���—���
�y�
�
�������\f���y���
�(���������\f�y�\f�
�����y
2009 Odyssey
Page 181 of 532
To reinstall the seat, hook the f ront
of the seat to the f loor, then push the
rear of the seat-back until it locks in
place. Make sure the seat is securely
latched bef ore driving.
Unlock the seat f rom the f loor by
pulling the lock release lever
under the seat cushion’s f ront
edge and lif ting the rear of the
seat.
Unhook the f ront of the seat f rom
the f loor by pulling it back slightly,
then pivoting it upward. Your vehicle has a plus-one seat for
the second row center position.
You can remove the plus-one seat
when it is not used. Do not remove
the seat while driving.
2.
3.
Except U.S. LX and Canadian DX models
Removing the Second Row
Plus-One Seat
Seats
178
�\f���—�\f���—���
�y�
�
�������\f���y���
�(���������\f�y�\f�
�����y
2009 Odyssey
Page 182 of 532
To remove the plus-one seat:Unlock the seat from the floor by
pulling the lock release lever and
lifting the rear of the seat.Unhook the f ront of the seat f rom
the f loor by pulling it back slightly,
then pivoting it upward.
Fold the seat-back forward by
pulling the seat-back strap.
Remove the seat cushion by
pulling the seat cushion strap.
Lower the head restraints f ully.
1.
2.
3. 4.5.
Seats
Inst rument s and Cont rols
179
SEAT CUSHION STRAP
SEAT-BACK STRAP LOCK RELEASE LEVER
�\f���—�\f���—���
�y�
�
�������
���y���
�(���������\f�y�\f�
�����y
2009 Odyssey
Page 183 of 532
To install the plus-one seat:Install the seat cushion on the seat
bottom plate. To install the cushion,
hook the f ront of the cushion f irst,
then push down the rear until the
cushion is securely positioned. To use the plus-one seat as a center
console, remove its seat cushion by
pulling up the seat cushion strap.
Then pivot the seat-back forward
until it is f lat. Store the seat cushion
in the f loor storage area.
Make sure the seats are securely
locked in place bef ore driving. A seat
thatisnotlockedinplacecouldfly
around and cause injury in a sudden
stop or crash.
Hook the f ront of the seat to the
f loor, then push down the back until
it locks. Make sure both the f ront
and back of the seat are securely
latched. Pull up the seat-back, and
adjust the seat-back angle to the
desired position while pulling the
seat-back strap on the outside of the
seat bottom.
Seats
180
SEAT-BACK STRAP
�\f���—�\f���—���
�y�
�
�����������y���
�(���������\f�y�\f�
�����y
2009 Odyssey
Page 189 of 532

�µ
�µ
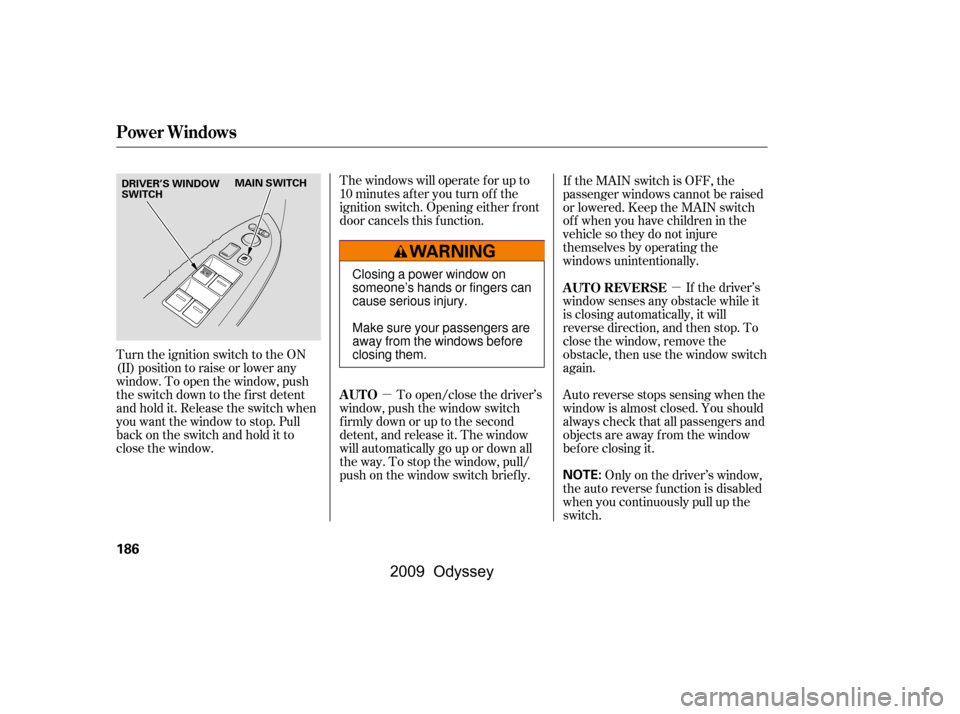
The windows will operate f or up to
10 minutes af ter you turn of f the
ignition switch. Opening either f ront
door cancels this f unction.
To open/close the driver’s
window, push the window switch
f irmly down or up to the second
detent, and release it. The window
will automatically go up or down all
the way. To stop the window, pull/
push on the window switch brief ly.
If the MAIN switch is OFF, the
passenger windows cannot be raised
or lowered. Keep the MAIN switch
off whenyouhavechildreninthe
vehicle so they do not injure
themselves by operating the
windows unintentionally.
If the driver’s
window senses any obstacle while it
is closing automatically, it will
reverse direction, and then stop. To
close the window, remove the
obstacle, then use the window switch
again.
Turn the ignition switch to the ON
(II) position to raise or lower any
window. To open the window, push
the switch down to the f irst detent
andholdit.Releasetheswitchwhen
you want the window to stop. Pull
back on the switch and hold it to
close the window.
Auto reverse stops sensing when the
window is almost closed. You should
always check that all passengers and
objects are away from the window
bef ore closing it.
Only on the driver’s window,
the auto reverse f unction is disabled
when you continuously pull up the
switch.
AUTO
AUTO REVERSE
Power Windows
186
NOTE:
MAIN SWITCHDRIVER’S WINDOW SWITCH
Closing a power window on
someone’s hands or fingers can
cause serious injury.
Make sure your passengers are
away from the windows before
closing them.
�����—�����—���
�y�
�
�������
���y���
�(�����������y���
���
�y
2009 Odyssey
Page 190 of 532

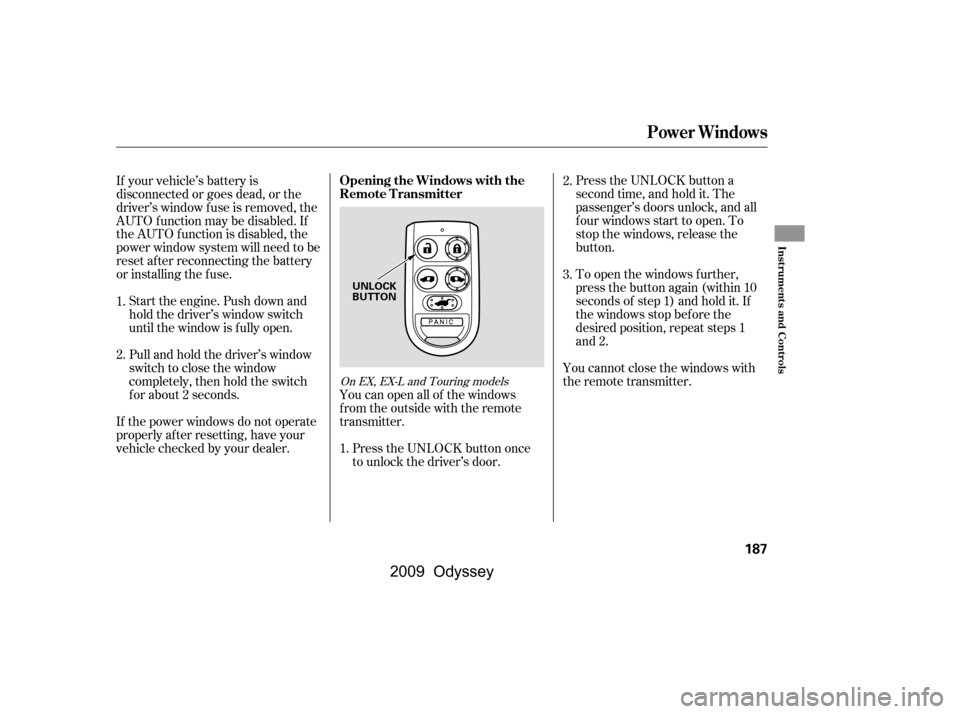
Press the UNLOCK button a
second time, and hold it. The
passenger’s doors unlock, and all
f our windows start to open. To
stop the windows, release the
button.
To open the windows f urther,
press the button again (within 10
seconds of step 1) and hold it. If
the windows stop bef ore the
desired position, repeat steps 1
and 2.
If your vehicle’s battery is
disconnected or goes dead, or the
driver’s window f use is removed, the
AUTO f unction may be disabled. If
the AUTO f unction is disabled, the
power window system will need to be
reset af ter reconnecting the battery
or installing the f use.
If the power windows do not operate
properly af ter resetting, have your
vehicle checked by your dealer.
Pull and hold the driver’s window
switch to close the window
completely, then hold the switch
f or about 2 seconds.
Start the engine. Push down and
hold the driver’s window switch
until the window is f ully open.
You cannot close the windows with
the remote transmitter.
You can open all of the windows
from the outside with the remote
transmitter.
Press the UNLOCK button once
to unlock the driver’s door.
1.
2.
3.
1. 2.
On EX, EX-L and Touring models
Opening the Windows with the
Remote Transmitter
Power Windows
Inst rument s and Cont rols
187
UNLOCK
BUTTON
�\f���—�\f���—���
�y�
�
�����������y���
�(���������\f�y�\f�
�����y
2009 Odyssey
Page 195 of 532
The outside mirrors are heated to
remove fog and frost. With the
ignition switch in the ON (II)
position, turn on the heaters by
pressing the button. The indicator in
the button comes on as a reminder.
Press the button again to turn the
heaters off.To apply the parking brake, push the
pedal down with your f oot. To
release it, push on the pedal again.
The parking brake indicator on the
instrument panel should go out when
the parking brake is fully released
(see page ).You will also see a ‘‘RELEASE
PARKING BRAKE’’ message on the
multi-inf ormation display (see page
).
69 88
Except U.S. LX model
On Touring models
Heated Mirrors
Parking Brake
Mirrors, Parking Brake
192
HEATED MIRROR BUTTON
PARKING BRAKE PEDALDriving the vehicle with the parking
brake applied can damage the rear
brakes and hubs. A beeper will sound if
the vehicle is driven with the parking
brake on.
�\f���—�\f���—���
�y�
�
����\f��\f���y���
�(���������\f�y�\f�
�����y
2009 Odyssey