Page 461 of 532

�µ
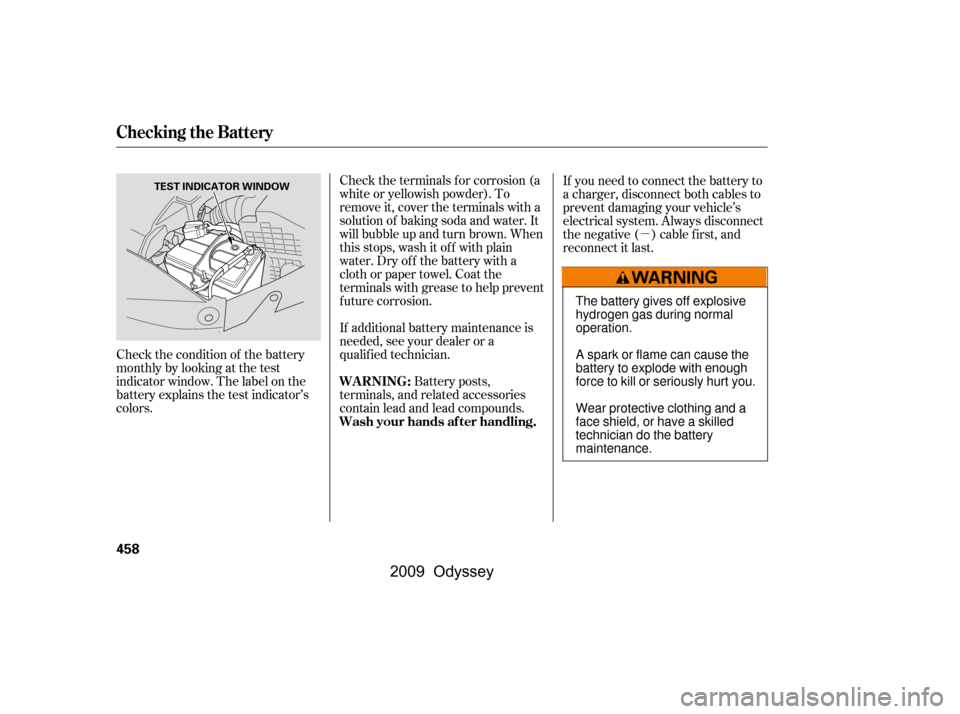
Check the condition of the battery
monthlybylookingatthetest
indicator window. The label on the
battery explains the test indicator’s
colors.
Check the terminals f or corrosion (a
white or yellowish powder). To
remove it, cover the terminals with a
solution of baking soda and water. It
will bubble up and turn brown. When
this stops, wash it of f with plain
water. Dry off the battery with a
cloth or paper towel. Coat the
terminals with grease to help prevent
f uture corrosion.
If additional battery maintenance is
needed, see your dealer or a
qualif ied technician.
Battery posts,
terminals, and related accessories
contain lead and lead compounds.
If you need to connect the battery to
a charger, disconnect both cables to
prevent damaging your vehicle’s
electrical system. Always disconnect
the negative ( ) cable first, and
reconnect it last.
WARNING:
Wash your hands af ter handling.
Checking the Battery
458
TEST INDICATOR WINDOW
The battery gives off explosive
hydrogen gas during normal
operation.
A spark or flame can cause the
battery to explode with enough
force to kill or seriously hurt you.
Wear protective clothing and a
face shield, or have a skilled
technician do the battery
maintenance.
�����—�����—���
�y�
����
��������y���
�(�����������y���������y
2009 Odyssey
Page 469 of 532

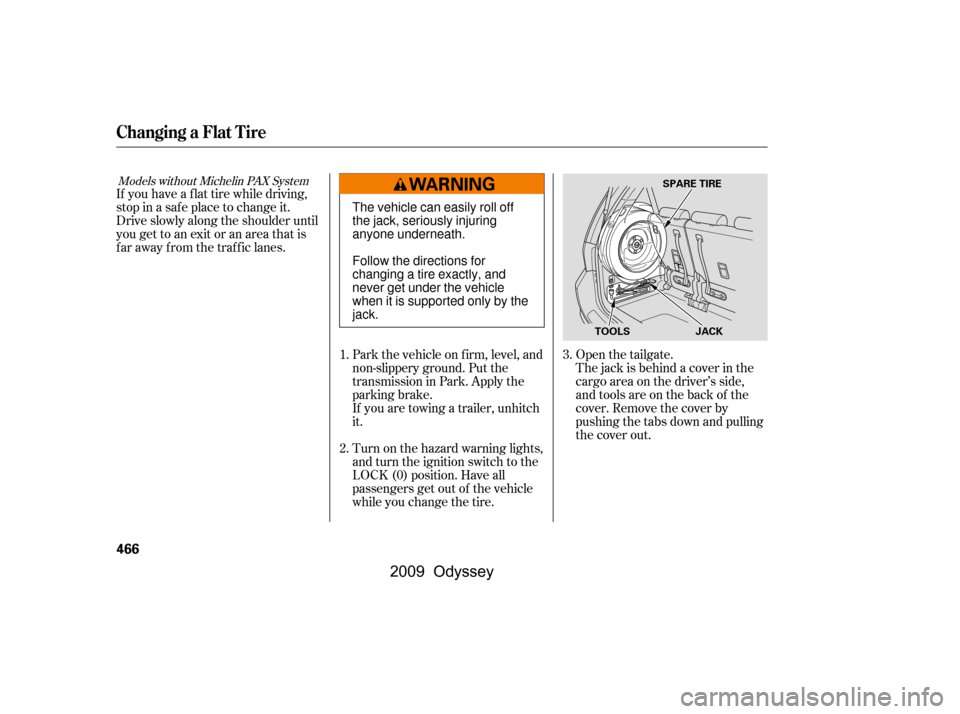
The jack is behind a cover in the
cargo area on the driver’s side,
and tools are on the back of the
cover. Remove the cover by
pushing the tabs down and pulling
the cover out.
Open the tailgate.
If you have a f lat tire while driving,
stop in a saf e place to change it.
Drive slowly along the shoulder until
you get to an exit or an area that is
far away from the traffic lanes.
Park the vehicle on f irm, level, and
non-slippery ground. Put the
transmission in Park. Apply the
parking brake.
If you are towing a trailer, unhitch
it.
Turn on the hazard warning lights,
and turn the ignition switch to the
LOCK (0) position. Have all
passengers get out of the vehicle
while you change the tire.
2.
1.3.
Models without Michelin PAX System
Changing a Flat Tire
466
JACK
SPARE TIRE
TOOLS
The vehicle can easily roll off
the jack, seriously injuring
anyone underneath.
Follow the directions for
changing a tire exactly, and
never get under the vehicle
when it is supported only by the
jack.
�����—�����—���
�y�
����
��������y���
�(�����������y�������
�y
2009 Odyssey
Page 470 of 532
CONT INUED
Loosen the jack from its holder by
turning the end counterclockwise.Remove the bracket from the jack
storageareabyunscrewingthe
bracket mounting wing bolt.
Remove the vinyl storage bag.Move the seat belt out of the way
by hanging the latch plate on the
holder.
Fold down the third row seat (see
page ).
6.
7.
5.
4.
181
Changing a Flat Tire
T aking Care of t he Unexpect ed
467
VINYL BAG
JACK
COVER BRACKET MOUNTING
WING BOLT
HOLDER
BRACKET
�\f���—�\f���—���
�y�
����
������
�y���
�(���������\f�y�\f�������y
2009 Odyssey
Page 471 of 532
The spare tire is stored behind spare
tire cover on the sidewall of the
cargo area on the driver’s side.Placethejackunderthejacking
point nearest the tire you need to
change. Turn the end bracket
clockwise until the top of the jack
contacts the jacking point. Make
sure the jacking point tab is
restinginthejacknotch.
Remove the cover by holding the
two handles on the spare tire
cover and pulling the cover out. If you are changing a rear tire,
close the sliding door.
Unscrew the tire mounting wing
bolt, and take the spare tire out of
its holder. Make sure you also turn of f the
sliding door main switch.
Loosen each wheel nut 1/2 turn
with the wheel nut wrench.
8.
9. 10.
12.
11.
On EX, EX-L, Touring models
Changing a Flat Tire
468
SEAT BELT
COVER
TIRE MOUNTING
WING BOLT
SPACER CONE
WHEEL NUT WRENCHWHEEL NUTS
�\f���—�\f���—���
�y�
����
����\f�
�y���
�(���������\f�y�\f�������y
2009 Odyssey
Page 472 of 532
Use the extension and the wheel
nut wrench as shown to raise the
vehicle until the f lat tire is of f the
ground.Bef ore mounting the spare tire,
wipe any dirt of f the mounting
surface of the wheel and hub with
a clean cloth. Wipe the hub
carefully;itmaybehotfrom
driving.
Do not attempt to forcibly pry the
wheel cover of f with a screwdriver or
other tool. The wheel cover cannot
be removed without f irst removing
the wheel nuts. Remove the wheel nuts, then
remove the f lat tire. Handle the
wheel nuts caref ully; they may be
hot from driving. Place the flat tire
on the ground with the outside
surface facing up.
13.
14.15.
CONT INUED
On LX and Canadian DX models
Changing a Flat Tire
T aking Care of t he Unexpect ed
469
EXTENSION
WHEEL COVER
HUB
WHEEL NUT
WRENCH
�\f���—�\f���—���
�y�
����
����\f���y���
�(���������\f�y�\f�������y
2009 Odyssey
Page 473 of 532
Tighten the wheel nuts securely in
a crisscross pattern. Have the
wheel nut torque checked at the
nearest automotive service f acility.
Tighten the wheel nuts to:Put the flat tire in the supplied
vinyl storage bag.
Put on the spare tire. Put the
wheel nuts back on f inger-tight,
then tighten them in a crisscross
pattern with the wheel nut wrench
until the wheel is f irmly against
the hub. Do not try to tighten the
wheel nuts f ully.
Lower the vehicle to the ground,
and remove the jack.
16.
17.
18.
19.
Changing a Flat Tire
470
94 lbf·ft (127 N·m , 13 kgf·m)
�\f���—�\f���—���
�y�
����
����
���y���
�(���������\f�y�\f�������y
2009 Odyssey
Page 474 of 532

CONT INUED
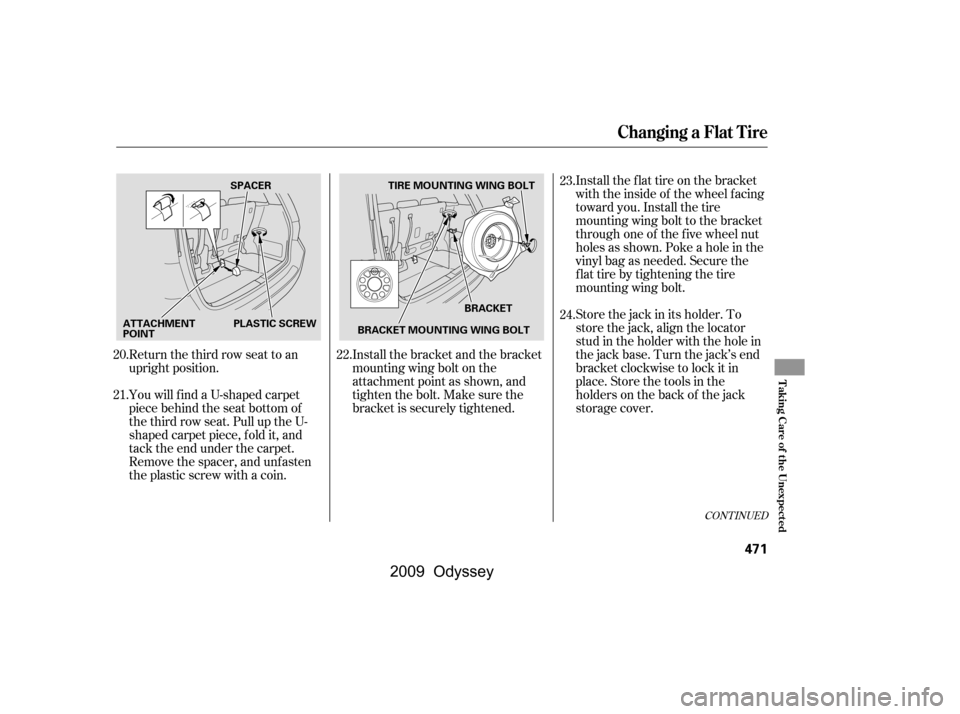
Install the bracket and the bracket
mountingwingboltonthe
attachment point as shown, and
tighten the bolt. Make sure the
bracket is securely tightened.Install the flat tire on the bracket
with the inside of the wheel facing
toward you. Install the tire
mounting wing bolt to the bracket
through one of the f ive wheel nut
holes as shown. Poke a hole in the
vinyl bag as needed. Secure the
f lat tire by tightening the tire
mounting wing bolt.
Store the jack in its holder. To
store the jack, align the locator
stud in the holder with the hole in
the jack base. Turn the jack’s end
bracket clockwise to lock it in
place. Store the tools in the
holders on the back of the jack
storage cover.
Return the third row seat to an
upright position.
YouwillfindaU-shapedcarpet
piece behind the seat bottom of
the third row seat. Pull up the U-
shaped carpet piece, f old it, and
tack the end under the carpet.
Remove the spacer, and unfasten
the plastic screw with a coin.
20.
21.
22.23.
24.
Changing a Flat Tire
T aking Care of t he Unexpect ed
471
BRACKET
TIRE MOUNTING WING BOLT
SPACER
PLASTIC SCREW BRACKET MOUNTING WING BOLT
ATTACHMENT
POINT
�\f���—�\f���—���
�y�
����
��������y���
�(���������\f�y�\f�������y
2009 Odyssey
Page 475 of 532

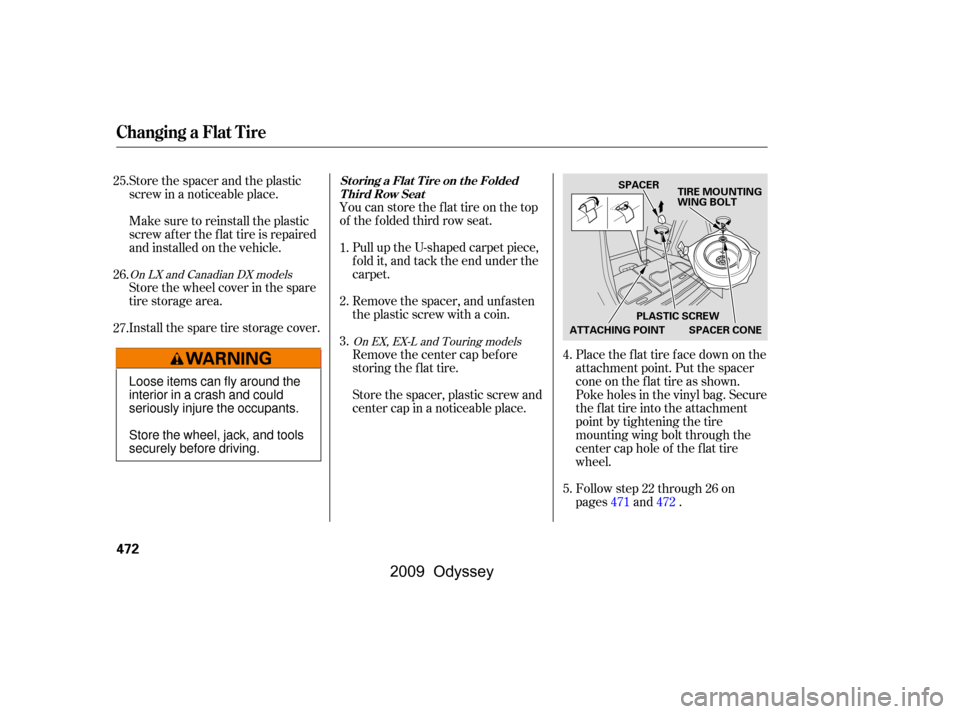
You can store the f lat tire on the top
of the f olded third row seat.
Pull up the U-shaped carpet piece,
f old it, and tack the end under the
carpet.
Remove the spacer, and unfasten
the plastic screw with a coin.
Place the flat tire face down on the
attachment point. Put the spacer
cone on the f lat tire as shown.
Poke holes in the vinyl bag. Secure
the flat tire into the attachment
point by tightening the tire
mounting wing bolt through the
center cap hole of the f lat tire
wheel.
Follow step 22 through 26 on
pages and .
Store the spacer and the plastic
screw in a noticeable place.
Make sure to reinstall the plastic
screw af ter the f lat tire is repaired
andinstalledonthevehicle.
Store the wheel cover in the spare
tire storage area.
Install the spare tire storage cover.
Remove the center cap before
storing the f lat tire.
Store the spacer, plastic screw and
center cap in a noticeable place.
1.
2.
3.
4.
5.
25.
26.
27.
471472
On EX, EX-L and Touring models
On LX and Canadian DX models
St oring a Flat T ire on t he Folded
Third Row Seat
Changing a Flat Tire
472
TIRE MOUNTING WING BOLT
ATTACHING POINT
SPACER
PLASTIC SCREW
SPACER CONE
Loose items can fly around the
interior in a crash and could
seriously injure the occupants.
Store the wheel, jack, and tools
securely before driving.
�����—�����—���
�y�
����
��������y���
�(�����������y���������y
2009 Odyssey