Page 49 of 136
 of cargo and
luggage capa")
The following gives you a few examples on how to calculate the available
amount of cargo and luggage load capacity:
•Another example for your vehicle with 1400 lb. (635 kg) of cargo and
luggage capacity. You decide to go golfing. Is there enough load
capacity to carry you, 4 of your friends and all the golf bags? You and
four friends average 220 lb. (99 kg) each and the golf bags weigh
approximately 30 lb. (13.5 kg) each. The calculation would be: 1400 -
(5 x 220) - (5 x 30) = 1400 - 1100 - 150 = 150 lb. Yes, you have
enough load capacity in your vehicle to transport four friends and
your golf bags. In metric units, the calculation would be: 635 kg - (5 x
99 kg) - (5 x 13.5 kg) = 635 - 495 - 67.5 = 72.5 kg.
•A final example for your vehicle with 1400 lb. (635 kg) of cargo and
luggage capacity. You and one of your friends decide to pick up
cement from the local home improvement store to finish that patio
you have been planning for the past 2 years. Measuring the inside of
the vehicle with the rear seat folded down, you have room for
12-100 lb. (45 kg) bags of cement. Do you have enough load capacity
to transport the cement to your home? If you and your friend each
weigh 220 lb. (99 kg), the calculation would be: 1400 - (2 x 220) - (12
x 100) = 1400 - 440 - 1200 = - 240 lb. No, you do not have enough
cargo capacity to carry that much weight. In metric units, the
calculation would be: 635 kg - (2 x 99 kg) - (12 x 45 kg) = 635 - 198 -
540 = -103 kg. You will need to reduce the load weight by at least
240 lb. (104 kg). If you remove 3-100 lb. (45 kg) cement bags, then
the load calculation would be:
1400 - (2 x 220) - (9 x 100) = 1400 - 440 - 900 = 60 lb. Now you have
the load capacity to transport the cement and your friend home. In
metric units, the calculation would be: 635 kg - (2 x 99 kg) - (9 x
45 kg) = 635 - 198 - 405 = 32 kg.
The above calculations also assume that the loads are positioned in your
vehicle in a manner that does not overload the Front or the Rear Gross
Axle Weight Rating specified for your vehicle on the Safety Compliance
Certification Label found on the edge of the driver’s door.
Special loading instructions for owners of pickup trucks and
utility-type vehicles
WARNING:For important information regarding safe operation
of this type of vehicle, see thePreparing to drive your vehicle
section in theDrivingchapter of thisOwner’s Guide.
2009 Motorhome(mot)
Supplement, 1st Printing
USA(fus)
Tires, Wheels and Loading
49
Page 50 of 136

WARNING:Loaded vehicles may handle differently than
unloaded vehicles. Extra precautions, such as slower speeds and
increased stopping distance, should be taken when driving a heavily
loaded vehicle.
Your vehicle can haul more cargo and people than most passenger cars.
Depending upon the type and placement of the load, hauling cargo and
people may raise the center of gravity of the vehicle.
TRAILER TOWING
Your vehicle may tow a class I, II or III trailer provided the maximum
trailer weight is less than or equal to the maximum trailer weight listed
for your engine and rear axle ratio on the following chart:
GCWR (Gross Combined Weight Rating)/Trailer Weights
Rear
axle
ratioMaximum
GVWR - lb
(kg)Maximum
GCWR - lb
(kg)Maximum
Trailer
weight - lb
(kg)Maximum
Frontal Area
of Trailer - ft
2
(m2)
5.3822000
(9979)26000
(11793)4000 (1814) 60 (5.6)
5.3820500
(9299)26000
(11793)5500 (2500) 60 (5.6)
5.3818000
(8165)26000
(11793)8000 (3629) 60 (5.6)
5.3816000
(7257)26000
(11793)10000 (4536) 60 (5.6)
6.1726000
(11793)30000
(13608)4000 (1814) 60 (5.6)
6.1724000
(10886)30000
(13608)6000 (2721) 60 (5.6)
For high altitude operation reduce GCW by 2% per 1,000 ft.
(300 meters) elevation. To determine the maximum trailer weight
designed for your particular vehicle as equipped, follow the section
Vehicle Loading–with and without a trailerin this chapter.
2009 Motorhome(mot)
Supplement, 1st Printing
USA(fus)
Tires, Wheels and Loading
50
Page 51 of 136

Preparing to tow
Use the proper equipment for towing a trailer and make sure it is
properly attached to your vehicle. Contact your authorized dealer or a
reliable trailer dealer as soon as possible if you require assistance.
Hitches
You must distribute the load in your trailer so that 10–15% of the total
weight of the trailer is on the tongue.
Weight distributing hitch
When hooking up a trailer using a load equalizing hitch, always use the
following procedure:
1. Park the unloaded vehicle on a level surface. With the ignition on and
all doors closed, allow the vehicle to stand for several minutes so that it
can level.
2. Measure the height of a reference point on the front and rear bumpers
at the center of the vehicle.
3. Attach the trailer to the vehicle and adjust the hitch equalizers so that
the front bumper height is within
1�2inch (13 mm) of the reference
point. After proper adjustment, the rear bumper should be no higher
than in Step 2.
WARNING:Do not adjust a weight distributing hitch to any
position where the rear bumper of the vehicle is higher than it
was before attaching the trailer. Doing so will defeat the function of
the weight distributing hitch, which may cause unpredictable handling,
and could result in serious personal injury.
Safety chains
Always connect the trailer’s safety chains to the frame or hook retainers
of the vehicle hitch. To connect the trailer’s safety chains, cross the
chains under the trailer tongue and allow slack for turning corners.
If you use a rental trailer, follow the instructions that the rental agency
gives to you.
Do not attach safety chains to the bumper.
2009 Motorhome(mot)
Supplement, 1st Printing
USA(fus)
Tires, Wheels and Loading
51
Page 52 of 136

Trailer brakes
Electric brakes and manual, automatic or surge-type brakes are safe if
installed properly and adjusted to the manufacturer’s specifications. The
trailer brakes must meet local and Federal regulations.
WARNING:Do not connect a trailer’s hydraulic brake system
directly to your vehicle’s brake system. Your vehicle may not
have enough braking power and your chances of having a collision
greatly increase.
The towing vehicle braking system is rated for operation at the
GVWR, not the GCWR.
Separate functioning brake systems are required for safe control
of towed vehicles and trailers weighing more than 1500 lb.
(680 kg) when loaded.
Trailer lamps
Trailer lamps are required on most towed vehicles. Make sure all running
lights, brake lights, turn signals and hazard lights are working. Contact
your authorized dealer or trailer rental agency for proper instructions
and equipment for hooking up trailer lamps.
Driving while you tow
When towing a trailer:
•Keep your speed no faster than 70 mph (113 km/h) during the first
500 miles (800 km) of towing a trailer, and don’t make full throttle
starts.
•Turn off the speed control. The speed control may shut off
automatically when you are towing on long, steep grades.
•Consult your local motor vehicle speed regulations for towing a trailer.
•To eliminate excessive shifting, use a lower gear. This will also assist
in transmission cooling.
•Anticipate stops and brake gradually.
Servicing after towing
If you tow a trailer for long distances, your vehicle will require more
frequent service intervals. Refer to yourscheduled maintenance
informationfor more information.
2009 Motorhome(mot)
Supplement, 1st Printing
USA(fus)
Tires, Wheels and Loading
52
Page 53 of 136

Trailer towing tips
•Practice turning, stopping and backing up before starting on a trip to
get the feel of the vehicle trailer combination. When turning, make
wider turns so the trailer wheels will clear curbs and other obstacles.
•Allow more distance for stopping with a trailer attached.
•If you are driving down a long or steep hill, shift to a lower gear. Do
not apply the brakes continuously, as they may overheat and become
less effective.
•The trailer tongue weight should be 10–15% of the loaded trailer
weight.
•If you will be towing a trailer frequently in hot weather, hilly
conditions, at GCWR, or any combination of these factors, consider
refilling your rear axle with synthetic gear lube if not already so
equipped. Refer to theMaintenance and Specificationschapter for
the lubricant specification. Remember that regardless of the rear axle
lube used, do not tow a trailer for the first 1,000 miles (1,600 km) of a
new vehicle, and that the first 500 miles (800 km) of towing be done
at no faster than 70 mph (113 km/h) with no full throttle starts.
•After you have traveled 50 miles (80 km), thoroughly check your
hitch, electrical connections and trailer wheel lug nuts.
•To aid in engine/transmission cooling and A/C efficiency during hot
weather while stopped in traffic, place the gearshift lever in P (Park).
•Vehicles with trailers should not be parked on a grade. If you must
park on a grade, place wheel chocks under the trailer’s wheels.
2009 Motorhome(mot)
Supplement, 1st Printing
USA(fus)
Tires, Wheels and Loading
53
Page 54 of 136

STARTING
Positions of the ignition
1. Accessory — allows the electrical
accessories such as the radio to
operate while the engine is not
running.
2. Lock — locks the automatic
transmission gearshift lever and
allows key removal.
3. Off — shuts off the engine and all
accessories.
4. On — all electrical circuits operational. Warning lights illuminated. Key
position when driving.
5. Start — cranks the engine. Release the key as soon as the engine
starts.
Preparing to start your vehicle
Engine starting is controlled by the powertrain control system.
This system meets all Canadian Interference-Causing Equipment
standard requirements regulating the impulse electrical field strength of
radio noise.
When starting a fuel-injected engine, avoid pressing the accelerator
before or during starting. Only use the accelerator when you have
difficulty starting the engine. For more information on starting the
vehicle, refer toStarting the enginein this chapter.
WARNING:Extended idling at high engine speeds can produce
very high temperatures in the engine and exhaust system,
creating the risk of fire or other damage.
WARNING:Do not park, idle, or drive your vehicle in dry grass
or other dry ground cover. The emission system heats up the
engine compartment and exhaust system, which can start a fire.
WARNING:Do not start your vehicle in a closed garage or in
other enclosed areas. Exhaust fumes can be toxic. Always open
the garage door before you start the engine. SeeGuarding against
exhaust fumesin this chapter for more instructions.
3
1
2
5
4
2009 Motorhome(mot)
Supplement, 1st Printing
USA(fus)
Driving
54
Page 55 of 136
WARNING:If you smell exhaust fumes inside your vehicle, have
your dealer inspect your vehicle immediately. Do not drive if you
smell exhaust fumes.
Important safety precautions
A computer system controls the engine’s idle revolutions per minute
(RPM). When the engine starts, the idle RPM runs higher than normal in
order to warm the engine. If the engine idle speed does not slow down
automatically, have the vehicle checked. Do not allow the vehicle to idle
for more than 10 minutes.
Before starting the vehicle:
1. Make sure all vehicle occupants have buckled their safety belts.
2. Make sure the headlamps and vehicle accessories are off.
3. Make sure the parking brake is
set.
4. Make sure the gearshift is in P
(Park).
2009 Motorhome(mot)
Supplement, 1st Printing
USA(fus)
Driving
55
Page 56 of 136
 without
turning the key to 5 (start).
Some warning lights will briefly illuminate. SeeWarning lights and
chimesin theInstrument Clusterchapter for more information
regarding")
5. Turn the key to 4 (on) without
turning the key to 5 (start).
Some warning lights will briefly illuminate. SeeWarning lights and
chimesin theInstrument Clusterchapter for more information
regarding the warning lights.
Vehicle speed is limited to 75 mph (120 km/h).
Starting the engine
1. Turn the key to 4 (on) without
turning the key to 5 (start).
2.
Turn the key to 5 (start), then
release the key as soon as the engine
begins cranking. Your vehicle has a
computer assisted cranking system
that assists in starting the engine.
After releasing the key from the 5
(start) position, the engine may
continue cranking for up to
10 seconds or until the vehicle starts.
Note:Cranking may be stopped at any time by turning the key to the off
position.
3. After idling for a few seconds, apply the brake, shift into gear and drive.
Note:If the engine does not start on the first try, turn the key to the 3
(off) position, wait 10 seconds and try Step 2 again. If the engine still
fails to start, press the accelerator to the floor and try Step 2 again,
keeping the accelerator on the floor until the engine begins to accelerate
above cranking speeds; this will allow the engine to crank with the fuel
shut off in case the engine is flooded with fuel.
Guarding against exhaust fumes
Carbon monoxide is present in exhaust fumes. Take precautions to avoid
its dangerous effects.
1
2
34
5
3
2
1
5
4
2009 Motorhome(mot)
Supplement, 1st Printing
USA(fus)
Driving
56
 1
1 2
2 3
3 4
4 5
5 6
6 7
7 8
8 9
9 10
10 11
11 12
12 13
13 14
14 15
15 16
16 17
17 18
18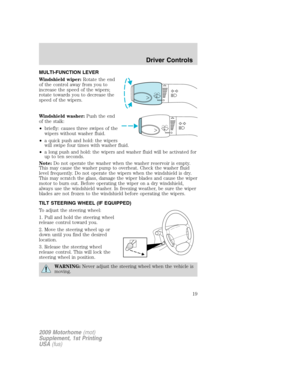 19
19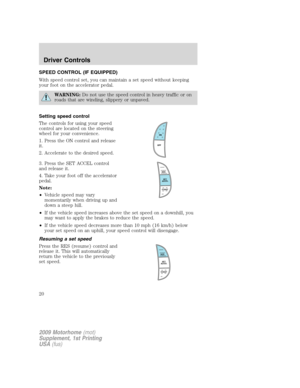 20
20 21
21 22
22 23
23 24
24 25
25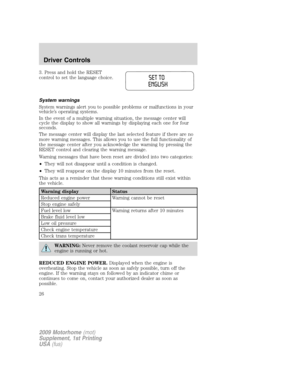 26
26 27
27 28
28 29
29 30
30 31
31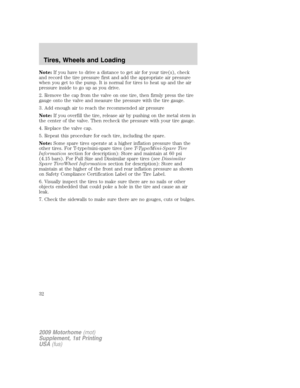 32
32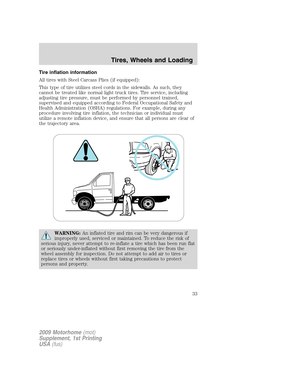 33
33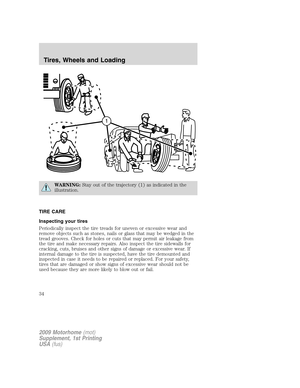 34
34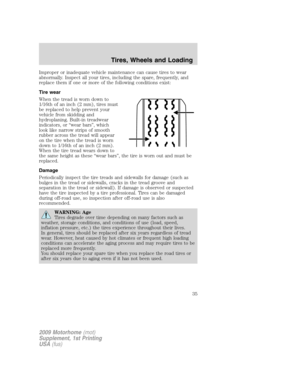 35
35 36
36 37
37 38
38 39
39 40
40 41
41 42
42 43
43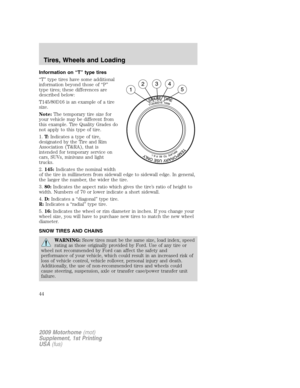 44
44 45
45 46
46 47
47 48
48 49
49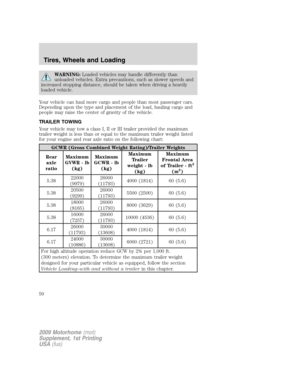 50
50 51
51 52
52 53
53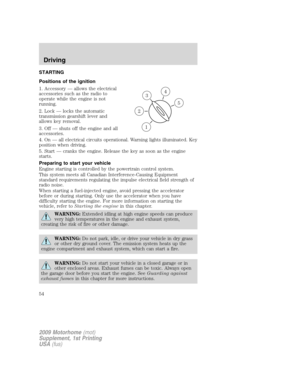 54
54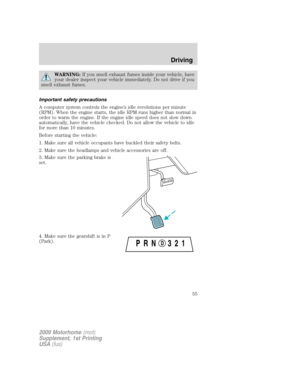 55
55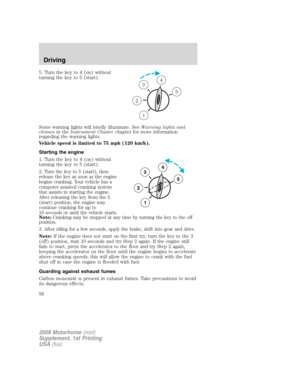 56
56 57
57 58
58 59
59 60
60 61
61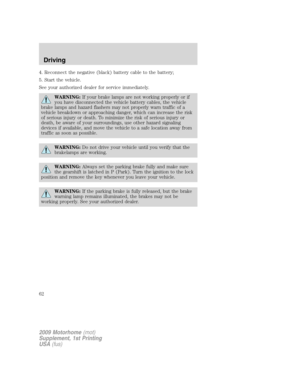 62
62 63
63 64
64 65
65 66
66 67
67 68
68 69
69 70
70 71
71 72
72 73
73 74
74 75
75 76
76 77
77 78
78 79
79 80
80 81
81 82
82 83
83 84
84 85
85 86
86 87
87 88
88 89
89 90
90 91
91 92
92 93
93 94
94 95
95 96
96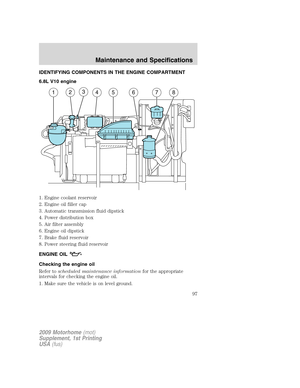 97
97 98
98 99
99 100
100 101
101 102
102 103
103 104
104 105
105 106
106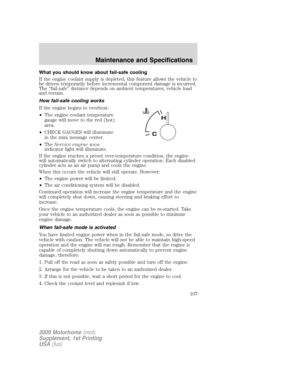 107
107 108
108 109
109 110
110 111
111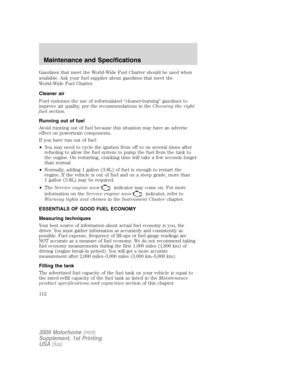 112
112 113
113 114
114 115
115 116
116 117
117 118
118 119
119 120
120 121
121 122
122 123
123 124
124 125
125 126
126 127
127 128
128 129
129 130
130 131
131 132
132 133
133 134
134 135
135