2009 FIAT SEDICI warning lights
[x] Cancel search: warning lightsPage 17 of 270
16
The turn signal lights will flash once when
the doors are locked and then the turn
signal lights will flash once again when the
doors are locked with the dead lock sys-
tem.
Keyless unlocking/locking
operation
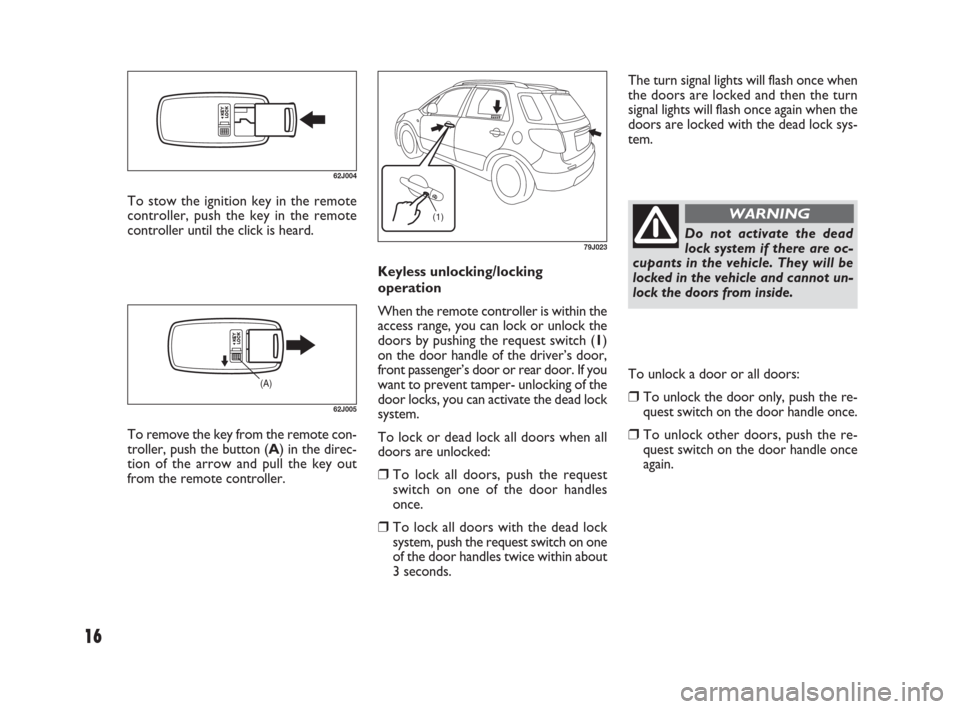
When the remote controller is within the
access range, you can lock or unlock the
doors by pushing the request switch (1)
on the door handle of the driver’s door,
front passenger’s door or rear door. If you
want to prevent tamper- unlocking of the
door locks, you can activate the dead lock
system.
To lock or dead lock all doors when all
doors are unlocked:
❒To lock all doors, push the request
switch on one of the door handles
once.
❒To lock all doors with the dead lock
system, push the request switch on one
of the door handles twice within about
3 seconds.
(1)
79J023Do not activate the dead
lock system if there are oc-
cupants in the vehicle. They will be
locked in the vehicle and cannot un-
lock the doors from inside.
WARNING
To unlock a door or all doors:
❒To unlock the door only, push the re-
quest switch on the door handle once.
❒To unlock other doors, push the re-
quest switch on the door handle once
again. To stow the ignition key in the remote
controller, push the key in the remote
controller until the click is heard.
62J004
(A)
62J005
To remove the key from the remote con-
troller, push the button (A) in the direc-
tion of the arrow and pull the key out
from the remote controller.
009-056 SEDICI LUM FL GB 1E 19-06-2009 14:11 Pagina 16
Page 20 of 270
19
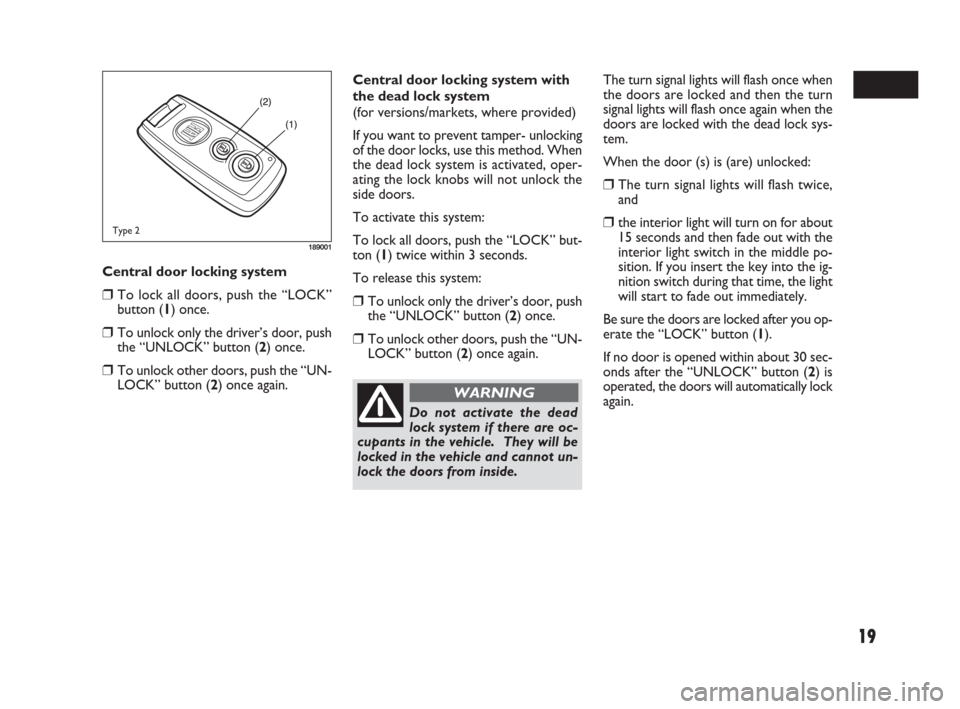
Central door locking system
❒To lock all doors, push the “LOCK”
button (1) once.
❒To unlock only the driver’s door, push
the “UNLOCK” button (2) once.
❒To unlock other doors, push the “UN-
LOCK” button (2) once again.
189001
Type 2
The turn signal lights will flash once when
the doors are locked and then the turn
signal lights will flash once again when the
doors are locked with the dead lock sys-
tem.
When the door (s) is (are) unlocked:
❒The turn signal lights will flash twice,
and
❒the interior light will turn on for about
15 seconds and then fade out with the
interior light switch in the middle po-
sition. If you insert the key into the ig-
nition switch during that time, the light
will start to fade out immediately.
Be sure the doors are locked after you op-
erate the “LOCK” button (1).
If no door is opened within about 30 sec-
onds after the “UNLOCK” button (2) is
operated, the doors will automatically lock
again. Central door locking system with
the dead lock system
(for versions/markets, where provided)
If you want to prevent tamper- unlocking
of the door locks, use this method. When
the dead lock system is activated, oper-
ating the lock knobs will not unlock the
side doors.
To activate this system:
To lock all doors, push the “LOCK” but-
ton (1) twice within 3 seconds.
To release this system:
❒To unlock only the driver’s door, push
the “UNLOCK” button (2) once.
❒To unlock other doors, push the “UN-
LOCK” button (2) once again.
Do not activate the dead
lock system if there are oc-
cupants in the vehicle. They will be
locked in the vehicle and cannot un-
lock the doors from inside.
WARNING
009-056 SEDICI LUM FL GB 1E 19-06-2009 14:11 Pagina 19
Page 28 of 270
27
MIRRORS
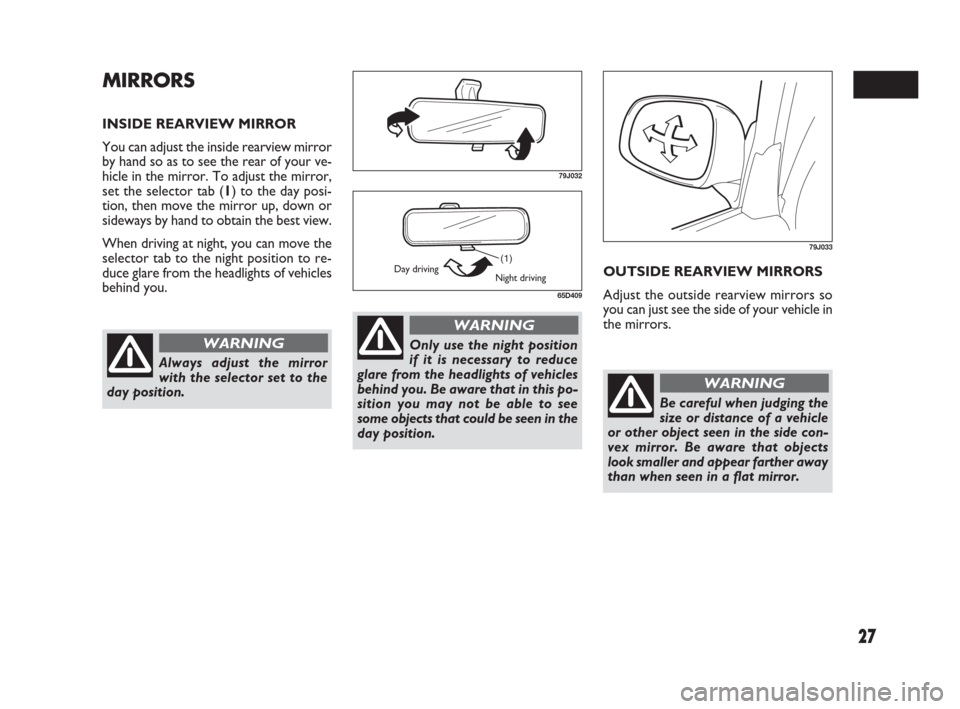
INSIDE REARVIEW MIRROR
You can adjust the inside rearview mirror
by hand so as to see the rear of your ve-
hicle in the mirror. To adjust the mirror,
set the selector tab (1) to the day posi-
tion, then move the mirror up, down or
sideways by hand to obtain the best view.
When driving at night, you can move the
selector tab to the night position to re-
duce glare from the headlights of vehicles
behind you.
79J032
(1)
65D409
Day driving
Night driving
Always adjust the mirror
with the selector set to the
day position.
WARNINGOnly use the night position
if it is necessary to reduce
glare from the headlights of vehicles
behind you. Be aware that in this po-
sition you may not be able to see
some objects that could be seen in the
day position.
WARNING
OUTSIDE REARVIEW MIRRORS
Adjust the outside rearview mirrors so
you can just see the side of your vehicle in
the mirrors.
79J033
Be careful when judging the
size or distance of a vehicle
or other object seen in the side con-
vex mirror. Be aware that objects
look smaller and appear farther away
than when seen in a flat mirror.
WARNING
009-056 SEDICI LUM FL GB 1E 19-06-2009 14:11 Pagina 27
Page 72 of 270
71
I I
N N
S S
T T
R R
U U
M M
E E
N N
T T
P P
A A
N N
E E
L L
60G406
INSTRUMENT PANEL......................................................... 72
INSTRUMENT CLUSTER.................................................... 73
WARNING AND INDICATOR LIGHTS........................ 74
SPEEDOMETER..................................................................... 83
TACHOMETER ..................................................................... 84
FUEL GAUGE......................................................................... 84
TEMPERATURE GAUGE/OVERHEAT INDICATOR
LIGHT (for Diesel Engine Model) ...................................... 85
INFORMATION DISPLAY.................................................. 85
HAZARD WARNING SWITCH ....................................... 91FRONT FOG LIGHT SWITCH
(for versions/markets, where provided)........................... 91
“ESP OFF” SWITCH
(for versions/markets, where provided)........................... 92
2WD/ 4WD SWITCH
(for versions/markets, where provided)........................... 92
HEATED REAR WINDOW AND HEATED OUTSIDE
REARVIEW MIRRORS SWITCH
(for versions/markets, where provided)........................... 93
HEADLIGHT LEVELING SWITCH
(for versions/markets, where provided)........................... 94
GLOVE BOX.......................................................................... 94
CIGARETTE LIGHTER AND ASHTRAY
(for versions/markets, where provided)........................... 95
THEFT DETERRENT LIGHT.............................................. 95
HEATING AND AIR CONDITIONING SYSTEM ........ 96
HEATING SYSTEM
(for versions/markets, where provided)........................... 97
MANUAL HEATING AND AIR CONDITIONING
SYSTEM (for versions/markets, where provided) ......... 100
AUTOMATIC HEATING AND AIR CONDITIONING
SYSTEM (Climate Control)
(for versions/markets, where provided)........................... 104
AUDIO SYSTEMS.................................................................. 110
3
071-128 SEDICI LUM FL GB 1E 19-06-2009 12:05 Pagina 71
Page 74 of 270
73
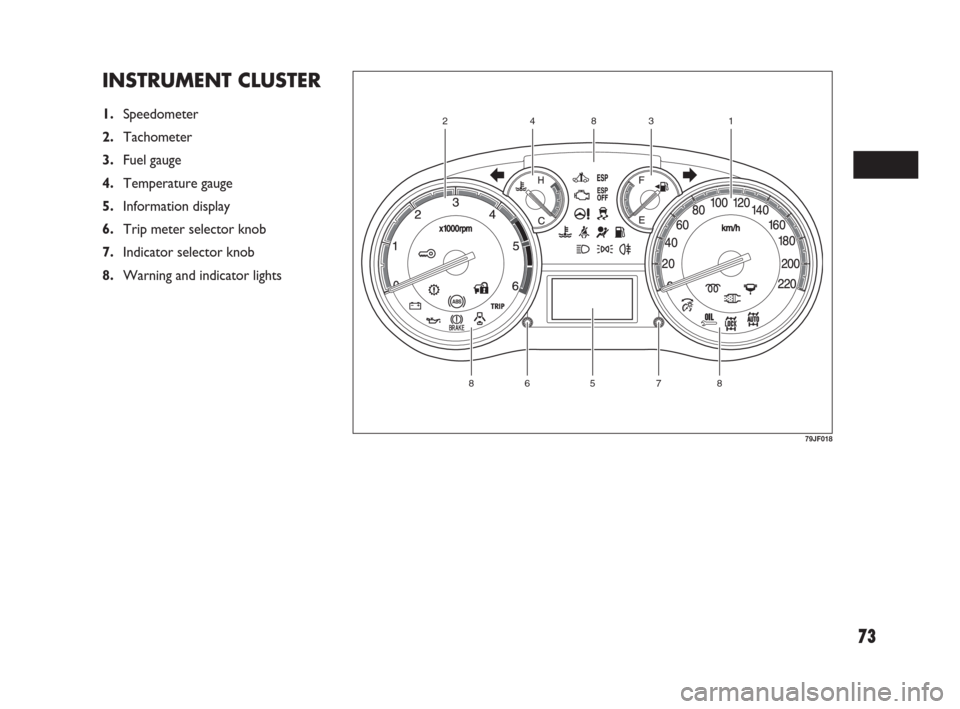
INSTRUMENT CLUSTER
1.Speedometer
2.Tachometer
3.Fuel gauge
4.Temperature gauge
5.Information display
6.Trip meter selector knob
7.Indicator selector knob
8.Warning and indicator lights
57886
12384
79JF018
071-128 SEDICI LUM FL GB 1E 19-06-2009 12:05 Pagina 73
Page 75 of 270
74
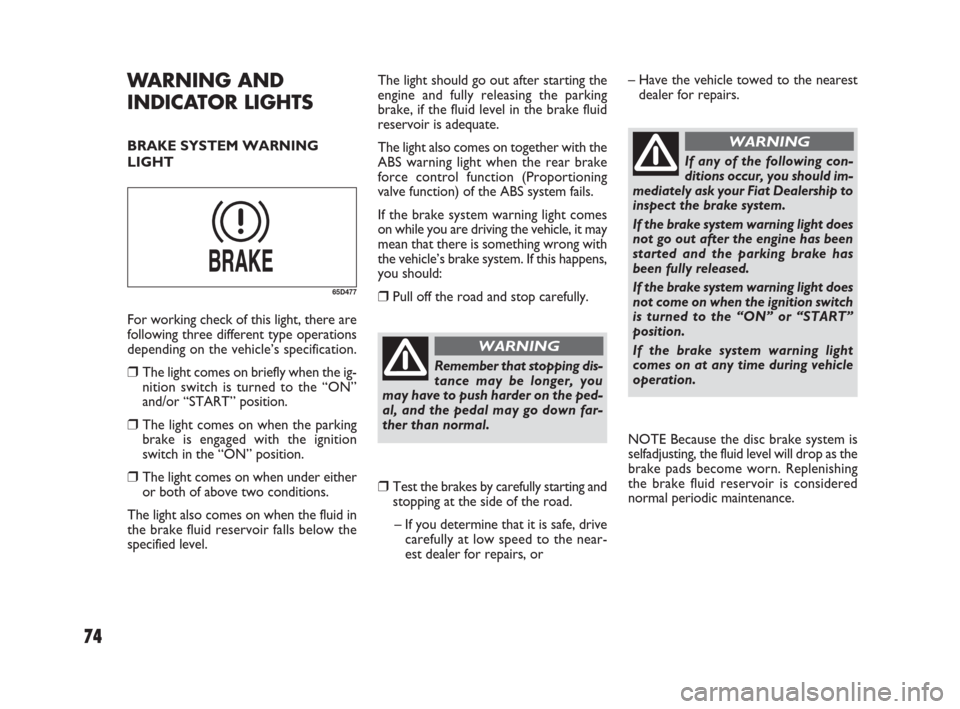
The light should go out after starting the
engine and fully releasing the parking
brake, if the fluid level in the brake fluid
reservoir is adequate.
The light also comes on together with the
ABS warning light when the rear brake
force control function (Proportioning
valve function) of the ABS system fails.
If the brake system warning light comes
on while you are driving the vehicle, it may
mean that there is something wrong with
the vehicle’s brake system. If this happens,
you should:
❒Pull off the road and stop carefully.
❒Test the brakes by carefully starting and
stopping at the side of the road.
– If you determine that it is safe, drive
carefully at low speed to the near-
est dealer for repairs, or
WARNING AND
INDICATOR LIGHTS
BRAKE SYSTEM WARNING
LIGHT
65D477
For working check of this light, there are
following three different type operations
depending on the vehicle’s specification.
❒The light comes on briefly when the ig-
nition switch is turned to the “ON”
and/or “START” position.
❒The light comes on when the parking
brake is engaged with the ignition
switch in the “ON” position.
❒The light comes on when under either
or both of above two conditions.
The light also comes on when the fluid in
the brake fluid reservoir falls below the
specified level.
Remember that stopping dis-
tance may be longer, you
may have to push harder on the ped-
al, and the pedal may go down far-
ther than normal.
WARNING
If any of the following con-
ditions occur, you should im-
mediately ask your Fiat Dealership to
inspect the brake system.
If the brake system warning light does
not go out after the engine has been
started and the parking brake has
been fully released.
If the brake system warning light does
not come on when the ignition switch
is turned to the “ON” or “START”
position.
If the brake system warning light
comes on at any time during vehicle
operation.
WARNING
– Have the vehicle towed to the nearest
dealer for repairs.
NOTE Because the disc brake system is
selfadjusting, the fluid level will drop as the
brake pads become worn. Replenishing
the brake fluid reservoir is considered
normal periodic maintenance.
071-128 SEDICI LUM FL GB 1E 19-06-2009 12:05 Pagina 74
Page 82 of 270
81
MAIN BEAM (HIGH BEAM)
INDICATOR LIGHT
50G055
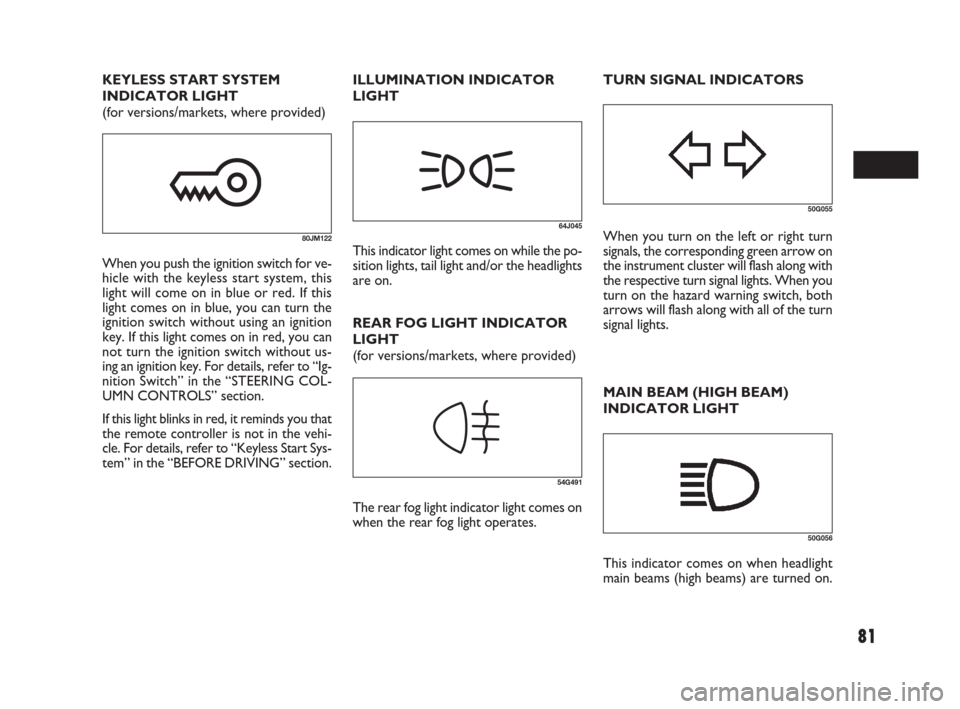
64J045When you turn on the left or right turn
signals, the corresponding green arrow on
the instrument cluster will flash along with
the respective turn signal lights. When you
turn on the hazard warning switch, both
arrows will flash along with all of the turn
signal lights.
50G056
This indicator comes on when headlight
main beams (high beams) are turned on. TURN SIGNAL INDICATORS KEYLESS START SYSTEM
INDICATOR LIGHT
(for versions/markets, where provided)
80JM122
When you push the ignition switch for ve-
hicle with the keyless start system, this
light will come on in blue or red. If this
light comes on in blue, you can turn the
ignition switch without using an ignition
key. If this light comes on in red, you can
not turn the ignition switch without us-
ing an ignition key. For details, refer to “Ig-
nition Switch” in the “STEERING COL-
UMN CONTROLS” section.
If this light blinks in red, it reminds you that
the remote controller is not in the vehi-
cle. For details, refer to “Keyless Start Sys-
tem” in the “BEFORE DRIVING” section.REAR FOG LIGHT INDICATOR
LIGHT
(for versions/markets, where provided)
54G491
The rear fog light indicator light comes on
when the rear fog light operates. ILLUMINATION INDICATOR
LIGHT
This indicator light comes on while the po-
sition lights, tail light and/or the headlights
are on.
071-128 SEDICI LUM FL GB 1E 19-06-2009 12:05 Pagina 81
Page 91 of 270
90
Do not attempt to adjust the
display while driving.
If you attempt to adjust the display
while driving, you could lose control
of the vehicle.
WARNING
NOTE
❒If you push the indicator selector knob
or do not turn the knob for more than
5 seconds while activating the illumi-
nation control, the illumination con-
trol will be canceled automatically and
the display (D) will show the odome-
ter indication.
❒You can change the brightness when
the position lights or headlights are on
even if the ignition switch is in the
“ACC” or “LOCK” position.
❒When you reconnect the negative (–)
terminal to the battery, the brightness
of the instrument panel lights will be
reinitialized. Readjust the brightness
according to your preference.
NOTE If you select the highest brightness
level when the position lights or headlights
are on, the instrument panel lights are not
dimmed.
Clock (for versions/markets, where
provided)
When the ignition switch is in the “ON”
position, the display (E) shows the time.
80JM039
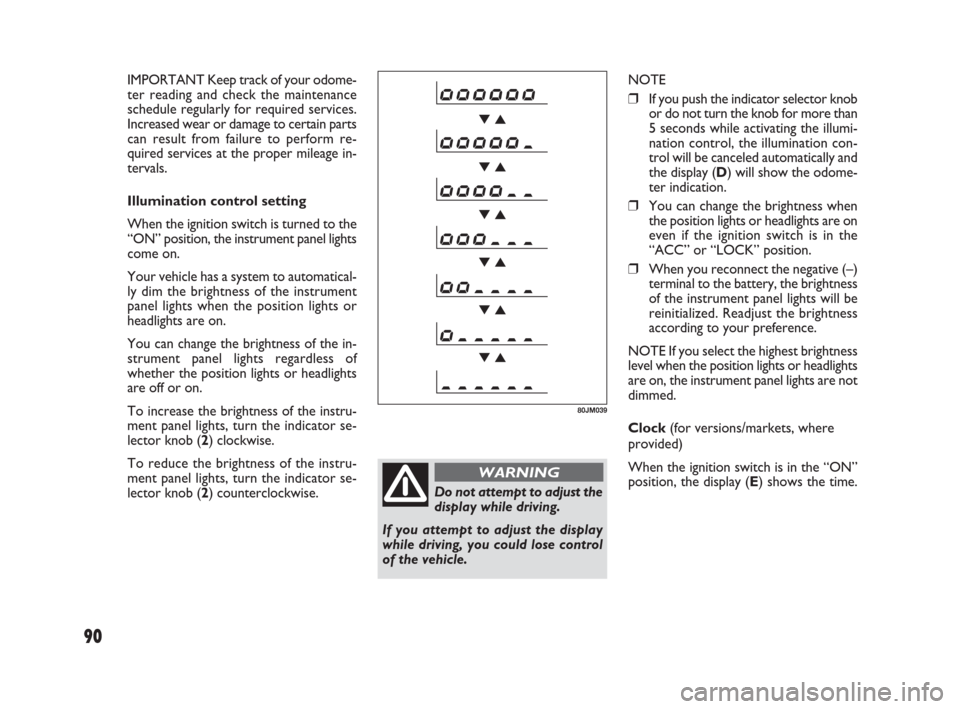
IMPORTANT Keep track of your odome-
ter reading and check the maintenance
schedule regularly for required services.
Increased wear or damage to certain parts
can result from failure to perform re-
quired services at the proper mileage in-
tervals.
Illumination control setting
When the ignition switch is turned to the
“ON” position, the instrument panel lights
come on.
Your vehicle has a system to automatical-
ly dim the brightness of the instrument
panel lights when the position lights or
headlights are on.
You can change the brightness of the in-
strument panel lights regardless of
whether the position lights or headlights
are off or on.
To increase the brightness of the instru-
ment panel lights, turn the indicator se-
lector knob (2) clockwise.
To reduce the brightness of the instru-
ment panel lights, turn the indicator se-
lector knob (2) counterclockwise.
071-128 SEDICI LUM FL GB 1E 19-06-2009 12:05 Pagina 90