2009 FIAT SEDICI set clock
[x] Cancel search: set clockPage 86 of 270
85
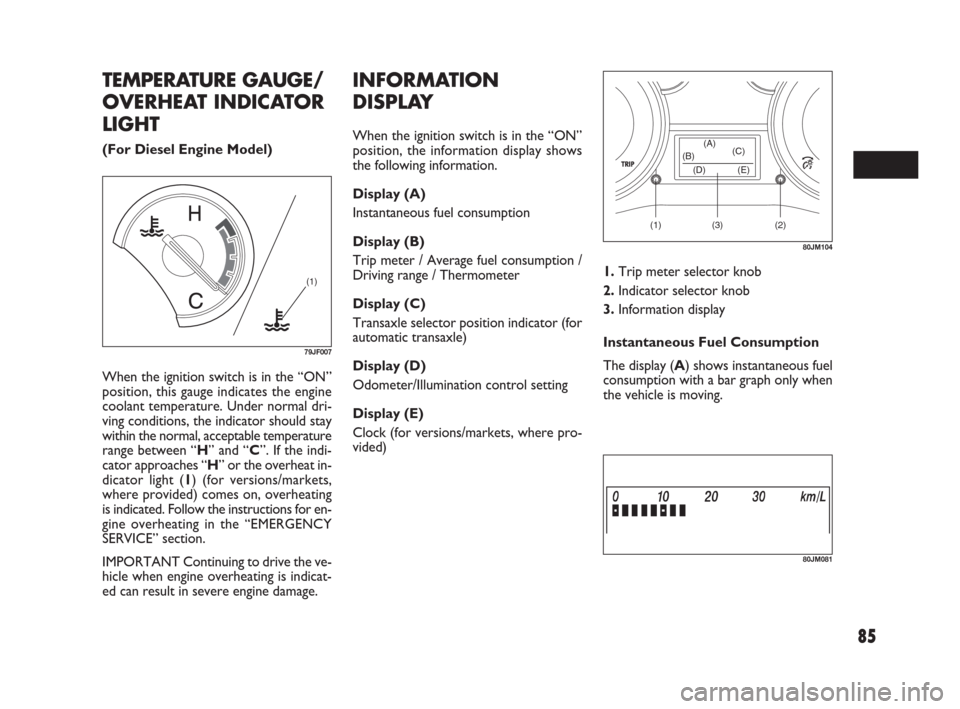
When the ignition switch is in the “ON”
position, this gauge indicates the engine
coolant temperature. Under normal dri-
ving conditions, the indicator should stay
within the normal, acceptable temperature
range between “H” and “C”. If the indi-
cator approaches “H” or the overheat in-
dicator light (1) (for versions/markets,
where provided) comes on, overheating
is indicated. Follow the instructions for en-
gine overheating in the “EMERGENCY
SERVICE” section.
IMPORTANT Continuing to drive the ve-
hicle when engine overheating is indicat-
ed can result in severe engine damage.
(1)
79JF007
(1) (2)(3) (D) (B)(A)
(C)
(E)
80JM104
TEMPERATURE GAUGE/
OVERHEAT INDICATOR
LIGHT
(For Diesel Engine Model)
INFORMATION
DISPLAY
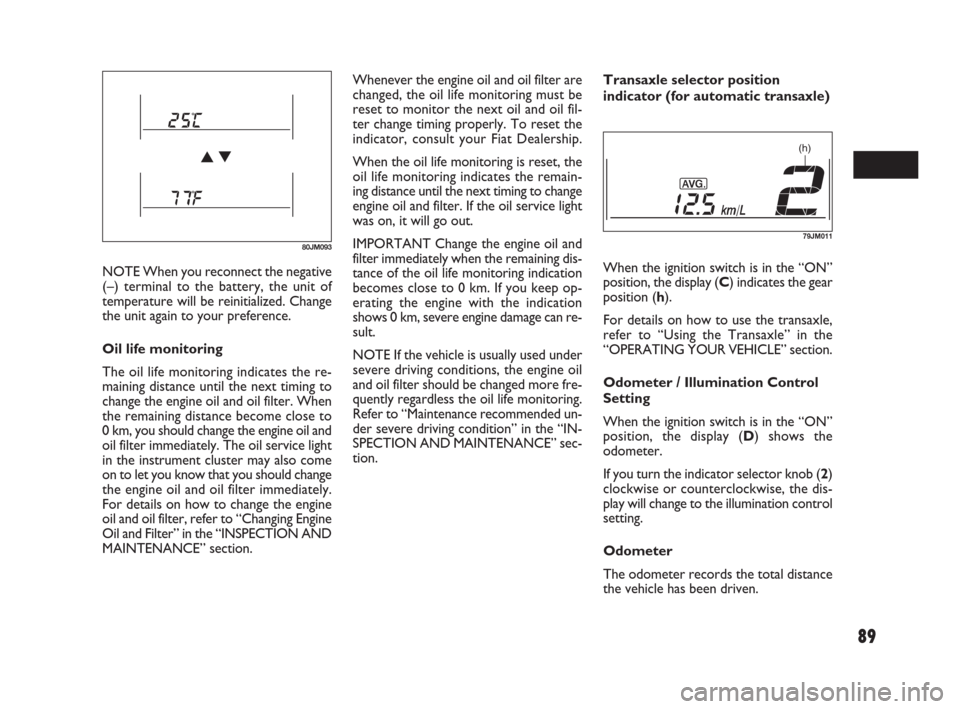
When the ignition switch is in the “ON”
position, the information display shows
the following information.
Display (A)
Instantaneous fuel consumption
Display (B)
Trip meter / Average fuel consumption /
Driving range / Thermometer
Display (C)
Transaxle selector position indicator (for
automatic transaxle)
Display (D)
Odometer/Illumination control setting
Display (E)
Clock (for versions/markets, where pro-
vided)
80JM081
1.Trip meter selector knob
2.Indicator selector knob
3.Information display
Instantaneous Fuel Consumption
The display (A) shows instantaneous fuel
consumption with a bar graph only when
the vehicle is moving.
071-128 SEDICI LUM FL GB 1E 19-06-2009 12:05 Pagina 85
Page 90 of 270
89
NOTE When you reconnect the negative
(–) terminal to the battery, the unit of
temperature will be reinitialized. Change
the unit again to your preference.
Oil life monitoring
The oil life monitoring indicates the re-
maining distance until the next timing to
change the engine oil and oil filter. When
the remaining distance become close to
0 km, you should change the engine oil and
oil filter immediately. The oil service light
in the instrument cluster may also come
on to let you know that you should change
the engine oil and oil filter immediately.
For details on how to change the engine
oil and oil filter, refer to “Changing Engine
Oil and Filter” in the “INSPECTION AND
MAINTENANCE” section.Whenever the engine oil and oil filter are
changed, the oil life monitoring must be
reset to monitor the next oil and oil fil-
ter change timing properly. To reset the
indicator, consult your Fiat Dealership.
When the oil life monitoring is reset, the
oil life monitoring indicates the remain-
ing distance until the next timing to change
engine oil and filter. If the oil service light
was on, it will go out.
IMPORTANT Change the engine oil and
filter immediately when the remaining dis-
tance of the oil life monitoring indication
becomes close to 0 km. If you keep op-
erating the engine with the indication
shows 0 km, severe engine damage can re-
sult.
NOTE If the vehicle is usually used under
severe driving conditions, the engine oil
and oil filter should be changed more fre-
quently regardless the oil life monitoring.
Refer to “Maintenance recommended un-
der severe driving condition” in the “IN-
SPECTION AND MAINTENANCE” sec-
tion.Transaxle selector position
indicator (for automatic transaxle)
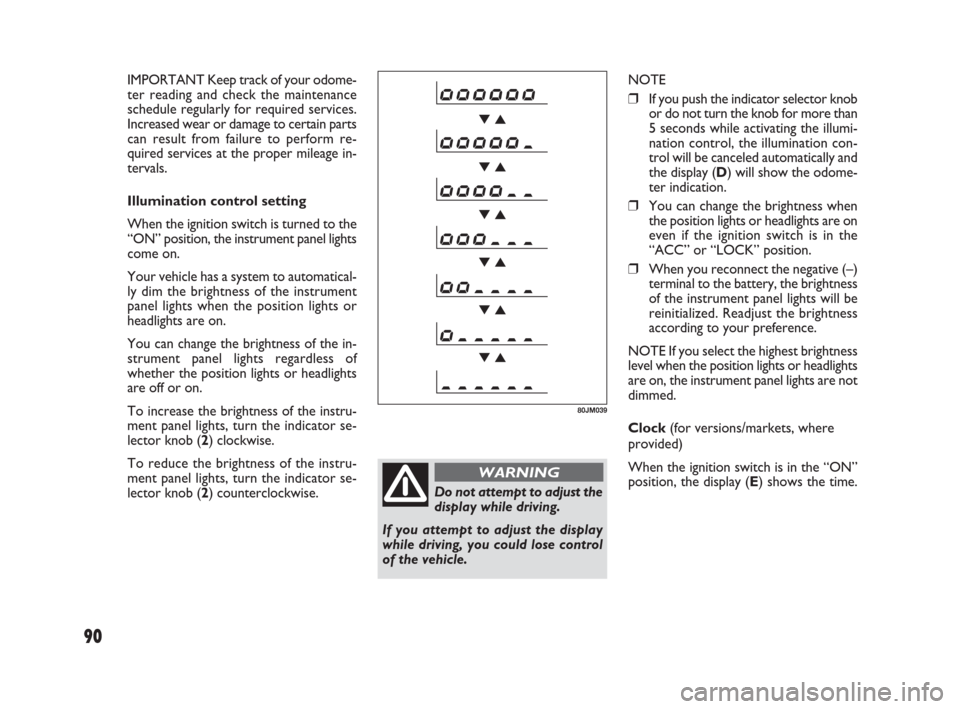
When the ignition switch is in the “ON”
position, the display (C) indicates the gear
position (h).
For details on how to use the transaxle,
refer to “Using the Transaxle” in the
“OPERATING YOUR VEHICLE” section.
Odometer / Illumination Control
Setting
When the ignition switch is in the “ON”
position, the display (D) shows the
odometer.
If you turn the indicator selector knob (2)
clockwise or counterclockwise, the dis-
play will change to the illumination control
setting.
Odometer
The odometer records the total distance
the vehicle has been driven.
80JM093
(h)
79JM011
071-128 SEDICI LUM FL GB 1E 19-06-2009 12:05 Pagina 89
Page 91 of 270
90
Do not attempt to adjust the
display while driving.
If you attempt to adjust the display
while driving, you could lose control
of the vehicle.
WARNING
NOTE
❒If you push the indicator selector knob
or do not turn the knob for more than
5 seconds while activating the illumi-
nation control, the illumination con-
trol will be canceled automatically and
the display (D) will show the odome-
ter indication.
❒You can change the brightness when
the position lights or headlights are on
even if the ignition switch is in the
“ACC” or “LOCK” position.
❒When you reconnect the negative (–)
terminal to the battery, the brightness
of the instrument panel lights will be
reinitialized. Readjust the brightness
according to your preference.
NOTE If you select the highest brightness
level when the position lights or headlights
are on, the instrument panel lights are not
dimmed.
Clock (for versions/markets, where
provided)
When the ignition switch is in the “ON”
position, the display (E) shows the time.
80JM039
IMPORTANT Keep track of your odome-
ter reading and check the maintenance
schedule regularly for required services.
Increased wear or damage to certain parts
can result from failure to perform re-
quired services at the proper mileage in-
tervals.
Illumination control setting
When the ignition switch is turned to the
“ON” position, the instrument panel lights
come on.
Your vehicle has a system to automatical-
ly dim the brightness of the instrument
panel lights when the position lights or
headlights are on.
You can change the brightness of the in-
strument panel lights regardless of
whether the position lights or headlights
are off or on.
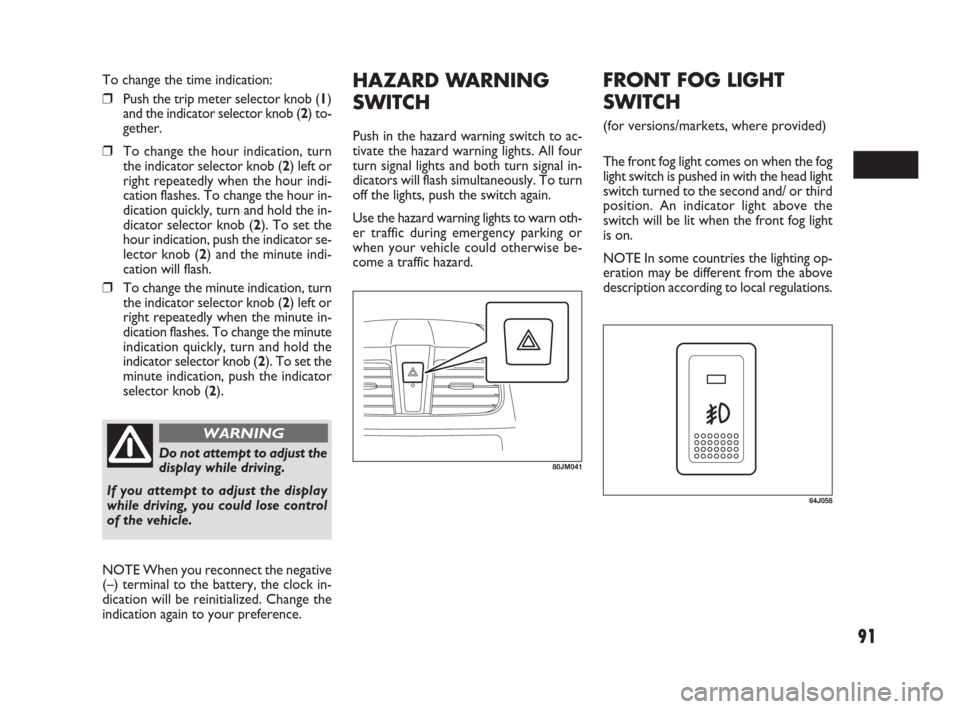
To increase the brightness of the instru-
ment panel lights, turn the indicator se-
lector knob (2) clockwise.
To reduce the brightness of the instru-
ment panel lights, turn the indicator se-
lector knob (2) counterclockwise.
071-128 SEDICI LUM FL GB 1E 19-06-2009 12:05 Pagina 90
Page 92 of 270
91
HAZARD WARNING
SWITCH
Push in the hazard warning switch to ac-
tivate the hazard warning lights. All four
turn signal lights and both turn signal in-
dicators will flash simultaneously. To turn
off the lights, push the switch again.
Use the hazard warning lights to warn oth-
er traffic during emergency parking or
when your vehicle could otherwise be-
come a traffic hazard.
80JM041Do not attempt to adjust the
display while driving.
If you attempt to adjust the display
while driving, you could lose control
of the vehicle.
WARNING
To change the time indication:
❒Push the trip meter selector knob (1)
and the indicator selector knob (2) to-
gether.
❒To change the hour indication, turn
the indicator selector knob (2) left or
right repeatedly when the hour indi-
cation flashes. To change the hour in-
dication quickly, turn and hold the in-
dicator selector knob (2). To set the
hour indication, push the indicator se-
lector knob (2) and the minute indi-
cation will flash.
❒To change the minute indication, turn
the indicator selector knob (2) left or
right repeatedly when the minute in-
dication flashes. To change the minute
indication quickly, turn and hold the
indicator selector knob (2). To set the
minute indication, push the indicator
selector knob (2).
NOTE When you reconnect the negative
(–) terminal to the battery, the clock in-
dication will be reinitialized. Change the
indication again to your preference.
64J058
FRONT FOG LIGHT
SWITCH
(for versions/markets, where provided)
The front fog light comes on when the fog
light switch is pushed in with the head light
switch turned to the second and/ or third
position. An indicator light above the
switch will be lit when the front fog light
is on.
NOTE In some countries the lighting op-
eration may be different from the above
description according to local regulations.
071-128 SEDICI LUM FL GB 1E 19-06-2009 12:05 Pagina 91
Page 233 of 270
232
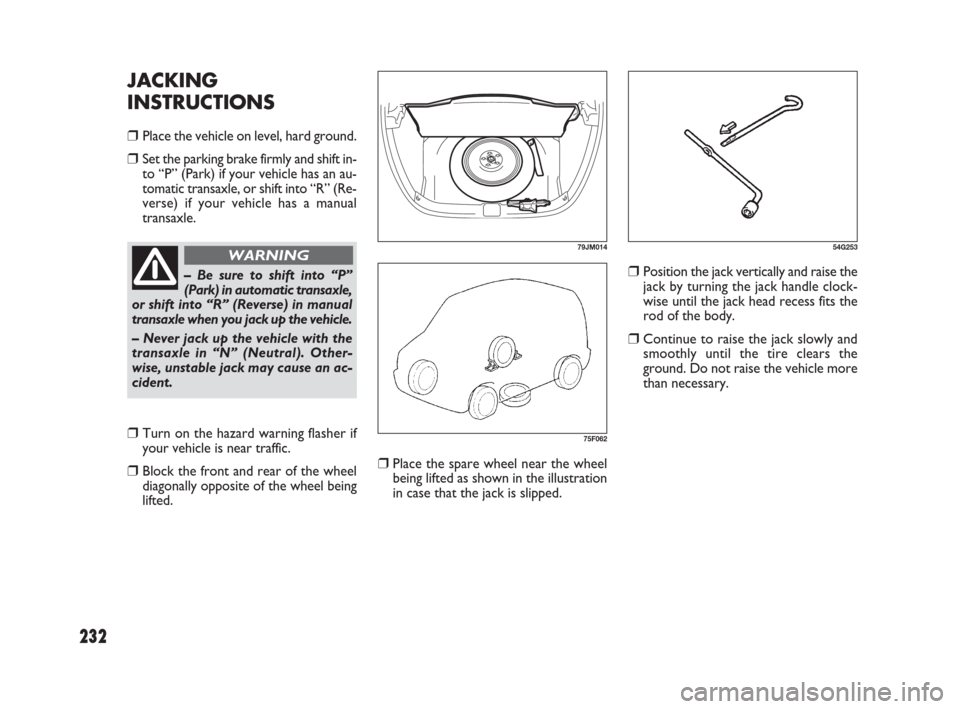
❒Place the spare wheel near the wheel
being lifted as shown in the illustration
in case that the jack is slipped.
❒Position the jack vertically and raise the
jack by turning the jack handle clock-
wise until the jack head recess fits the
rod of the body.
❒Continue to raise the jack slowly and
smoothly until the tire clears the
ground. Do not raise the vehicle more
than necessary.
JACKING
INSTRUCTIONS
❒Place the vehicle on level, hard ground.
❒Set the parking brake firmly and shift in-
to “P” (Park) if your vehicle has an au-
tomatic transaxle, or shift into “R” (Re-
verse) if your vehicle has a manual
transaxle.
79JM014
75F062
– Be sure to shift into “P”
(Park) in automatic transaxle,
or shift into “R” (Reverse) in manual
transaxle when you jack up the vehicle.
– Never jack up the vehicle with the
transaxle in “N” (Neutral). Other-
wise, unstable jack may cause an ac-
cident.
WARNING
❒Turn on the hazard warning flasher if
your vehicle is near traffic.
❒Block the front and rear of the wheel
diagonally opposite of the wheel being
lifted.
54G253
231-238 SEDICI LUM FL GB 1E 19-06-2009 11:06 Pagina 232