2009 FIAT SEDICI engine
[x] Cancel search: enginePage 90 of 270
89
NOTE When you reconnect the negative
(–) terminal to the battery, the unit of
temperature will be reinitialized. Change
the unit again to your preference.
Oil life monitoring
The oil life monitoring indicates the re-
maining distance until the next timing to
change the engine oil and oil filter. When
the remaining distance become close to
0 km, you should change the engine oil and
oil filter immediately. The oil service light
in the instrument cluster may also come
on to let you know that you should change
the engine oil and oil filter immediately.
For details on how to change the engine
oil and oil filter, refer to “Changing Engine
Oil and Filter” in the “INSPECTION AND
MAINTENANCE” section.Whenever the engine oil and oil filter are
changed, the oil life monitoring must be
reset to monitor the next oil and oil fil-
ter change timing properly. To reset the
indicator, consult your Fiat Dealership.
When the oil life monitoring is reset, the
oil life monitoring indicates the remain-
ing distance until the next timing to change
engine oil and filter. If the oil service light
was on, it will go out.
IMPORTANT Change the engine oil and
filter immediately when the remaining dis-
tance of the oil life monitoring indication
becomes close to 0 km. If you keep op-
erating the engine with the indication
shows 0 km, severe engine damage can re-
sult.
NOTE If the vehicle is usually used under
severe driving conditions, the engine oil
and oil filter should be changed more fre-
quently regardless the oil life monitoring.
Refer to “Maintenance recommended un-
der severe driving condition” in the “IN-
SPECTION AND MAINTENANCE” sec-
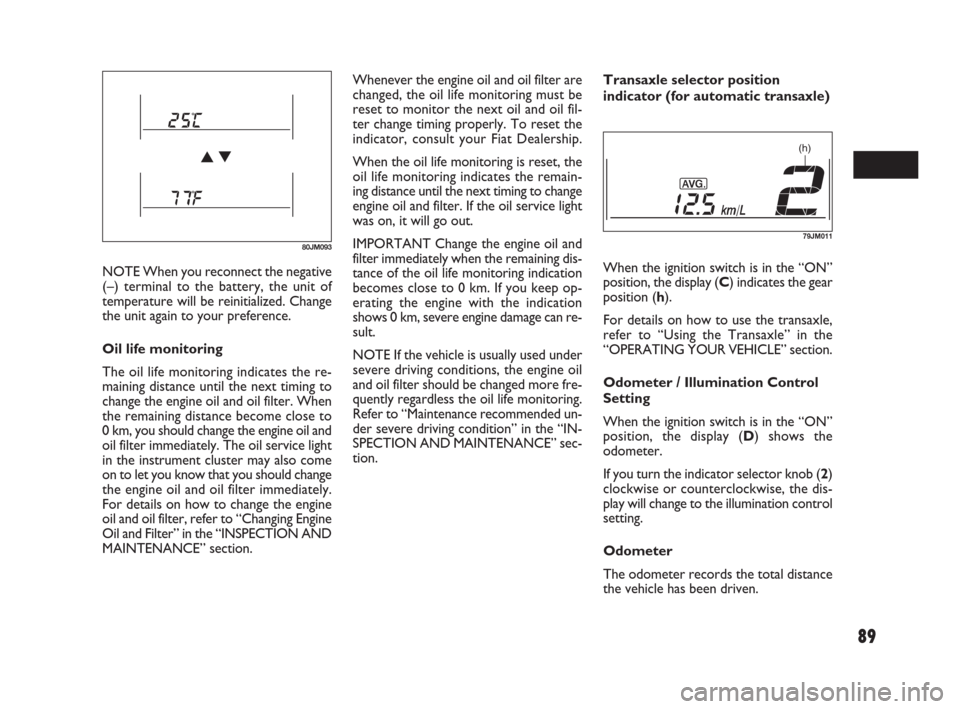
tion.Transaxle selector position
indicator (for automatic transaxle)
When the ignition switch is in the “ON”
position, the display (C) indicates the gear
position (h).
For details on how to use the transaxle,
refer to “Using the Transaxle” in the
“OPERATING YOUR VEHICLE” section.
Odometer / Illumination Control
Setting
When the ignition switch is in the “ON”
position, the display (D) shows the
odometer.
If you turn the indicator selector knob (2)
clockwise or counterclockwise, the dis-
play will change to the illumination control
setting.
Odometer
The odometer records the total distance
the vehicle has been driven.
80JM093
(h)
79JM011
071-128 SEDICI LUM FL GB 1E 19-06-2009 12:05 Pagina 89
Page 94 of 270
93
HEATED REAR
WINDOW AND HEATED
OUTSIDE REARVIEW
MIRRORS SWITCH
(for versions/markets, where provided)
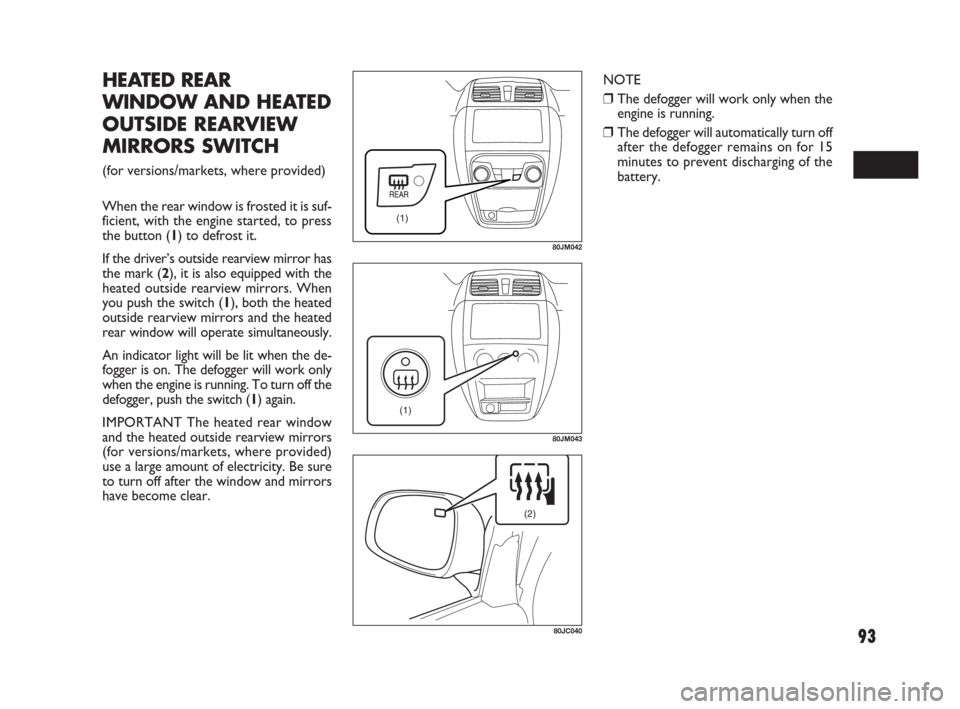
When the rear window is frosted it is suf-
ficient, with the engine started, to press
the button (1) to defrost it.
If the driver’s outside rearview mirror has
the mark (2), it is also equipped with the
heated outside rearview mirrors. When
you push the switch (1), both the heated
outside rearview mirrors and the heated
rear window will operate simultaneously.
An indicator light will be lit when the de-
fogger is on. The defogger will work only
when the engine is running. To turn off the
defogger, push the switch (1) again.
IMPORTANT The heated rear window
and the heated outside rearview mirrors
(for versions/markets, where provided)
use a large amount of electricity. Be sure
to turn off after the window and mirrors
have become clear.
(1)
80JM042
(1)
80JM043
NOTE
❒The defogger will work only when the
engine is running.
❒The defogger will automatically turn off
after the defogger remains on for 15
minutes to prevent discharging of the
battery.
(2)
80JC040
071-128 SEDICI LUM FL GB 1E 19-06-2009 12:05 Pagina 93
Page 103 of 270
102
Air conditioning switch (5)
To turn on the air conditioning system,
push in the “A/C” switch and set the blow-
er speed selector to a position other than
“OFF”. With this “A/ C” switch operation,
a indicator light will come on when the air
conditioning system is on. To turn off the
air conditioning system, push the “A/C”
switch again.
During operation of the air conditioner,
you may notice slight changes in engine
speed. These changes are normal, the sys-
tem is designed so that the compressor
turns on or off to maintain the desired
temperature.
Less operation of the compressor results
in better fuel economy.
SYSTEM OPERATING
INSTRUCTIONS
Natural ventilation
Select “VENTILATION” and “FRESH
AIR”, the temperature selector to the de-
sired temperature position, and the blow-
er speed selector to “OFF”. Fresh air will
flow through the vehicle during driving.Forced ventilation
The control settings are the same as for
natural ventilation except you set the
blower speed selector to a position oth-
er than “OFF”.
Normal heating (using outside air)
Select “HEAT” and “FRESH AIR”, the
temperature selector to the desired tem-
perature position and the blower speed
selector to the desired blower speed po-
sition. Setting the blower speed selector
to a higher blower speed position in-
creases heating efficiency.
Quick heating
(using recirculated air)
The control settings are the same as for
normal heating except you select “RE-
CIRCULATED AIR”. If you use this heat-
ing method for an extended period of
time, the air in the vehicle can become
contaminated and the windows can be-
come misty. Therefore, use this method
only for quick heating and change to the
normal heating method as soon as possi-
ble. Recirculated Air (g)
When this mode is selected, the indicator
light will come on, outside air is shut out
and inside air is recirculated. This mode is
suitable when driving through dusty or
polluted air such as in a tunnel, or when
attempting to quickly cool down the in-
terior.
“FRESH AIR” and “RECIRCULATED AIR”
are switched alternately each time the air
intake selector is pushed.
NOTE If you select “RECIRCULATED
AIR” for an extended period of time, the
air in the vehicle can become contami-
nated. Therefore, you should occasional-
ly select “FRESH AIR”.
071-128 SEDICI LUM FL GB 1E 19-06-2009 12:05 Pagina 102
Page 105 of 270
104
NOTE Your vehicle uses the air condi-
tioning refrigerant HFC-134a, commonly
called “R-134a”. R-134a replaced R-12
around 1993 for automotive applications.
Other refrigerants are available, including
recycled R-12, but only R-134a should be
used in your vehicle.
IMPORTANT Using the wrong refriger-
ant may damage your air conditioning sys-
tem. Use R-134a only. Do not mix or re-
place the R-134a with other refrigerants.AUTOMATIC HEATING
AND AIR
CONDITIONING
SYSTEM
(Climate Control)
(for versions/markets, where provided)
DESCRIPTION OF CONTROLS
1.Temperature selector
2.Blower speed selector
3.Air intake selector
4.Air flow selector
5.Defrost switch
6.“OFF” switch
7.Air conditioning switch
8.“AUTO” switch
9.LCD display MAINTENANCE
If you do not use the air conditioner for
a long period, such as during winter, it may
not give the best performance when you
start using it again. To help maintain op-
timum performance and durability of your
air conditioner, it needs to be run peri-
odically. Operate the air conditioner at
least once a month for one minute with
the engine idling. This circulates the re-
frigerant and oil and helps protect the in-
ternal components.
Your air conditioner is equipped with air
filters. Clean or replace them as specified
in the “Maintenance Schedule” in the “IN-
SPECTION AND MAINTENANCE” sec-
tion. Have this job done by your Fiat Deal-
ership as the lower glove box must be
lowered for this job.
071-128 SEDICI LUM FL GB 1E 19-06-2009 12:05 Pagina 104
Page 109 of 270
108
(5)
80JM050
(7)(6)
(8)(1)
80JM126
80JM051
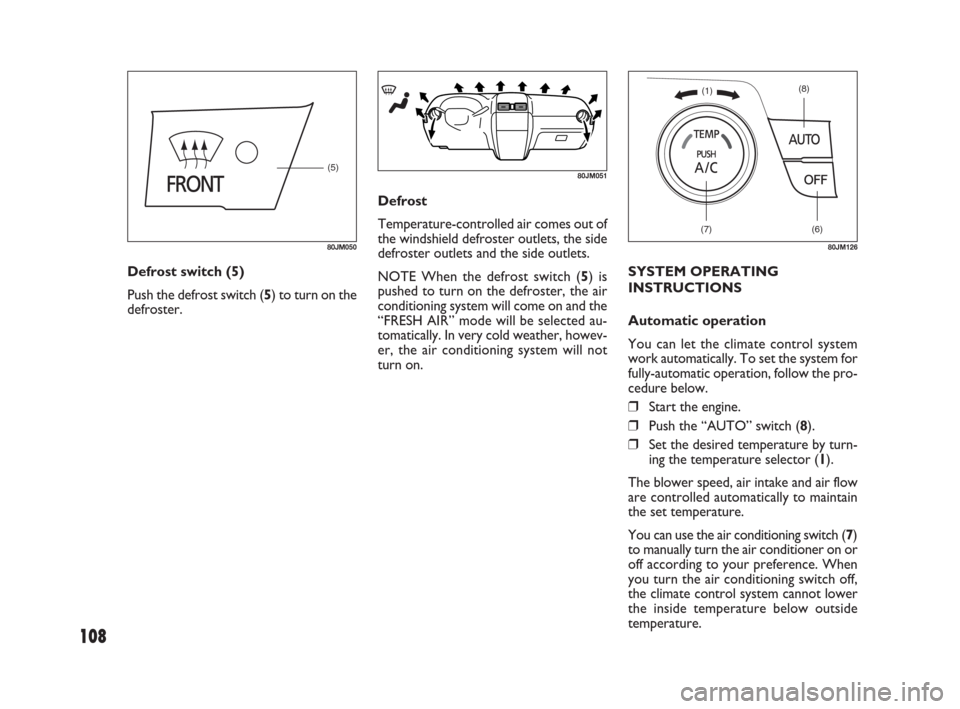
Defrost switch (5)
Push the defrost switch (5) to turn on the
defroster.Defrost
Temperature-controlled air comes out of
the windshield defroster outlets, the side
defroster outlets and the side outlets.
NOTE When the defrost switch (5) is
pushed to turn on the defroster, the air
conditioning system will come on and the
“FRESH AIR” mode will be selected au-
tomatically. In very cold weather, howev-
er, the air conditioning system will not
turn on.SYSTEM OPERATING
INSTRUCTIONS
Automatic operation
You can let the climate control system
work automatically. To set the system for
fully-automatic operation, follow the pro-
cedure below.
❒Start the engine.
❒Push the “AUTO” switch (8).
❒Set the desired temperature by turn-
ing the temperature selector (1).
The blower speed, air intake and air flow
are controlled automatically to maintain
the set temperature.
You can use the air conditioning switch (7)
to manually turn the air conditioner on or
off according to your preference. When
you turn the air conditioning switch off,
the climate control system cannot lower
the inside temperature below outside
temperature.
071-128 SEDICI LUM FL GB 1E 19-06-2009 12:05 Pagina 108
Page 111 of 270
110
AUDIO SYSTEMS
❒Driving on extremely bumpy roads
which cause severe vibrations may
cause sound to skip.
❒This unit uses a precision mechanism.
Even in the event that trouble arises,
never open the case, disassemble the
unit, or lubricate the rotating parts.
Please bring the unit to an authorized
Fiat Dealership. MAINTENANCE
If you do not use the air conditioner for
a long period, such as during winter, it may
not give the best performance when you
start using it again. To help maintain op-
timum performance and durability of your
air conditioner, it needs to be run peri-
odically. Operate the air conditioner at
least once a month for one minute with
the engine idling. This circulates the re-
frigerant and oil and helps protect the in-
ternal components.
Your air conditioner is equipped with air
filters. Clean or replace them as specified
in the “Maintenance Schedule” in the “IN-
SPECTION AND MAINTENANCE” sec-
tion. Have this job done by your Fiat Deal-
ership as the lower glove box must be
lowered for this job.
NOTE Your vehicle uses the air condi-
tioning refrigerant HFC-134a, commonly
called “R-134a”. R-134a replaced R-12
around 1993 for automotive applications.
Other refrigerants are available, including
recycled R-12, but only R-134a should be
used in your vehicle.
IMPORTANT Using the wrong refriger-
ant may damage your air conditioning sys-
tem. Use R-134a only. Do not mix or re-
place the R-134a with other refrigerants.
79J188
Too high a volume when dri-
ving can put the driver’s life
at risk and that of other people.
Therefore the volume should always
be adjusted in such a way that it is al-
ways possible to hear the noises of
the surrounding environment (e.g.:
horns, ambulance, police sirens, etc.).
WARNING
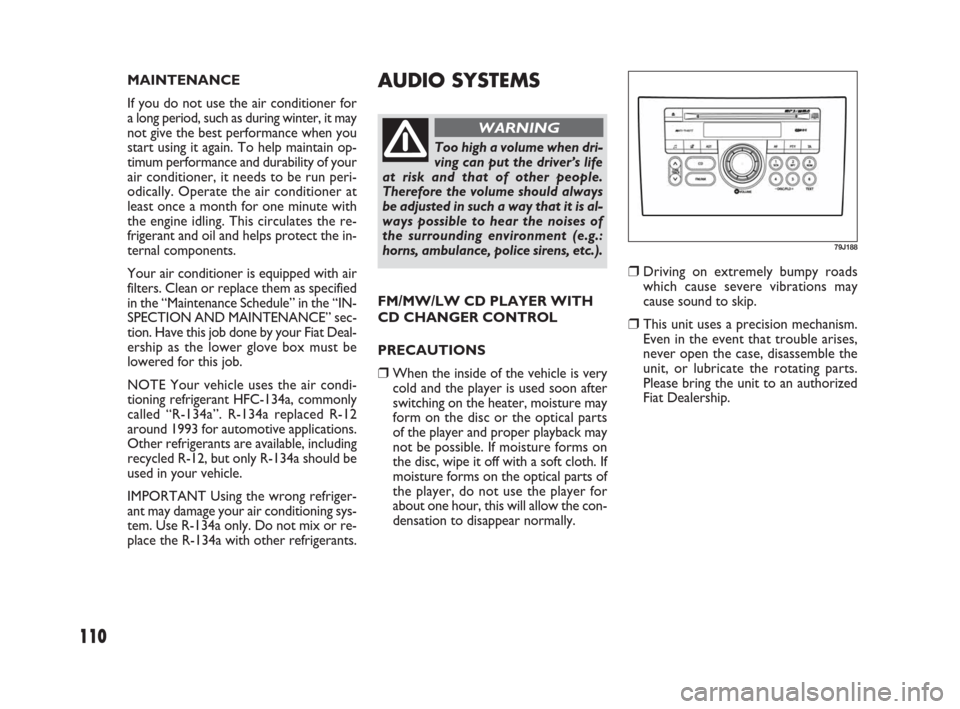
FM/MW/LW CD PLAYER WITH
CD CHANGER CONTROL
PRECAUTIONS
❒When the inside of the vehicle is very
cold and the player is used soon after
switching on the heater, moisture may
form on the disc or the optical parts
of the player and proper playback may
not be possible. If moisture forms on
the disc, wipe it off with a soft cloth. If
moisture forms on the optical parts of
the player, do not use the player for
about one hour, this will allow the con-
densation to disappear normally.
071-128 SEDICI LUM FL GB 1E 19-06-2009 12:05 Pagina 110
Page 130 of 270
129
O O
T T
H H
E E
R R
C C
O O
N N
T T
R R
O O
L L
S S
A A
N N
D D
E E
Q Q
U U
I I
P P
M M
E E
N N
T T
60G407
PARKING BRAKE LEVER.................................................... 130
PEDAL...................................................................................... 131
GEARSHIFT LEVER ............................................................... 132
FUEL FILLER CAP................................................................. 132
FOLDING REAR SEATS...................................................... 134
SUN VISOR............................................................................ 137
INTERIOR LIGHT SWITCH............................................... 138
SPOT LIGHT (for versions/markets, where provided). 138
FRONT SEAT HEATER
(for versions/markets, where provided)........................... 139
ASSIST GRIPS (for versions/markets, where provided) 140
ENGINE HOOD ................................................................... 140
CUP HOLDER
(for versions/markets, where provided)........................... 142
FRAME HOOKS .................................................................... 143
TIRE CHANGING TOOL................................................... 144
FRONT SEAT BACK POCKET
(for versions/markets, where provided)........................... 145
SHOPPING HOOK
(for versions/markets, where provided)........................... 145
LUGGAGE RESTRAINT LOOPS
(for versions/markets, where provided)........................... 145
LUGGAGE COMPARTMENT COVER
(for versions/markets, where provided)........................... 146
LUGGAGE COMPARTMENT LIGHT.............................. 146
RADIO ANTENNA
(for versions/markets, where provided)........................... 147
INSTALLATION OF RADIO FREQUENCY
TRANSMITTERS.................................................................... 147
ROOF RAILS OR ROOF RACK ANCHORS
(for versions/markets, where provided)........................... 147
4
129-148 SEDICI LUM FL GB 1E 19-06-2009 13:31 Pagina 129
Page 131 of 270
130
PARKING BRAKE
LEVER
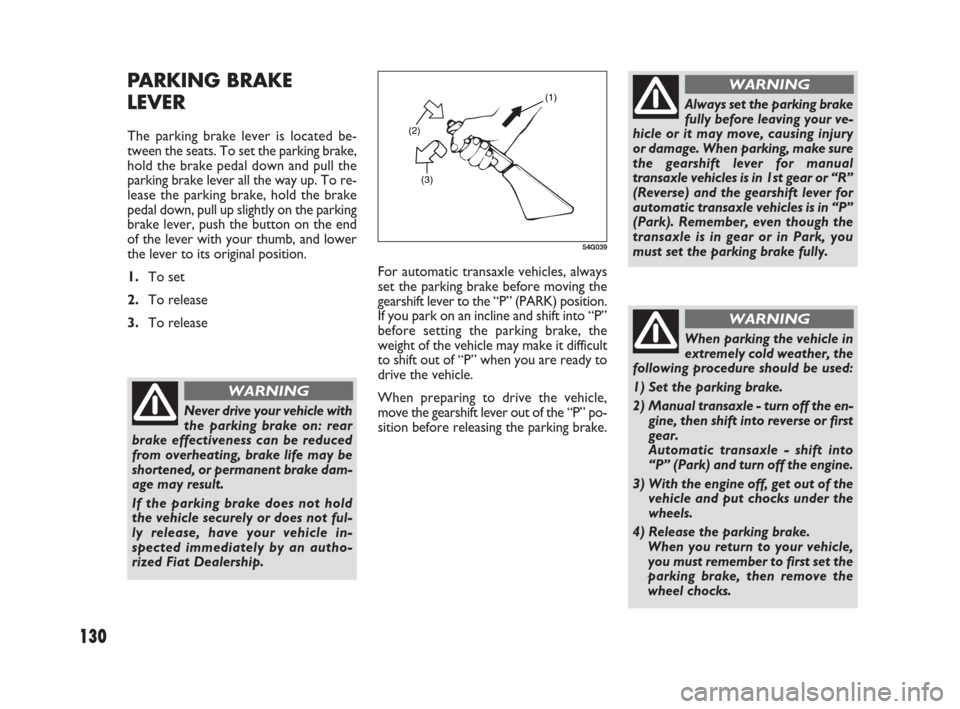
The parking brake lever is located be-
tween the seats. To set the parking brake,
hold the brake pedal down and pull the
parking brake lever all the way up. To re-
lease the parking brake, hold the brake
pedal down, pull up slightly on the parking
brake lever, push the button on the end
of the lever with your thumb, and lower
the lever to its original position.
1.To set
2.To release
3.To release(2)
(3)(1)
54G039
Never drive your vehicle with
the parking brake on: rear
brake effectiveness can be reduced
from overheating, brake life may be
shortened, or permanent brake dam-
age may result.
If the parking brake does not hold
the vehicle securely or does not ful-
ly release, have your vehicle in-
spected immediately by an autho-
rized Fiat Dealership.
WARNING
Always set the parking brake
fully before leaving your ve-
hicle or it may move, causing injury
or damage. When parking, make sure
the gearshift lever for manual
transaxle vehicles is in 1st gear or “R”
(Reverse) and the gearshift lever for
automatic transaxle vehicles is in “P”
(Park). Remember, even though the
transaxle is in gear or in Park, you
must set the parking brake fully.
WARNING
When parking the vehicle in
extremely cold weather, the
following procedure should be used:
1) Set the parking brake.
2) Manual transaxle - turn off the en-
gine, then shift into reverse or first
gear.
Automatic transaxle - shift into
“P” (Park) and turn off the engine.
3) With the engine off, get out of the
vehicle and put chocks under the
wheels.
4) Release the parking brake.
When you return to your vehicle,
you must remember to first set the
parking brake, then remove the
wheel chocks.
WARNING
For automatic transaxle vehicles, always
set the parking brake before moving the
gearshift lever to the “P” (PARK) position.
If you park on an incline and shift into “P”
before setting the parking brake, the
weight of the vehicle may make it difficult
to shift out of “P” when you are ready to
drive the vehicle.
When preparing to drive the vehicle,
move the gearshift lever out of the “P” po-
sition before releasing the parking brake.
129-148 SEDICI LUM FL GB 1E 19-06-2009 13:31 Pagina 130