2009 FIAT SEDICI clock
[x] Cancel search: clockPage 24 of 270
23
Rear door
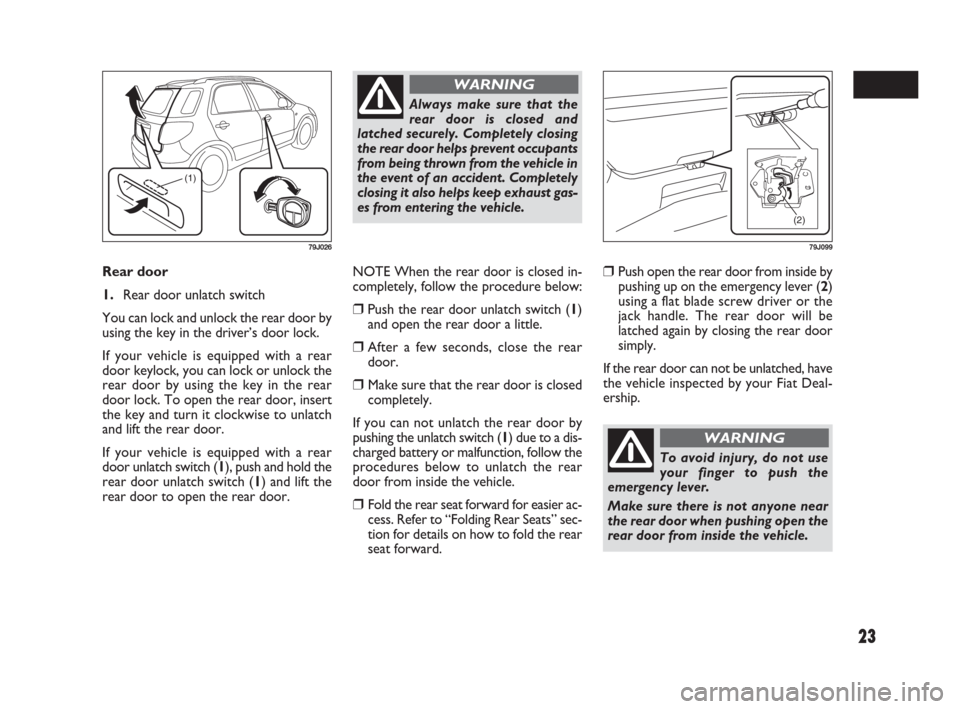
1.Rear door unlatch switch
You can lock and unlock the rear door by
using the key in the driver’s door lock.
If your vehicle is equipped with a rear
door keylock, you can lock or unlock the
rear door by using the key in the rear
door lock. To open the rear door, insert
the key and turn it clockwise to unlatch
and lift the rear door.
If your vehicle is equipped with a rear
door unlatch switch (1), push and hold the
rear door unlatch switch (1) and lift the
rear door to open the rear door.NOTE When the rear door is closed in-
completely, follow the procedure below:
❒Push the rear door unlatch switch (1)
and open the rear door a little.
❒After a few seconds, close the rear
door.
❒Make sure that the rear door is closed
completely.
If you can not unlatch the rear door by
pushing the unlatch switch (1) due to a dis-
charged battery or malfunction, follow the
procedures below to unlatch the rear
door from inside the vehicle.
❒Fold the rear seat forward for easier ac-
cess. Refer to “Folding Rear Seats” sec-
tion for details on how to fold the rear
seat forward.
(1)
79J026
Always make sure that the
rear door is closed and
latched securely. Completely closing
the rear door helps prevent occupants
from being thrown from the vehicle in
the event of an accident. Completely
closing it also helps keep exhaust gas-
es from entering the vehicle.
WARNING
❒Push open the rear door from inside by
pushing up on the emergency lever (2)
using a flat blade screw driver or the
jack handle. The rear door will be
latched again by closing the rear door
simply.
If the rear door can not be unlatched, have
the vehicle inspected by your Fiat Deal-
ership.
(2)
79J099
To avoid injury, do not use
your finger to push the
emergency lever.
Make sure there is not anyone near
the rear door when pushing open the
rear door from inside the vehicle.
WARNING
009-056 SEDICI LUM FL GB 1E 19-06-2009 14:11 Pagina 23
Page 59 of 270
58
IGNITION SWITCH
VEHICLE WITHOUT KEYLESS
START SYSTEM
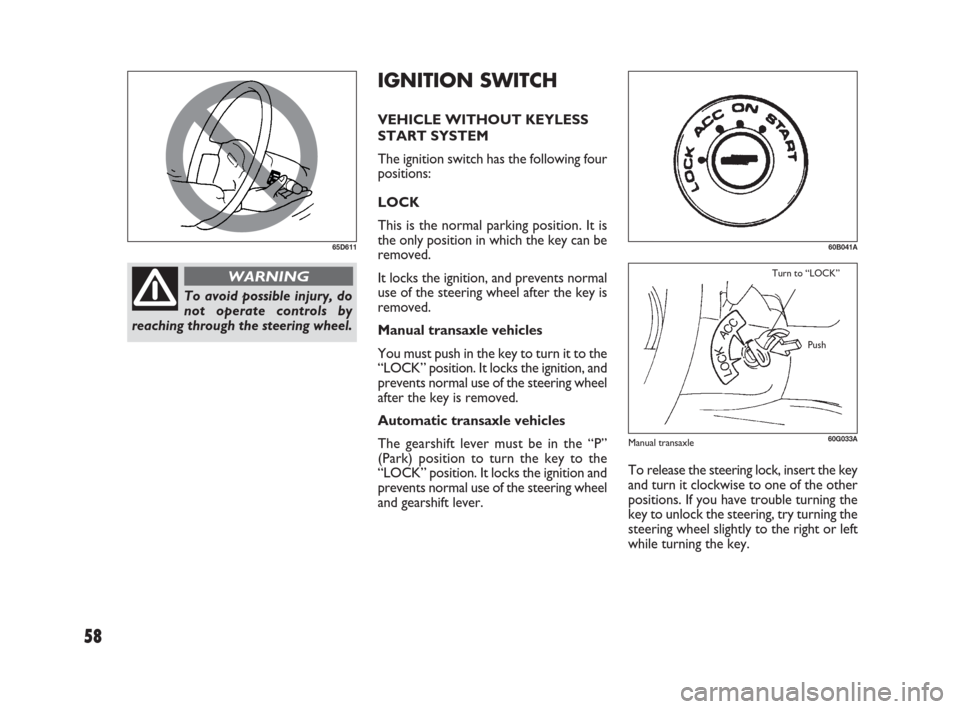
The ignition switch has the following four
positions:
LOCK
This is the normal parking position. It is
the only position in which the key can be
removed.
It locks the ignition, and prevents normal
use of the steering wheel after the key is
removed.
Manual transaxle vehicles
You must push in the key to turn it to the
“LOCK” position. It locks the ignition, and
prevents normal use of the steering wheel
after the key is removed.
Automatic transaxle vehicles
The gearshift lever must be in the “P”
(Park) position to turn the key to the
“LOCK” position. It locks the ignition and
prevents normal use of the steering wheel
and gearshift lever.
65D611
To avoid possible injury, do
not operate controls by
reaching through the steering wheel.
WARNING
60G033A
Turn to “LOCK”
Push
60B041A
To release the steering lock, insert the key
and turn it clockwise to one of the other
positions. If you have trouble turning the
key to unlock the steering, try turning the
steering wheel slightly to the right or left
while turning the key.
Manual transaxle
057-070 SEDICI LUM FL GB 1E 19-06-2009 10:32 Pagina 58
Page 61 of 270
60
❒If the keyless start system red indicator
light illuminates, the remote controller
may not be in the vehicle or the battery
of the remote controller may be unre-
liable. The red indicator light will turn
off within several seconds after the re-
mote controller is returned in the ve-
hicle except in the rear luggage area.
When the remote controller is in the ve-
hicle except the rear luggage area, you can
turn the ignition switch without using an
ignition key.
NOTE
❒If the battery of the remote controller
runs down or there are strong radio
waves or noise, the operating range
may be narrower or the remote con-
troller may be inoperative.
❒If the remote controller is too close to
the door glass, it may not operate.
❒The ignition switch may not turn when
the remote controller is on the instru-
ment panel, in the glove box, in the
door pocket, in the sun visor or on the
floor. VEHICLE WITH KEYLESS
START SYSTEM
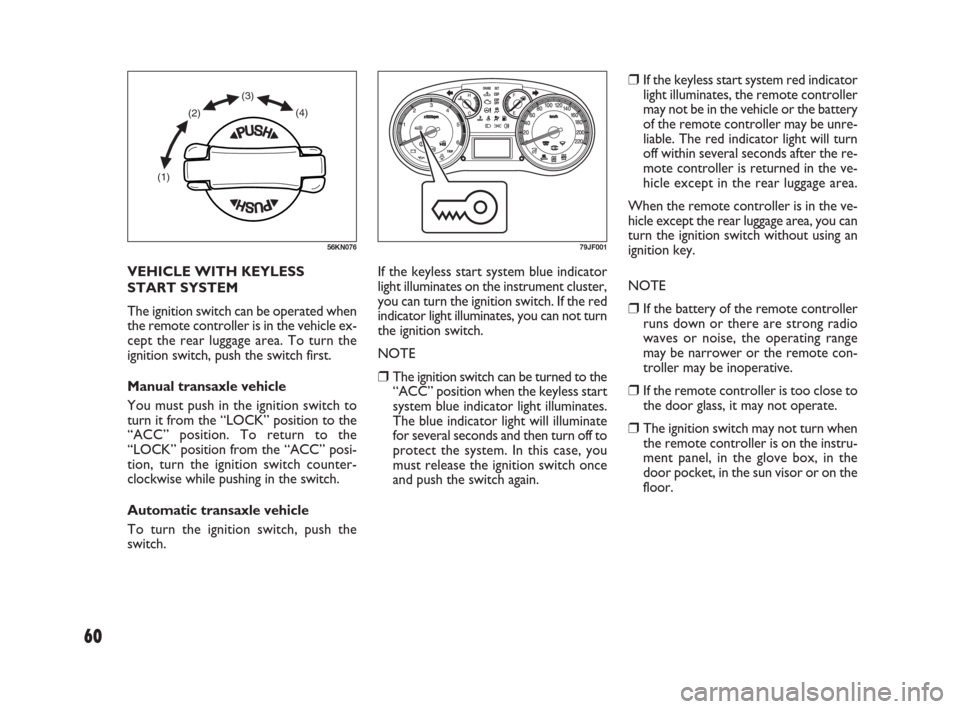
The ignition switch can be operated when
the remote controller is in the vehicle ex-
cept the rear luggage area. To turn the
ignition switch, push the switch first.
Manual transaxle vehicle
You must push in the ignition switch to
turn it from the “LOCK” position to the
“ACC” position. To return to the
“LOCK” position from the “ACC” posi-
tion, turn the ignition switch counter-
clockwise while pushing in the switch.
Automatic transaxle vehicle
To turn the ignition switch, push the
switch.If the keyless start system blue indicator
light illuminates on the instrument cluster,
you can turn the ignition switch. If the red
indicator light illuminates, you can not turn
the ignition switch.
NOTE
❒The ignition switch can be turned to the
“ACC” position when the keyless start
system blue indicator light illuminates.
The blue indicator light will illuminate
for several seconds and then turn off to
protect the system. In this case, you
must release the ignition switch once
and push the switch again.
(1)(2)(3)
(4)
56KN07679JF001
057-070 SEDICI LUM FL GB 1E 19-06-2009 10:32 Pagina 60
Page 62 of 270
61
IMPORTANT The remote controller is
a sensitive electronic instrument. To avoid
damaging the remote controller:
❒Do not expose it to impacts, moisture
or high temperature such as on the
dashboard under direct sunlight.
❒Keep the remote controller away from
magnetic objects such as a television.
You can also turn the ignition switch by
inserting the ignition key into the slot.
If you leave any of the doors open with the
ignition switch in the “ACC” position for
a while (and no key inserted), the engine
may not start when you turn the ignition
switch to “START”. If the engine does not
start, close all doors completely or turn
the ignition switch back to the “LOCK”
position, then start the engine.
The ignition switch has the following four
positions:ACC (2)
Accessories such as the radio can oper-
ate, but the engine is off.
ON (3)
This is the normal operating position. All
electrical systems are on.
START (4)
This is the position for starting the engine
using the starter motor. The switch should
be released from this position as soon as
the engine starts.
Ignition switch reminder
(When using the keyless start system)
A buzzer sounds intermittently to remind
you to return the ignition switch to the
“LOCK” position if it is in the “ACC” po-
sition when the driver’s door is opened. LOCK (1)
This is the normal parking position. It is
the only position in which the key can be
removed. It locks the ignition, and pre-
vents normal use of the steering wheel.
If your vehicle is equipped with the auto-
matic transaxle key inter lock system, the
ignition switch can be turned to the
“LOCK” position only when the gearshift
lever is in the “P” (Park) position.
To release the steering lock, turn the ig-
nition switch clockwise to one of the oth-
er positions. If you have trouble turning
the ignition switch to unlock the steer-
ing, try turning the steering wheel slightly
to the right or left while turning the
switch.
Manual transaxle vehicle
You must push in the ignition switch to
turn it from the “LOCK” position to the
“ACC” position. To return to the
“LOCK” position from the “ACC” posi-
tion, turn the ignition switch counter-
clockwise while pushing in the switch.
Automatic transaxle vehicle
To turn the ignition switch, push the
switch.
057-070 SEDICI LUM FL GB 1E 19-06-2009 10:32 Pagina 61
Page 86 of 270
85
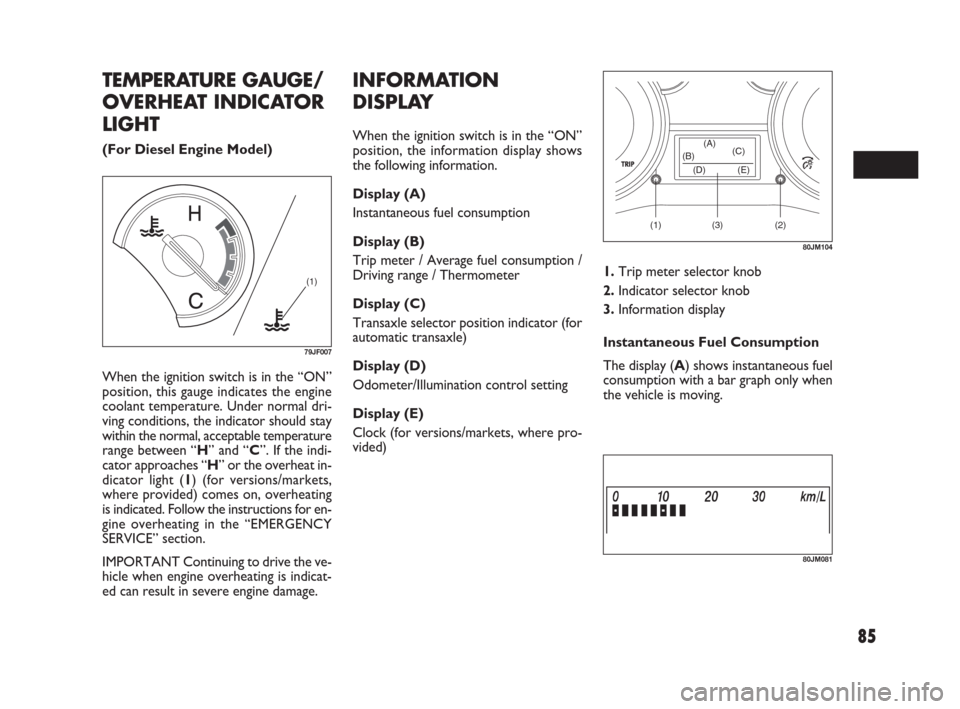
When the ignition switch is in the “ON”
position, this gauge indicates the engine
coolant temperature. Under normal dri-
ving conditions, the indicator should stay
within the normal, acceptable temperature
range between “H” and “C”. If the indi-
cator approaches “H” or the overheat in-
dicator light (1) (for versions/markets,
where provided) comes on, overheating
is indicated. Follow the instructions for en-
gine overheating in the “EMERGENCY
SERVICE” section.
IMPORTANT Continuing to drive the ve-
hicle when engine overheating is indicat-
ed can result in severe engine damage.
(1)
79JF007
(1) (2)(3) (D) (B)(A)
(C)
(E)
80JM104
TEMPERATURE GAUGE/
OVERHEAT INDICATOR
LIGHT
(For Diesel Engine Model)
INFORMATION
DISPLAY
When the ignition switch is in the “ON”
position, the information display shows
the following information.
Display (A)
Instantaneous fuel consumption
Display (B)
Trip meter / Average fuel consumption /
Driving range / Thermometer
Display (C)
Transaxle selector position indicator (for
automatic transaxle)
Display (D)
Odometer/Illumination control setting
Display (E)
Clock (for versions/markets, where pro-
vided)
80JM081
1.Trip meter selector knob
2.Indicator selector knob
3.Information display
Instantaneous Fuel Consumption
The display (A) shows instantaneous fuel
consumption with a bar graph only when
the vehicle is moving.
071-128 SEDICI LUM FL GB 1E 19-06-2009 12:05 Pagina 85
Page 90 of 270
89
NOTE When you reconnect the negative
(–) terminal to the battery, the unit of
temperature will be reinitialized. Change
the unit again to your preference.
Oil life monitoring
The oil life monitoring indicates the re-
maining distance until the next timing to
change the engine oil and oil filter. When
the remaining distance become close to
0 km, you should change the engine oil and
oil filter immediately. The oil service light
in the instrument cluster may also come
on to let you know that you should change
the engine oil and oil filter immediately.
For details on how to change the engine
oil and oil filter, refer to “Changing Engine
Oil and Filter” in the “INSPECTION AND
MAINTENANCE” section.Whenever the engine oil and oil filter are
changed, the oil life monitoring must be
reset to monitor the next oil and oil fil-
ter change timing properly. To reset the
indicator, consult your Fiat Dealership.
When the oil life monitoring is reset, the
oil life monitoring indicates the remain-
ing distance until the next timing to change
engine oil and filter. If the oil service light
was on, it will go out.
IMPORTANT Change the engine oil and
filter immediately when the remaining dis-
tance of the oil life monitoring indication
becomes close to 0 km. If you keep op-
erating the engine with the indication
shows 0 km, severe engine damage can re-
sult.
NOTE If the vehicle is usually used under
severe driving conditions, the engine oil
and oil filter should be changed more fre-
quently regardless the oil life monitoring.
Refer to “Maintenance recommended un-
der severe driving condition” in the “IN-
SPECTION AND MAINTENANCE” sec-
tion.Transaxle selector position
indicator (for automatic transaxle)
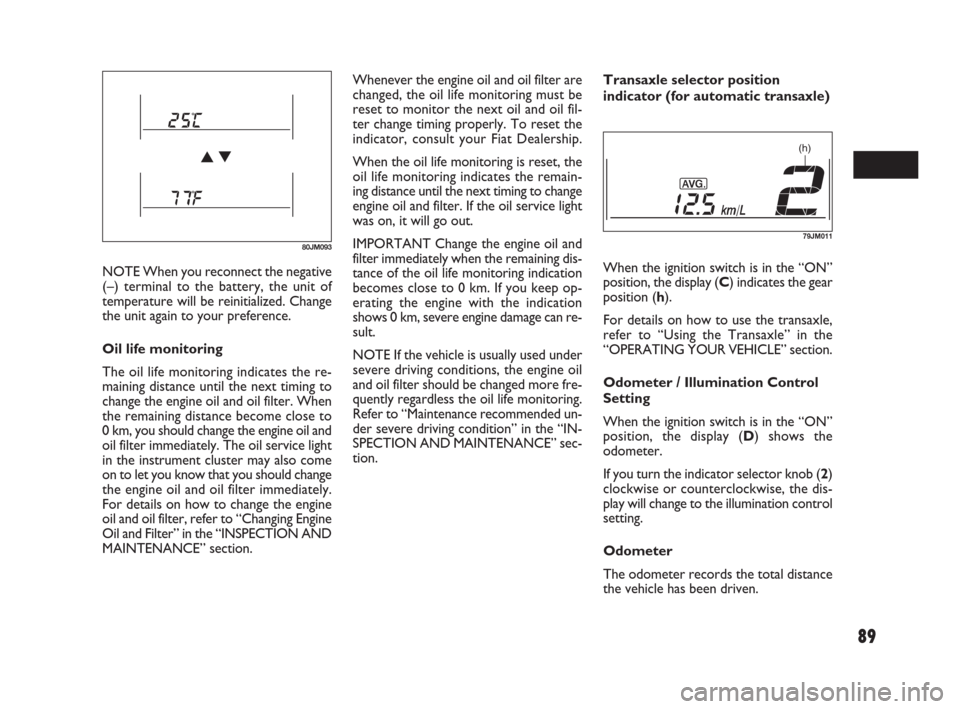
When the ignition switch is in the “ON”
position, the display (C) indicates the gear
position (h).
For details on how to use the transaxle,
refer to “Using the Transaxle” in the
“OPERATING YOUR VEHICLE” section.
Odometer / Illumination Control
Setting
When the ignition switch is in the “ON”
position, the display (D) shows the
odometer.
If you turn the indicator selector knob (2)
clockwise or counterclockwise, the dis-
play will change to the illumination control
setting.
Odometer
The odometer records the total distance
the vehicle has been driven.
80JM093
(h)
79JM011
071-128 SEDICI LUM FL GB 1E 19-06-2009 12:05 Pagina 89
Page 91 of 270
90
Do not attempt to adjust the
display while driving.
If you attempt to adjust the display
while driving, you could lose control
of the vehicle.
WARNING
NOTE
❒If you push the indicator selector knob
or do not turn the knob for more than
5 seconds while activating the illumi-
nation control, the illumination con-
trol will be canceled automatically and
the display (D) will show the odome-
ter indication.
❒You can change the brightness when
the position lights or headlights are on
even if the ignition switch is in the
“ACC” or “LOCK” position.
❒When you reconnect the negative (–)
terminal to the battery, the brightness
of the instrument panel lights will be
reinitialized. Readjust the brightness
according to your preference.
NOTE If you select the highest brightness
level when the position lights or headlights
are on, the instrument panel lights are not
dimmed.
Clock (for versions/markets, where
provided)
When the ignition switch is in the “ON”
position, the display (E) shows the time.
80JM039
IMPORTANT Keep track of your odome-
ter reading and check the maintenance
schedule regularly for required services.
Increased wear or damage to certain parts
can result from failure to perform re-
quired services at the proper mileage in-
tervals.
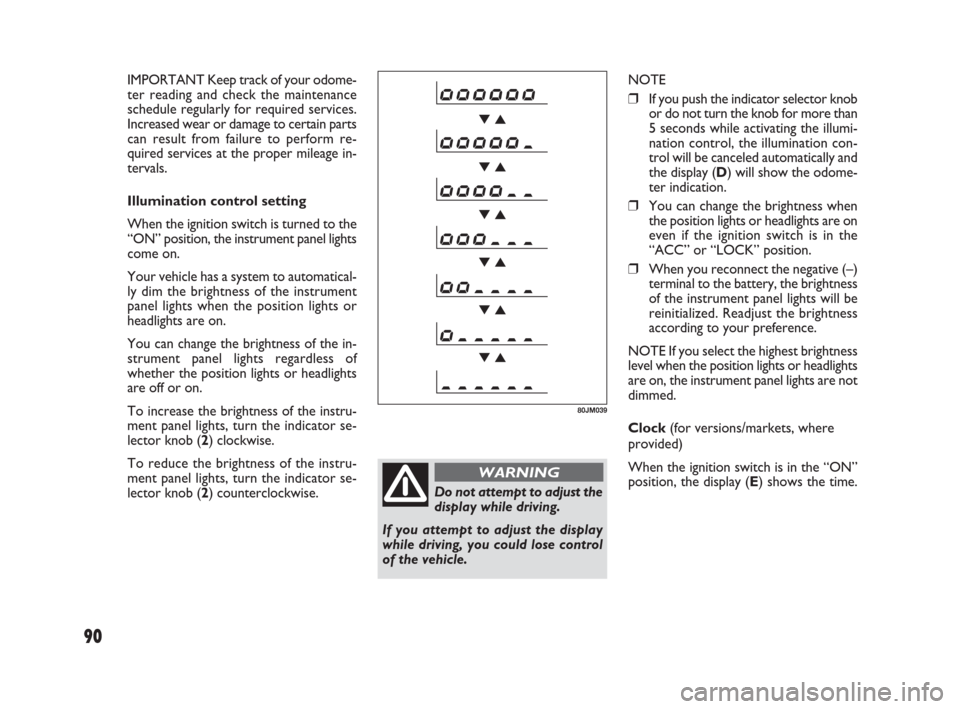
Illumination control setting
When the ignition switch is turned to the
“ON” position, the instrument panel lights
come on.
Your vehicle has a system to automatical-
ly dim the brightness of the instrument
panel lights when the position lights or
headlights are on.
You can change the brightness of the in-
strument panel lights regardless of
whether the position lights or headlights
are off or on.
To increase the brightness of the instru-
ment panel lights, turn the indicator se-
lector knob (2) clockwise.
To reduce the brightness of the instru-
ment panel lights, turn the indicator se-
lector knob (2) counterclockwise.
071-128 SEDICI LUM FL GB 1E 19-06-2009 12:05 Pagina 90
Page 92 of 270
91
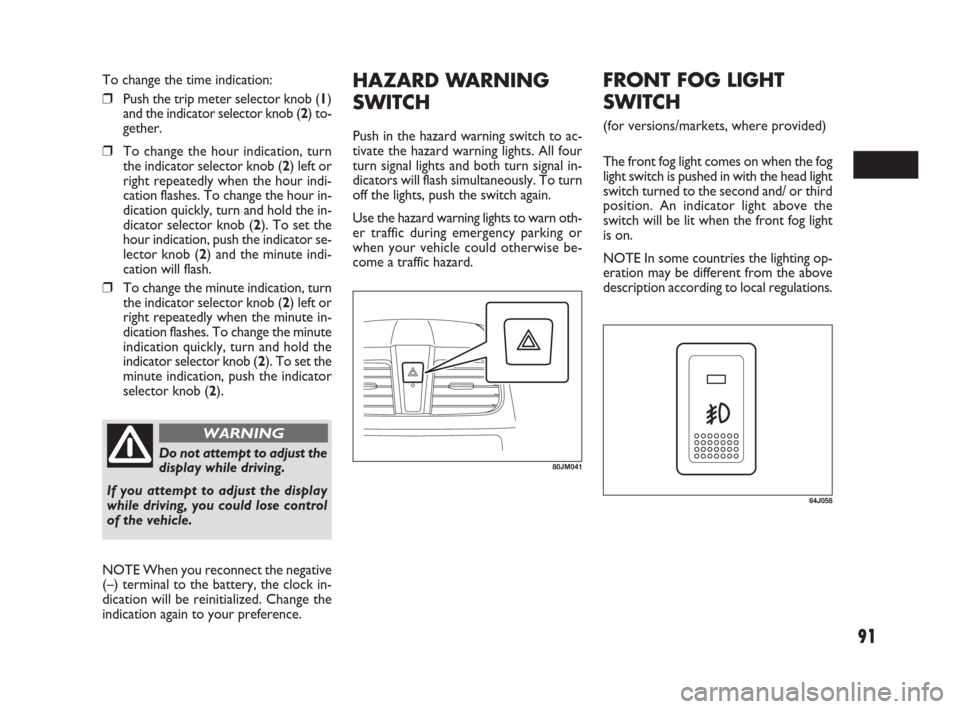
HAZARD WARNING
SWITCH
Push in the hazard warning switch to ac-
tivate the hazard warning lights. All four
turn signal lights and both turn signal in-
dicators will flash simultaneously. To turn
off the lights, push the switch again.
Use the hazard warning lights to warn oth-
er traffic during emergency parking or
when your vehicle could otherwise be-
come a traffic hazard.
80JM041Do not attempt to adjust the
display while driving.
If you attempt to adjust the display
while driving, you could lose control
of the vehicle.
WARNING
To change the time indication:
❒Push the trip meter selector knob (1)
and the indicator selector knob (2) to-
gether.
❒To change the hour indication, turn
the indicator selector knob (2) left or
right repeatedly when the hour indi-
cation flashes. To change the hour in-
dication quickly, turn and hold the in-
dicator selector knob (2). To set the
hour indication, push the indicator se-
lector knob (2) and the minute indi-
cation will flash.
❒To change the minute indication, turn
the indicator selector knob (2) left or
right repeatedly when the minute in-
dication flashes. To change the minute
indication quickly, turn and hold the
indicator selector knob (2). To set the
minute indication, push the indicator
selector knob (2).
NOTE When you reconnect the negative
(–) terminal to the battery, the clock in-
dication will be reinitialized. Change the
indication again to your preference.
64J058
FRONT FOG LIGHT
SWITCH
(for versions/markets, where provided)
The front fog light comes on when the fog
light switch is pushed in with the head light
switch turned to the second and/ or third
position. An indicator light above the
switch will be lit when the front fog light
is on.
NOTE In some countries the lighting op-
eration may be different from the above
description according to local regulations.
071-128 SEDICI LUM FL GB 1E 19-06-2009 12:05 Pagina 91