Page 68 of 449

locking retractor seat belts, refer to9Automatic Locking
Mode9in this section. If you have trouble tightening the
lap/shoulder belt on the child restraint because, the
buckle or latch plate is too close to the belt path opening
on the restraint, follow these steps. If the buckle is
webbing-mounted, disconnect the latch plate from the
buckle and twist the short buckle-end belt to shorten it.
Insert the latch plate into the buckle with the release
button facing out. If the belt still can't be tightened, the
buckle is not webbing-mounted, or if by pulling and
pushing on the restraint loosens the belt, you may need
to do something more. Disconnect the latch plate from
the buckle, turn the latch plate around, and insert the
latch plate into the buckle again. If you still can't make
the child restraint secure, try a different seating position
or use the locking clip provided with your child restraint.
To complete the child seat installation, refer to9Child
Restraint Tether Anchor9in this section.Child Restraint Tether Anchor
The Extended Cab model has one routing strap
located behind the passenger side, rear out-
board seating position. The tether anchor itself
is located in the center of vehicle, in between
the two seating positions. The front outboard passenger
seating position is also equipped with a child tether
anchorage, located at the base of the front seatback.
When there is a rear seat delete option, the tether
anchorage located on the cab back panel is designed to be
used for the front seat center seating position. The Crew
Cab model has three anchorages located behind each of
the rear seating positions (rear left, rear center, and rear
right).
66 THINGS TO KNOW BEFORE STARTING YOUR VEHICLE
Page 75 of 449
Safety Checks You Should Make Outside The
Vehicle
Tires
Examine tires for tread wear or uneven wear patterns.
Check for stones, nails, glass or other objects lodged in
the tread.
Inspect for tread cuts or sidewall cracks. Check wheel
nuts for tightness and tires for proper pressure.
Lights
Check the operation of all exterior lights. Check turn
signal and high beam indicator lights on the instrument
panel.
Door Latches
Check for positive closing, latching and locking.
Fluid Leaks
Check area under vehicle after overnight parking for fuel,
water, oil, or other fluid leaks. Also, if fuel fumes are
detected the cause should be located and corrected.
THINGS TO KNOW BEFORE STARTING YOUR VEHICLE 73
2
Page 117 of 449

Voice Training
For users experiencing difficulty with the system recog-
nizing their voice commands or numbers, the UConnectt
system Voice Training feature may be used.
1. Press the VR hard-key, speak ªSystem Setupº and once
you are in that menu then speak ªVoice Training.º This
will train your own voice to the system and will improve
recognition.
2. Repeat the words and phrases when prompted by the
UConnecttSystem. For best results, the Voice Training
session should be completed when the vehicle is parked,
engine running, all windows closed, and the blower fan
switched OFF. This procedure may be repeated with a
new user. The system will adapt to the last trained voice
only.
SEATS
Manual Seat Adjustment
The adjusting lever is at the front of the seat, near the
floor. Lift the lever and move the seat to the desired
position. Release the bar to lock the seat into position.
Using body pressure, move forward and rearward on the
seat to be sure the seat adjusters have latched.
UNDERSTANDING THE FEATURES OF YOUR VEHICLE 115
3
Page 118 of 449
WARNING!
Adjusting a seat while the vehicle is moving is
dangerous. The sudden movement of the seat could
cause you to lose control. The seat belt might not be
properly adjusted and you could be injured. Adjust
any seat only while the vehicle is parked.
Front Seats Manual Seat Recliners
The front seats are equipped with recliners. The reclining
mechanism is operated by a lever located on the right
side of the passenger's seat and the left side of the
driver's seat. To recline, lean forward slightly before
lifting the lever, then push back to the desired position
and release the lever. Lean forward and lift the lever to
return the seatback to its normal position. Using body
pressure, lean forward and rearward on the seat to be
sure the seatback is locked.
Adjusting Lever
116 UNDERSTANDING THE FEATURES OF YOUR VEHICLE
Page 124 of 449
2. Then push the safety latch lever up while lifting the
grille with your hand. It is located at the bottom center of
the grille.Lift the hood, and the gas filled props will hold it open.
To prevent possible damage, do not slam the hood to
close it. Use a firm downward push at the center front
edge of the hood to ensure that both latches engage.
Never drive your vehicle unless the hood is fully closed,
with both latches engaged.
WARNING!
If the hood is not fully latched, it could fly up when
the vehicle is moving and block your forward vision.
Be sure all hood latches are fully latched before
driving.
Secondary Latch Location
122 UNDERSTANDING THE FEATURES OF YOUR VEHICLE
Page 125 of 449

LIGHTS
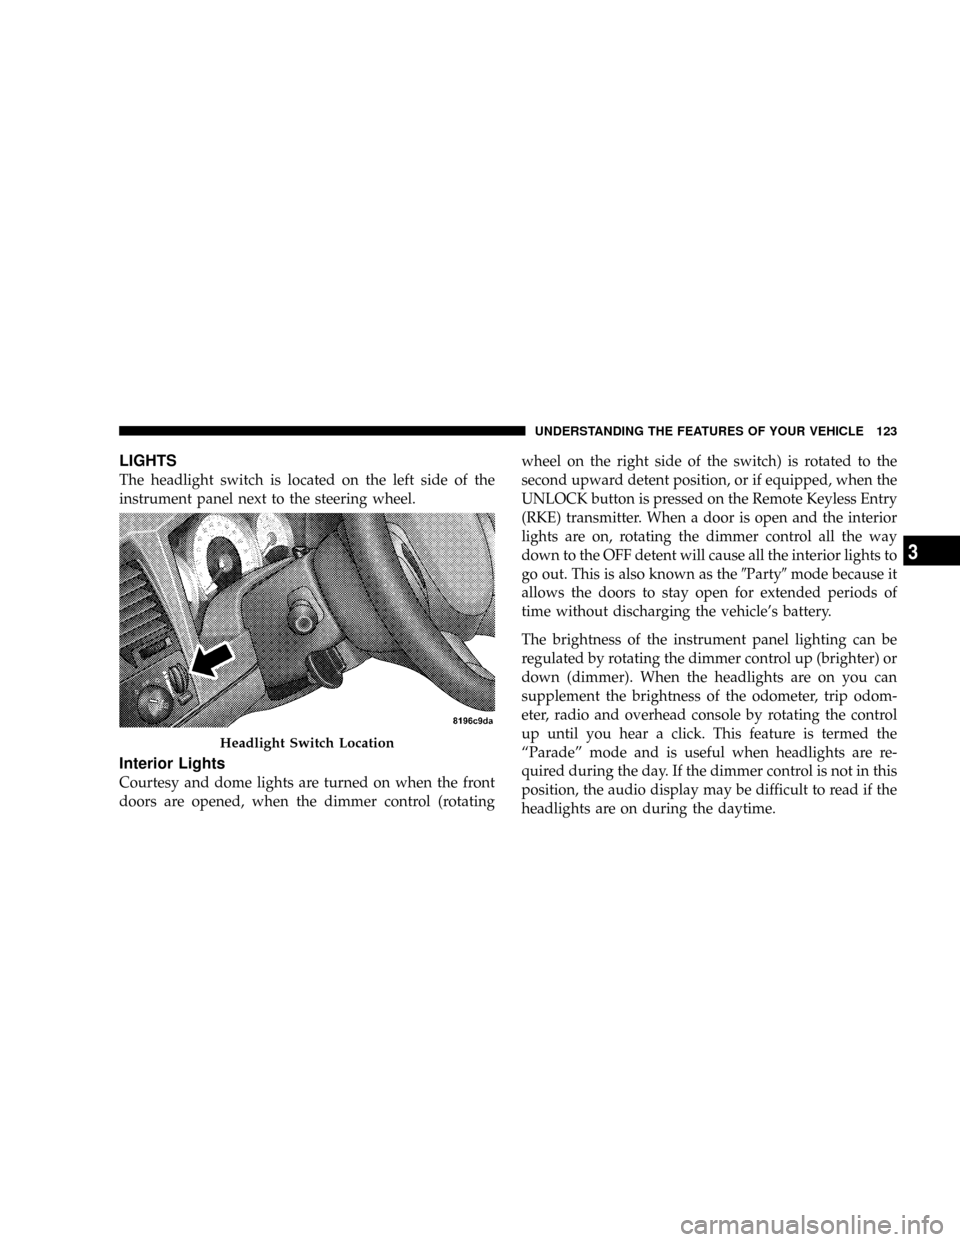
The headlight switch is located on the left side of the
instrument panel next to the steering wheel.
Interior Lights
Courtesy and dome lights are turned on when the front
doors are opened, when the dimmer control (rotatingwheel on the right side of the switch) is rotated to the
second upward detent position, or if equipped, when the
UNLOCK button is pressed on the Remote Keyless Entry
(RKE) transmitter. When a door is open and the interior
lights are on, rotating the dimmer control all the way
down to the OFF detent will cause all the interior lights to
go out. This is also known as the9Party9mode because it
allows the doors to stay open for extended periods of
time without discharging the vehicle's battery.
The brightness of the instrument panel lighting can be
regulated by rotating the dimmer control up (brighter) or
down (dimmer). When the headlights are on you can
supplement the brightness of the odometer, trip odom-
eter, radio and overhead console by rotating the control
up until you hear a click. This feature is termed the
ªParadeº mode and is useful when headlights are re-
quired during the day. If the dimmer control is not in this
position, the audio display may be difficult to read if the
headlights are on during the daytime.
Headlight Switch Location
UNDERSTANDING THE FEATURES OF YOUR VEHICLE 123
3
Page 129 of 449
30 seconds when the RKE transmitter UNLOCK button is
pressed, as part of the illuminated entry feature.
Multifunction Lever
The multifunction lever is located on the left side of the
steering column.
Turn Signals
To operate the turn signals, move the multifunction lever
up to signal a right-hand turn or down to signal a
left-hand turn.
You can signal a lane change by moving the lever
partially up or down.
Cargo Light Switch
Signaling Turns
UNDERSTANDING THE FEATURES OF YOUR VEHICLE 127
3
Page 133 of 449

Windshield Washers
To use the washer, push in on the washer knob on the end
of the multifunction lever and hold while spray is
desired. If the washer knob is depressed while in the
delay range, the wiper will operate for several seconds
after the washer knob is released. It will then resume the
intermittent interval previously selected. If the washer
knob is pushed, for a period greater than one second
while in the off position, the wiper will wipe approxi-
mately three wipes after the wash knob is released.
To prevent freeze-up of your windshield washer system
in cold weather, select a solution or mixture that meets or
exceeds the temperature range of your climate. This
rating information can be found on most washer fluid
containers.
TILT STEERING COLUMN
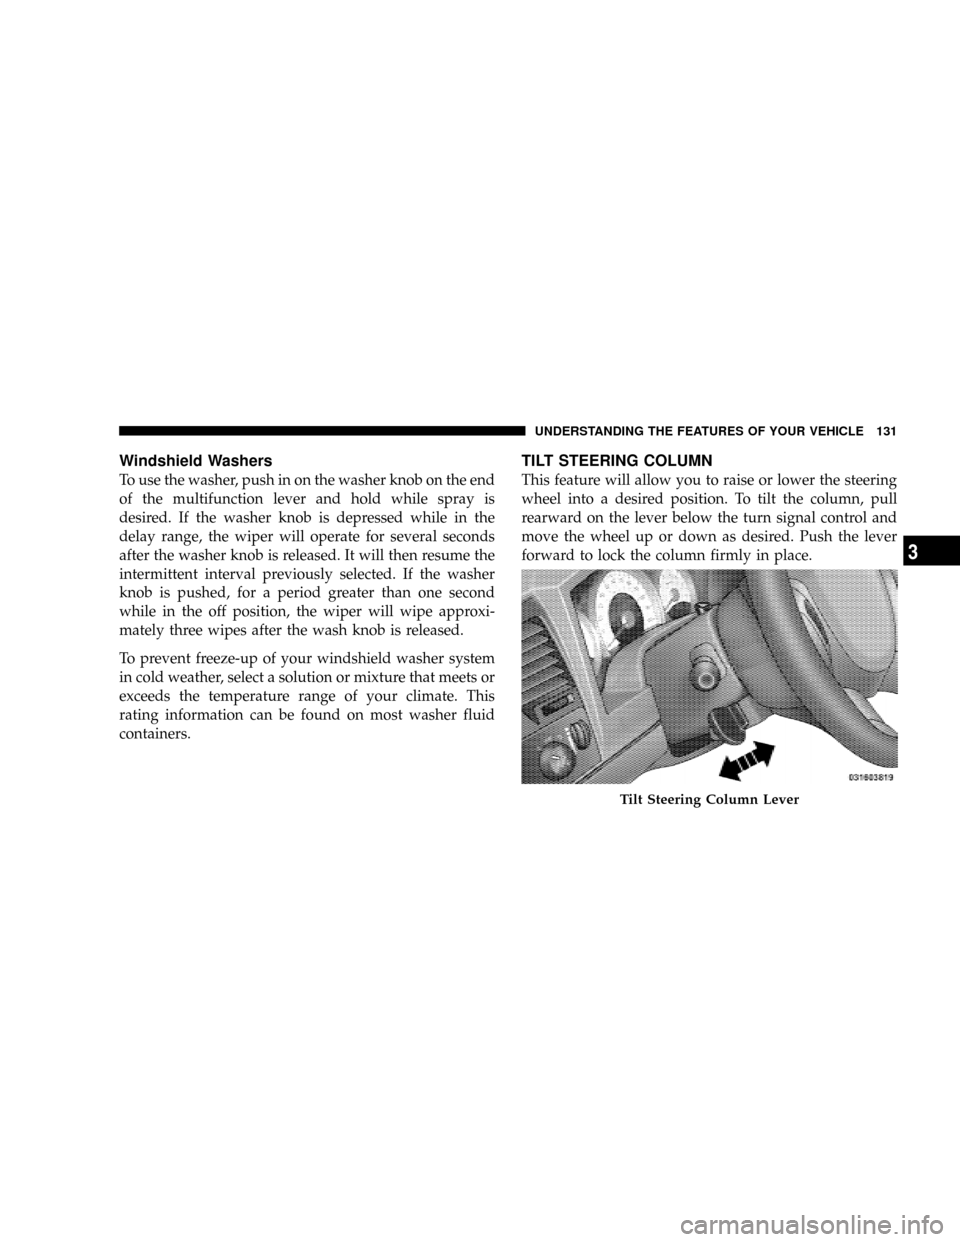
This feature will allow you to raise or lower the steering
wheel into a desired position. To tilt the column, pull
rearward on the lever below the turn signal control and
move the wheel up or down as desired. Push the lever
forward to lock the column firmly in place.
Tilt Steering Column Lever
UNDERSTANDING THE FEATURES OF YOUR VEHICLE 131
3