2008 Seat Ibiza SC CD player
[x] Cancel search: CD playerPage 3 of 54
Contents
2ContentsGeneral information
. . . . . . . . . . . . . . . .
Introduction
. . . . . . . . . . . . . . . . . . . . . . . . . .
Remember
. . . . . . . . . . . . . . . . . . . . . . . . . . . .
Convenience anti-theft code
. . . . . . . . . . . . . . .
Important information concerning the
handling of your radio equipment
. . . . . . . . .
Soft-Clipping Function
. . . . . . . . . . . . . . . . . . . .
Protection against overloading
. . . . . . . . . . . .
Alternative frequencies (AF)
. . . . . . . . . . . . . . .
Using your CD player
. . . . . . . . . . . . . . . . . . . . . .
Tips when handling CDs
. . . . . . . . . . . . . . . . . .
Important for care
. . . . . . . . . . . . . . . . . . . . . . . .
Tips for handling your CD-ROM
. . . . . . . . . . . .
We recommend
. . . . . . . . . . . . . . . . . . . . . . . . . . .
Brief instructions
. . . . . . . . . . . . . . . . . . .
General overview
. . . . . . . . . . . . . . . . . . . . . . . . .
Settings
. . . . . . . . . . . . . . . . . . . . . . . . . . . . . . .
AUDIO Menu
. . . . . . . . . . . . . . . . . . . . . . . . . . . . .
Sound setting memory
. . . . . . . . . . . . . . . . . . . .
MENU function
. . . . . . . . . . . . . . . . . . . . . . . . . . .
Possible functions in the Menu
. . . . . . . . . . . .
Radio mode
. . . . . . . . . . . . . . . . . . . . . . . . . .
Search functions
. . . . . . . . . . . . . . . . . . . . . . . . .
Selecting wavelength and memory bank
. . .
Selecting pretuned stations
. . . . . . . . . . . . . . .
Storing pretuned stations
. . . . . . . . . . . . . . . . .
Storing all pretuned stations of one waveband
(auto-store function)
. . . . . . . . . . . . . . . . . . . . . .
Switching to traffic reports (TP function) *
. .
CD mode
. . . . . . . . . . . . . . . . . . . . . . . . . . . . . .
CD mode
. . . . . . . . . . . . . . . . . . . . . . . . . . . . . . . . .
Selecting CD mode
. . . . . . . . . . . . . . . . . . . . . . .
Selecting CD tracks
. . . . . . . . . . . . . . . . . . . . . . .
Searching through individual tracks
. . . . . . .
Random play function
. . . . . . . . . . . . . . . . . . . .
PAUSE Function
. . . . . . . . . . . . . . . . . . . . . . . . . .
INFO function
. . . . . . . . . . . . . . . . . . . . . . . . . . . .
Traffic reports when in CD mode
. . . . . . . . . . .
AUX* Mode
. . . . . . . . . . . . . . . . . . . . . . . . . . .
AUX-IN* Operation
. . . . . . . . . . . . . . . . . . . . . . . .
Auxiliary input volume
. . . . . . . . . . . . . . . . . . . .
Traffic reports when in AUX mode
. . . . . . . . . .
MP3 mode
. . . . . . . . . . . . . . . . . . . . . . . . . . . .
Comments about CD-R (CD Writable) / CR-RW
(CD Re-writable)
. . . . . . . . . . . . . . . . . . . . . . . . . .
What are MP3 files?
. . . . . . . . . . . . . . . . . . . . . .
Accepted recording formats
. . . . . . . . . . . . . . .
Information from the ID3 data field
. . . . . . . .
Structure of folders and files
. . . . . . . . . . . . . .
USB/iPod® from Apple* mode
. .
USB/iPod® from Apple*
. . . . . . . . . . . . . . . . . .
Selecting tracks from the USB/iPod®
. . . . . .
Searching through individual tracks
. . . . . . .
Random play function
. . . . . . . . . . . . . . . . . . . .
PAUSE Function
. . . . . . . . . . . . . . . . . . . . . . . . . .
INFO Function
. . . . . . . . . . . . . . . . . . . . . . . . . . . .
Traffic reports in USB/iPod® mode
. . . . . . . .
4
5
6
6
6
6
6
7
7
7
7
8
8
9
9
11
11
12 13
13
15
15
15
15
15
16
16
18
18
18
18
19
19
19
20
20
21
21
22
22
23
23
23
23
23
25
26
26
27
27
27
27
28
29
Car stereo_EN.book Seite 2 Di
enstag, 18. März 2008 4:15 16
Page 8 of 54
Remember7
Alternative frequencies (AF) This function is only available on FM.
Some RDS programmes can be broadcast by various stations with different
frequencies.
If function is ON, available alternative frecuency searches for the selected
radio stations are done.
Your radio automatically (and quietly) chooses the strongest signal for the
selected station.
If you are driving through an area with bad coverage, each automatic re-tune
will result in short breaks or slight changes in volume in the audio source.Using your CD player– Do not insert credit cards, coins or other objects inside the CD unit.
– Do not insert irregular-shaped discs, discs with anti-scratch protection or discs with labels attached inside the unit.
– Do not insert DVDs, Dual-Disc, DVD+, Flip Disc as these contain large quantities of information and can not be read.
– Only use standard 12 cm diameter CDs.
– Some anti-copy CDs cannot be played in the unit.
– Store discs in their cases when not in use. – Insert the CD into the unit until the mechanism automatically
pulls it.
– Insert CD with the printed side facing upwards and at the correct angle into the front opening of the radio.
– Do not try to insert a CD when there is already a CD in the unit.
– The radio is fitted with a disconnection protective device and when the temperature of the CD unit is too high, the radio
switches to the last selected source.
– The playing time of files recorded with a variable bit rate may not be accurate.
Tips when handling CDs– Hold the CD by the edge or by the edges and through the central hole. Figure prints and scratches reduce sound quality.
– CDs left in direct sunlight or very high temperatures may be damaged or may block the CD player.
– Normally CD-R/CD-RW discs have an operating temperature of -5 °C to 55 °C. Please, see the manufacturer specifications for the
CD.
Car stereo_EN.book Seite 7 Di enstag, 18. März 2008 4:15 16
Page 11 of 54
Brief instructions
10 SCAN Button
-This plays the radio stations in radio mode or songs in CD/external audio
source mode for a set time.
MIX Button
- This enables songs in CD/external audio source mode to be played in
random order.
TP Button
- TP Button. Traffic Programmes: It allows to activate or deactivate the traffic
reports, interrupting the reproduction of other sources, if necessary.
Buttons
- Radio: Press the button brief ly to search for a station.
- CD: Press briefly for track selection; pres s and hold if you wish to hear fast
forward or reverse within a track.
EJECT Button CD eject button
- The CD is ejected from the player.
Slot for inserting CD
- Push the audio CD with the printed side facing up into the CD slot to the
point where it is automatically pulled in.
Display
- All information on the current operating status as well as the current alloca-
tion of the multi-function keys and is displayed.
Functions allocated to multi-function buttons.
Variable functions allocated to multi-function buttons A and B.
Multi-function buttons
- The function of these keys depends on the operating mode. The current
multi-function key assignment is shown on the display. Rotary knob
Volume settings: Turn the knob to the right to increase the volume and to the
left to lower the volume.
Selection menus : Turn the button to the right to go forwards in a clockwise
direction in the menu or to go to the next song in CD /external audio source
mode. Turn the button to the left to go forwards in anti-clockwise direction in
the menu or to go to the previous song in CD /external audio source mode.A6A7A8A9A10A11A12
AA
AB
A13AAAB
AC
Car stereo_EN.book Seite 10 Dienstag, 18. März 2008 4:15 16
Page 19 of 54
CD mode
18CD mode CD modeInserting a CD
Push the audio CD with the printed side facing up into the CD slot until it is
automatically pulled in.
After inserting a CD with MP3 format, while the equipment is reading and
recognising the structure of the CD, “c d loading” is shown on the display and
it is not possible to activate any functions. The play function will start auto-
matically.
CD eject button
Press the button to eject the CD.
Note
•
An error message will appear on the display if there is no CD in the CD
player, or if the inserted CD cannot be read.
•
You might not be able to play CDs with copy protection or CD-Rs and CD-
RWs.
Selecting CD mode– Press the button.
– Turn button to select CD mode. Note
If you are not in CD mode (e.g. in FM) when the button is pressed, the
last selected mode will start to play (where available).Selecting CD tracksSelecting CD tracks
Press
or to rewind or fast forward CD tracks. The number of selected track
will be shown on the display.
For audio CDs with additional information (CD text) the title of the album, the
track name and the artist will be displayed ⇒page 20.
For CD in MP3 format, the title of the album, the track name, the artist, the file
name and the folder name are displayed ⇒page 20
SCAN function
When the SCAN function is switched on, 10 seconds of each track are played.
For an audio CD or an audio CD with additional information (CD text) the
SCAN function is activated by briefly pressing the SCAN button.
For a CD in MP3 format there are two types of SCAN:
•
SCAN FOLDER: This plays 10 seconds of each track in the current folder.
You start the SCAN function by briefly pressing the function key SCAN.
•
SCAN ALL: This plays 10 seconds of the first track in each of the CD
folders. You start the SCAN function by pressing the function key SCAN for 2
seconds.
eject
MEDIAAC
media
Car stereo_EN.book Seite 18 Dienstag, 18. März 2008 4:15 16
Page 22 of 54
AUX* Mode21
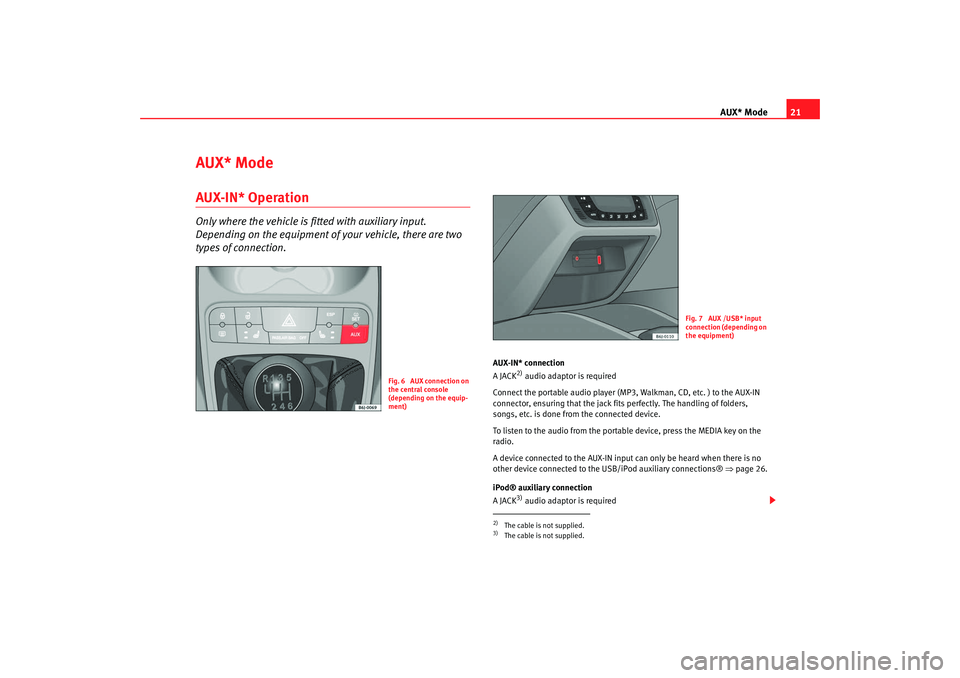
AUX* ModeAUX-IN* OperationOnly where the vehicle is fitted with auxiliary input.
Depending on the equipment of your vehicle, there are two
types of connection.
AUX-IN* connection
A JACK
2) audio adaptor is required
Connect the portable audio player (MP 3, Walkman, CD, etc. ) to the AUX-IN
connector, ensuring that the jack fits perfectly. The handling of folders,
songs, etc. is done from the connected device.
To listen to the audio from the portable device, press the MEDIA key on the
radio.
A device connected to the AUX-IN input can only be heard when there is no
other device connected to the USB/iPod auxiliary connections® ⇒page 26.
iPod® auxiliary connection
A JACK3) audio adaptor is required
Fig. 6 AUX connection on
the central console
(depending on the equip-
ment)
2)The cable is not supplied.3)The cable is not supplied.
Fig. 7 AUX /USB* input
connection (depending on
the equipment)
Car stereo_EN.book Seite 21 Dienstag, 18. März 2008 4:15 16
Page 23 of 54

AUX* Mode
22Connect the portable audio player (MP3, Walkman, CD, etc. ) to the iPod®
⇒ page 21, fig. 7 auxiliary connector, ensuring that the jack fits perfectly.
Folders, tracks... are managed from the connected device. To listen to the
audio from the portable device, press the MEDIA key on the radio.
For further information see ⇒page 26, “USB/iPod® from Apple* mode”.
Note
Keep in mind that if you change temporarily to a different source without stop-
ping the play on the portable device, when you go back to the auxiliary source
using the menu displayed with the button, it will not continue to play
at the point where you left off.Auxiliary input volumeThis volume is independent of the car radio volume and is used to adjust the
difference in volume between the different external and internal Audio
sources.
Depending on the connection type of th e auxiliary input, the volume can be
adjusted using button or option “aux vol” in the menu. Three
different amplification levels can be selected by turning button .Traffic repor ts when in AUX modeThe TP function is only valid for the European version.Any incoming traffic radio reports will interrupt the AUX mode and are shown
in the display. TP display
If you switch from radio to AUX mode while a traffic report station is tuned in,
TP will be displayed.
Search function
A search for a station with traffic radio compatibility will automatically start if
the transmitting range of the selected station is left while in AUX mode and
the station selected in radio mode does not have traffic radio.
Traffic report reception
The traffic radio reports of the radio station that you have selected in radio
mode will interrupt the AUX mode if the TP function has been switched on.
Turning the TP function on/off
To activate the function, press briefly the TP button.
To deactivate the function, press briefly the TP button.
If pressed while a report is being broadcast, only this report is deactivated.
If the TP function is switched off, TP is no longer displayed.
MEDIA
AB
AUVOL
AC
Car stereo_EN.book Seite 22 Dienstag, 18. März 2008 4:15 16
Page 24 of 54
MP3 mode23
MP3 modeComments about CD-R (CD Writable) / CR-RW (CD Re-writable) With this unit CD-ROMs, CD-Rs or CD-RWs can be played in CD-DA (Digital
Audio) and MP3 mode.
Depending on the quality of the medium and the characteristics of the
recording some CDs may not be read. Th is is normal and is not a sign of
malfunction.
If a CD-R / CD-RW disc has not been finished, it cannot be played
4).
What are MP3 files? MP3 (MPEG 1 Audio Layer-3) is a standardised technology and format for the
compression of sound sequen ces. The sound file is compressed to about
1/10th of its original size. Sounds th at are out of the human hearing range
are excluded while those that are within the range are compressed.Accepted recording formatsIt is possible to play MP3 files recorded on CD-ROMs, CD-Rs and CD-RWs. The unit supports MP3 discs that have been formatted using the ISO 9660
standard level 1 or 2. The unit can also play discs recorded using the Romeo
or Joliet standard.
The unit will not play CDs recorded using “Packet Writing” (UDF or Direct CD
formats) whether this has been used on the entire disc or within a session. In
this case the display will display an error message and will eject the CD.
ISO 9660 format
This is the most common of international standards for the format logic of
files and folders on a CD-ROM.
There are different levels of specification. For level 1, the names must be in
8.3 format (8 characters maximum for the name of the file + 3 characters for
the extension “.MP3”. Folder names cann
ot be more than 8 letters long. On
the contrary, Level 2 specifications allow up to 31 characters.
Multi-session CDs
This method of recording means that information may later be added to the
CD (while there is enough space remaining and the CD is not closed). The
information on each recorded CD is contained within an area marked by two
data labels called “Lead-in” for the be ginning of the session and “Lead-out”
for the end. A multi-session CD will allow for multiple segments that contain
their own “Lead-in” and “Lead-out”.
Information from the ID3 data fieldThe ID3 data of an MP3 file· contains information about the Artist, Album and
the name of the track.
4)A process required so that a CD-R/CD-RW can be played by an audio CD player. Any CD
with a session open (not finished) will not be recognised and the display will show an
error message.
Car stereo_EN.book Seite 23 Dienstag, 18. März 2008 4:15 16
Page 27 of 54
USB/iPod® from Apple* mode
26USB/iPod® from Apple* modeUSB/iPod® from Apple* This operation mode permits any of the following elements to be connected:•
USB mode: A storage device with USB connection. The connection is
directly done into the USB port.
•
iPod® mode: Through an adapter cable
5) with connection to iPod® at
one end and a USB and JACK audio
6) at the other end, it is possible to connect
an iPod player from Apple Computer Inc.
•
Auxiliary connection mode: A portable audio player device (MP3,
Walkman, CD, etc...). Connection is through a JACK-JACK audio adapter
6)
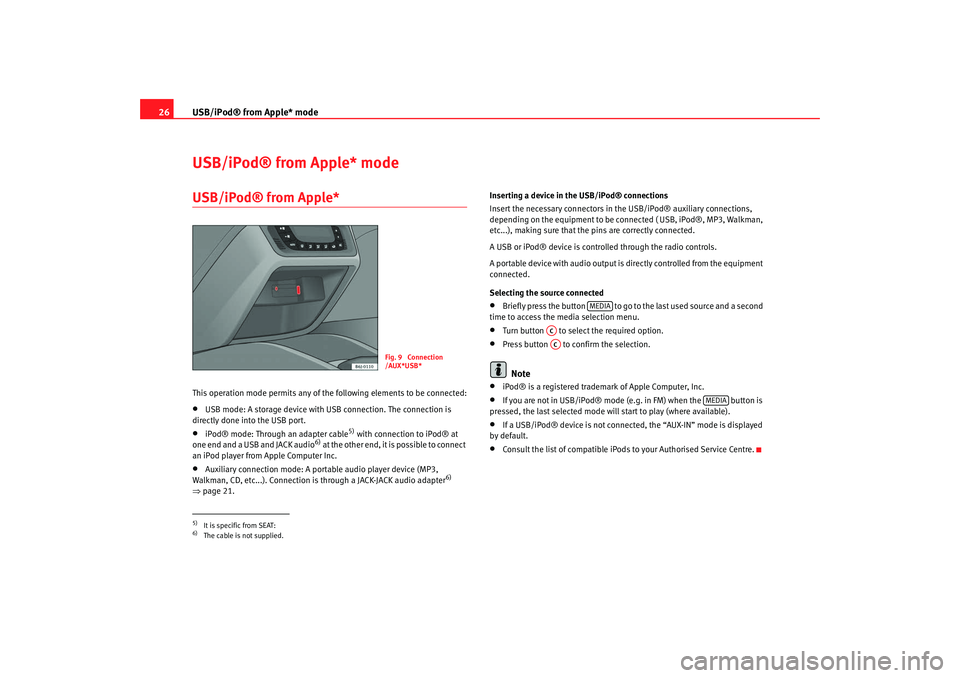
⇒ page 21. Inserting a device in the USB/iPod® connections
Insert the necessary connectors in the USB/iPod® auxiliary connections,
depending on the equipment to be connected ( USB, iPod®, MP3, Walkman,
etc...), making sure that the pins are correctly connected.
A USB or iPod® device is controlled through the radio controls.
A portable device with audio output is
directly controlled from the equipment
connected.
Selecting the source connected
•
Briefly press the button to go to the last used source and a second
time to access the media selection menu.
•
Turn button to select the required option.
•
Press button to confirm the selection.Note
•
iPod® is a registered trademark of Apple Computer, Inc.
•
If you are not in USB/iPod® mode (e.g. in FM) when the button is
pressed, the last selected mode will start to play (where available).
•
If a USB/iPod® device is not connected, the “AUX-IN” mode is displayed
by default.
•
Consult the list of compatible iPods to your Authorised Service Centre.
5)It is specific from SEAT:6)The cable is not supplied.
Fig. 9 Connection
/AUX*USB*
MEDIA
ACAC
MEDIA
Car stereo_EN.book Seite 26 Dienstag, 18. März 2008 4:15 16