Page 9 of 32

DEFROSTING/DEFOGGING REAR WINDOW AND OUTSIDE HEATED
MIRROR
Push the rear window defroster switch
on. Push the switch again to manually turn
the defroster off. This function automatically turns off in approximately 15 minutes.
A/C ON/OFF BUTTON
Press theA/Cbutton to manually turn the A/C on or off.
AIR RECIRCULATION/FRESH AIR BUTTON
�Press the air intake button to alternate between
(air recirculation) and
(fresh air) .
�The air recirculation mode cannot be selected if the air flow control dial is in the
defrost position
.
NOTE: When the center button is pressed to recirculate the interior air, the A/C will
automatically turn on (if not already on) . This is done to help reduce window fogging.
REAR FLOOR BOX
�Rear floor storage is located behind the passenger’s
seat.
�Fold the passenger’s seatback forward to access the
rear floor box.
�Coupe – Pull up on the lever
.
�Roadster – Push the upper portion of the passenger
power seat switch
.
�Pull up on the lever
to open the rear floor box.
NOTE: The rear floor storage box has additional space un-
der the bottom plate.
�Using the master key, lock the storage box (turn key to
the right) or unlock the storage box (turn key to the left) .
�Return the passenger’s seatback to a locked position
after using the rear floor box.
�Coupe – Pull up on the lever
to return seatback to
original position.
�Roadster – Push lower portion of the passenger power
seat switch
to return seatback to original position.
7
Page 10 of 32

LOAD BUTTON
�LOAD A SINGLE DISC- Press the
button for less than 1.5 seconds. Select the
loading slot by pressing one of the CD insert select button (1")
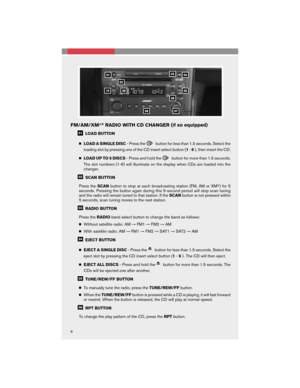
FM/AM/XM�* RADIO WITH CD CHANGER (if so equipped)
LOAD BUTTON
�LOAD A SINGLE DISC- Press the
button for less than 1.5 seconds. Select the
loading slot by pressing one of the CD insert select button (1-6) , then insert the CD.
�LOAD UP TO 6 DISCS- Press and hold the
button for more than 1.5 seconds.
The slot numbers (1-6) will illuminate on the display when CDs are loaded into the
changer.
SCAN BUTTON
Press theSCANbutton to stop at each broadcasting station (FM, AM or XM�) for 5
seconds. Pressing the button again during this 5-second period will stop scan tuning
and the radio will remain tuned to that station. If theSCANbutton is not pressed within
5 seconds, scan tuning moves to the next station.
RADIO BUTTON
Press theRADIOband select button to change the band as follows:
�Without satellite radio: AM→FM1→FM2→AM
�With satellite radio: AM→FM1→FM2→SAT1→SAT2→AM
EJECT BUTTON
�EJECT A SINGLE DISC- Press the
button for less than 1.5 seconds. Select the
eject slot by pressing the CD insert select button (1-6) . The CD will then eject.
�EJECT ALL DISCS- Press and hold the
button for more than 1.5 seconds. The
CDs will be ejected one after another.
TUNE/REW/FF BUTTON
�To manually tune the radio, press theTUNE/REW/FFbutton.
�When theTUNE/REW/FFbutton is pressed while a CD is playing, it will fast forward
or rewind. When the button is released, the CD will play at normal speed.
RPT BUTTON
To change the play pattern of the CD, press theRPTbutton.
8
Page 11 of 32

AUDIO BUTTON
To adjust the Bass, Treble, Fade, Balance, and Audio Pilot, press theAUDIObutton until
the desired mode appears in the display. Then press theTUNE/REW/FFbutton to
adjust to the desired level.
STATION AND CD SELECT BUTTONS
�To store a station in a preset you must first select AM, FM1, FM2, SAT1 or SAT2 radio
band by pressing theRADIObutton and tune to the desired FM, AM or XM�station.
Then press and hold the desired station select button for at least 2 seconds. When
the preset indicator illuminates, a beep will sound, indicating memorization is com-
plete. To retrieve a previously set station, select the radio band where the preset was
set, then press the corresponding station select button.
�While playing a CD, to select a different CD loaded into the CD changer press one of
the CD select buttons (1-6).
DISP BUTTON
Pressing theDISPbutton will display additional information (for example: Title, Artist
name) .
�MP3 PLAYBACK (if so equipped)
In addition to playing audio CDs, the audio system can play MP3 files recorded on
CD-ROM, CD-R, and CD-RW discs. Each disc can have a maximum of 8 folder levels
and 255 folders. A total of 512 MP3 files can be played back. During MP3 playback,
some recorded ID3 tag information can be displayed by pressing theDISPbutton.
Use theTUNE/REW/FFbutton to navigate the MP3 folders.
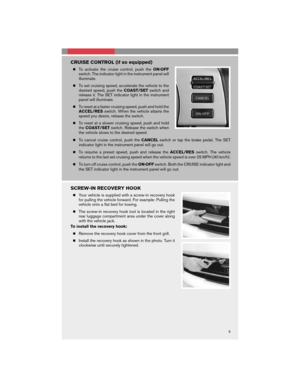
SEEK/TRACK BUTTON
�To scan quickly through each broadcasting station, press theSEEK/TRACKbutton.
�To skip from one track to another on a CD, press theSEEK/TRACKbutton. Each
time the button is pressed, the CD will advance or skip back one track.
*XM�Satellite Radio is only available on vehicles equipped with optional XM�satellite
subscription service.
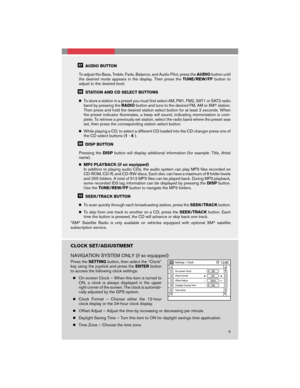
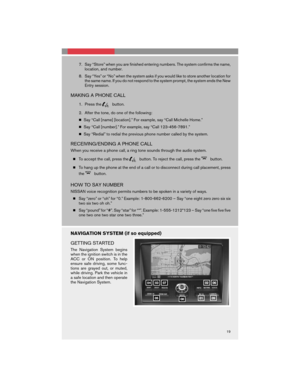
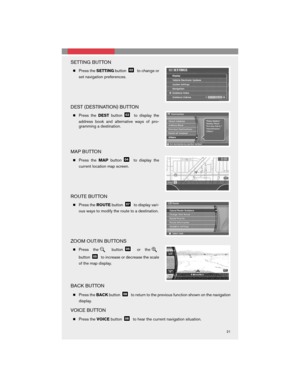
CLOCK SET/ADJUSTMENT
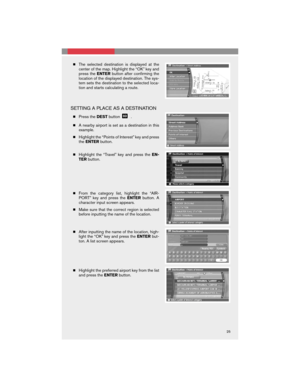
NAVIGATION SYSTEM ONLY (if so equipped)
Press theSETTINGbutton, then select the “Clock”
key using the joystick and press theENTERbutton
to access the following clock settings:
�On-screen Clock – When this item is turned to
ON, a clock is always displayed in the upper
right corner of the screen. The clock is automati-
cally adjusted by the GPS system.
�Clock Format – Choose either the 12-hour
clock display or the 24-hour clock display.
�Offset Adjust – Adjust the time by increasing or decreasing per minute.
�Daylight Saving Time – Turn this item to ON for daylight savings time application.
�Time Zone – Choose the time zone.
9
Page 12 of 32

�Press and hold theRPTbutton for approximately 2 seconds until the clock display starts
to flash.
�Press theSEEK/TRACKbutton to adjust the hours.
�Press")
FM/AM/XM�RADIO WITH CD CHANGER (if so equipped)
�Press and hold theRPTbutton for approximately 2 seconds until the clock display starts
to flash.
�Press theSEEK/TRACKbutton to adjust the hours.
�Press theTUNE/REW/FFbutton to adjust the minutes.
�Press theRPTbutton again to exit the clock set mode.
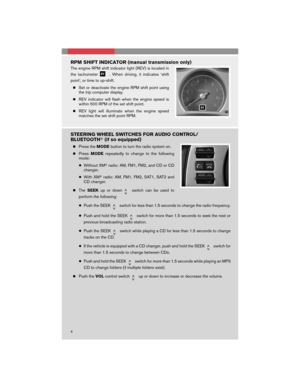
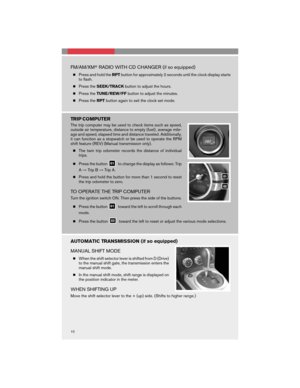
TRIP COMPUTER
The trip computer may be used to check items such as speed,
outside air temperature, distance to empty (fuel) , average mile-
age and speed, elapsed time and distance traveled. Additionally,
it can function as a stopwatch or be used to operate the RPM
shift feature (REV) (Manual transmission only) .
�The twin trip odometer records the distance of individual
trips.
�Press the button
to change the display as follows: Trip
A→Trip B→Trip A.
�Press and hold the button for more than 1 second to reset
the trip odometer to zero.
TO OPERATE THE TRIP COMPUTER
Turn the ignition switch ON. Then press the side of the buttons.
�Press the button
toward the left to scroll through each
mode.
�Press the button
toward the left to reset or adjust the various mode selections.
AUTOMATIC TRANSMISSION (if so equipped)
MANUAL SHIFT MODE
�When the shift selector lever is shifted from D (Drive)
to the manual shift gate, the transmission enters the
manual shift mode.
�In the manual shift mode, shift range is displayed on
the position indicator in the meter.
WHEN SHIFTING UP
Move the shift selector lever to the + (up) side. (Shifts to higher range.)
10
Page 13 of 32
 side. (Shifts to lower range.)
�In manual shift mode, the transmission automatically shifts down to M1 (first) before the
vehicle com")
WHEN SHIFTING DOWN
Move the shift selector lever to the – (down) side. (Shifts to lower range.)
�In manual shift mode, the transmission automatically shifts down to M1 (first) before the
vehicle comes to a stop. When accelerating again, it is necessary to shift to the desired
range.
�Moving the shift selector lever rapidly to the same side twice will shift the ranges in
succession.
�When canceling the manual shift mode, return the shift selector lever to the D (Drive)
position. The transmission returns to the normal driving mode.
6-SPEED MANUAL TRANSMISSION (if so equipped)
REVERSE GEAR
LOCK OUT
�In 6-speed manual transmission equipped vehicles, the shift lever is equipped with a
Reverse lock-out feature that prevents accidental selection of Reverse (instead of 1st
gear) .
SHIFTING TO REVERSE
�Depress the shift lever down, then move it to the right and back into Reverse.
NOTE: When shifting, always depress the clutch pedal fully to avoid noise and gear grind.
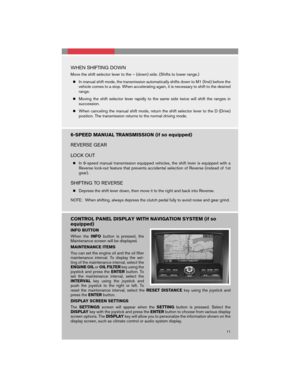
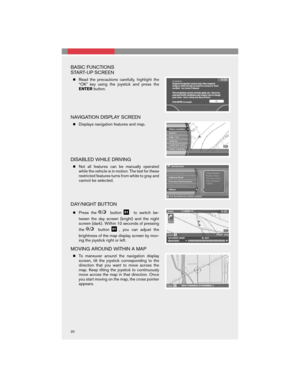
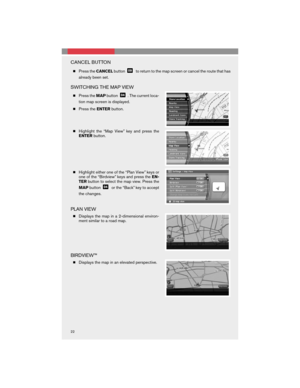
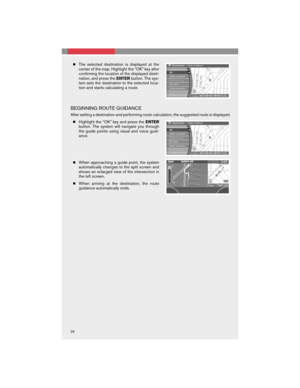
CONTROL PANEL DISPLAY WITH NAVIGATION SYSTEM (if so
equipped)
INFO BUTTON
When theINFObutton is pressed, the
Maintenance screen will be displayed.
MAINTENANCE ITEMS
You can set the engine oil and the oil filter
maintenance interval. To display the set-
ting of the maintenance interval, select the
ENGINE OILorOIL FILTERkey using the
joystick and press theENTERbutton. To
set the maintenance interval, select the
INTERVALkey using the joystick and
push the joystick to the right or left. To
reset the maintenance interval, select theRESET DISTANCEkey using the joystick and
press theENTERbutton.
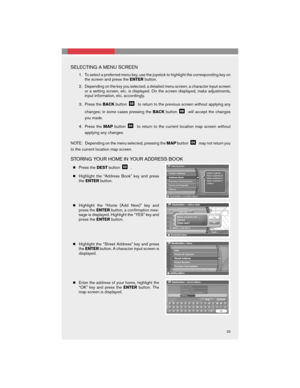
DISPLAY SCREEN SETTINGS
TheSETTINGSscreen will appear when theSETTINGbutton is pressed. Select the
DISPLAYkey with the joystick and press theENTERbutton to choose from various display
screen options. TheDISPLAYkey will allow you to personalize the information shown on the
display screen, such as climate control or audio system display.
11
Page 14 of 32
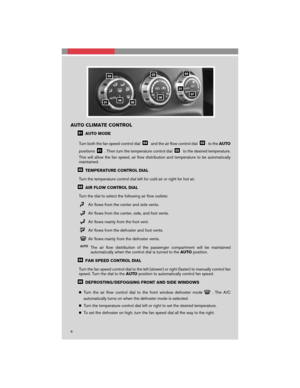
 OFF SWITCH (if so equipped)
The vehicle should be driven with the Traction Control System (TCS) on
for most driving conditions. TCS reduces the engine output to reduce
wh")
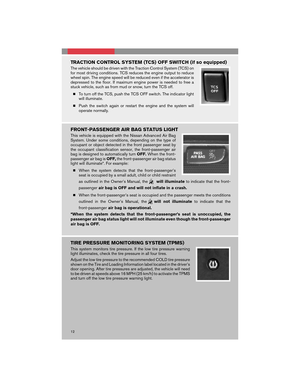
TRACTION CONTROL SYSTEM (TCS) OFF SWITCH (if so equipped)
The vehicle should be driven with the Traction Control System (TCS) on
for most driving conditions. TCS reduces the engine output to reduce
wheel spin. The engine speed will be reduced even if the accelerator is
depressed to the floor. If maximum engine power is needed to free a
stuck vehicle, such as from mud or snow, turn the TCS off.
�To turn off the TCS, push the TCS OFF switch. The indicator light
will illuminate.
�Push the switch again or restart the engine and the system will
operate normally.
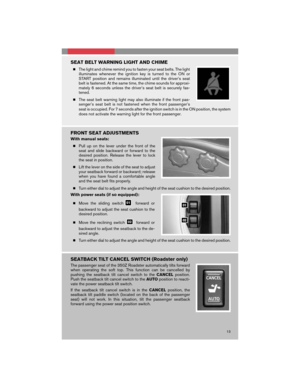
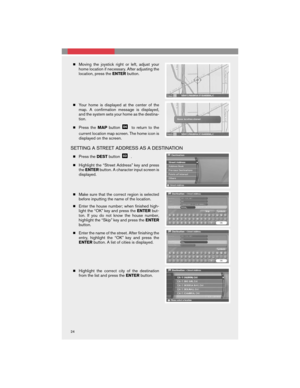
FRONT-PASSENGER AIR BAG STATUS LIGHT
This vehicle is equipped with the Nissan Advanced Air Bag
System. Under some conditions, depending on the type of
occupant or object detected in the front passenger seat by
the occupant classification sensor, the front-passenger air
bag is designed to automatically turnOFF.When the front-
passenger air bag isOFF,the front-passenger air bag status
light will illuminate*. For example:
�When the system detects that the front-passenger’s
seat is occupied by a small adult, child or child restraint
as outlined in the Owner’s Manual, the
will illuminateto indicate that the front-
passengerair bag is OFF and will not inflate in a crash.
�When the front-passenger’s seat is occupied and the passenger meets the conditions
outlined in the Owner’s Manual, the
will not illuminateto indicate that the
front-passengerair bag is operational.
*When the system detects that the front-passenger’s seat is unoccupied, the
passenger air bag status light will not illuminate even though the front-passenger
air bag is OFF.
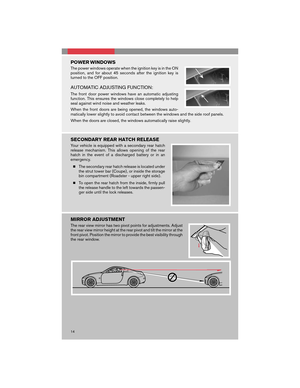
TIRE PRESSURE MONITORING SYSTEM (TPMS)
This system monitors tire pressure. If the low tire pressure warning
light illuminates, check the tire pressure in all four tires.
Adjust the low tire pressure to the recommended COLD tire pressure
shown on the Tire and Loading Information label located in the driver’s
door opening. After tire pressures are adjusted, the vehicle will need
to be driven at speeds above 16 MPH (25 km/h) to activate the TPMS
and turn off the low tire pressure warning light.
12
Page 15 of 32

SEAT BELT WARNING LIGHT AND CHIME
�The light and chime remind you to fasten your seat belts. The light
illuminates whenever the ignition key is turned to the ON or
START position and remains illuminated until the driver’s seat
belt is fastened. At the same time, the chime sounds for approxi-
mately 6 seconds unless the driver’s seat belt is securely fas-
tened.
�The seat belt warning light may also illuminate if the front pas-
senger’s seat belt is not fastened when the front passenger’s
seat is occupied. For 7 seconds after the ignition switch is in the ON position, the system
does not activate the warning light for the front passenger.
FRONT SEAT ADJUSTMENTS
With manual seats:
�Pull up on the lever under the front of the
seat and slide backward or forward to the
desired position. Release the lever to lock
the seat in position.
�Lift the lever on the side of the seat to adjust
your seatback forward or backward; release
when you have found a comfortable angle
and the seat belt fits properly.
�Turn either dial to adjust the angle and height of the seat cushion to the desired position.
With power seats (if so equipped):
�Move the sliding switch
forward or
backward to adjust the seat cushion to the
desired position.
�Move the reclining switch
forward or
backward to adjust the seatback to the de-
sired angle.
�Turn either dial to adjust the angle and height of the seat cushion to the desired position.
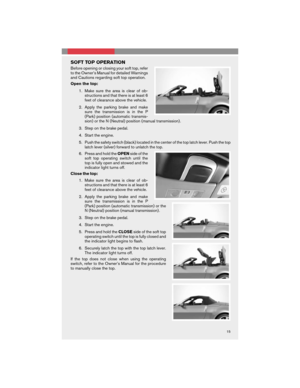
SEATBACK TILT CANCEL SWITCH (Roadster only)
The passenger seat of the 350Z Roadster automatically tilts forward
when operating the soft top. This function can be cancelled by
pushing the seatback tilt cancel switch to theCANCELposition.
Push the seatback tilt cancel switch to theAUTOposition to reacti-
vate the power seatback tilt switch.
If the seatback tilt cancel switch is in theCANCELposition, the
seatback tilt paddle switch (located on the back of the passenger
seat) will not work. In this situation, tilt the passenger seatback
forward using the power seat position switch.
13
Page 16 of 32

POWER WINDOWS
The power windows operate when the ignition key is in the ON
position, and for about 45 seconds after the ignition key is
turned to the OFF position.
AUTOMATIC ADJUSTING FUNCTION:
The front door power windows have an automatic adjusting
function. This ensures the windows close completely to help
seal against wind noise and weather leaks.
When the front doors are being opened, the windows auto-
matically lower slightly to avoid contact between the windows and the side roof panels.
When the doors are closed, the windows automatically raise slightly.
SECONDARY REAR HATCH RELEASE
Your vehicle is equipped with a secondary rear hatch
release mechanism. This allows opening of the rear
hatch in the event of a discharged battery or in an
emergency.
�The secondary rear hatch release is located under
the strut tower bar (Coupe) , or inside the storage
bin compartment (Roadster - upper right side) .
�To open the rear hatch from the inside, firmly pull
the release handle to the left towards the passen-
ger side until the lock releases.
MIRROR ADJUSTMENT
The rear view mirror has two pivot points for adjustments. Adjust
the rear view mirror height at the rear pivot and tilt the mirror at the
front pivot. Position the mirror to provide the best visibility through
the rear window.
14