Page 17 of 32

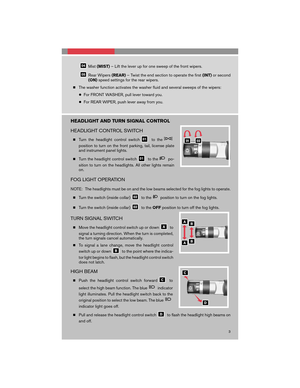
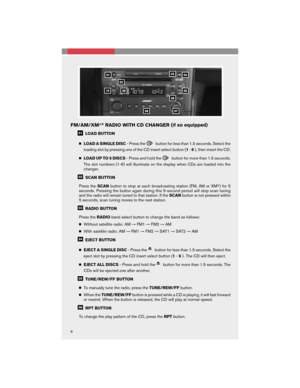
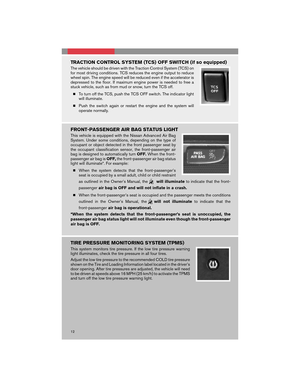
SOFT TOP OPERATION
Before opening or closing your soft top, refer
to the Owner’s Manual for detailed Warnings
and Cautions regarding soft top operation.
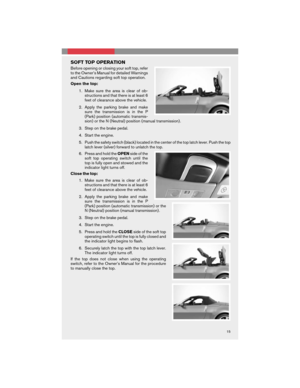
Open the top:
1. Make sure the area is clear of ob-
structions and that there is at least 6
feet of clearance above the vehicle.
2. Apply the parking brake and make
sure the transmission is in the P
(Park) position (automatic transmis-
sion) or the N (Neutral) position (manual transmission) .
3. Step on the brake pedal.
4. Start the engine.
5. Push the safety switch (black) located in the center of the top latch lever. Push the top
latch lever (silver) forward to unlatch the top.
6. Press and hold theOPENside of the
soft top operating switch until the
top is fully open and stowed and the
indicator light turns off.
Close the top:
1. Make sure the area is clear of ob-
structions and that there is at least 6
feet of clearance above the vehicle.
2. Apply the parking brake and make
sure the transmission is in the P
(Park) position (automatic transmission) or the
N (Neutral) position (manual transmission) .
3. Step on the brake pedal.
4. Start the engine.
5. Press and hold theCLOSEside of the soft top
operating switch until the top is fully closed and
the indicator light begins to flash.
6. Securely latch the top with the top latch lever.
The indicator light turns off.
If the top does not close when using the operating
switch, refer to the Owner’s Manual for the procedure
to manually close the top.
15
Page 18 of 32

SYSTEM OPERATING TIPS
�Garage doors, electrical gates, entry doors, etc. will be activated during programming.
To avoid injury, make sure that people an")
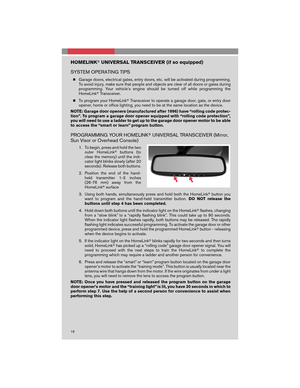
HOMELINK�UNIVERSAL TRANSCEIVER (if so equipped)
SYSTEM OPERATING TIPS
�Garage doors, electrical gates, entry doors, etc. will be activated during programming.
To avoid injury, make sure that people and objects are clear of all doors or gates during
programming. Your vehicle’s engine should be turned off while programming the
HomeLink�Transceiver.
�To program your HomeLink�Transceiver to operate a garage door, gate, or entry door
opener, home or office lighting, you need to be at the same location as the device.
NOTE: Garage door openers (manufactured after 1996) have “rolling code protec-
tion”. To program a garage door opener equipped with “rolling code protection”,
you will need to use a ladder to get up to the garage door opener motor to be able
to access the “smart or learn” program button.
PROGRAMMING YOUR HOMELINK�UNIVERSAL TRANSCEIVER (Mirror,
Sun Visor or Overhead Console)
1. To begin, press and hold the two
outer HomeLink�buttons (to
clear the memory) until the indi-
cator light blinks slowly (after 20
seconds) . Release both buttons.
2. Position the end of the hand-
held transmitter 1-3 inches
(26-76 mm) away from the
HomeLink�surface
3. Using both hands, simultaneously press and hold both the HomeLink�button you
want to program and the hand-held transmitter button.DO NOT release the
buttons until step 4 has been completed.
4. Hold down both buttons until the indicator light on the HomeLink�flashes, changing
from a “slow blink” to a “rapidly flashing blink”. This could take up to 90 seconds.
When the indicator light flashes rapidly, both buttons may be released. The rapidly
flashing light indicates successful programming. To activate the garage door or other
programmed device, press and hold the programmed HomeLink�button - releasing
when the device begins to activate.
5. If the indicator light on the HomeLink�blinks rapidly for two seconds and then turns
solid, HomeLink�has picked up a “rolling code” garage door opener signal. You will
need to proceed with the next steps to train the HomeLink�to complete the
programming which may require a ladder and another person for convenience.
6. Press and release the “smart” or “learn” program button located on the garage door
opener’s motor to activate the “training mode”. This button is usually located near the
antenna wire that hangs down from the motor. If the wire originates from under a light
lens, you will need to remove the lens to access the program button.
NOTE: Once you have pressed and released the program button on the garage
door opener’s motor and the “training light” is lit, you have 30 seconds in which to
perform step 7. Use the help of a second person for convenience to assist when
performing this step.
16
Page 19 of 32

7. Quickly within 30 seconds of pressing and releasing the garage door opener
program button, firmly press and release the HomeLink�button you’ve just pro-
grammed. Press and release the HomeLink�button up to three times to complete the
training.
8. Your HomeLink�button should now be programmed. (To program the remaining
HomeLink�buttons for additional door or gate openers, follow steps 2-8 only) .
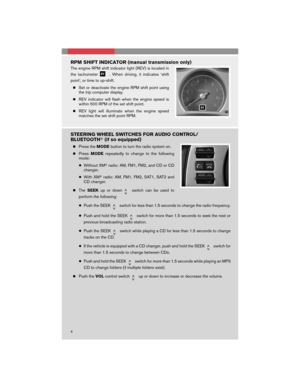
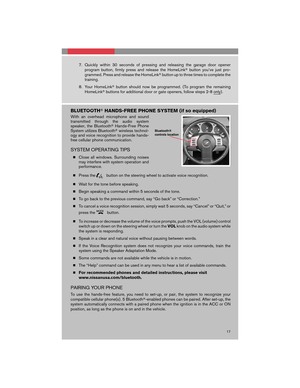
BLUETOOTH�HANDS-FREE PHONE SYSTEM (if so equipped)
With an overhead microphone and sound
transmitted through the audio system
speaker, the Bluetooth�Hands-Free Phone
System utilizes Bluetooth�wireless technol-
ogy and voice recognition to provide hands-
free cellular phone communication.
SYSTEM OPERATING TIPS
�Close all windows. Surrounding noises
may interfere with system operation and
performance.
�Press the
button on the steering wheel to activate voice recognition.
�Wait for the tone before speaking.
�Begin speaking a command within 5 seconds of the tone.
�To go back to the previous command, say “Go back” or “Correction.”
�To cancel a voice recognition session, simply wait 5 seconds, say “Cancel” or “Quit,” or
press the
button.
�To increase or decrease the volume of the voice prompts, push the VOL (volume) control
switch up or down on the steering wheel or turn theVOLknob on the audio system while
the system is responding.
�Speak in a clear and natural voice without pausing between words.
�If the Voice Recognition system does not recognize your voice commands, train the
system using the Speaker Adaptation Mode.
�Some commands are not available while the vehicle is in motion.
�The “Help” command can be used in any menu to hear a list of available commands.
�For recommended phones and detailed instructions, please visit
www.nissanusa.com/bluetooth.
PAIRING YOUR PHONE
To use the hands-free feature, you need to set-up, or pair, the system to recognize your
compatible cellular phone(s) . 5 Bluetooth�-enabled phones can be paired. After set-up, the
system automatically connects with a paired phone when the ignition is in the ACC or ON
position, as long as the phone is on and in the vehicle.
17
Page 20 of 32

PAIRING PROCEDURE
NOTE: The vehicle must be stationary when pairing the phone.
1. Press the
button on the steering wheel and wait for the tone.
2. Say “Setup.”
3. Wait for the tone, then say “Pair phone.”
4. Wait for the tone, then say “New phone.”
5. Initiate pairing from the phone.
�The pairing procedure varies according to each cellular phone model. For detailed
pairing instructions and a list of compatible phones, please visit
www.nissanusa.com/bluetooth.
�When prompted for a PASSKEY code, enter “1234” from the handset. (The PASS-
KEY code is assigned by NISSAN and cannot be changed.)
6. Say a name for the phone when the system asks you to provide one. You can give the
phone a name of your choice.
7. Say a number between 1 and 5 when the system asks you for a priority level. The
priority level determines which phone interacts with the system when two or more
paired phones are active in the vehicle at the same time. Choose 1 if this is the only
phone or the primary phone.
8. Say “Yes” or “No” when the system asks if you would like to select a custom ring tone.
Follow the instructions provided by the system to choose a ring tone.
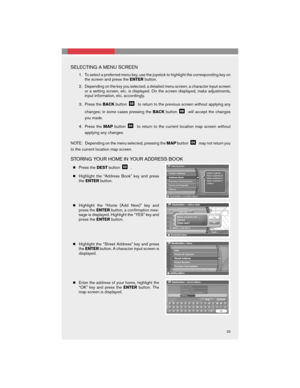
SETTING UP YOUR PHONEBOOK – ADDING NEW ENTRIES
Each paired phone has its own dedicated phone book. Each phone book can store up to 40
names. Each name can have up to 4 locations/numbers: Home, Office, Mobile, and Other.
NOTE: The vehicle must be stationary when adding new entries.
1. Press the
button and wait for the tone.
2. Say “Phone book.”
3. Wait for the tone, then say “New entry.”
4. When prompted, say the name for the new entry. For example, say “Michelle.” If the
name is too short or too long, or if it sounds too much like a name that is already
stored in the phone book, the system tells you and prompts you to say a name again.
Choose a new name.
5. Say “Yes” or “No” when the system asks you to confirm the name is correct.
6. Say a location (“Home,” “Office,” “Mobile” or “Other”) when the system asks you to
provide one. The system acknowledges the location.
�By Voice command - When prompted, say a phone number for the location. For
example, say “five five five one two one two.” The system repeats the number and
prompts you for the next command.
�By Bluetooth�transfer - Say “Transfer entry.” The system acknowledges the com-
mand and asks you to initiate the transfer from the phone handset. The new contact
phone number will be transferred from the cellular phone via the Bluetooth�commu-
nication link. The transfer procedure varies according to each cellular phone. See the
cellular phone owner’s manual for details.
18
Page 21 of 32

7. Say “Store” when you are finished entering numbers. The system confirms the name,
location, and number.
8. Say “Yes” or “No” when the system asks if you would like to store another location for
the same name. If you do not respond to the system prompt, the system ends the New
Entry session.
MAKING A PHONE CALL
1. Press thebutton.
2. After the tone, do one of the following:
�Say “Call [name] [location].” For example, say “Call Michelle Home.”
�Say “Call [number].” For example, say “Call 123-456-7891.”
�Say “Redial” to redial the previous phone number called by the system.
RECEIVING/ENDING A PHONE CALL
When you receive a phone call, a ring tone sounds through the audio system.
�To accept the call, press the
button. To reject the call, press thebutton.
�To hang up the phone at the end of a call or to disconnect during call placement, press
the
button.
HOW TO SAY NUMBER
NISSAN voice recognition permits numbers to be spoken in a variety of ways.
�Say “zero” or “oh” for “0.” Example: 1-800-662-6200 – Say “one eight zero zero six six
two six two oh oh.”
�Say “pound” for “#”. Say “star” for “*”. Example: 1-555-1212*123 – Say “one five five five
one two one two star one two three.”
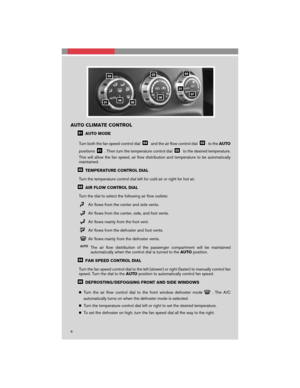
NAVIGATION SYSTEM (if so equipped)
GETTING STARTED
The Navigation System begins
when the ignition switch is in the
ACC or ON position. To help
ensure safe driving, some func-
tions are grayed out, or muted,
while driving. Park the vehicle in
a safe location and then operate
the Navigation System.
19
Page 22 of 32
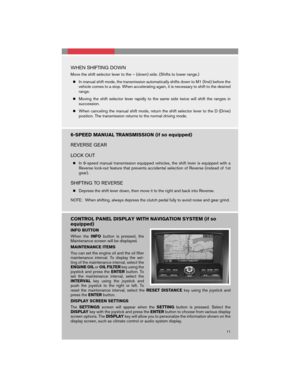
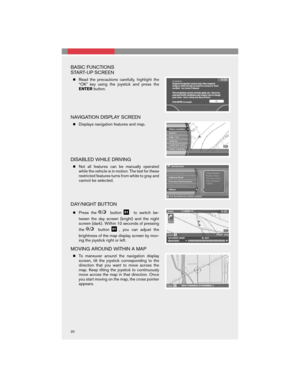
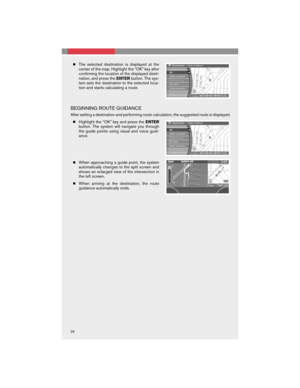
BASIC FUNCTIONS
START-UP SCREEN
�Read the precautions carefully, highlight the
“OK” key using the joystick and press the
ENTERbutton.
NAVIGATION DISPLAY SCREEN
�Displays navigation features and map.
DISABLED WHILE DRIVING
�Not all features can be manually operated
while the vehicle is in motion. The text for these
restricted features turns from white to gray and
cannot be selected.
DAY/NIGHT BUTTON
�Press thebuttonto switch be-
tween the day screen (bright) and the night
screen (dark) . Within 10 seconds of pressing
the
button, you can adjust the
brightness of the map display screen by mov-
ing the joystick right or left.
MOVING AROUND WITHIN A MAP
�To maneuver around the navigation display
screen, tilt the joystick corresponding to the
direction that you want to move across the
map. Keep tilting the joystick to continuously
move across the map in that direction. Once
you start moving on the map, the cross pointer
appears.
20
Page 23 of 32
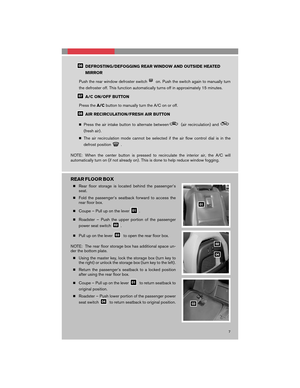
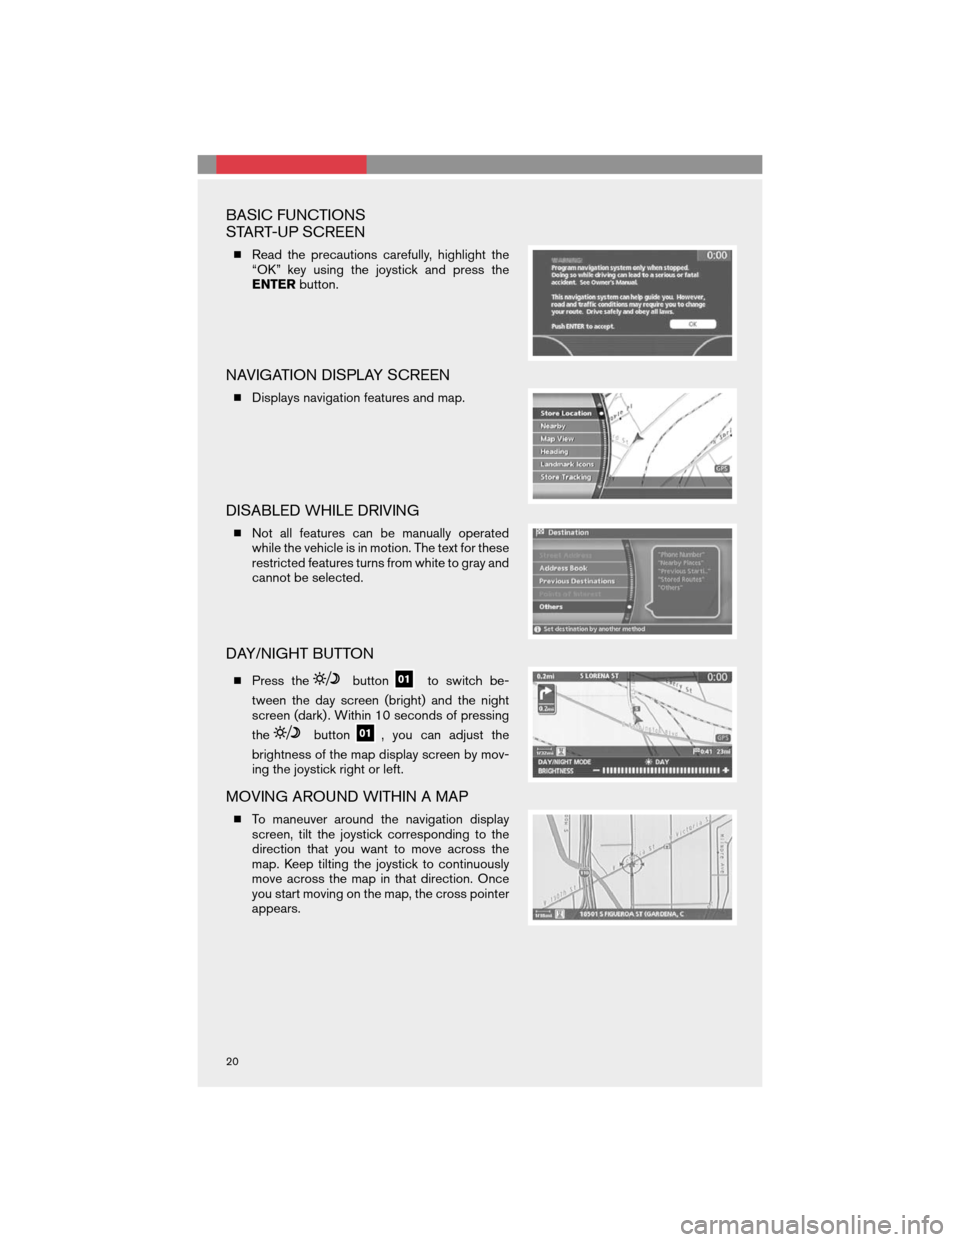
SETTING BUTTON
�Press the SETTING buttonto change or
set navigation preferences.
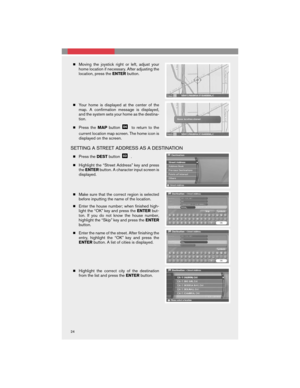
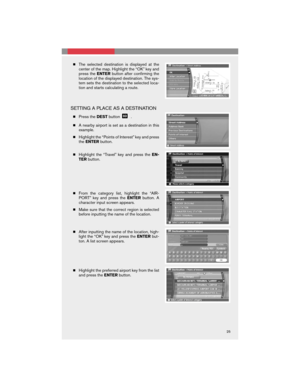
DEST (DESTINATION) BUTTON
� Press the DESTbuttonto display the
address book and alternative ways of pro-
gramming a destination.
MAP BUTTON
� Press the MAPbuttonto display the
current location map screen.
ROUTE BUTTON
� Press the ROUTEbuttonto display vari-
ous ways to modify the route to a destination.
ZOOM OUT/IN BUTTONS
� Press thebuttonor the
buttonto increase or decrease the scale
of the map display.
BACK BUTTON
� Press the BACKbuttonto return to the previous function shown on the navigation
display.
VOICE BUTTON
� Press the VOICEbuttonto hear the current navigation situation.
21
Page 24 of 32
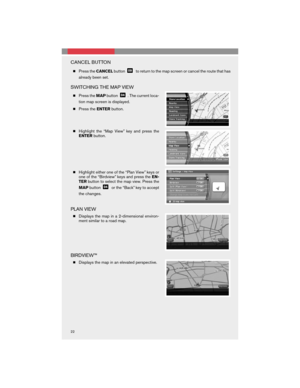
CANCEL BUTTON
�Press theCANCELbuttonto return to the map screen or cancel the route that has
already been set.
SWITCHING THE MAP VIEW
�Press theMAPbutton. The current loca-
tion map screen is displayed.
�Press theENTERbutton.
�Highlight the “Map View” key and press the
ENTERbutton.
�Highlight either one of the “Plan View” keys or
one of the “Birdview” keys and press theEN-
TERbutton to select the map view. Press the
MAPbutton
or the “Back” key to accept
the changes.
PLAN VIEW
�Displays the map in a 2-dimensional environ-
ment similar to a road map.
BIRDVIEW™
�Displays the map in an elevated perspective.
22