2008 MERCEDES-BENZ GLK SUV fuse chart
[x] Cancel search: fuse chartPage 11 of 261

Engine oil
........................................... 246
Consumption ................................. 148
Display message ............................. 195
Filler neck. ...................................... 148
Topping up. ..................................... 148
ESP ®
(Electronic Stability Program)... 52
Activating/deactivating ....................53
Display message (luxury multi-
function steering wheel) .........179, 183
Display message (multi-function
steering wheel). ......................178, 179
Trailer stabilisatio n........................... 53
Warning lamp. .......................... 52, 201
ETS (Electronic Traction Support)...... .53
Exterior lighting Delayed switch-off (luxury multi-
function steering wheel). ................103
Exterior mirrors
Adjusting .......................................... 67
Anti-dazzle mode (automatic). ..........68
Folding in/out (automatically). .........68
Folding in/out (electrically). .............68
Folding in (on-board computer,
luxury multi-function steering
wheel). ............................................ 104
Malfunction..................................... 211
Parking position. ............................... 69
Resetting. ......................................... 68
Storing settings ................................ 69
Exterior view
Overview. .......................................... 22F
Fire extinguisher................................ 174
First-aid kit ......................................... 174
Flat tyre Equipment. ..................................... 222
Preparing the vehicle. .....................222
TIREFIT kit....................................... 222
Floormat............................................. .141
Foglamps Display message ............................. 193
Fording........................................ 157, 161
Frequencies Telephone. ...................................... 244
Front airbag .......................................... 38
Front-passenger airbag ........................ 38Fuel......................................................
245
Diesel. ............................................ 145
Loss. ............................................... 206
Petrol .............................................. 145
Fuel consumption................................. 95
Current (on-board computer,
multi-function steering wheel)
................................................... 93, 96
Notes..................................... .242, 246
Vehicle data. ................................... 249
see Trip computer(on-board computer)
Fuel filler flap
Emergency release. ........................215
Opening/closing ............................ 144
Fuel filter
Display message (luxury multi-
function steering wheel) .................187
Display message (multi-function
steering wheel). .............................. 180
Fuel level
Calling up the range (on-board
computer, luxury multi-function
steering wheel). ................................ 96
Calling up the range (on-board
computer, multi-function steering
wheel). .............................................. 93
Display. ....................................... 24, 26
Fuel line
Malfunction..................................... 206
Fuel tank
Defect ............................................. 206
Fuse allocation chart......................... 239
Fuse box Dashboard. ..................................... 239
Engine compartment ......................239
Luggage compartment. ...................240
Fuses................................................... 238 G
Genuine Mercedes-Benz parts.......... 242
Glove compartment ...........................130
Gradient-climbing capability (max-
imum).................................................. 1608 Index
X204_AKB; 1; 5, en-GB
wobuchh,
Version: 2.11.4 2008-10-15T13:20:56+02:00 - Seite 8Dateiname: 6515_0671_02_buchblock.pdf; preflight
Page 241 of 261

Opening the rear cover
X
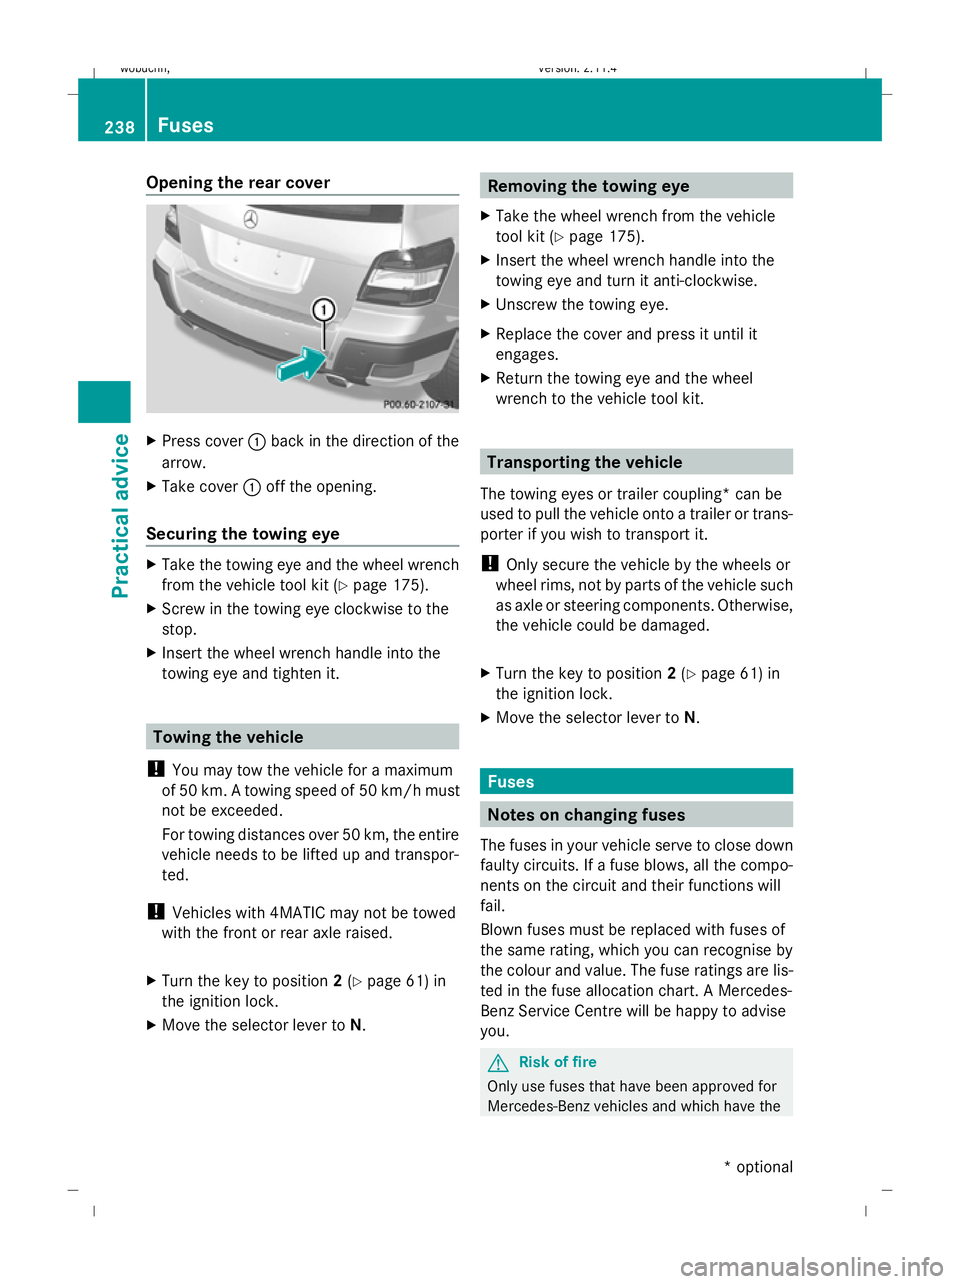
Press cover :back in the direction of the
arrow.
X Take cover :off the opening.
Securing the towing eye X
Take the towing eye and the wheel wrench
from the vehicle tool kit (Y page 175).
X Screw in the towing eye clockwise to the
stop.
X Insert the wheel wrench handle into the
towing eye and tighten it. Towing the vehicle
! You may tow the vehicle for a maximum
of 50 km. A towing speed of 50 km/hm ust
not be exceeded.
For towing distances over 50 km, the entire
vehicle needs to be lifted up and transpor-
ted.
! Vehicles with 4MATIC may not be towed
with the front or rear axle raised.
X Turn the key to position 2(Y page 61) in
the ignition lock.
X Move the selector lever to N. Removing the towing eye
X Take the wheel wrench from the vehicle
tool kit (Y page 175).
X Insert the wheel wrench handle into the
towing eye and turn it anti-clockwise.
X Unscrew the towing eye.
X Replace the cover and press it until it
engages.
X Return the towing eye and the wheel
wrench to the vehicle tool kit. Transporting the vehicle
The towing eyes or trailer coupling* can be
used to pull the vehicle onto a trailer or trans-
porter if you wish to transport it.
! Only secure the vehicle by the wheels or
wheel rims, not by parts of the vehicle such
as axle or steering components. Otherwise,
the vehicle could be damaged.
X Turn the key to position 2(Y page 61) in
the ignition lock.
X Move the selector lever to N. Fuses
Notes on changing fuses
The fuses in your vehicle serve to close down
faulty circuits. If a fuse blows, all the compo-
nents on the circuit and their functions will
fail.
Blown fuses must be replaced with fuses of
the same rating, which you can recognise by
the colour and value. The fuse ratings are lis-
ted in the fuse allocation chart. A Mercedes-
Benz Service Centre will be happy to advise
you. G
Risk of fire
Only use fuses that have been approved for
Mercedes-Benz vehicles and which have the 238 FusesPractical advice
* optional
X204_AKB; 1; 5, en-GB
wobuchh,
Version: 2.11.4 2008-10-15T13:20:56+02:00 - Seite 238Dateiname: 6515_0671_02_buchblock.pdf; preflight
Page 242 of 261

correct fuse rating for the systems con-
cerned. Do not attempt to repair or bridge
faulty fuses. Otherwise, a circuit overload
could cause a fire. Have the cause traced and
rectified at a qualified specialist workshop,
e.g. a Mercedes-Benz Service Centre.
If the newly inserted fuse also blows, have the
cause traced and rectified at a qualified spe-
cialist workshop, e.g. a Mercedes-Benz
Service Centre.
! Only use fuses that have been approved
for Mercedes-Benz vehicles and which
have the correct fuse rating for the system
concerned. Otherwise, components or sys-
tems could be damaged.
The fuses are located in various fuse boxes:
R fuse box on the driver's side of the dash-
board*
R fuse box in the engine compartment on the
driver's side
R fuse box in the stowage well under the lug-
gage compartment floor on the right-hand
side of the vehicle
Fuse allocation chart The fuse allocation chart is located with the
vehicle tool kit (Y
page 175) in the stowage
compartment under the luggage compart-
ment floor. Before changing a fuse
X Park the vehicle.
X Switch off all electrical consumers.
X Remove the key from the ignition lock. Fuse box in the dashboard*
X
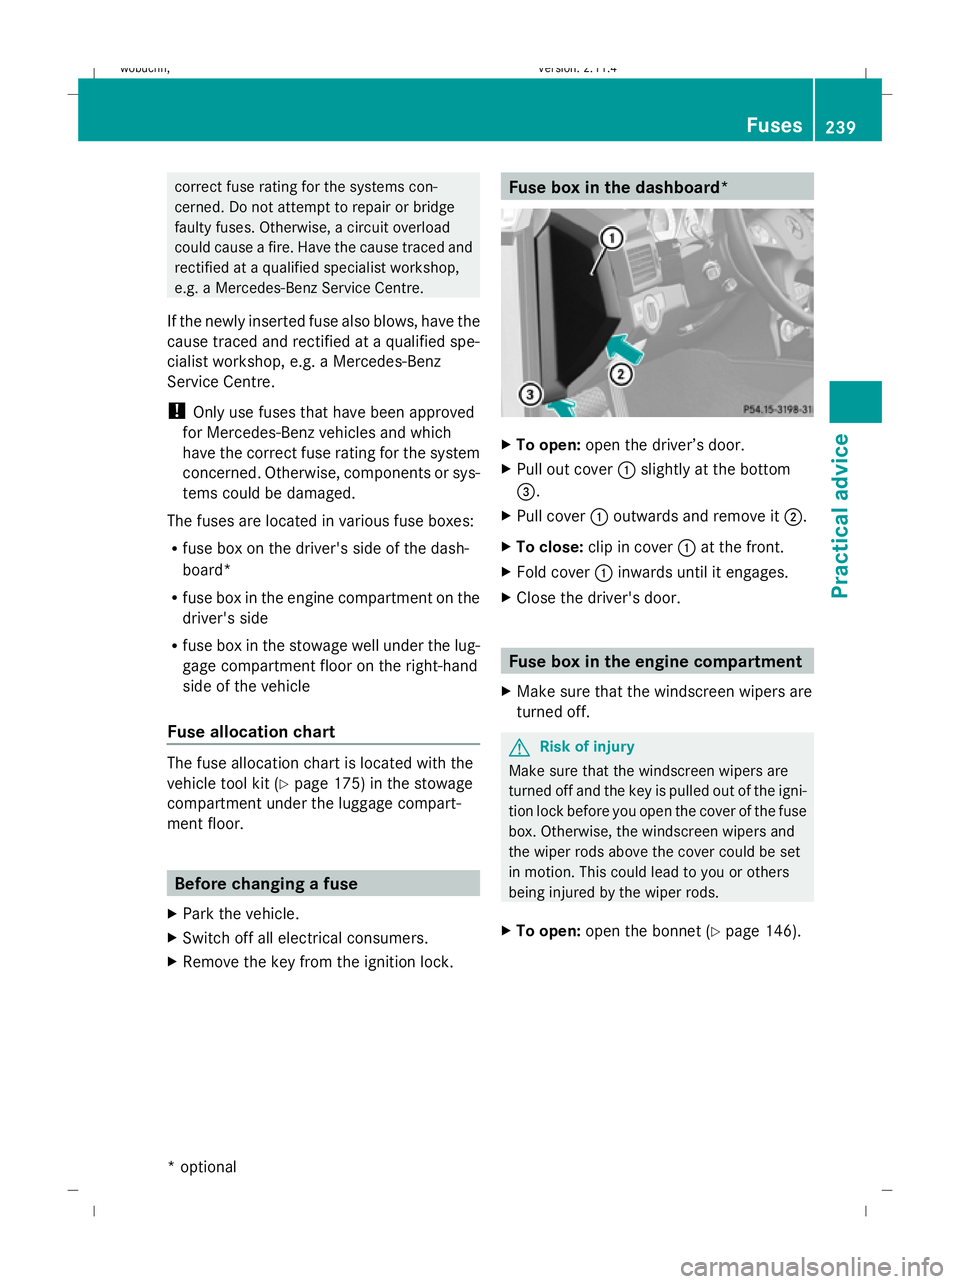
To open: open the driver’s door.
X Pull out cover :slightly at the bottom
=.
X Pull cover :outwards and remove it ;.
X To close: clip in cover :at the front.
X Fold cover :inwards until it engages.
X Close the driver's door. Fuse box in the engine compartment
X Make sure that the windscreen wipers are
turned off. G
Risk of injury
Make sure that the windscreen wipers are
turned off and the key is pulled out of the igni-
tion lock before you open the cover of the fuse
box. Otherwise, the windscreen wipers and
the wiper rods above the cover could be set
in motion. This could lead to you or others
being injured by the wiper rods.
X To open: open the bonnet (Y page 146). Fuses
239Practical advice
* optional
X204_AKB; 1; 5, en-GB
wobuchh,
Version: 2.11.4 2008-10-15T13:20:56+02:00 - Seite 239 ZDateiname: 6515_0671_02_buchblock.pdf; preflight