2008 MERCEDES-BENZ GLK SUV boot
[x] Cancel search: bootPage 8 of 261

Selector lever positions.
...................85
Shift ranges. ..................................... 86
Trailer towing. ................................... 88
Axle load, permissible
Rear (trailer towing) ........................254 B
Bag hook............................................. 136
Ball coupling Fitting ............................................. 162
Removing....................................... .165
BAS (Brake Assist)............................... 52
Battery Changing (key).. .............................. 216
Charging. ........................................ 234
Checking (key). ............................... 216
Check lamp (key). ........................... 216
Disconnecting ................................. 233
Display message ............................. 184
Jump-starting. ................................. 234
Maintenance (vehicle)..................... 232
Reconnecting.................................. 234
Removing/fitting. ........................... 233
Vehicle battery. .............................. 232
Belt force limiters
Activation.......................................... 35
Belt height adjustment ........................72
Belt tensioners Activation.......................................... 35
Belt warning.......................................... 72
Bonnet
Bonnet catch .................................. 147
Display message ............................. 183
Opening/closing ............................ 146
Bonnet release lever
Release leve r.................................. 147
Boot
Automatic opening. ....................60, 61
Boot lid
Opening/closing. .............................. 59
Brake Assist
see BAS
Brake fluid .......................................... 248
Display message (luxury multi-
function steering wheel) .................185
Display message (multi-function
steering wheel). .............................. 180Brake lamps
Adaptive............................................ 52
Display message..................... 188, 191
Brakes
Parking brake................................... .84
Warning lamp..................................2 02
Brake system
Display message ............................. 185
Bulb
see Lamp
Bulbs
Brake lamp. .................................... 220
Display messages (multi-function
steering wheel). .............................. 194
Licence plate lamp.......................... 220
Overview. ........................................ 218
Rear foglamp. ................................. 220
Replacing. ....................................... 219
Reversing lamp. .............................. 220
Tail lamp ......................................... 220
Turn signal lamp. ....................219, 220 C
Care..................................................... 167
Automatic car wash. .......................168
Dashboard. ..................................... 170
Headlamps. .................................... 169
High-pressure cleaners. ..................168
Panorama sliding sunroo f............... 170
Parktronic. ...................................... 171
Plastic trim. .................................... 170
Rear window. .................................. 169
Reversing camera. ..........................172
Seat covers.................................... .170
Side windows ................................. 169
Steering wheel boss. ......................170
Tail pipes ........................................ 171
Trailer tow hitch. ............................. 172
Trim strips ...................................... 171
Windscreen. .................................... 169
Wiper blades.. ................................. 169
Wooden strips................................. 171
CD player/CD changer
Operating (on-board computer,
luxury multi-function steering
wheel). .............................................. 99 Index
5 X204_AKB; 1; 5, en-GB
wobuchh,
Version: 2.11.4
2008-10-15T13:20:56+02:00 - Seite 5 Dateiname: 6515_0671_02_buchblock.pdf; preflight
Page 63 of 261

there is sufficient clearance above and
behind the tailgate.
Do not leave the key in the luggage compart-
ment. Otherwise, you could lock yourself out.
The tailgate can be:
R opened and closed manually
(Y page 60)
R opened and closed* automatically from
outside (Y page 60)
R opened and closed* automatically from
inside (Y page 61) Opening and closing manually
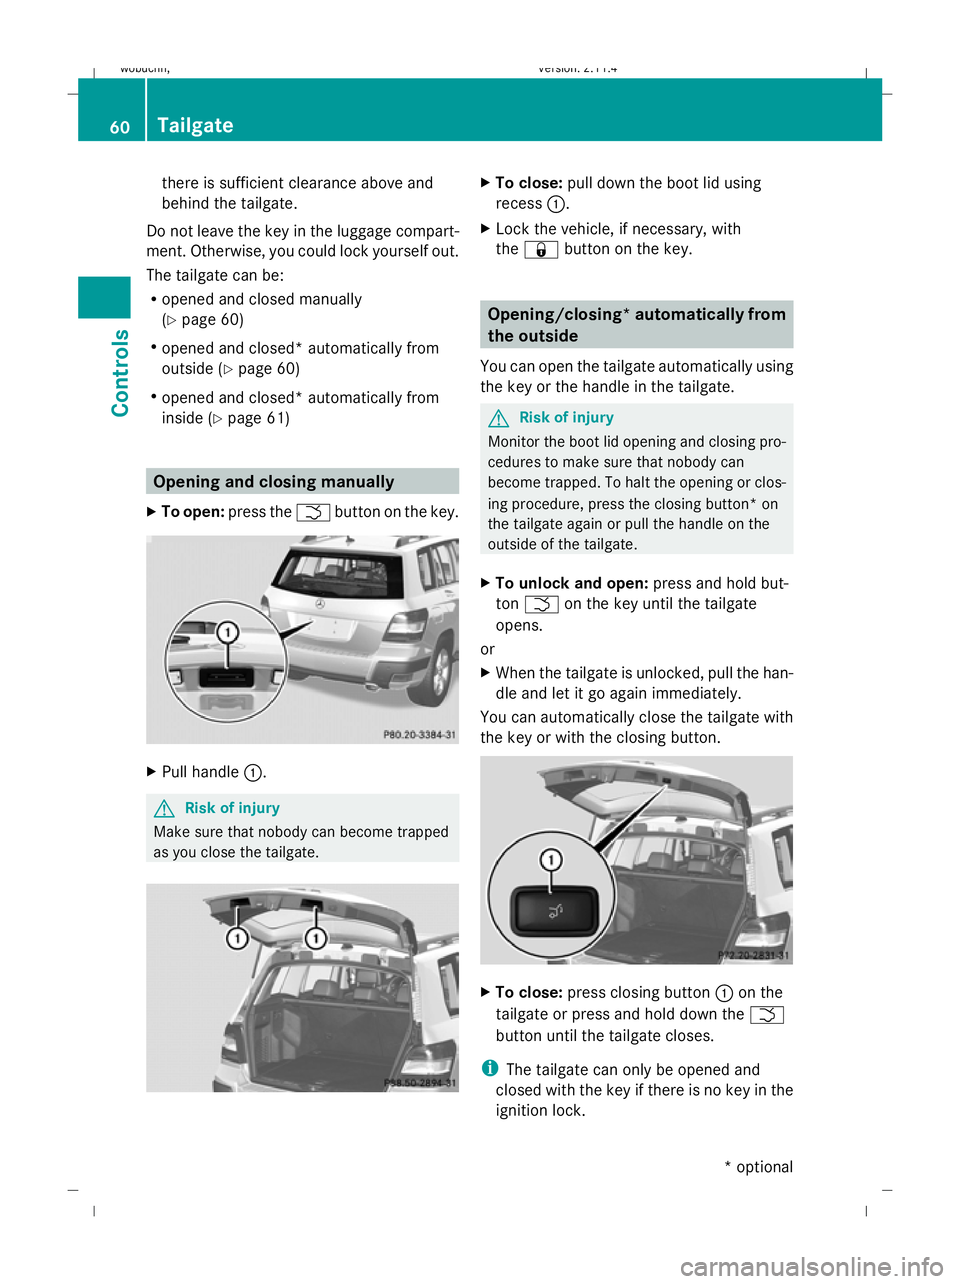
X To open: press the Fbutton on the key. X
Pull handle :. G
Risk of injury
Make sure that nobody can become trapped
as you close the tailgate. X
To close: pull down the boot lid using
recess :.
X Lock the vehicle, if necessary, with
the & button on the key. Opening/closing* automatically from
the outside
You can open the tailgate automatically using
the key or the handle in the tailgate. G
Risk of injury
Monitor the boot lid opening and closing pro-
cedures to make sure that nobody can
become trapped. To halt the opening or clos-
ing procedure, press the closing button* on
the tailgate again or pull the handle on the
outside of the tailgate.
X To unlock and open: press and hold but-
ton F on the key until the tailgate
opens.
or
X When the tailgate is unlocked, pull the han-
dle and let it go again immediately.
You can automatically close the tailgate with
the key or with the closing button. X
To close: press closing button :on the
tailgate or press and hold down the F
button until the tailgate closes.
i The tailgate can only be opened and
closed with the key if there is no key in the
ignition lock. 60 TailgateControls
* optional
X204_AKB; 1; 5, en-GB
wobuchh
,V ersion: 2.11.4
2008-10-15T13:20:56+02:00 - Seite 60 Dateiname: 6515_0671_02_buchblock.pdf; preflight
Page 177 of 261

Where will I find...?
Where will I find...?
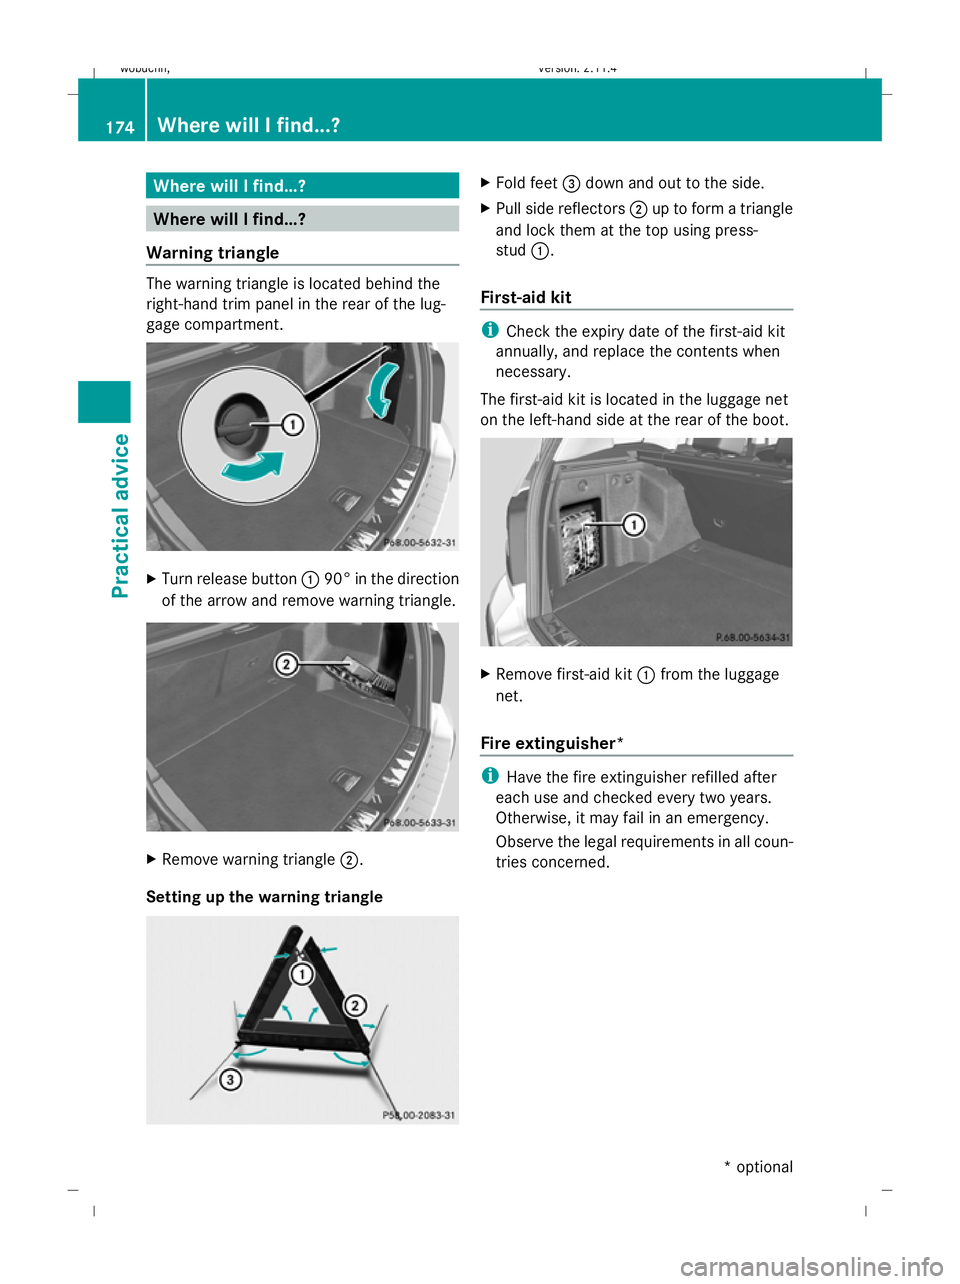
Warning triangle The warning triangle is located behind the
right-hand trim panel in the rear of the lug-
gage compartment. X
Turn release button :90° in the direction
of the arrow and remove warning triangle. X
Remove warning triangle ;.
Setting up the warning triangle X
Fold feet =down and out to the side.
X Pull side reflectors ;up to form a triangle
and lock them at the top using press-
stud :.
First-aid kit i
Check the expiry date of the first-aid kit
annually, and replace the contents when
necessary.
The first-aid kit is located in the luggage net
on the left-hand side at the rear of the boot. X
Remove first-aid kit :from the luggage
net.
Fire extinguisher* i
Have the fire extinguisher refilled after
each use and checked every two years.
Otherwise, it may fail in an emergency.
Observe the legal requirements in all coun-
tries concerned. 174 Where will I find...?Practical advice
* optional
X204_AKB; 1; 5, en-GB
wobuchh,
Version: 2.11.4 2008-10-15T13:20:56+02:00 - Seite 174Dateiname: 6515_0671_02_buchblock.pdf; preflight
Page 234 of 261

X
Version 1: open flap1.
X Version 1: pull connector 3and air hose
4 out of the housing.
X Version 2: pull connector 3and the air
hose out of the housing.
X Version 1: make sure that pressure
release screw 4on the pressure gauge is
fully closed.
X Remove the cap from the valve on the tyre.
X Screw union nut 5on the air hose onto the
valve.
X Make sure on/off switch 2of the electric
air pump is set to 0.
X Insert plug 3into the cigarette lighter
socket* (Y page 138) or into a 12 V socket
in your vehicle (Y page 139).
X Make sure that the key is in posi-
tion 2(Y page 61) in the ignition lock.
X Press on/off switch 2on the electric air
pump to I.
The electric air pump is switched on. The
tyre is inflated.
X When a tyre pressure of 2.8 bar is reached,
press on/off switch 2on the electric air
pump to 0.
The electric air pump is switched off.
! Do not operate the electric air pump for
longer than eight minutes at a time without
a break. Otherwise, it may overheat.
The air pump can be operated again once
it has cooled down.
If the tyre pressure is higher than 2.8 bar:
X Version 1: open pressure release
screw 4on the pressure gauge until the
tyre pressure is correct.
X Version 2: press pressure release button
6 until the tyre pressure is correct.
X Switch off the electric air pump at on/off
switch 2, disconnect from the tyre valve
and stow away. Lowering the vehicle X
Place the ratchet ring spanner onto the
hexagon nut of the jack so that the letters
AB are visible.
X Lower the vehicle by turning the ratchet
ring spanner until the vehicle is once again
standing firmly on the ground.
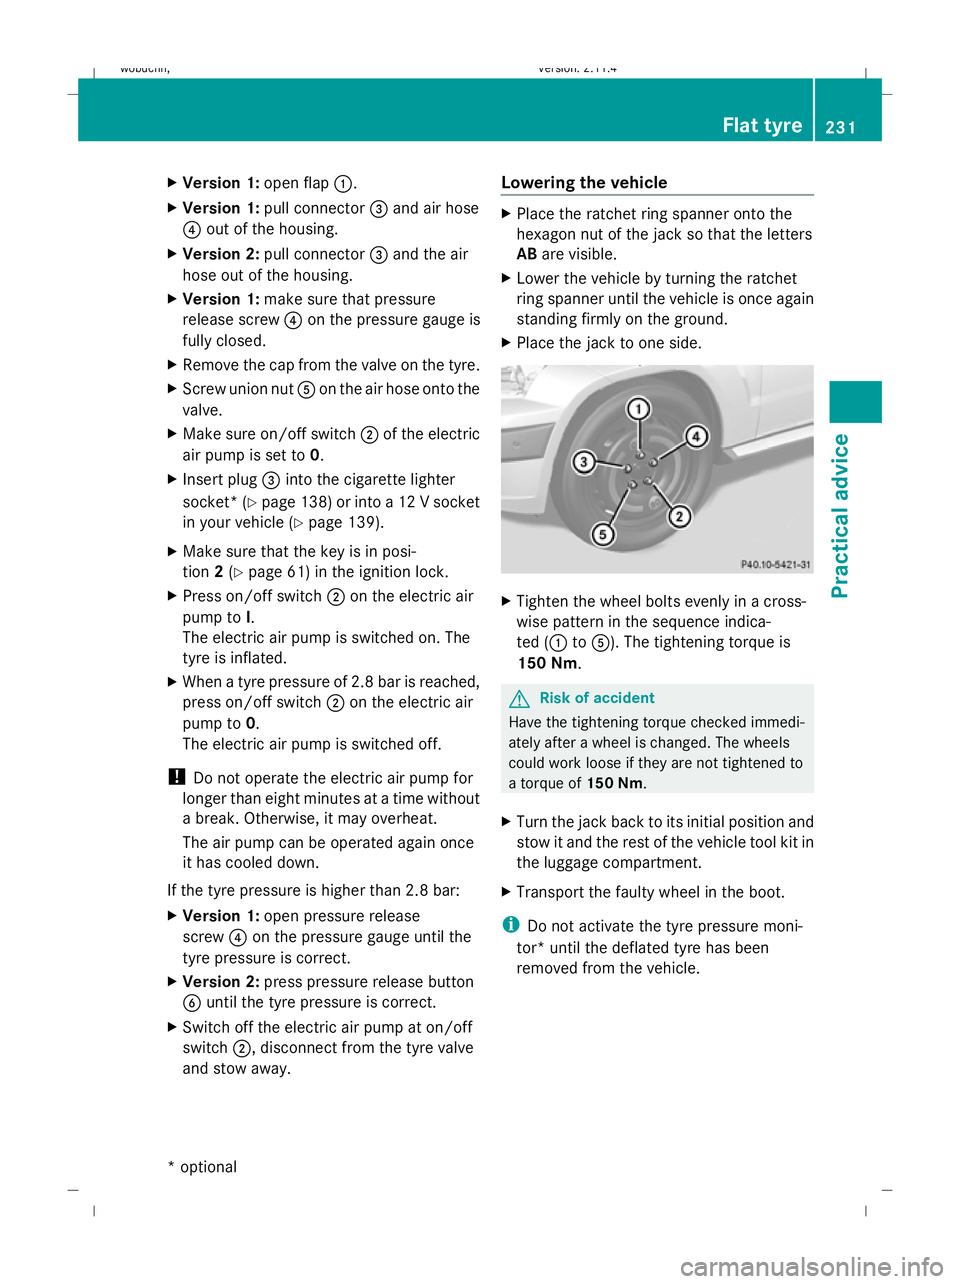
X Place the jack to one side. X
Tighten the wheel bolts evenly in a cross-
wise pattern in the sequence indica-
ted (1 to5). The tightening torque is
150 Nm. G
Risk of accident
Have the tightening torque checked immedi-
ately after a wheel is changed. The wheels
could work loose if they are not tightened to
a torque of 150 Nm.
X Turn the jack back to its initial position and
stow it and the rest of the vehicle tool kit in
the luggage compartment.
X Transport the faulty wheel in the boot.
i Do not activate the tyre pressure moni-
tor* until the deflated tyre has been
removed from the vehicle. Flat tyre
231Practical advice
* optional
X204_AKB; 1; 5, en-GB
wobuchh,
Version: 2.11.4 2008-10-15T13:20:56+02:00 - Seite 231 ZDateiname: 6515_0671_02_buchblock.pdf; preflight