2008 MERCEDES-BENZ GLK SUV light
[x] Cancel search: lightPage 116 of 261
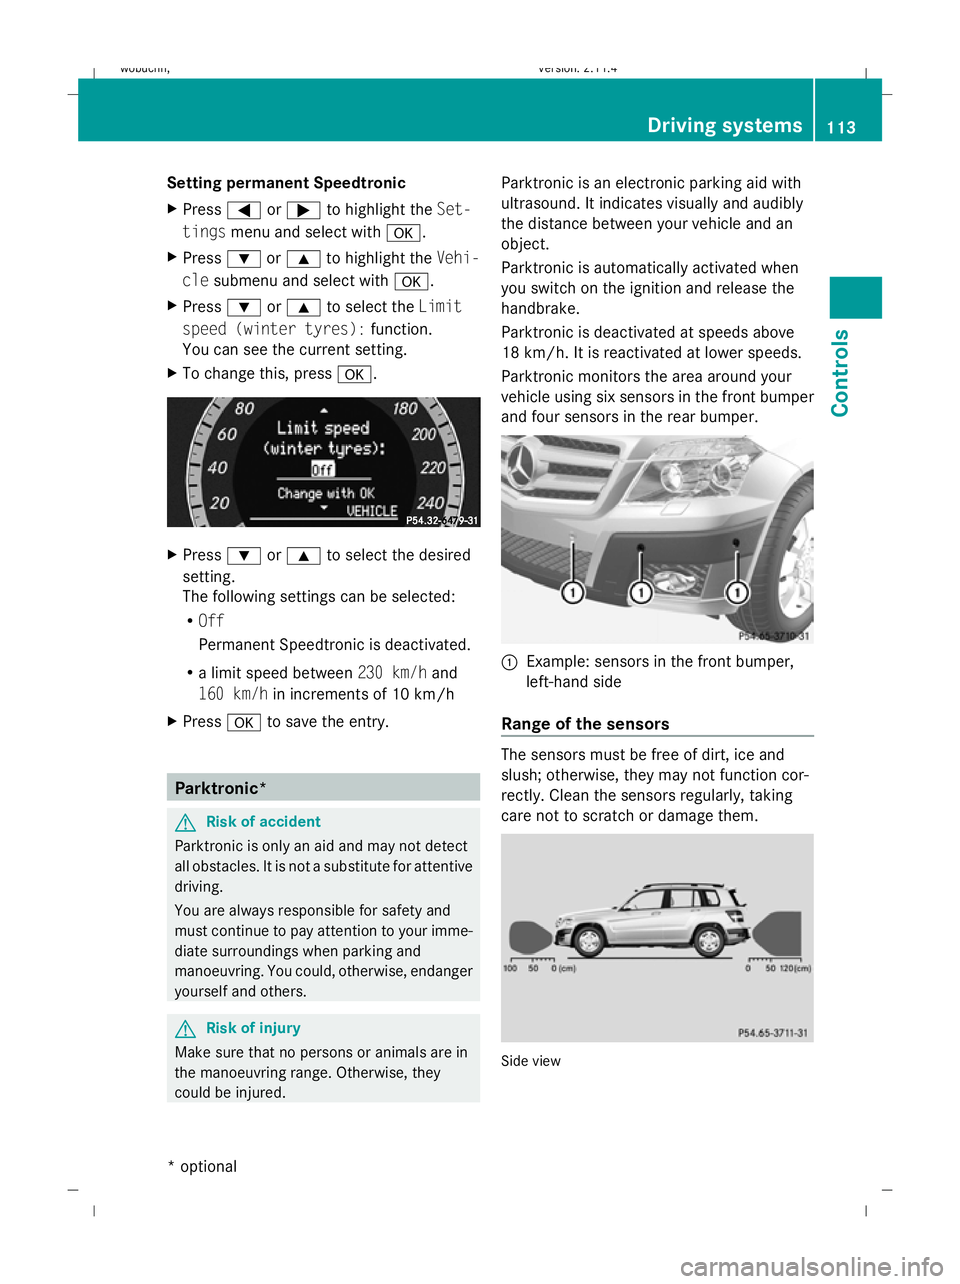
Setting permanent Speedtronic
X
Press =or; to highlight the Set-
tings menu and select with a.
X Press :or9 to highlight the Vehi-
cle submenu and select with a.
X Press :or9 to select the Limit
speed (winter tyres): function.
You can see the current setting.
X To change this, press a. X
Press :or9 to select the desired
setting.
The following settings can be selected:
R Off
Permanent Speedtronic is deactivated.
R a limit speed between 230 km/hand
160 km/h in increments of 10 km/h
X Press ato save the entry. Parktronic*
G
Risk of accident
Parktronic is only an aid and may not detect
all obstacles. It is not a substitute for attentive
driving.
You are always responsible for safety and
must continue to pay attention to your imme-
diate surroundings when parking and
manoeuvring. You could, otherwise, endanger
yourself and others. G
Risk of injury
Make sure that no persons or animals are in
the manoeuvring range. Otherwise, they
could be injured. Parktronic is an electronic parking aid with
ultrasound. It indicates visually and audibly
the distance between your vehicle and an
object.
Parktronic is automatically activated when
you switch on the ignition and release the
handbrake.
Parktronic is deactivated at speeds above
18 km/h. It is reactivated at lower speeds.
Parktronic monitors the area around your
vehicle using six sensors in the front bumper
and four sensors in the rear bumper.
:
Example: sensors in the front bumper,
left-hand side
Range of the sensors The sensors must be free of dirt, ice and
slush; otherwise, they may not function cor-
rectly. Clean the sensors regularly, taking
care not to scratch or damage them.
Side view Driving systems
113Controls
* optional
X204_AKB; 1; 5, en-GB
wobuchh,
Version: 2.11.4
2008-10-15T13:20:56+02:00 - Seite 113 ZDateiname: 6515_0671_02_buchblock.pdf; preflight
Page 117 of 261
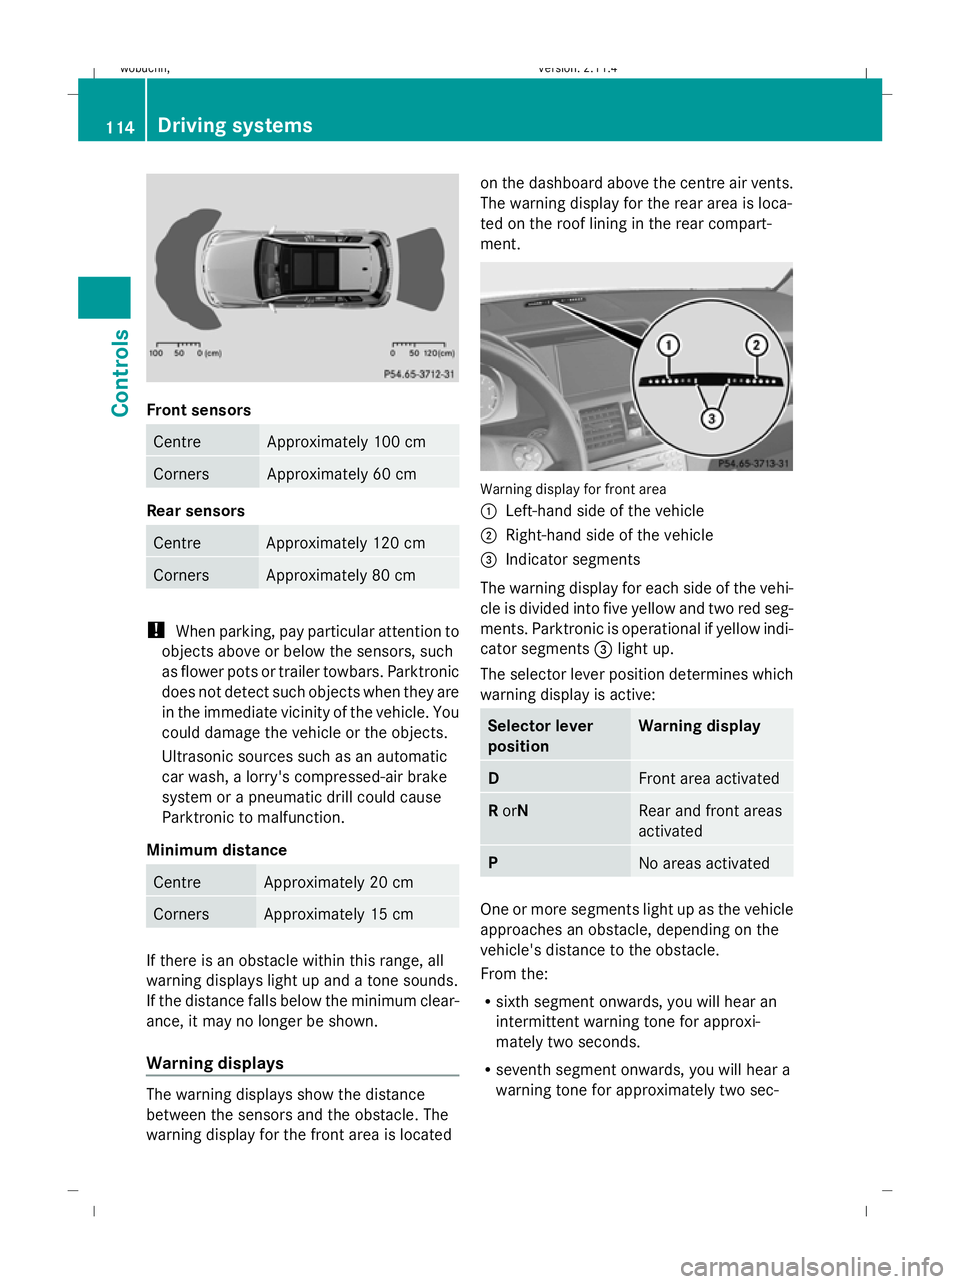
Front sensors
Centre Approximately 100 cm
Corners Approximately 60 cm
Rear sensors
Centre Approximately 120 cm
Corners Approximately 80 cm
!
When parking, pay particular attention to
objects above or below the sensors, such
as flower pots or trailer towbars. Parktronic
does not detect such objects when they are
in the immediate vicinity of the vehicle. You
could damage the vehicle or the objects.
Ultrasonic sources such as an automatic
car wash, a lorry's compressed-air brake
system or a pneumatic drill could cause
Parktronic to malfunction.
Minimum distance Centre Approximately 20 cm
Corners Approximately 15 cm
If there is an obstacle within this range, all
warning displays light up and a tone sounds.
If the distance falls below the minimum clear-
ance, it may no longer be shown.
Warning displays The warning displays show the distance
between the sensors and the obstacle. The
warning display for the front area is located on the dashboard above the centre air vents.
The warning display for the rear area is loca-
ted on the roof lining in the rear compart-
ment.
Warning display for front area
:
Left-hand side of the vehicle
; Right-hand side of the vehicle
= Indicator segments
The warning display for each side of the vehi-
cle is divided into five yellow and two red seg-
ments. Parktronic is operational if yellow indi-
cator segments =light up.
The selector lever position determines which
warning display is active: Selector lever
position Warning display
D
Front area activated
R
orN Rear and front areas
activated
P
No areas activated
One or more segments light up as the vehicle
approaches an obstacle, depending on the
vehicle's distance to the obstacle.
From the:
R
sixth segment onwards, you will hear an
intermittent warning tone for approxi-
mately two seconds.
R seventh segment onwards, you will hear a
warning tone for approximately two sec- 114 Driving systemsControls
X204_AKB; 1; 5, en-GB
wobuchh,
Version: 2.11.4 2008-10-15T13:20:56+02:00 - Seite 114Dateiname: 6515_0671_02_buchblock.pdf; preflight
Page 118 of 261
onds. You have reached the minimum dis-
tance.
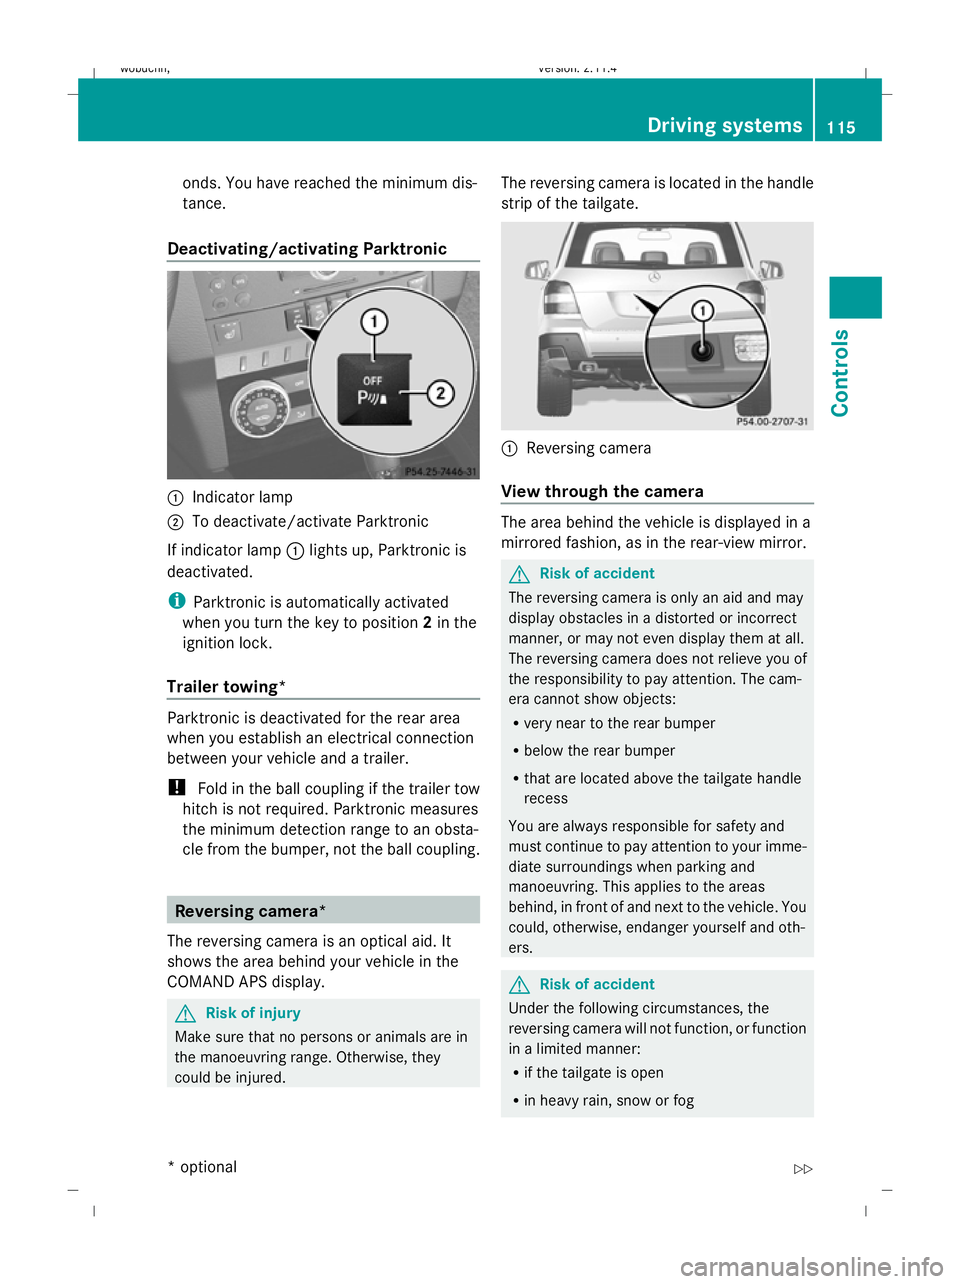
Deactivating/activating Parktronic :
Indicator lamp
; To deactivate/activate Parktronic
If indicator lamp :lights up, Parktronic is
deactivated.
i Parktronic is automatically activated
when you turn the key to position 2in the
ignition lock.
Trailer towing* Parktronic is deactivated for the rear area
when you establish an electrical connection
between your vehicle and a trailer.
! Fold in the ball coupling if the trailer tow
hitch is not required. Parktronic measures
the minimum detection range to an obsta-
cle from the bumper, not the ball coupling. Reversing camera*
The reversing camera is an optical aid. It
shows the area behind your vehicle in the
COMAND APS display. G
Risk of injury
Make sure that no persons or animals are in
the manoeuvring range. Otherwise, they
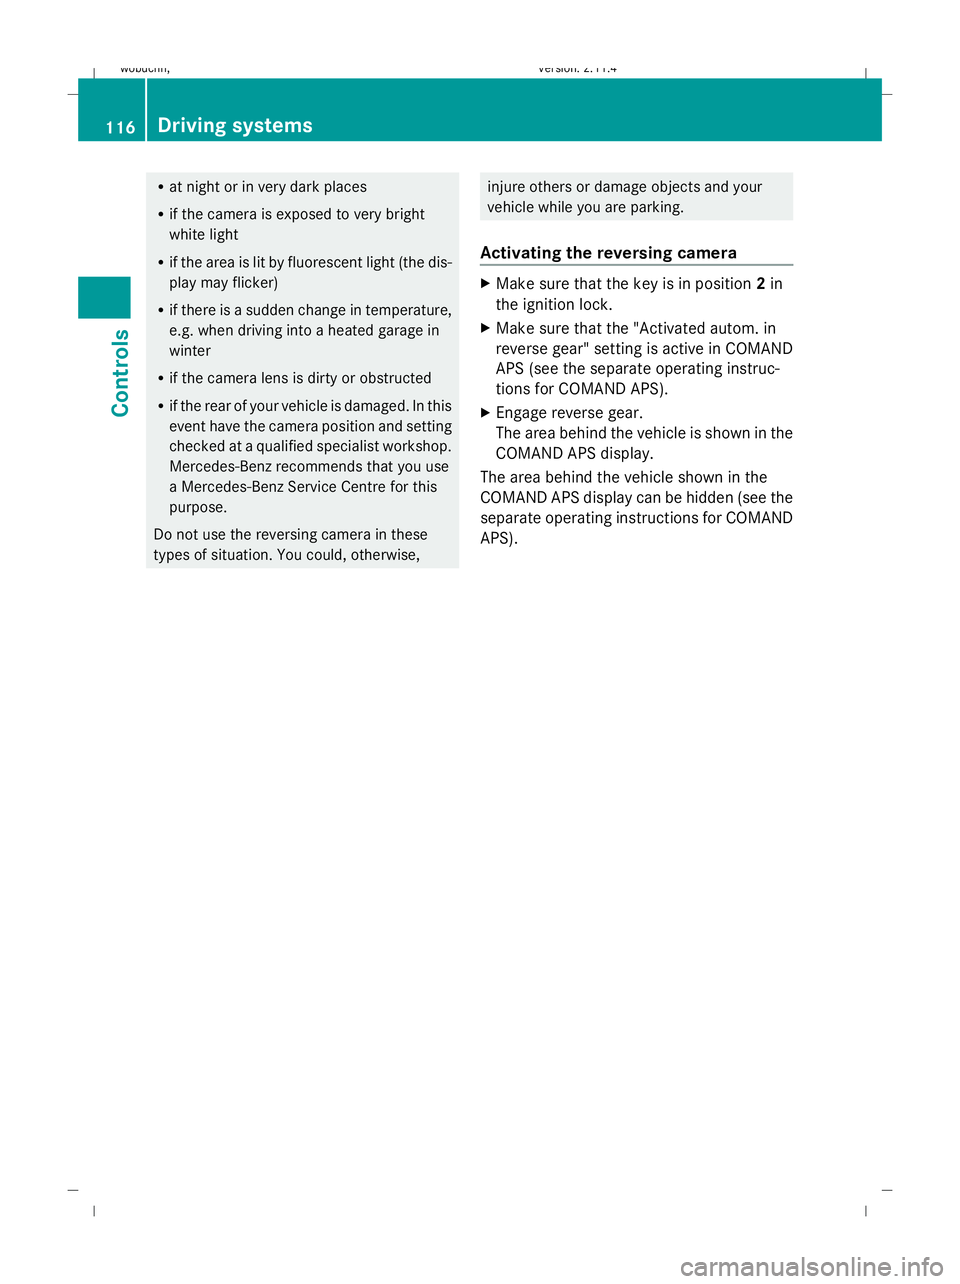
could be injured. The reversing camera is located in the handle
strip of the tailgate. :
Reversing camera
View through the camera The area behind the vehicle is displayed in a
mirrored fashion, as in the rear-view mirror.
G
Risk of accident
The reversing camera is only an aid and may
display obstacles in a distorted or incorrect
manner, or may not even display them at all.
The reversing camera does not relieve you of
the responsibility to pay attention. The cam-
era cannot show objects:
R very near to the rear bumper
R below the rear bumper
R that are located above the tailgate handle
recess
You are always responsible for safety and
must continue to pay attention to your imme-
diate surroundings when parking and
manoeuvring. This applies to the areas
behind, in front of and next to the vehicle. You
could, otherwise, endanger yourself and oth-
ers. G
Risk of accident
Under the following circumstances, the
reversing camera will not function, or function
in a limited manner:
R if the tailgate is open
R in heavy rain, snow or fog Driving systems
115Controls
* optional
X204_AKB; 1; 5, en-GB
wobuchh,
Version: 2.11.4 2008-10-15T13:20:56+02:00 - Seite 115 ZDateiname: 6515_0671_02_buchblock.pdf; preflight
Page 119 of 261
R
at night or in very dark places
R if the camera is exposed to very bright
white light
R if the area is lit by fluorescent light (the dis-
play may flicker)
R if there is a sudden change in temperature,
e.g. when driving into a heated garage in
winter
R if the camera lens is dirty or obstructed
R if the rear of your vehicle is damaged. In this
event have the camera position and setting
checked at a qualified specialist workshop.
Mercedes-Benz recommends that you use
a Mercedes-Benz Service Centre for this
purpose.
Do not use the reversing camera in these
types of situation. You could, otherwise, injure others or damage objects and your
vehicle while you are parking.
Activating the reversing camera X
Make sure that the key is in position 2in
the ignition lock.
X Make sure that the "Activated autom. in
reverse gear" setting is active in COMAND
APS (see the separate operating instruc-
tions for COMAND APS).
X Engage reverse gear.
The area behind the vehicle is shown in the
COMAND APS display.
The area behind the vehicle shown in the
COMAND APS display can be hidden (see the
separate operating instructions for COMAND
APS). 116 Driving systemsControls
X204_AKB; 1; 5, en-GB
wobuchh,
Version: 2.11.4 2008-10-15T13:20:56+02:00 - Seite 116Dateiname: 6515_0671_02_buchblock.pdf; preflight
Page 120 of 261
Air conditioning
Overview of air-conditioning systems
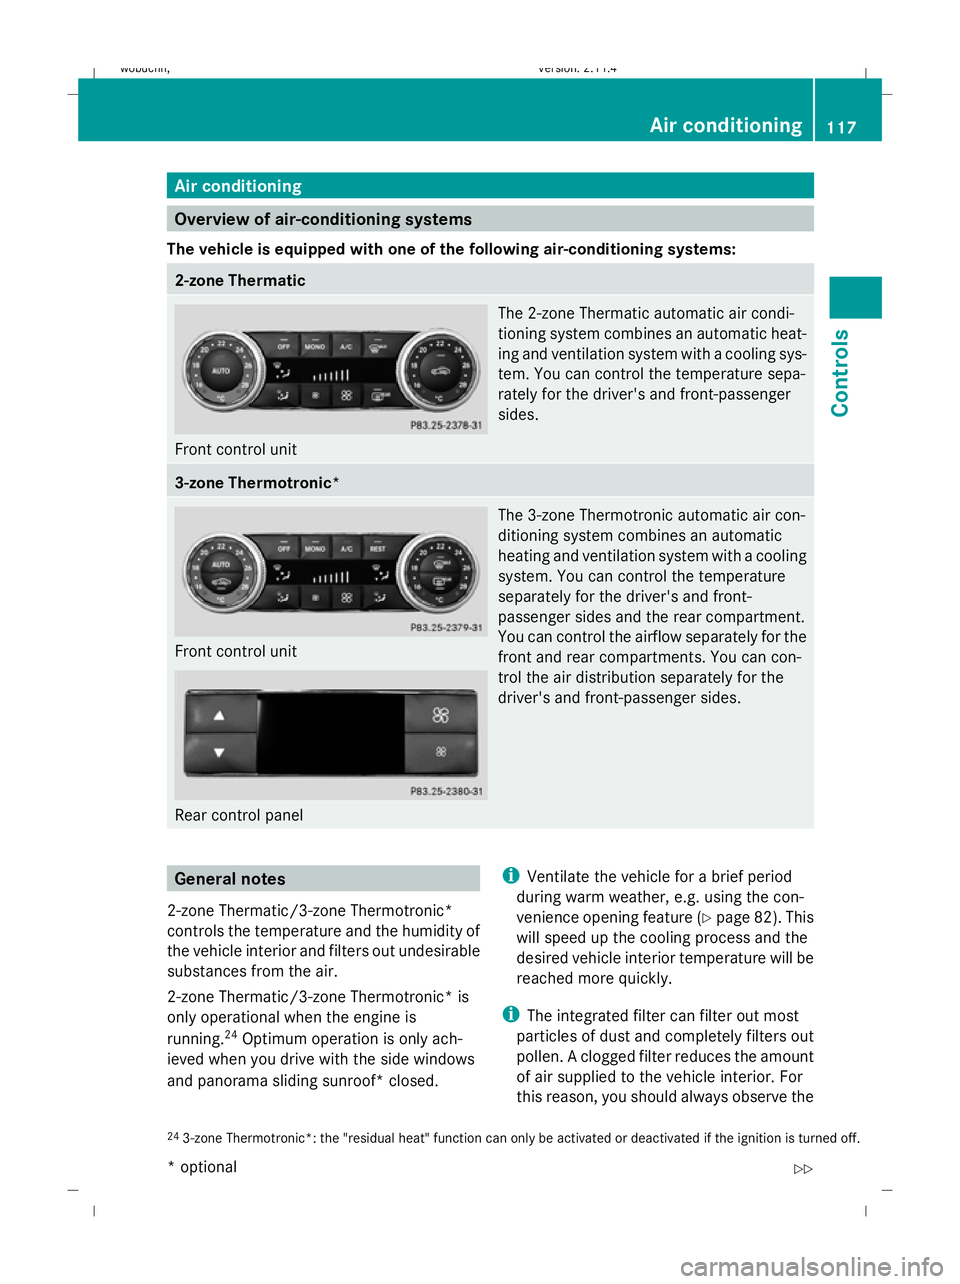
The vehicle is equipped with one of the following air-conditioning systems: 2-zone Thermatic
Front control unit The 2-zone Thermatic automatic air condi-
tioning system combines an automatic heat-
ing and ventilation system with a cooling sys-
tem. You can control the temperature sepa-
rately for the driver's and front-passenger
sides. 3-zone Thermotronic*
Front control unit
Rear control panel The 3-zone Thermotronic automatic air con-
ditioning system combines an automatic
heating and ventilation system with a cooling
system. You can control the temperature
separately for the driver's and front-
passenger sides and the rear compartment.
You can control the airflow separately for the
front and rear compartments. You can con-
trol the air distribution separately for the
driver's and front-passenger sides. General notes
2-zone Thermatic/3-zone Thermotronic*
controls the temperature and the humidity of
the vehicle interior and filters out undesirable
substances from the air.
2-zone Thermatic/3-zone Thermotronic* is
only operational when the engine is
running. 24
Optimum operation is only ach-
ieved when you drive with the side windows
and panorama sliding sunroof* closed. i
Ventilate the vehicle for a brief period
during warm weather, e.g. using the con-
venience opening feature (Y page 82). This
will speed up the cooling process and the
desired vehicle interior temperature will be
reached more quickly.
i The integrated filter can filter out most
particles of dust and completely filters out
pollen. A clogged filter reduces the amount
of air supplied to the vehicle interior. For
this reason, you should always observe the
24 3-zone Thermotronic*: the "residual heat" function can only be activated or deactivated if the ignition is turned off. Air conditioning
117Controls
* optional
X204_AKB; 1; 5, en-GB
wobuchh,
Version: 2.11.4
2008-10-15T13:20:56+02:00 - Seite 117 ZDateiname: 6515_0671_02_buchblock.pdf; preflight
Page 121 of 261
interval for replacing the filter, which is
specified in the Service Booklet. As it
depends on environmental conditions, e.g.
heavy air pollution, the interval may be
shorter than stated in the Service Booklet. G
Risk of accident
Observe the settings recommended on the
following pages. Otherwise, the windows could mist up. This may obstruct your view of
the traffic situation and, as a result, you may
cause an accident.
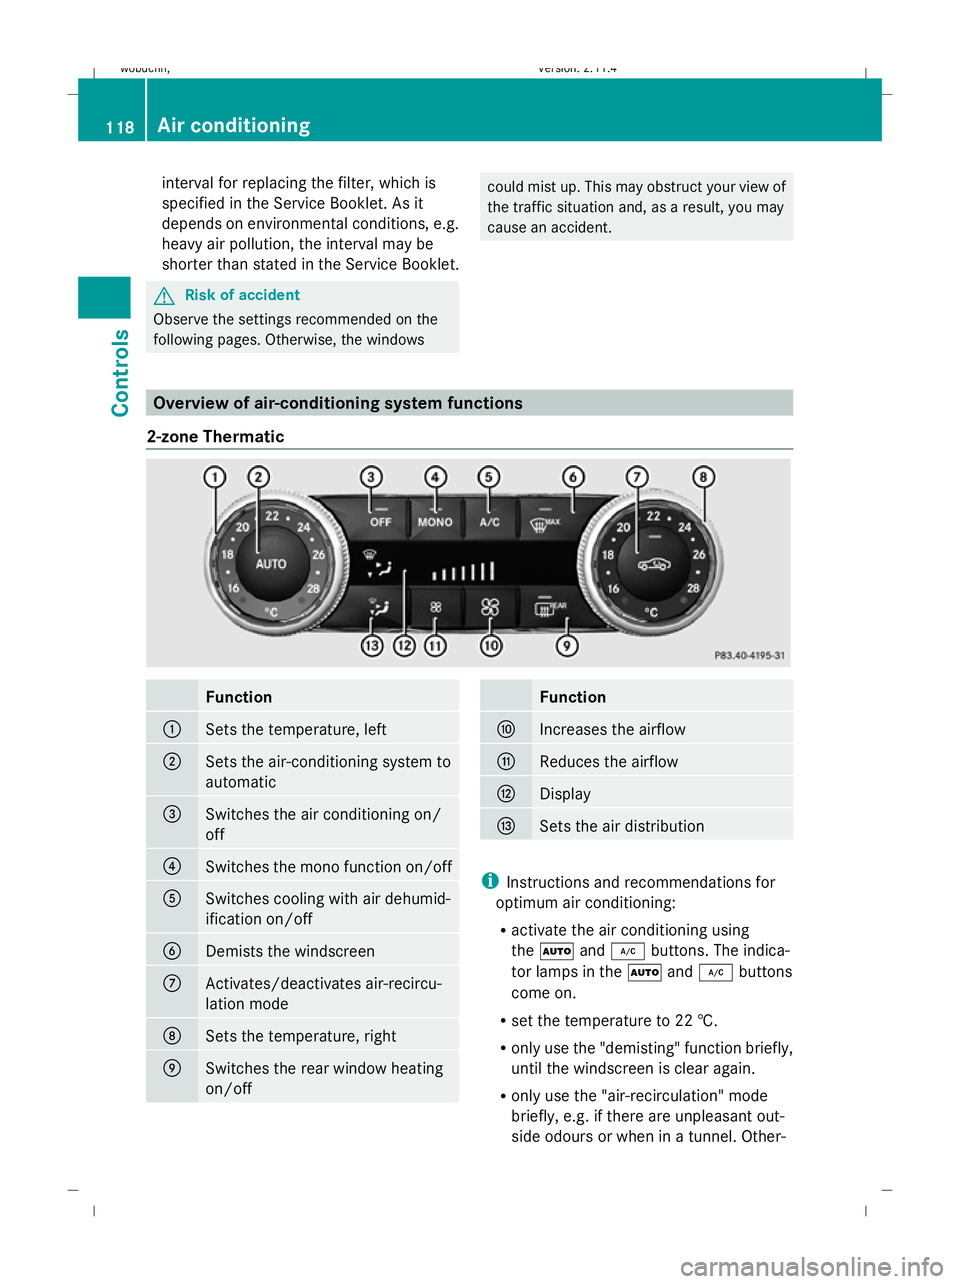
Overview of air-conditioning system functions
2-zone Thermatic Function
:
Sets the temperature, left
;
Sets the air-conditioning system to
automatic
=
Switches the air conditioning on/
off
?
Switches the mono function on/off
A
Switches cooling with air dehumid-
ification on/off
B
Demists the windscreen
C
Activates/deactivates air-recircu-
lation mode
D
Sets the temperature, right
E
Switches the rear window heating
on/off Function
F
Increases the airflow
G
Reduces the airflow
H
Display
I
Sets the air distribution
i
Instructions and recommendations for
optimum air conditioning:
R activate the air conditioning using
the à and¿ buttons. The indica-
tor lamps in the Ãand¿ buttons
come on.
R set the temperature to 22 †.
R only use the "demisting" function briefly,
until the windscreen is clear again.
R only use the "air-recirculation" mode
briefly, e.g. if there are unpleasant out-
side odours or when in a tunnel. Other- 118 Air conditioningControls
X204_AKB; 1; 5, en-GB
wobuchh,
Version: 2.11.4 2008-10-15T13:20:56+02:00 - Seite 118Dateiname: 6515_0671_02_buchblock.pdf; preflight
Page 122 of 261

wise, the windows could mist up due to
a lack of fresh air.
R use the "MONO" function if you want to
adopt the temperature and air distribu- tion settings from the driver's side for the
front-passenger side. The indicator lamp
in the
ºbutton comes on. Air conditioning
119Controls
X204_AKB; 1; 5, en-GB
wobuchh, Version: 2.11.4 2008-10-15T13:20:56+02:00 - Seite 119 ZDateiname: 6515_0671_02_buchblock.pdf; preflight
Page 123 of 261
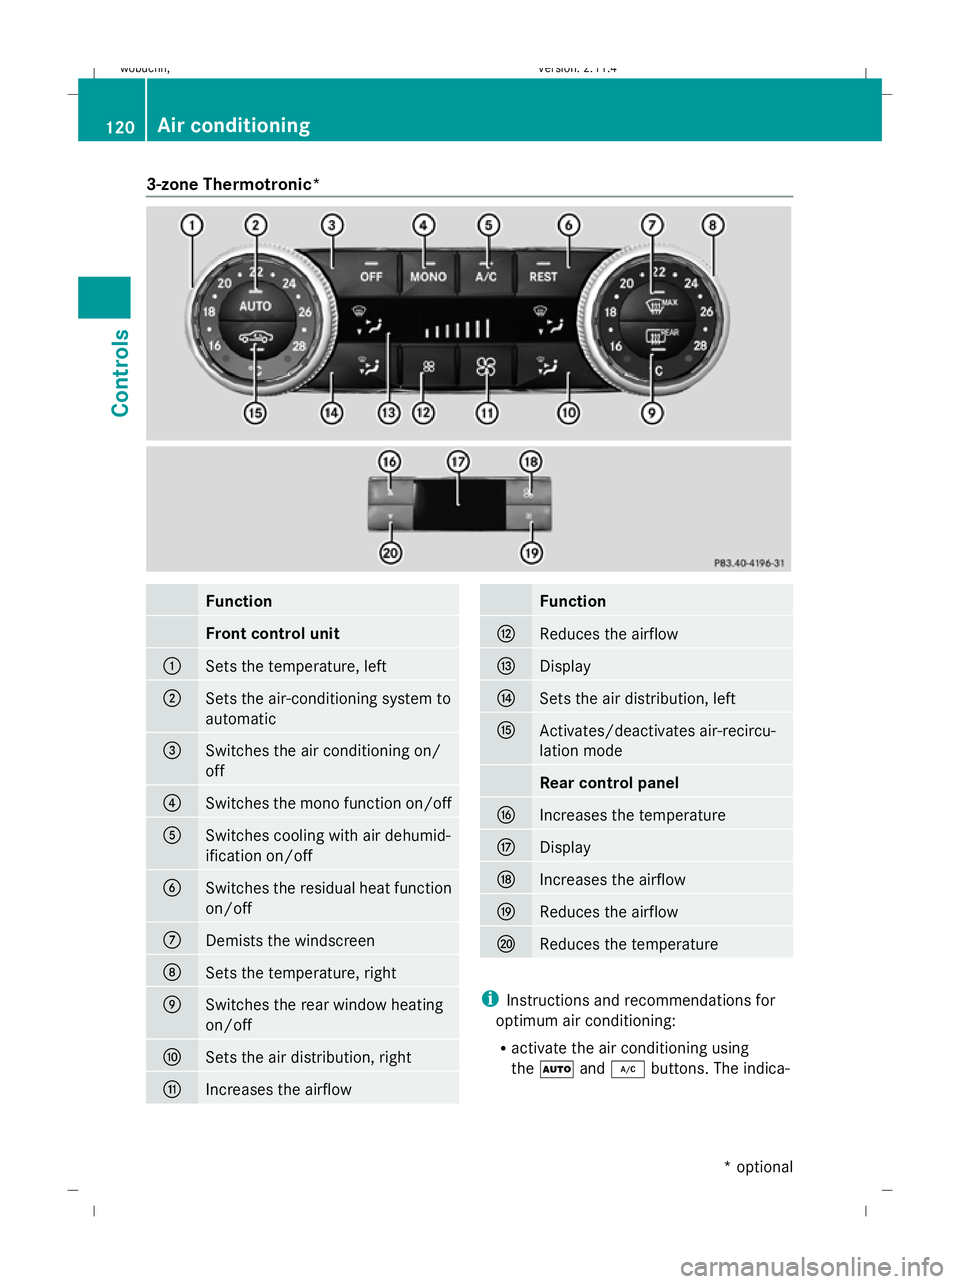
3-zone Thermotronic*
Function
Front control unit
:
Sets the temperature, left
;
Sets the air-conditioning system to
automatic
=
Switches the air conditioning on/
off
?
Switches the mono function on/off
A
Switches cooling with air dehumid-
ification on/off
B
Switches the residual heat function
on/off
C
Demists the windscreen
D
Sets the temperature, right
E
Switches the rear window heating
on/off
F
Sets the air distribution, right
G
Increases the airflow Function
H
Reduces the airflow
I
Display
J
Sets the air distribution, left
K
Activates/deactivates air-recircu-
lation mode
Rear control panel
L
Increases the temperature
M
Display
N
Increases the airflow
O
Reduces the airflow
P
Reduces the temperature
i
Instructions and recommendations for
optimum air conditioning:
R activate the air conditioning using
the à and¿ buttons. The indica- 120 Air conditioningControls
* optional
X204_AKB; 1; 5, en-GB
wobuchh,
Version: 2.11.4 2008-10-15T13:20:56+02:00 - Seite 120Dateiname: 6515_0671_02_buchblock.pdf; preflight