2008 MERCEDES-BENZ GLK SUV change wheel
[x] Cancel search: change wheelPage 8 of 261
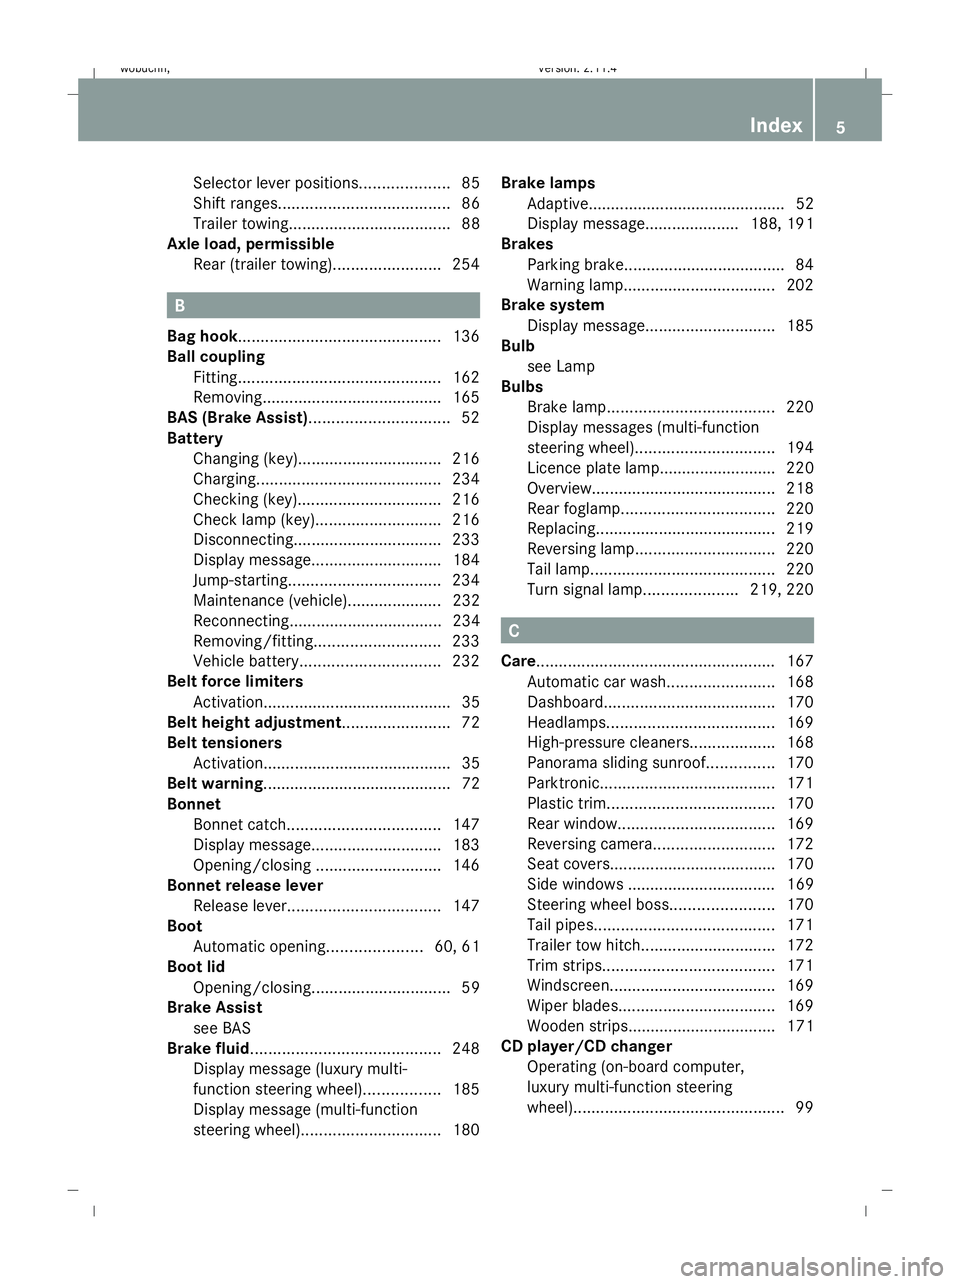
Selector lever positions.
...................85
Shift ranges. ..................................... 86
Trailer towing. ................................... 88
Axle load, permissible
Rear (trailer towing) ........................254 B
Bag hook............................................. 136
Ball coupling Fitting ............................................. 162
Removing....................................... .165
BAS (Brake Assist)............................... 52
Battery Changing (key).. .............................. 216
Charging. ........................................ 234
Checking (key). ............................... 216
Check lamp (key). ........................... 216
Disconnecting ................................. 233
Display message ............................. 184
Jump-starting. ................................. 234
Maintenance (vehicle)..................... 232
Reconnecting.................................. 234
Removing/fitting. ........................... 233
Vehicle battery. .............................. 232
Belt force limiters
Activation.......................................... 35
Belt height adjustment ........................72
Belt tensioners Activation.......................................... 35
Belt warning.......................................... 72
Bonnet
Bonnet catch .................................. 147
Display message ............................. 183
Opening/closing ............................ 146
Bonnet release lever
Release leve r.................................. 147
Boot
Automatic opening. ....................60, 61
Boot lid
Opening/closing. .............................. 59
Brake Assist
see BAS
Brake fluid .......................................... 248
Display message (luxury multi-
function steering wheel) .................185
Display message (multi-function
steering wheel). .............................. 180Brake lamps
Adaptive............................................ 52
Display message..................... 188, 191
Brakes
Parking brake................................... .84
Warning lamp..................................2 02
Brake system
Display message ............................. 185
Bulb
see Lamp
Bulbs
Brake lamp. .................................... 220
Display messages (multi-function
steering wheel). .............................. 194
Licence plate lamp.......................... 220
Overview. ........................................ 218
Rear foglamp. ................................. 220
Replacing. ....................................... 219
Reversing lamp. .............................. 220
Tail lamp ......................................... 220
Turn signal lamp. ....................219, 220 C
Care..................................................... 167
Automatic car wash. .......................168
Dashboard. ..................................... 170
Headlamps. .................................... 169
High-pressure cleaners. ..................168
Panorama sliding sunroo f............... 170
Parktronic. ...................................... 171
Plastic trim. .................................... 170
Rear window. .................................. 169
Reversing camera. ..........................172
Seat covers.................................... .170
Side windows ................................. 169
Steering wheel boss. ......................170
Tail pipes ........................................ 171
Trailer tow hitch. ............................. 172
Trim strips ...................................... 171
Windscreen. .................................... 169
Wiper blades.. ................................. 169
Wooden strips................................. 171
CD player/CD changer
Operating (on-board computer,
luxury multi-function steering
wheel). .............................................. 99 Index
5 X204_AKB; 1; 5, en-GB
wobuchh,
Version: 2.11.4
2008-10-15T13:20:56+02:00 - Seite 5 Dateiname: 6515_0671_02_buchblock.pdf; preflight
Page 21 of 261
Operating safety
Safety notes
G
Risk of accident and injury
Always have work on the vehicle carried out
by a qualified specialist workshop. In particu-
lar, work relevant to safety or on safety-rela-
ted systems as well as maintenance work
must be carried out at a qualified specialist
workshop. The workshop must have the nec-
essary specialist knowledge and tools to carry
out the work required. Mercedes-Benz rec-
ommends that you use a Mercedes-Benz
Service Centre for this purpose. G
Risk of accident and injury
Some safety systems only function when the
engine is running. You should therefore never
switch off the engine when driving. Otherwise,
the safety systems of your vehicle may not
function correctly and as a result will no lon-
ger protect you and other persons as inten-
ded. In addition, there is a risk that you may
lose control of your vehicle and thus cause an
accident. G
Risk of accident and injury
Work carried out incorrectly, or alterations
made to the vehicle, e.g. rerouting of cables
under coverings, could cause the safety sys-
tems of your vehicle to stop working properly.
The safety systems would thus no longer pro-
tect you and other persons as intended. In
addition, there is a risk that you may lose con-
trol of your vehicle and thus cause an acci-
dent.
All work and alterations to the vehicle, e.g.
installations or modifications, should there-
fore be carried out at a qualified specialist
workshop. G
Risk of accident
If you drive over obstacles at high speed or if
the vehicle bottoms out in rough terrain, it
could cause heavy impacts to the vehicle
underbody, tyres or wheels. This could cause your vehicle to be damaged, which in turn
might lead to an accident. This also applies to
vehicles which are equipped with underbody
protection.
You should therefore drive over obstacles
slowly and prevent the vehicle from bottom-
ing out when driving off-road. If necessary,
have your vehicle inspected at a qualified spe-
cialist workshop. G
Risk of accident
If work on electronic equipment and its soft-
ware is carried out incorrectly, the equipment
could stop functioning. The electronic sys-
tems are networked via interfaces. Tampering
with these electronic systems could cause
malfunctions in systems which have not been
modified. Such malfunctions can seriously
compromise the vehicle’s operating safety
and your own safety as well.
Have all work on and modifications to elec-
tronic components carried out at a qualified
workshop. Vehicle registration
Mercedes-Benz may ask its Service Centres
to carry out technical inspections on certain
vehicles to improve their quality or safety.
If you did not purchase your vehicle from an
authorised specialist dealer and your vehicle
has never been inspected at a Mercedes-
Benz Service Centre, it is possible that your
vehicle is not registered in your name with
Mercedes-Benz. Mercedes-Benz can only
inform you about vehicle checks if it has your
registration data.
It is advisable to register your vehicle with a
Mercedes-Benz Service Centre.
Inform Mercedes-Benz as soon as possible
about any change in address or vehicle own-
ership. 18 Introduction
X204_AKB; 1; 5, en-GB
wobuchh,
Version: 2.11.4 2008-10-15T13:20:56+02:00 - Seite 18Dateiname: 6515_0671_02_buchblock.pdf; preflight
Page 77 of 261
Make sure that:
R
you are as far away from the driver's front
airbag as possible.
R you are sitting in a normal upright posi-
tion.
R you can fasten the seat belt properly.
R you have moved the backrest to an
almost vertical position.
R you have set the seat angle so that your
thighs are gently supported.
R you can depress the pedals properly.
R you have adjusted the head restraint so
that the back of your head is supported
at eye level by the central area of the
head restraint.
X Check whether steering wheel :is adjus-
ted properly (Y page 66).
Make sure that:
R you can hold the steering wheel with your
arms slightly bent.
R you can move your legs freely.
R you can see all the displays in the instru-
ment cluster clearly.
X Check whether you have fastened seat
belt ;properly (Y page 70).
It should:
R fit snugly across your body.
R be routed across the middle of your
shoulder.
R be routed in your pelvic area across the
hip joints. Lights
Light switch
For safety reasons, Mercedes-Benz recom-
mends that you drive with the lights switched
on even during the daytime. In some coun-
tries, daytime operation of headlamps varies
due to legal and voluntary requirements. In these countries, daytime driving lights are
automatically switched on when the engine is
started.
i
If you drive in countries in which traffic
drives on the opposite side of the road to
the country where the vehicle is registered,
oncoming traffic may be dazzled by the
asymmetrical dipped-beam headlamps.
Have the headlamps changed to symmet-
rical dipped beam when driving in these
countries. You can obtain information
about this from any Mercedes-Benz Service
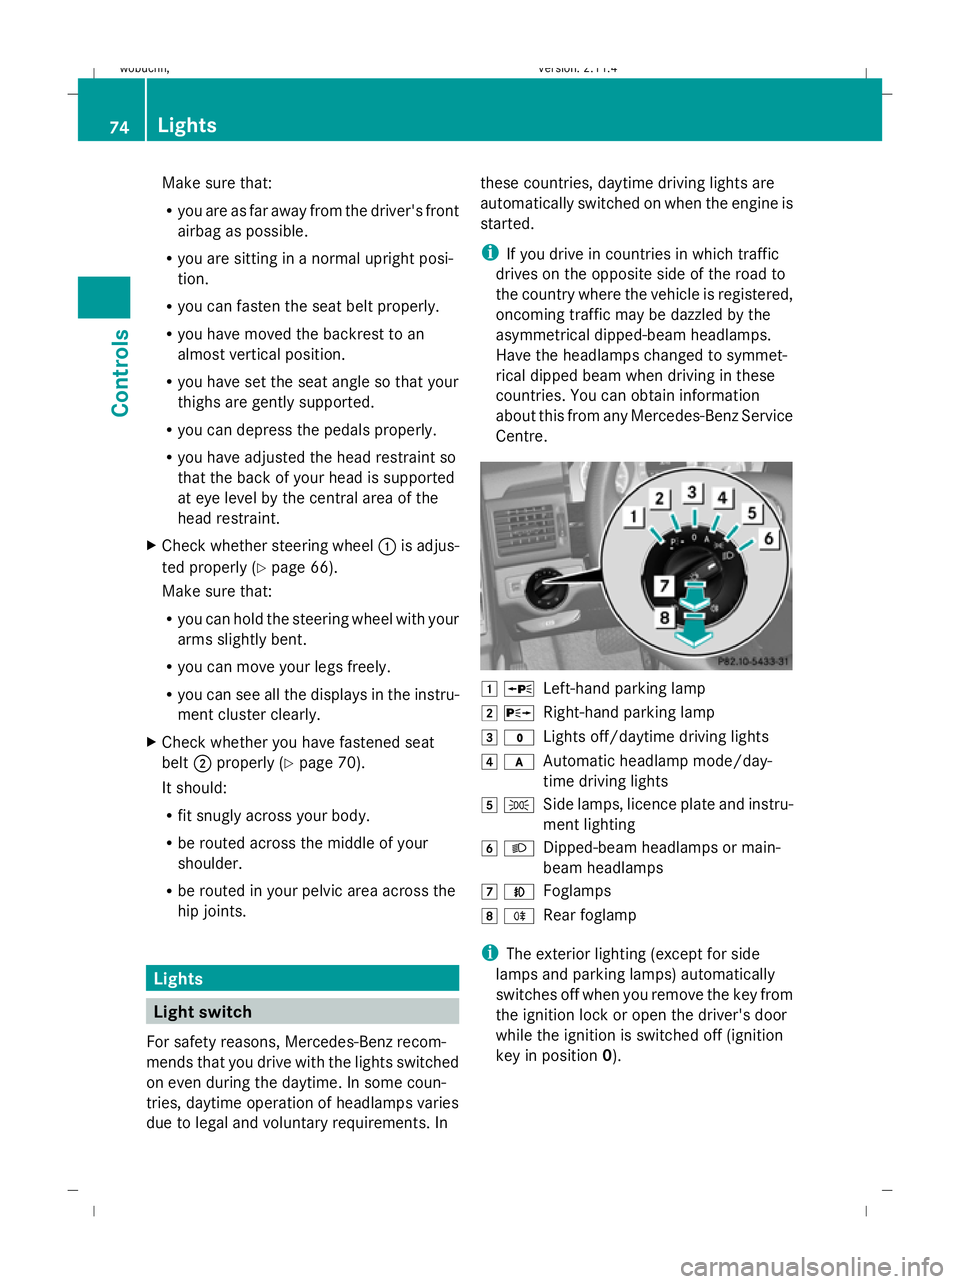
Centre. 1
W
Left-hand parking lamp
2 X
Right-hand parking lamp
3 $
Lights off/daytime driving lights
4 c
Automatic headlamp mode/day-
time driving lights
5 T
Side lamps, licence plate and instru-
ment lighting
6 L
Dipped-beam headlamps or main-
beam headlamps
7 N
Foglamps
8 R
Rear foglamp
i The exterior lighting (except for side
lamps and parking lamps) automatically
switches off when you remove the key from
the ignition lock or open the driver's door
while the ignition is switched off (ignition
key in position 0). 74 LightsControls
X204_AKB; 1; 5, en-GB
wobuchh,
Version: 2.11.4 2008-10-15T13:20:56+02:00 - Seite 74Dateiname: 6515_0671_02_buchblock.pdf; preflight
Page 86 of 261
X
Press and hold the &button until the
side windows and the panorama sliding
sunroof* are fully closed.
X Make sure that all the side windows and the
panorama sliding sunroof* are closed.
On vehicles with a panorama sliding sun-
roof*:
X Press and hold the &button again until
the roller sunblinds* of the panorama slid-
ing sunroof* close. Driving and parking
Starting the engine
G
Risk of accident
Do not put any objects in the driver's footwell.
If you use a floormat or carpet in the driver's
footwell, make sure that they are correctly
secured and that there is sufficient clearance
for the pedals.
Do not place several floormats on top of one
another.
Otherwise, the objects or floormats could get
between the pedals in the event of sudden
braking or acceleration. You may then no lon-
ger be able to brake, change gear or acceler-
ate as intended. This may result in an accident
and injury. G
Risk of poisoning
Never leave the engine running in enclosed
spaces. The exhaust gases contain carbon
monoxide. Inhaling exhaust fumes consti-
tutes a health hazard and could lead to loss
of consciousness or even death.
! Do not depress the accelerator pedal
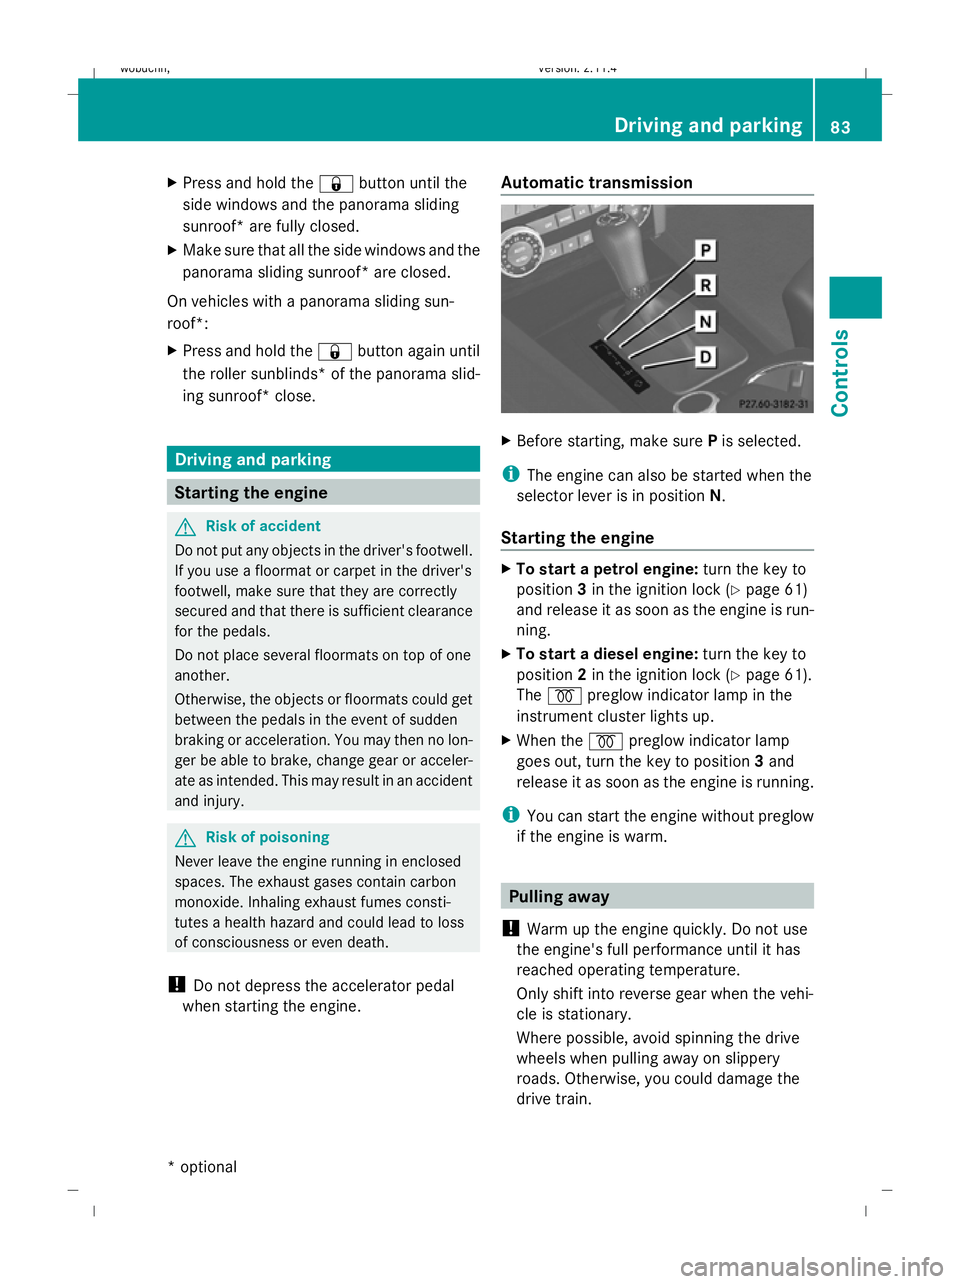
when starting the engine. Automatic transmission X
Before starting, make sure Pis selected.
i The engine can also be started when the
selector lever is in position N.
Starting the engine X
To start a petrol engine: turn the key to
position 3in the ignition lock (Y page 61)
and release it as soon as the engine is run-
ning.
X To start a diesel engine: turn the key to
position 2in the ignition lock (Y page 61).
The % preglow indicator lamp in the
instrument cluster lights up.
X When the %preglow indicator lamp
goes out, turn the key to position 3and
release it as soon as the engine is running.
i You can start the engine without preglow
if the engine is warm. Pulling away
! Warm up the engine quickly. Do not use
the engine's full performance until it has
reached operating temperature.
Only shift into reverse gear when the vehi-
cle is stationary.
Where possible, avoid spinning the drive
wheels when pulling away on slippery
roads. Otherwise, you could damage the
drive train. Driving and parking
83Controls
* optional
X204_AKB; 1; 5, en-GB
wobuchh,
Version: 2.11.4 2008-10-15T13:20:56+02:00 - Seite 83 ZDateiname: 6515_0671_02_buchblock.pdf; preflight
Page 88 of 261
X
To release: depress the brake pedal and
keep it depressed.
X Pull release handle :.
The J warning lamp in the instrument
cluster goes out. Switching off the engine
G
Risk of accident
If the engine is not running, there is no power
assistance for the steering and brakes. Steer-
ing and braking will then require significantly
greater effort.
As a result, you might lose control of the vehi-
cle, cause an accident and injure yourself and
others.
Do not switch off the engine while driving.
X Move the selector lever to P.
X Turn the key to position 0(Y page 61) in
the ignition lock and remove it.
The immobiliser is activated.
i The key can only be removed when the
selector lever is in position P.Transmission
Notes on the transmission
G
Risk of accident
The movement of the pedals must not be
impaired in any way. Do not keep any objects
in the driver's footwell. Make sure that floor-
mats or carpets are correctly secured and
that there is sufficient clearance for the ped-
als.
Do not place several floormats on top of one
another. G
Risk of accident
Do not change down for additional engine
braking on a slippery road surface. This could
cause the drive wheels to lose their grip and the vehicle could skid. This could cause you
to lose control of your vehicle and cause an
accident.
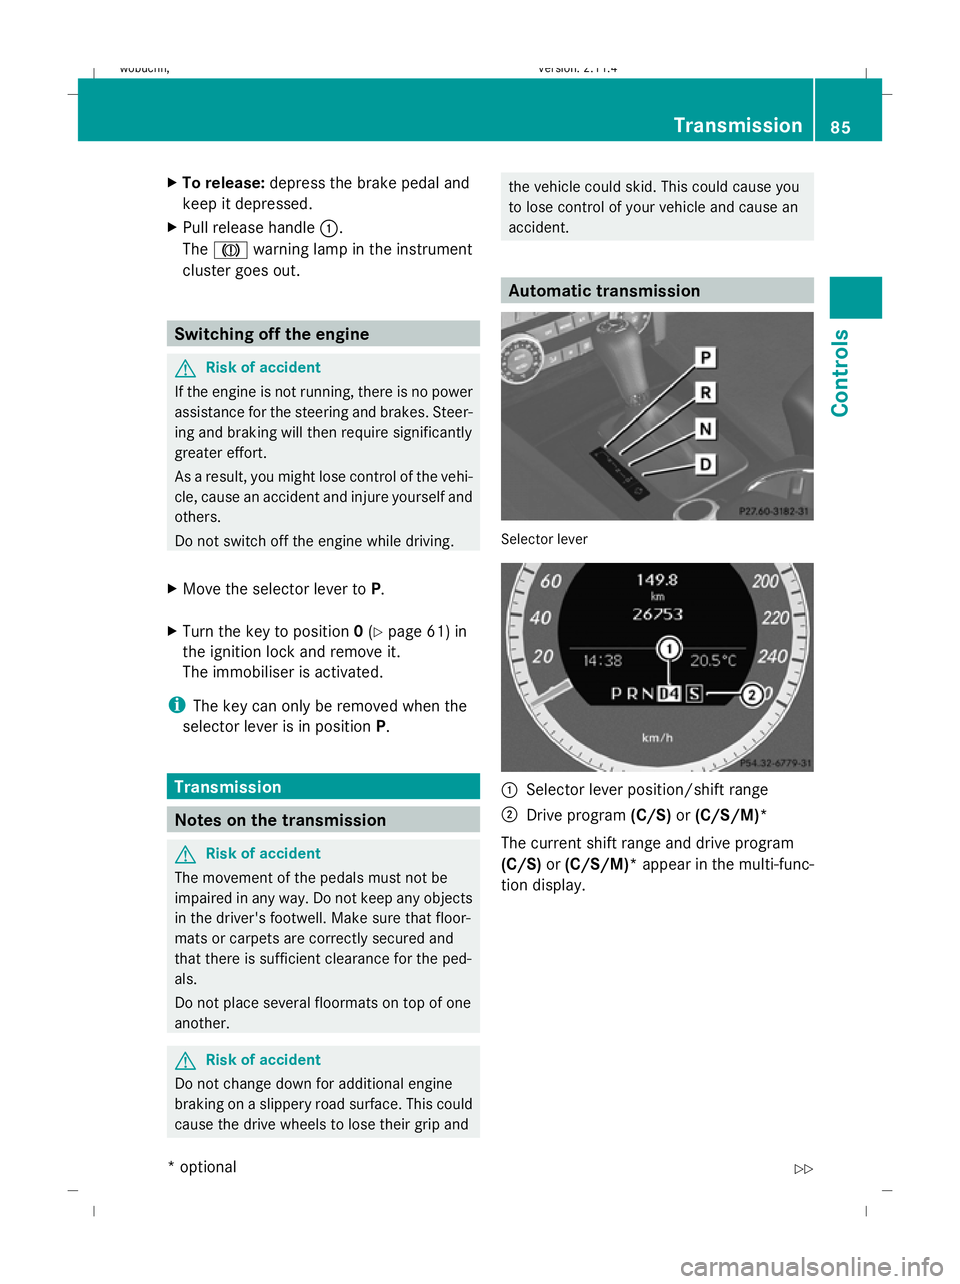
Automatic transmission
Selector lever
:
Selector lever position/shift range
; Drive program (C/S)or(C/S/M)*
The current shift range and drive program
(C/S) or(C/S/M)* appear in the multi-func-
tion display. Transmission
85Controls
* optional
X204_AKB; 1; 5, en-GB
wobuchh
,V ersion: 2.11.4
2008-10-15T13:20:56+02:00 - Seite 85 ZDateiname: 6515_0671_02_buchblock.pdf; preflight
Page 89 of 261
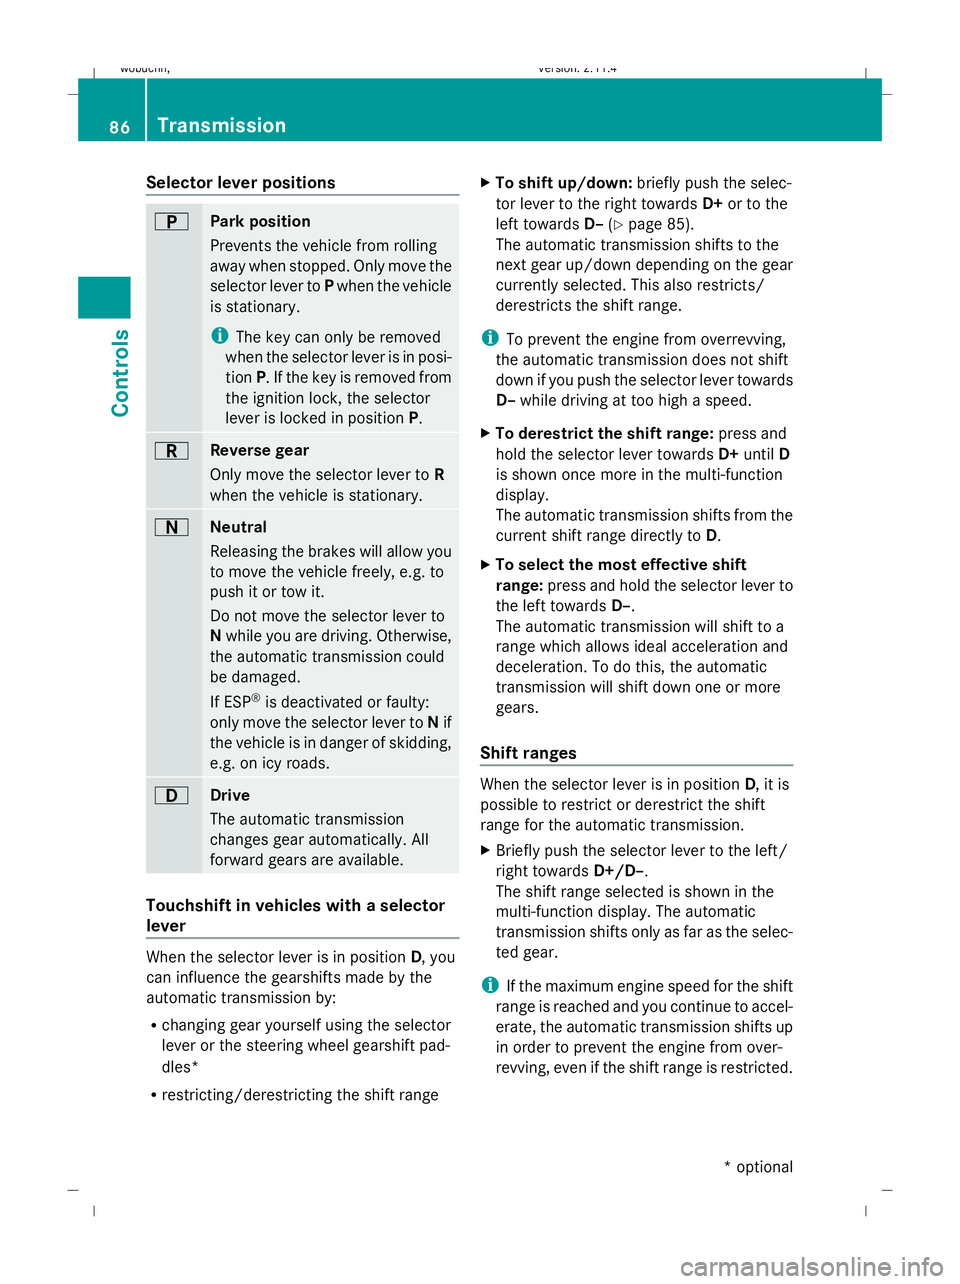
Selector lever positions
B
Park position
Prevents the vehicle from rolling
away when stopped. Only move the
selector lever to
Pwhen the vehicle
is stationary.
i The key can only be removed
when the selector lever is in posi-
tion P. If the key is removed from
the ignition lock, the selector
lever is locked in position P.C
Reverse gear
Only move the selector lever to
R
when the vehicle is stationary. A
Neutral
Releasing the brakes will allow you
to move the vehicle freely, e.g. to
push it or tow it.
Do not move the selector lever to
N while you are driving. Otherwise,
the automatic transmission could
be damaged.
If ESP ®
is deactivated or faulty:
only move the selector lever to Nif
the vehicle is in danger of skidding,
e.g. on icy roads. 7
Drive
The automatic transmission
changes gear automatically. All
forward gears are available.
Touchshift in vehicles with a selector
lever When the selector lever is in position
D, you
can influence the gearshifts made by the
automatic transmission by:
R changing gear yourself using the selector
lever or the steering wheel gearshift pad-
dles*
R restricting/derestricting the shift range X
To shift up/down: briefly push the selec-
tor lever to the right towards D+or to the
left towards D–(Ypage 85).
The automatic transmission shifts to the
next gear up/down depending on the gear
currently selected. This also restricts/
derestricts the shift range.
i To prevent the engine from overrevving,
the automatic transmission does not shift
down if you push the selector lever towards
D– while driving at too high a speed.
X To derestrict the shift range: press and
hold the selector lever towards D+until D
is shown once more in the multi-function
display.
The automatic transmission shifts from the
current shift range directly to D.
X To select the most effective shift
range: press and hold the selector lever to
the left towards D–.
The automatic transmission will shift to a
range which allows ideal acceleration and
deceleration. To do this, the automatic
transmission will shift down one or more
gears.
Shift ranges When the selector lever is in position
D, it is
possible to restrict or derestrict the shift
range for the automatic transmission.
X Briefly push the selector lever to the left/
right towards D+/D–.
The shift range selected is shown in the
multi-function display. The automatic
transmission shifts only as far as the selec-
ted gear.
i If the maximum engine speed for the shift
range is reached and you continue to accel-
erate, the automatic transmission shifts up
in order to prevent the engine from over-
revving, even if the shift range is restricted. 86 TransmissionControls
* optional
X204_AKB; 1; 5, en-GB
wobuchh,
Version: 2.11.4 2008-10-15T13:20:56+02:00 - Seite 86Dateiname: 6515_0671_02_buchblock.pdf; preflight
Page 91 of 261
Kickdown
Use kickdown for maximum acceleration.
X Depress the accelerator pedal beyond the
pressure point.
The transmission shifts to a lower gear
depending on the engine speed.
X Ease off the accelerator pedal once the
desired speed is reached.
The automatic transmission shifts back up.
Trailer towing
X When driving up gradients, keep to the mid-
dle of the engine speed range.
X Shift down to shift range 3or 2depending
on the gradient, even if cruise con-
trol*( Ypage 86)is activated. Steering wheel gearshift paddles*
and manual gearshift program* G
Risk of accident
Do not change down for additional engine
braking on a slippery road surface. This could
cause the drive wheels to lose their grip and
the vehicle could skid.
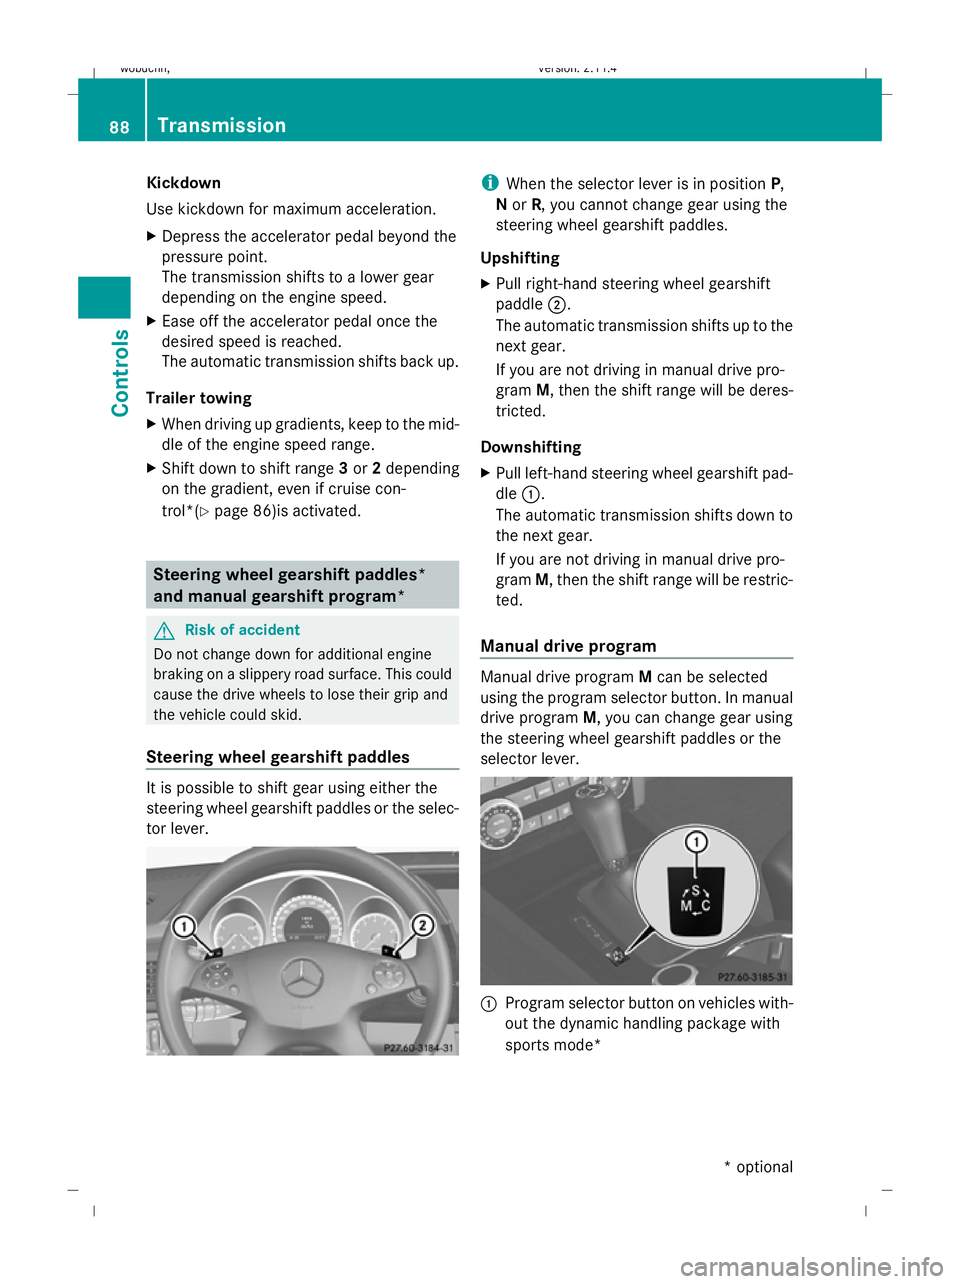
Steering wheel gearshift paddles It is possible to shift gear using either the
steering wheel gearshift paddles or the selec-
tor lever. i
When the selector lever is in position P,
N or R, you cannot change gear using the
steering wheel gearshift paddles.
Upshifting
X Pull right-hand steering wheel gearshift
paddle ;.
The automatic transmission shifts up to the
next gear.
If you are not driving in manual drive pro-
gram M, then the shift range will be deres-
tricted.
Downshifting
X Pull left-hand steering wheel gearshift pad-
dle :.
The automatic transmission shifts down to
the next gear.
If you are not driving in manual drive pro-
gram M, then the shift range will be restric-
ted.
Manual drive program Manual drive program
Mcan be selected
using the program selector button. In manual
drive program M, you can change gear using
the steering wheel gearshift paddles or the
selector lever. :
Program selector button on vehicles with-
out the dynamic handling package with
sports mode* 88 TransmissionCont
rols
* optional
X204_AKB; 1; 5, en-GB
wobuchh,
Version: 2.11.4 2008-10-15T13:20:56+02:00 - Seite 88Dateiname: 6515_0671_02_buchblock.pdf; preflight
Page 93 of 261
Instrument cluster
Points to remember
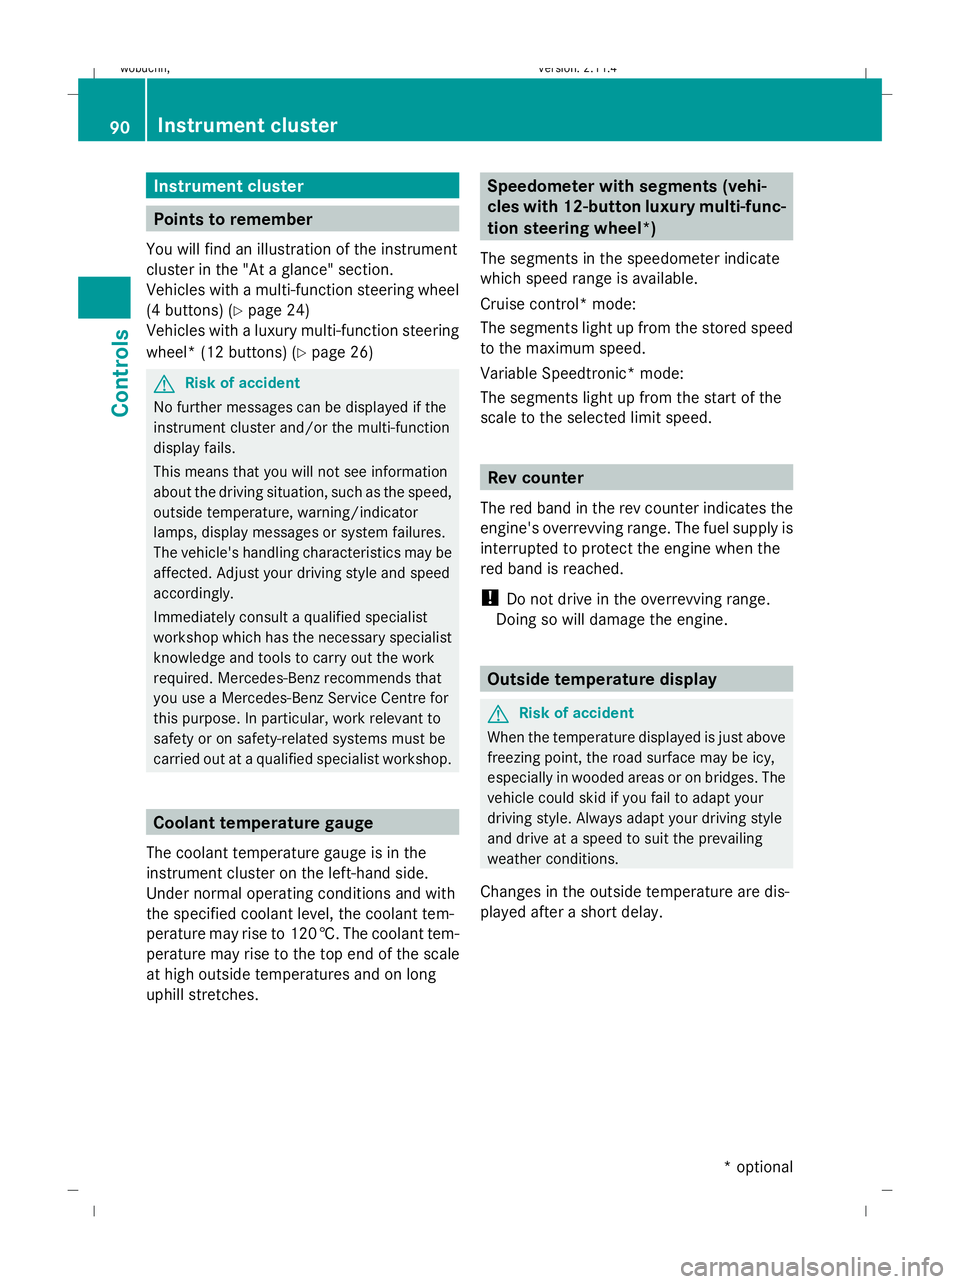
You will find an illustration of the instrument
cluster in the "At a glance" section.
Vehicles with a multi-function steering wheel
(4 buttons) (Y page 24)
Vehicles with a luxury multi-function steering
wheel* (12 buttons) (Y page 26)G
Risk of accident
No further messages can be displayed if the
instrument cluster and/or the multi-function
display fails.
This means that you will not see information
about the driving situation, such as the speed,
outside temperature, warning/indicator
lamps, display messages or system failures.
The vehicle's handling characteristics may be
affected. Adjust your driving style and speed
accordingly.
Immediately consult a qualified specialist
workshop which has the necessary specialist
knowledge and tools to carry out the work
required. Mercedes-Benz recommends that
you use a Mercedes-Benz Service Centre for
this purpose. In particular, work relevant to
safety or on safety-related systems must be
carried out at a qualified specialist workshop. Coolant temperature gauge
The coolant temperature gauge is in the
instrument cluster on the left-hand side.
Under normal operating conditions and with
the specified coolant level, the coolant tem-
perature may rise to 120 †. The coolant tem-
perature may rise to the top end of the scale
at high outside temperatures and on long
uphill stretches. Speedometer with segments (vehi-
cles with 12-button luxury multi-func-
tion steering wheel*)
The segments in the speedometer indicate
which speed range is available.
Cruise control* mode:
The segments light up from the stored speed
to the maximum speed.
Variable Speedtronic* mode:
The segments light up from the start of the
scale to the selected limit speed. Rev counter
The red band in the rev counter indicates the
engine's overrevving range. The fuel supply is
interrupted to protect the engine when the
red band is reached.
! Do not drive in the overrevving range.
Doing so will damage the engine. Outside temperature display
G
Risk of accident
When the temperature displayed is just above
freezing point, the road surface may be icy,
especially in wooded areas or on bridges. The
vehicle could skid if you fail to adapt your
driving style. Always adapt your driving style
and drive at a speed to suit the prevailing
weather conditions.
Changes in the outside temperature are dis-
played after a short delay. 90 Instrument clusterCont
rols
* optional
X204_AKB; 1; 5, en-GB
wobuchh,
Version: 2.11.4 2008-10-15T13:20:56+02:00 - Seite 90Dateiname: 6515_0671_02_buchblock.pdf; preflight