Page 131 of 467

WARNING!If the hood is not fully latched it could fly up when
the vehicle is moving and block your forward vision.
You could have a collision. Be sure all hood latches
are fully latched before driving.
LIGHTS
MAP/READING/INTERIOR LIGHTS
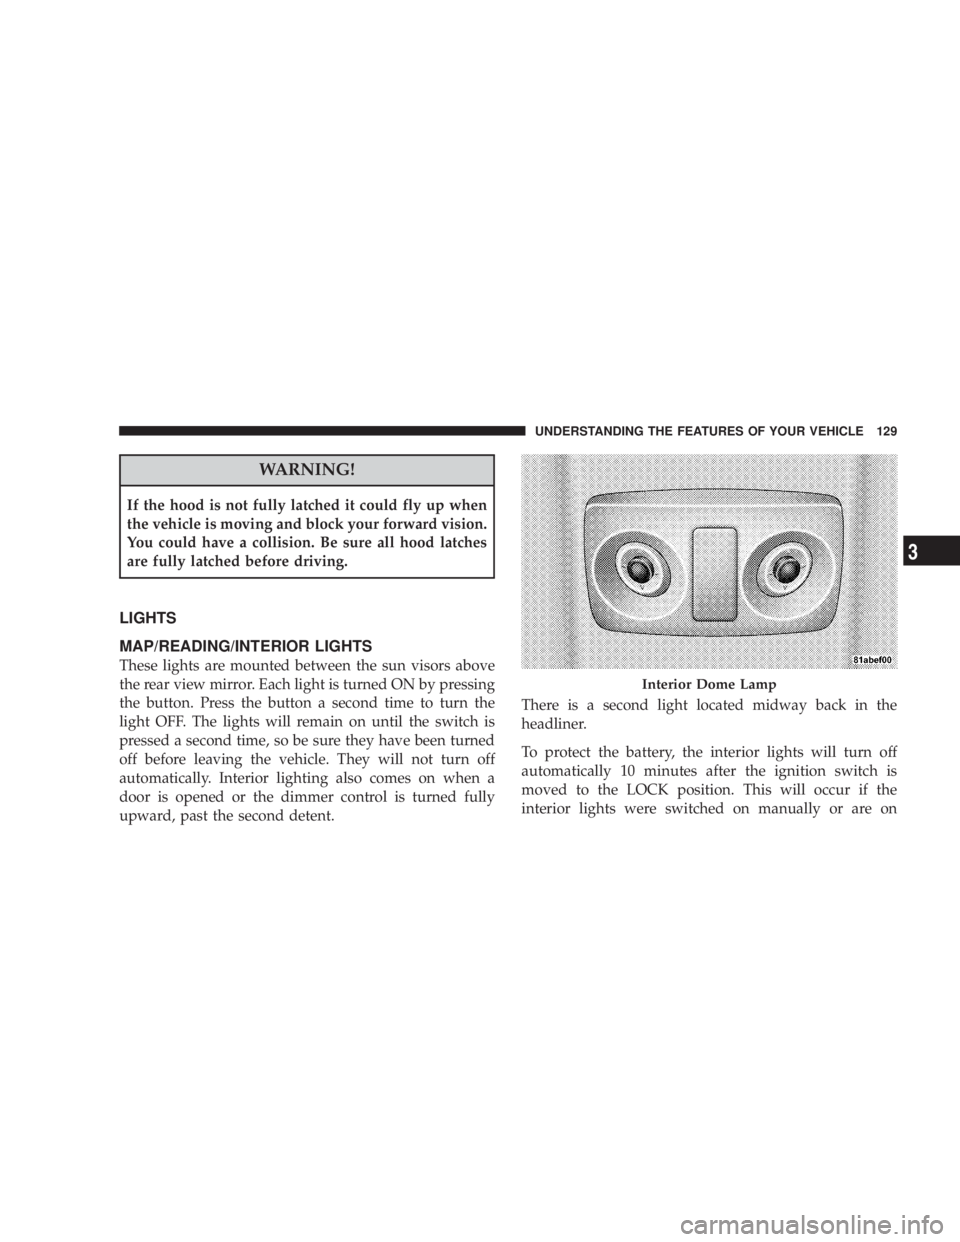
These lights are mounted between the sun visors above
the rear view mirror. Each light is turned ON by pressing
the button. Press the button a second time to turn the
light OFF. The lights will remain on until the switch is
pressed a second time, so be sure they have been turned
off before leaving the vehicle. They will not turn off
automatically. Interior lighting also comes on when a
door is opened or the dimmer control is turned fully
upward, past the second detent. There is a second light located midway back in the
headliner.
To protect the battery, the interior lights will turn off
automatically 10 minutes after the ignition switch is
moved to the LOCK position. This will occur if the
interior lights were switched on manually or are on Interior Dome LampUNDERSTANDING THE FEATURES OF YOUR VEHICLE 129
3
Page 141 of 467
TILT/TELESCOPING STEERING COLUMN
This feature allows you to tilt the steering column
upward or downward. It also allows you to lengthen or
shorten the steering column. The tilt/telescoping control
handle is located below the steering wheel at the end of
the steering column. To unlock the steering column, pull the control handle
outward. To tilt the steering column, move the steering
wheel upward or downward as desired. To lengthen or
shorten the steering column, pull the steering wheel
outward or push it inward as desired. To lock the steering
column in position, push the control handle inward until
fully engaged.
WARNING!Do not adjust the steering wheel while driving. The
telescoping adjustment must be locked while driv-
ing. Adjusting the steering wheel while driving or
driving without the telescoping adjustment locked
could cause the driver to lose control of the vehicle.
Tilt/Telescoping Steering Wheel UNDERSTANDING THE FEATURES OF YOUR VEHICLE 139
3
Page 142 of 467
ELECTRONIC SPEED CONTROL Ð IF EQUIPPED
When engaged, this device takes over the accelerator
operation at speeds greater than 25 mph (40 km/h).
The Speed Control Lever is located on the right side of
the steering wheel. To Activate:
Push in and release the ON/OFF button located in the
end of the Electronic Speed Control Lever. The Speed
Control indicator in the instrument cluster will illumi-
nate. To turn the system OFF, push in and release the
ON/OFF button a second time. The Speed Control
indicator will turn off. The system should be turned OFF
when not in use.
NOTE: The Electronic Speed Control System will auto-
matically turn itself off when the ignition key is turned to
the LOCK position.
Speed Control Location140 UNDERSTANDING THE FEATURES OF YOUR VEHICLE
Page 149 of 467

NOTE: There are 30 seconds in which to initiate the next
step after the ªLearnº button has been pressed.
7. Return to the vehicle and press the programmed
HomeLink t button twice (holding the button for two
seconds each time). If the device is plugged in and
activates, programming is complete.
If the device does not activate, press the button a third
time (for two seconds) to complete the training.
If you have any problems, or require assistance, please
call toll-free 1±800±355±3515 or, on the Internet at
www.HomeLink.com for information or assistance.
To program the remaining two HomeLink t buttons,
repeat each step for each remaining button. DO NOT
erase the channels. Using HomeLink t
To operate, simply press and release the programmed
HomeLink t button. Activation will now occur for the
trained device (i.e., garage door opener, gate operator,
security system, entry door lock, home/office lighting,
etc. The hand-held transmitter of the device may also be
used at any time.
Reprogramming a Single Homelink t Button
To reprogram a channel that has been previously trained,
follow these steps:
1. Turn the ignition switch to the ON/RUN position.
2. Press and hold the desired HomeLink t button until
the indicator light begins to flash after 20 seconds. Do not
release the button.
3. Without releasing the button, proceed with Program-
ming Homelink t Step 2 and follow all remaining steps.UNDERSTANDING THE FEATURES OF YOUR VEHICLE 147
3
Page 155 of 467
ELECTRICAL POWER OUTLETS
There are two 12-volt electrical outlets on this vehicle.
Both of the outlets are protected by a fuse.
The instrument panel power outlet, located below the
climate control knobs, has power available only when the
ignition is on. This outlet will also operate a conventional
cigar lighter unit.
NOTE: If desired, the instrument panel power outlet
can be converted by your authorized dealer to provide
power with the ignition switch while in the LOCK
position. Instrument Panel Power OutletUNDERSTANDING THE FEATURES OF YOUR VEHICLE 153
3
Page 162 of 467

WARNING!If containers of hot liquid are placed in the bottle
holder, they can spill when the door is closed, burn-
ing the occupants. Be careful when closing the doors
to avoid injury.
STORAGE
CARGO AREA
The 60/40 split-folding rear seat provides cargo-carrying
versatility. The seatbacks fold down easily by pulling
nylon tabs between the seatbacks and the bolsters. When
the seats are folded down, they provide a continuous,
nearly flat extension of the load floor.
When the seatback is folded to the upright position, make
sure it is latched by strongly pulling on the top of the
seatback above the seat strap. WARNING!² Be certain that the seatback is securely locked into
position. If the seatback in not securely locked
into position, the seat will not provide the proper
stability for child seats and/or passengers. An
improperly latched seat could cause serious injury.
² The cargo area in the rear of the vehicle (with the
rear seatbacks in the locked-up or folded down
position) should not be used as a play area by
children when the vehicle is in motion. They could
be seriously injured in an accident. Children
should be seated and using the proper restraint
system.
² To help protect against personal injury, passengers
should not be seated in the rear cargo area. The
rear cargo space is intended for load carrying
purposes only, not for passengers, who should sit
in seats and use seat belts.160 UNDERSTANDING THE FEATURES OF YOUR VEHICLE
Page 166 of 467

N Operation Instructions - CD Mode For CD And
MP3 Audio Play ......................198
N Notes On Playing MP3 Files .............200
N List Button (CD Mode For MP3 Play) .......203
N Info Button (CD Mode For MP3 Play) .......203
m Sales Code REQ Ð AM/FM Stereo Radio And
6±Disc CD/DVD Changer
(MP3/WMA AUX Jack) ..................205
N Operating Instructions - Radio Mode .......205
N Operation Instructions - (Disc Mode For CD
And MP3/WMA Audio Play, DVD-Video) ....213
N Notes On Playing MP3/WMA Files ........215
N List Button (Disc Mode For MP3/WMA Play) . . 218
N
Info Button (Disc Mode For MP3/WMA Play) . . 218 m Sales Code REN Ð Multimedia System Ð
If Equipped ...........................220
N Operating Instructions Ð Satellite Radio
(If Equipped) ........................221
N Operating Instructions Ð Voice Recognition
System (VR) (If Equipped) ...............221
N Operating Instructions Ð Hands-Free
Communication (UConnect t ) (If Equipped) . . . 221
N Clock Setting Procedur e.................221
m Sales Code RER Ð Multimedia System Ð
If Equipped ...........................223
N Operating Instructions Ð Satellite Radio .....224
N Operating Instructions Ð Hands-Free
Communication (UConnect t ) (If Equipped) . . . 224
N Clock Setting Procedur e.................225164 UNDERSTANDING YOUR INSTRUMENT PANEL
Page 176 of 467

indicator system is duty cycle based, which means the
engine oil change interval may fluctuate dependent upon
your personal driving style.
Unless reset, this message will continue to display each
time you turn the ignition switch to the ªONº position.
To turn off the message temporarily, press and release the
Trip Odometer button on the instrument cluster. To reset
the oil change indicator system (after performing the
scheduled maintenance) perform the following proce-
dure:
1. Turn the ignition switch to the ªONº position (Do
not start the engine).
2. Fully depress the accelerator pedal slowly three
times within 10 seconds.
3. Turn the ignition switch to the LOCK position. NOTE: If the indicator message illuminates when you
start the vehicle, the oil change indicator system did not
reset. If necessary repeat this procedure.
16. Cruise Indicator Ð If Equipped
This indicator shows that the Speed Control
System is ON.
17. Odometer/Trip Odometer Reset Knob
Single Trip Odometer
Press and release this button to change the display from
odometer to trip odometer. The word ªTripº displays to
show that the odometer is in Trip Mode. Press and release
the button again to change the display back to the
odometer.
To reset the trip odometer, first set the display to Trip
Mode. Then push and hold the button (approximately 2
seconds) until the display resets to 0. The odometer must
be in Trip Mode to reset the trip odometer.174 UNDERSTANDING YOUR INSTRUMENT PANEL