Page 65 of 257

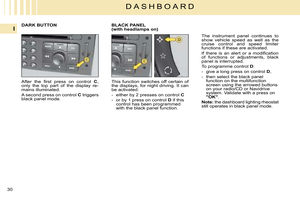
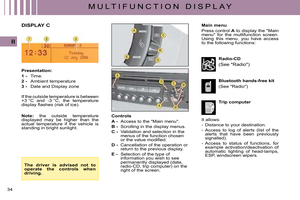
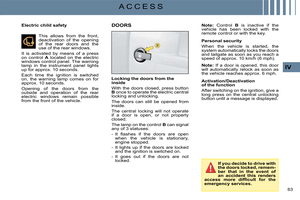
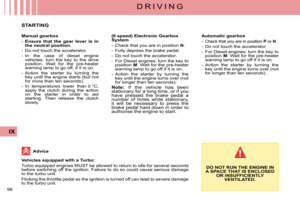
64
IV
A C C E S S
Manual operation (emergency mode)
In the event of an electrical fault, it is possible to lock the vehicle’s doors by actioning control C on each door.
With the door open, insert the end of a key or similar item into the aperture and turn.
Close the door.
After a repair, normal functioning resumes using either the unlocking control B, the remote control, or the key used in the driver’s door.
Closing the tailgate
Lower the tailgate, using the 2 hand-hold zones located on the tailgate interior trim.
R e m o v i n g y o u r fi n g e r s , p r e s s d o w n to close.
TAILGATE
Opening from the outside
Press upwards on lever 1 which is located between the number plate lamps.
Anti-theft security
In all cases, as soon as the vehicle is moving (at above approx. 10 km/h or 6 mph) the tailgate locks auto-matically. The tailgate unlocks when a door is opened or if the interior locking/unlocking button is pressed.
Emergency unlocking
If there is a problem with unlocking the tailgate, it can be unlocked from inside the boot:
- insert a screwdriver or similar tool into hole 2 of the lock,
- turn it in order to unlock the tailgate.
Page 66 of 257

64
IV
A C C E S S
Manual operation (emergency mode)
In the event of an electrical fault, it is possible to lock the vehicle’s doors by actioning control C on each door.
With the door open, insert the end of a key or similar item into the aperture and turn.
Close the door.
After a repair, normal functioning resumes using either the unlocking control B, the remote control, or the key used in the driver’s door.
Closing the tailgate
Lower the tailgate, using the 2 hand-hold zones located on the tailgate interior trim.
R e m o v i n g y o u r fi n g e r s , p r e s s d o w n to close.
TAILGATE
Opening from the outside
Press upwards on lever 1 which is located between the number plate lamps.
Anti-theft security
In all cases, as soon as the vehicle is moving (at above approx. 10 km/h or 6 mph) the tailgate locks auto-matically. The tailgate unlocks when a door is opened or if the interior locking/unlocking button is pressed.
Emergency unlocking
If there is a problem with unlocking the tailgate, it can be unlocked from inside the boot:
- insert a screwdriver or similar tool into hole 2 of the lock,
- turn it in order to unlock the tailgate.
Page 67 of 257
65
V
V I S I B I L I T Y
LIGHTING CONTROLS
1 Off
2 Automatic lighting
3 Sidelamps
4 Dipped beam/Main beam
Sidelamps on
Dipped beams/main beams on
Pull the stalk towards you to change from dipped beam to main beam and vice versa.
Turn the barrel A forward.
Automatic lighting of headlamps
Sidelamps and dipped beams come on automatically in conditions of poor ambient light or when the wip-ers are in continuous operation.
Guide-me-home lighting
This function leaves the headlamps on temporarily to assist your exit in low light conditions.
This function is activated:
Page 68 of 257

66
V
V I S I B I L I T Y
Vehicles with front and rear foglamps (Ring B)
In conditions of poor visibility, if the ambient brightness does not trigger the automatic light-ing, it is up to you to switch on your dipped beams manually, as well as your foglamps.
They operate when sidelamps, dipped beams or main beams are switched on.
HEADLAMP ADJUSTMENT
You are advised to adjust the aim of the headlamps in accordance with vehicle load.
In the dashboard on the right hand side of the steering column.
0. 1 or 2 occupants in the front seats.
-. 3 occupants.
1. 5 occupants.
-. Intermediate position.
2. 5 occupants + maximum au-thorised load.
-. Intermediate position.
3. Driver + maximum authorised load.
Note: vehicles equipped with Xenon headlamps have automatic head-lamp adjustment.
For a vehicle equipped with front and rear foglamps:
- 1st notch forwards: switches on front foglamps.
- 2nd notch forwards: switches on rear foglamps.
- 1st notch rearwards: switches off rear foglamps.
- 2nd notch rearwards: switches off front foglamps.
Note:
The rear foglamps must only be used when visibility is severely re-duced (fog, snow).
For a vehicle equipped with rear foglamps:
- 1st notch forwards: switches on rear foglamps.
- 1st notch rearwards: switches off rear foglamps.
Page 69 of 257
65
V
V I S I B I L I T Y
LIGHTING CONTROLS
1 Off
2 Automatic lighting
3 Sidelamps
4 Dipped beam/Main beam
Sidelamps on
Dipped beams/main beams on
Pull the stalk towards you to change from dipped beam to main beam and vice versa.
Turn the barrel A forward.
Automatic lighting of headlamps
Sidelamps and dipped beams come on automatically in conditions of poor ambient light or when the wip-ers are in continuous operation.
Guide-me-home lighting
This function leaves the headlamps on temporarily to assist your exit in low light conditions.
This function is activated:
Page 70 of 257

66
V
V I S I B I L I T Y
Vehicles with front and rear foglamps (Ring B)
In conditions of poor visibility, if the ambient brightness does not trigger the automatic light-ing, it is up to you to switch on your dipped beams manually, as well as your foglamps.
They operate when sidelamps, dipped beams or main beams are switched on.
HEADLAMP ADJUSTMENT
You are advised to adjust the aim of the headlamps in accordance with vehicle load.
In the dashboard on the right hand side of the steering column.
0. 1 or 2 occupants in the front seats.
-. 3 occupants.
1. 5 occupants.
-. Intermediate position.
2. 5 occupants + maximum au-thorised load.
-. Intermediate position.
3. Driver + maximum authorised load.
Note: vehicles equipped with Xenon headlamps have automatic head-lamp adjustment.
For a vehicle equipped with front and rear foglamps:
- 1st notch forwards: switches on front foglamps.
- 2nd notch forwards: switches on rear foglamps.
- 1st notch rearwards: switches off rear foglamps.
- 2nd notch rearwards: switches off front foglamps.
Note:
The rear foglamps must only be used when visibility is severely re-duced (fog, snow).
For a vehicle equipped with rear foglamps:
- 1st notch forwards: switches on rear foglamps.
- 1st notch rearwards: switches off rear foglamps.
Page 71 of 257
67
V
V I S I B I L I T Y
SIGNALLING
Direction indicators
Left: move the stalk downwards.
Right: move the stalk upwards.
Movement of the steering wheel returns the stalk to the off position automatically.
Hazard warning lamps
Simultaneous operation of the direc-tion indicators.
Only use these if there is danger,for example when you have to stop suddenly or in unusual driving con-ditions.
They also operate without the igni-tion being on.
H e a d l a m p fl a s h
P u l l t h e s t a l k t o w a r d s y o u t o fl a s h headlamps.
T h e h e a d l a m p fl a s h o p e r a t e s e v e n with the ignition off.
Emergency lighting of hazard warning lamps
Sudden vehicle deceleration auto-matically causes the hazard warning lamps to activate.
These cease automatically when you reaccelerate or manually if you press the hazard warning lamps control on the dashboard.
Driving with the hazard warning lamps on renders the direction indicators inoperable.
Page 72 of 257