2008 CHEVROLET SILVERADO clock
[x] Cancel search: clockPage 138 of 596
Shifting Out of Four-Wheel-Drive Low
To shift from Four-Wheel-Drive Low to
Four-Wheel-Drive High, or Two-Wheel-Drive High,
your vehicle must be stopped or moving less than 3 mph
(5 km/h) with the transmission in NEUTRAL (N) and the
ignition in ON/RUN. The preferred method for shifting
out of Four-Wheel-Drive Low is to have your vehicle
moving 1 to 2 mph (1.6 to 3.2 km/h). Turn the knob to
the Four-Wheel-Drive High, or Two-Wheel-Drive High
position. You must wait for the Four-Wheel-Drive High,
or Two-Wheel-Drive High indicator light to stop �ashing
and remain on before shifting the transmission into gear.
Notice:Shifting the transmission into gear before
the requested mode indicator light has stopped
�ashing could damage the transfer case. To help
avoid damaging your vehicle, always wait for the
mode indicator lights to stop �ashing before shifting
the transmission into gear.
It is typical for your vehicle to exhibit signi�cant
engagement noise and bump when shifting between
Four-Wheel-Drive Low and Four-Wheel-Drive High
ranges or from NEUTRAL with the engine running.
If the knob is turned to the Four-Wheel-Drive High, or
Two-Wheel-Drive High switch position when your vehicle
is in gear and/or moving, the Four-Wheel-Drive High,
or Two-Wheel-Drive High indicator light will �ash for
30 seconds but will not complete the shift unless your
vehicle is moving less than 3 mph (5 km/h) and the
transmission is in NEUTRAL (N).
Shifting into NEUTRAL
To shift the transfer case to NEUTRAL do the following:
1. Make sure the vehicle is parked so that it will
not roll.
2. Set the parking brake and press and hold the
regular brake pedal. SeeParking Brake on
page 2-50for more information.
3. Start the vehicle or turn the ignition to ON/RUN.
4. Shift the transmission to NEUTRAL (N).
5. Shift the transfer case to Two-Wheel-Drive High.
6. Turn the transfer case dial clockwise to NEUTRAL
till it stops and hold it for 10 seconds. Then slowly
release the dial to the four low position. The
NEUTRAL light will come on when the transfer
case shift to NEUTRAL is complete.
7. If the engine is running, verify that the transfer case
is in NEUTRAL (N) by shifting the transmission to
REVERSE (R) for one second, then shift the
transmission to DRIVE (D) for one second.
8. Turn the ignition to ACC/ACCESSORY, which will
turn the engine off.
9. Place the transmission shift lever in PARK (P).
10. Release the parking brake prior to moving
the vehicle.
11. Turn the ignition to LOCK/OFF.
2-44
Page 143 of 596
Shifting into NEUTRAL
To shift the transfer case to NEUTRAL do the following:
1. Make sure the vehicle is parked so that it will not roll.
2. Set the parking brake and apply the regular brake
pedal. SeeParking Brake on page 2-50for more
information.
3. Start the vehicle or turn the ignition to ON/RUN.
4. Put the transmission in NEUTRAL (N).
5. Shift the transfer case to Two-Wheel Drive High.
6. Turn the transfer case dial clockwise to NEUTRAL
till it stops and hold it for 10 seconds. Then slowly
release the dial to the four low position. The
NEUTRAL light will come on when the transfer
case shift to NEUTRAL is complete.
7. If the engine is running, make sure that the transfer
case is in NEUTRAL (N) by shifting the transmission
to REVERSE (R) for one second, then shift the
transmission to DRIVE (D) for one second.
8. Turn the ignition to ACC/ACCESSORY, which will
turn the engine off.
9. Place the transmission shift lever in PARK (P).
10. Release the parking brake prior to moving
the vehicle.
11. Turn the ignition to LOCK/OFF.
Shifting Out of NEUTRAL
To shift out of NEUTRAL do the following:
1. Set the parking brake and apply the regular
brake pedal.
2. Shift the transmission to NEUTRAL (N) and turn the
ignition to RUN with the engine off.
3. Turn the transfer case dial to Two-Wheel-Drive
High, Four-Wheel-Drive High, AUTO.
After the transfer case has shifted out of NEUTRAL
the NEUTRAL light will go out.
4. Release the parking brake prior to moving the
vehicle.
Notice:Shifting the transmission into gear
before the requested mode indicator light has
stopped �ashing could damage the transfer case.
To help avoid damaging your vehicle, always
wait for the mode indicator lights to stop �ashing
before shifting the transmission into gear.
5. Start the engine and shift the transmission to the
desired position.
2-49
Page 180 of 596

StabiliTrak®Indicator Light.............................3-48
Engine Coolant Temperature Gage..................3-48
Tire Pressure Light.......................................3-49
Malfunction Indicator Lamp.............................3-49
Oil Pressure Gage........................................3-52
Oil Pressure Light.........................................3-53
Security Light...............................................3-53
Fog Lamp Light............................................3-53
Cruise Control Light......................................3-54
Highbeam On Light.......................................3-54
Four-Wheel-Drive Light..................................3-54
Tow/Haul Mode Light....................................3-54
Fuel Gage...................................................3-55
Low Fuel Warning Light.................................3-56
Driver Information Center (DIC).......................3-56
DIC Operation and Displays
(With DIC Buttons)....................................3-57
DIC Operation and Displays
(Without DIC Buttons)................................3-63DIC Warnings and Messages.........................3-66
DIC Vehicle Customization (With DIC Buttons) . . .3-76
Audio System(s).............................................3-84
Setting the Clock..........................................3-86
Radio(s)......................................................3-88
Using an MP3 (Radio with CD or
Six-Disc CD Player).................................3-108
Using an MP3 (Radio with CD and
DVD Player)...........................................3-114
XM Radio Messages...................................3-119
Navigation/Radio System..............................3-120
Rear Seat Entertainment (RSE) System.........3-121
Rear Seat Audio (RSA)................................3-130
Theft-Deterrent Feature................................3-132
Audio Steering Wheel Controls......................3-132
Radio Reception.........................................3-133
Fixed Mast Antenna....................................3-134
XM™ Satellite Radio Antenna System............3-134
Section 3 Instrument Panel
3-2
Page 199 of 596
If your vehicle has this button, your vehicle may have
the snow plow prep package. For further information see
Adding a Snow Plow or Similar Equipment on
page 4-43.
Instrument Panel Brightness
D(Instrument Panel Brightness):This feature
controls the brightness of the instrument panel lights
and is located next to the exterior lamp control.
Push the knob to extend out and then it can be turned.
Turn the knob clockwise or counterclockwise to
brighten or dim the instrument panel lights. Turning the
knob to the farthest clockwise position turns on the
dome lamps.
Dome Lamps
The dome lamps come on when any door is opened.
They turn off after all the doors are closed.
The dome lamps can also be turned on by turning the
instrument panel brightness knob, located next to
the exterior lamps control, clockwise to the farthest
position. In this position, the dome lamps remain
on whether a door is opened or closed.
Dome Lamp Override
The dome lamp override button is located next to the
exterior lamps control.
k(Dome Off):Press the button in and the dome
lamps remain off when a door is opened. Press
the button again to return it to the extended position so
that the dome lamps come on when a door is opened.
Entry Lighting
Your vehicle has an illuminated entry feature.
When the doors are opened, the dome lamps will come
on if the dome override button is in the extended
position. If the dome override button is pressed in,
the lamps will not come on.
Exit Lighting
The interior lamps come on when the key is removed
from the ignition. They turn off automatically in
20 seconds. The lights do not come on if the dome
override button is pressed in.
3-21
Page 200 of 596
Reading Lamps
If your vehicle has reading lamps they are located on
the overhead console.
To turn on the reading lamps, press the button
located next to each lamp. To turn them off, press the
button again.
Your vehicle may also have reading lamps in other
locations. To turn the lamps on or off, press the button
located next to the lamp.
If your vehicle has a DVD Rear Seat Entertainment
(RSE) system, press the lamp lenses to turn the lamps
on or off.
The lamps are �xed and cannot be adjusted.
Cargo Lamp
The cargo lamps come on by turning the instrument
panel brightness control knob to the farthest clockwise
position. This knob is located on the instrument
panel and also turns on the dome lamps.
The cargo lamp can be used if more light is needed
in the cargo area of the vehicle or in the top-box
storage units.
Electric Power Management
The vehicle has Electric Power Management (EPM) that
estimates the battery’s temperature and state of
charge. It then adjusts the voltage for best performance
and extended life of the battery.
When the battery’s state of charge is low, the voltage is
raised slightly to quickly put the charge back in. When
the state of charge is high, the voltage is lowered slightly
to prevent overcharging. If the vehicle has a voltmeter
gage or a voltage display on the Driver Information
Center (DIC), you may see the voltage move up
or down. This is normal. If there is a problem, an alert
will be displayed.
The battery can be discharged at idle if the electrical
loads are very high. This is true for all vehicles.
This is because the generator (alternator) may not be
spinning fast enough at idle to produce all the power that
is needed for very high electrical loads.
A high electrical load occurs when several of the
following loads are on: headlamps, high beams, fog
lamps, rear window defogger, climate control fan at
high speed, heated seats, engine cooling fans, trailer
loads, and loads plugged into accessory power outlets.
3-22
Page 203 of 596
Climate Controls
Climate Control System
(With Air Conditioning )
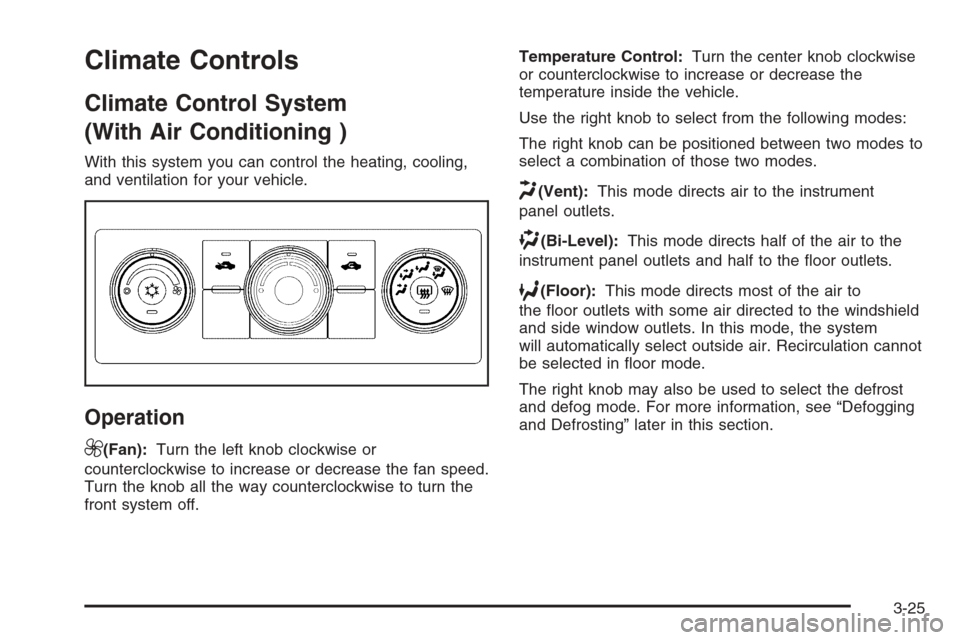
With this system you can control the heating, cooling,
and ventilation for your vehicle.
Operation
9
(Fan):Turn the left knob clockwise or
counterclockwise to increase or decrease the fan speed.
Turn the knob all the way counterclockwise to turn the
front system off.Temperature Control:Turn the center knob clockwise
or counterclockwise to increase or decrease the
temperature inside the vehicle.
Use the right knob to select from the following modes:
The right knob can be positioned between two modes to
select a combination of those two modes.
H(Vent):This mode directs air to the instrument
panel outlets.
)(Bi-Level):This mode directs half of the air to the
instrument panel outlets and half to the �oor outlets.
6(Floor):This mode directs most of the air to
the �oor outlets with some air directed to the windshield
and side window outlets. In this mode, the system
will automatically select outside air. Recirculation cannot
be selected in �oor mode.
The right knob may also be used to select the defrost
and defog mode. For more information, see “Defogging
and Defrosting” later in this section.
3-25
Page 206 of 596
Climate Control System
(Heater Only)
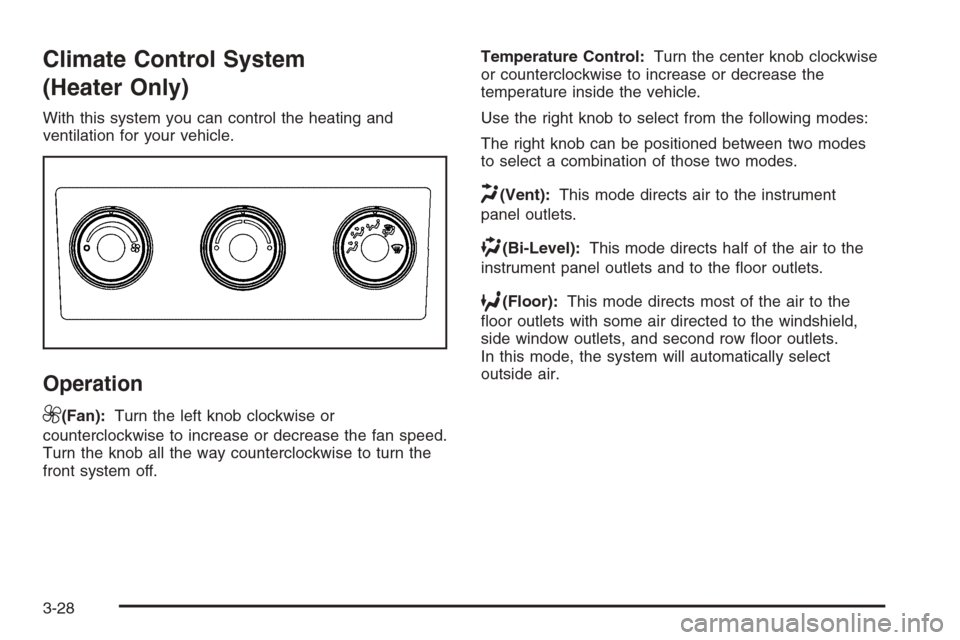
With this system you can control the heating and
ventilation for your vehicle.
Operation
9
(Fan):Turn the left knob clockwise or
counterclockwise to increase or decrease the fan speed.
Turn the knob all the way counterclockwise to turn the
front system off.Temperature Control:Turn the center knob clockwise
or counterclockwise to increase or decrease the
temperature inside the vehicle.
Use the right knob to select from the following modes:
The right knob can be positioned between two modes
to select a combination of those two modes.
H(Vent):This mode directs air to the instrument
panel outlets.
)(Bi-Level):This mode directs half of the air to the
instrument panel outlets and to the �oor outlets.
6(Floor):This mode directs most of the air to the
�oor outlets with some air directed to the windshield,
side window outlets, and second row �oor outlets.
In this mode, the system will automatically select
outside air.
3-28
Page 264 of 596

Setting the Clock
AM-FM Radio with Optional CD Player
If the vehicle has an AM/FM radio with an optional
CD player, it has a
H(clock) button for setting the time.
With these types of radios, the clock can be set with
either the radio turned on or off.
Set the time by following these steps:
1. Press the
Hbutton until the hour numbers begin
�ashing on the display. Press the
Hbutton a
second time and the minute numbers begin �ashing
on the display. Press the
Hbutton a third time
and the 12HR or 24HR time format begins �ashing.
2. While either the hour or the minute numbers
are �ashing, turn the
fknob, located on the upper
right side of the radio faceplate, clockwise or
counterclockwise to increase or decrease the time.
While the 12HR or 24HR time format is �ashing,
turn the
fknob clockwise or counterclockwise
to select the default time settings.
3. Press the
Hbutton again until the clock display
stops �ashing to set the currently displayed time;
otherwise, the �ashing stops after �ve seconds and
the current time displayed will be automatically set.
MP3 Radios with a Single CD or a
Single CD and DVD Player
If the vehicle has a radio with a single CD or a CD
and DVD player, it has a
Hbutton for setting the time
and date.
To set the time and date, follow the instructions:
1. Press the
Hbutton and the HR, MIN, MM, DD,
YYYY (hour, minute, month, day, and year)
displays.
2. Press the pushbutton located under any one of the
labels to change. Every time the pushbutton is
pressed again, the time or the date if selected,
increases by one.
Another way to increase the time or date,
is to press the right
¨SEEK arrow or the
\FWD (forward) button.
To decrease, press the left©SEEK arrow or the
sREV (reverse) button, or turn thefknob,
located on the upper right side of the radio, to
adjust the selected setting.
3-86