2008 AUDI TT ROADSTER engine
[x] Cancel search: enginePage 51 of 316

Master key battery replacement
Each master key contains a battery housed under the
cover.
Fig . 3 4 Master key:
o peni ng the cover
We recommend having the battery cha nged by a n autho
rized dealership. However, if y ou wish to replace the dead
battery y ourself, proceed as follows :
- Pry apart the base => fig. 34
@ and the cover@ carefully
with a coin.
- Remove the cove r (arrow).
- Remove the dead battery from the cover.
- I nsta ll the new battery . Pl eas e make ce rtain t hat t he" +"
sign on the batte ry faces down . Correct po la rity is shown
on t he cover .
- Place the cover w ith the new bat tery on t he key base and
press both parts together .
For the sake of the environment
Dispose of dead batteries proper ly so as not to pol lute the environ
ment.
Con tro ls and eq uip
ment
Op ening and clo sing
[ i ] Tip s
The replacement battery must be the same specification as the
origina l.•
Electronic immobilizer
The immobilizer helps to prevent unauthorized use of
your vehicle.
A computer chip inside your key automatically deactivates the elec
tronic immobilizer when you insert the key in the ignition lock.
When you remove the key from the ignition lock, the e lectronic
immobil izer is automatically activated once again.
If an unauthorized key was used, SA FE is displayed continuously in
the odometer display field .
& WARNING
Always ta ke the key with y ou when you le ave the vehi cle. The key
ca n dis arm the el ectroni c eng ine immob ilizer and permit an un au
thori zed p erson to start the engine and enabl e ope ration of the
v ehi cle s ystems su ch a s po wer window or power t op leading to
s eri ous pe rso nal injury .
[ i ] Tip s
• Your engine can only be started using the fac tory -equipped key .
• You may not be ab le to start your vehicle if an ignition key of a
different vehicle make is a lso loca ted on your set of keys .•
Certification
The remote control device comp lies with
• USA models : Part 15 of the FCC Rules.
Vehicle care
I I irechnical data
Page 54 of 316

Openin g a nd clo sin g
PANIC B utton
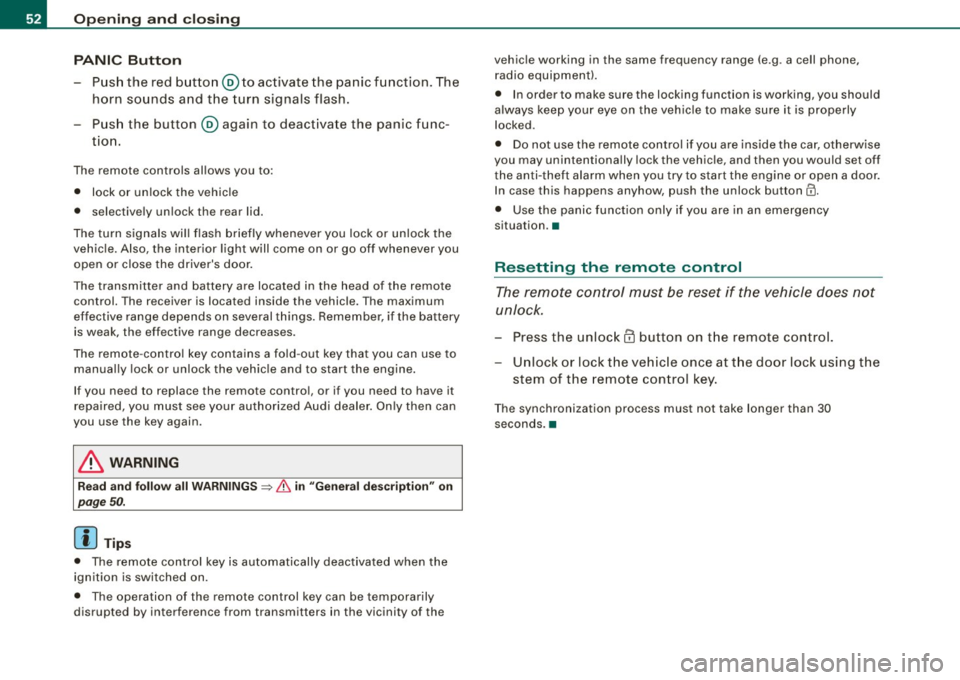
- Push the red button@to activate the panic function. The
horn sounds and the turn signals flash.
- Push the button ® again to deactivate the panic func-
tion.
The remote controls allows you to:
• lock or unlock the vehicle
• selectively unlock the rear lid.
The turn signals wi ll flash briefly whenever you lock or unlock the
vehic le. Also, the interior light will come on or go off whenever you
open or close the driver's door.
The transmitter and battery are located in the head of the remote control. The receiver is located inside the vehicle. The maximum
effective range depends on several things. Remember, if the battery
is weak, the effective range decreases.
The remote -contro l key contains a fo ld -out key that you can use to
manually lock or unlock the vehicle and to start the engine.
If you need to replace the remote contro l, or if you need to have it
repaired, you must see your authorized Audi dealer . On ly then can
you use the key again.
& WARNING
Re ad and follo w all WARNINGS ~ & in "General de scr iption " on
page 50 .
[ i J Tips
• The remote control key is automatically deactivated when the
ignition is switched on.
• The operation of the remote control key can be temporarily
disrupted by interference from transmitters in the vicinity of the vehic
le working in the same frequency range (e.g . a cell phone,
radio equipment).
• In order to make sure the locking function is working, you should
a lways keep your eye on the vehic le to make sure it is properly
locked .
• Do not use the remote control if you are inside the ca r, otherwise
you may unintentionally lock the vehicle, and then you would set off
the an ti-theft alarm when you try to start the engine or open a door.
I n case this happens anyhow, push the unlock button@.
• Use the panic func tion only if you are in an emergency
situation. •
Resetting the remote control
The remote con tr o l must be reset if the vehicle does not
unlock.
- Press the unlock
III button on the remote control.
- Unlock or lock the vehicle once at t he door lock using the
stem of the remote control key.
T he synchronization process must not take longer than 30
seco nds. •
Page 59 of 316

When w ill the anti th eft ala rm sys te m be trigge re d ?
When the vehicle is locked, the alarm system mon itors and protects
the following parts of the vehicle :
• engine compartment
• luggage compartment
• doors
• ignition
When the system is activated, the alarm will be triggered if one of the doors , the engine hood or the rear lid are opened, or if the igni
tion is turned on .
The anti -theft alarm sys tem will also go off when the battery is
disconnected .
You can also trigger the alarm by pressing the PANIC button on your remo te -control key . This will alert other people in case of emer
gency. Press the
PANIC button again to turn off the a larm.
H ow is the ant i-th eft al arm s witche d o ff wh en
t riggered ?
The alarm system is switched off when you unlock the vehic le using
t he remote -con tro l key or when the ignition is swi tched on . The
alarm will also switch itse lf off when it comes to the end of its cycle .
Emerg en cy fla sher
The emergency flasher wil l b link brief ly when the doors, engine
hood and rear lid are properly closed .
If the emergency flashers do not blink, check the doors, engine hood
and rear lid to make sure they are properly closed. If you close a
door, the hood or the rear lid with the anti-theft alarm switched on,
the emergency flashers will blink only after you have closed the
door or lid.
[ i ] Tips
• For the ant i-theft a larm system to function properly, make sure
all vehicle doors and windows are closed before leaving the vehicle.
Con tro ls and eq uip
ment
Op ening and clo sing
• When you open the vehicle from the driver's door using the key,
the central locking swi tch wi ll work only after you have swi tched on
the ignition .•
Power windows
Controls
The driver can operate all windows.
M ;g 0
i
F ig . 44 Dri ver's door:
p ow er w in dow
swi tc hes
Fi g. 4 5 Passe nger's
d oor : p ow er window
swi tch
If the respective switch is pushed or pulled the window wil l
open or close. The power window sw itches have a
two-posi -
tion fun ction :
1)1,
Vehicle care I I Technical data
Page 60 of 316

Opening and closing
Opening the windows
- Press the switch and hold it down until the window has
reached the desired position.
- Press the switch
briefly to open the window automati
cally. By briefly pressing the switch again, the downward
travel of the window can be stopped in any position
=> & .
Closing the windows
- Pull the switch and hold it until the window has reached
the desired position.
- Pull the switch
briefly to close the window automatically.
By briefly pressing the switch again, the upward travel of
the window can be stopped in any position => & .
Switch @:::::, page 57, fig. 44 operates the window in the driver's
door.
Switch @ operates the window in the front passenger's door.
& WARNING
• Do not leave children unattended in the vehicle, especially with
access to vehicle keys. Unsupervised use of the keys can result in
starting of the engine and use of vehicle systems such as power
windows, etc. which could result in serious injury.
• Remember -you can still open or close the power windows for
about ten minutes after the ignition is switched off. Only when
either of the front doors are opened are the power windows
switched off.
• Be careful when closing the windows. Check to see that no one
is in the way, or serious injury could result!
• Always remove the ignition key whenever you leave your
vehicle.
& WARNING (continued)
• If you lock your vehicle from the outside, no one, especially chil
dren, should remain in the vehicle.
• Do not stick anything on the windows or the windshield that
may interfere with the driver's field of vision.
[ i] Tips
• When the doors are opened, the windows are automatically
lowered 10 mm.
• The windows can still be opened and closed for about ten
minutes after the ignition has been turned off. The power windows
are not shut off until one of the front doors is opened .•
Convenience close /open feature
You can close or open the windows from outside when
you lock or unlock your car with the key.
Closing the windows
Fig. 46 Key turns for
opening and closing
- Insert the key into the lock of the driver's door.
- Make sure that the windows are not blocked=>& .
Page 62 of 316

Folding top
Folding top
Folding top
General
The comprehensively engineered design of the fabric folding top
allows it to be operated quickly and simply. When open, the folding
top is stowed completely in a tonneau provided specifically for this
purpose.
In normal operating conditions, the folding top is wind -and water
proof. Under certain circumstances, a small quantity of droplets might form, but only in extremely inclement weather, e.g. torrential
or continuous heavy rain. This is normal and not a cause for
concern .
Follow the care instructions =>
page 203, "Folding top care" to main
tain the folding top's attractive appearance and to keep it wind- and
waterproof. Please follow these instructions as well:
• Stow and open the folding top only when it is clean . When the
top is folded away, sharp -edged contaminants can build up as silt
and cause wear spots on the rear window, which may damage the
folding top over time. Of course, ice and snow should also be
removed before opening the folding top.
• Under no circumstances should you use sharp -edged or abrasive
objects to remove ice and snow. Use a commercial ice scraper to
remove ice from of the rear window.
• The folding top should be opened only if it is completely dry . If
the folding top is opened and then stored wet, unattractive indenta
tions may develop. In addition, over time, mold and mildew stains
can develop.
• Do not leave the folding top open for several weeks at a time;
instead, open and close it from time to time so that the fabric does
not discolor where it folds, and to prevent creases from forming. This is especially
important if it happens to be stowed while still
damp on occasion.
• Because the fabric becomes less flexible when temperatures
drops below zero, we recommend not operating the folding top
below0°C.
& WARNING
• When operating the folding top, make sure that any external
factors {e.g. the wind) do not impair its function or endanger other
drivers.
• Never drive while the folding top is not properly secured. Other
wise, it may be pulled open by the wind. This can cause injuries
and damage to the vehicle -danger of an accident!
• When opening and closing the folding top make sure to keep
yourself and others clear of all moving parts. Risk of injury!
0 Note
• Always make sure that there is enough clearance above the
vehicle so that the folding top is not damaged when opening and
closing.
• Do not place any objects in the tonneau to avoid damage when
opening the folding top.
[ i] Tips
• The folding top should be operated only with the ignition
switched on.
• When parking the car with the folding top open, bear in mind
that the vehicle's interior is not protected from damage due to unex pected weather conditions, or unauthorized access. It is therefore
advisable to close the folding top before leaving the vehicle. If
~
Page 65 of 316

-Press and hold the switch down throughout the closing
procedure.
The folding top is completely open or closed when the indicator
light <:-in the instrument cluster goes out. The door windows are
automatically lowered about 20 mm while the top is opening .
& WARNING
Never drive the vehicle with the top not properly latched! Other
wise there is a risk that the top will be opened by the wind. This
can result in injuries and damage to the vehicle.
[ i] Tips
• Opening and closing the automatic convertible top is possible
below posted speed limits in city driving . At speeds above 4 mph (6
km/h), you can use the "convenience opening" function. The folding
top is completely opened by briefly pulling on the switch.
• The indicator light for the folding top goes out as soon as it is
correctly latched .
• In order not to discharge the battery unnecessarily, the top
should not be lowered or raised several times in succession with the
engine not running.
• I f the indicator light for the folding top flashes when the switch
is actuated, there is a malfunction. •
Controls and equip
ment
Folding top
Ap plies to vehic les: with power fo lding top
Convenience opening and closing of power
top
The power top can alternatively be opened and closed by
turning the key in the driver's door Jock.
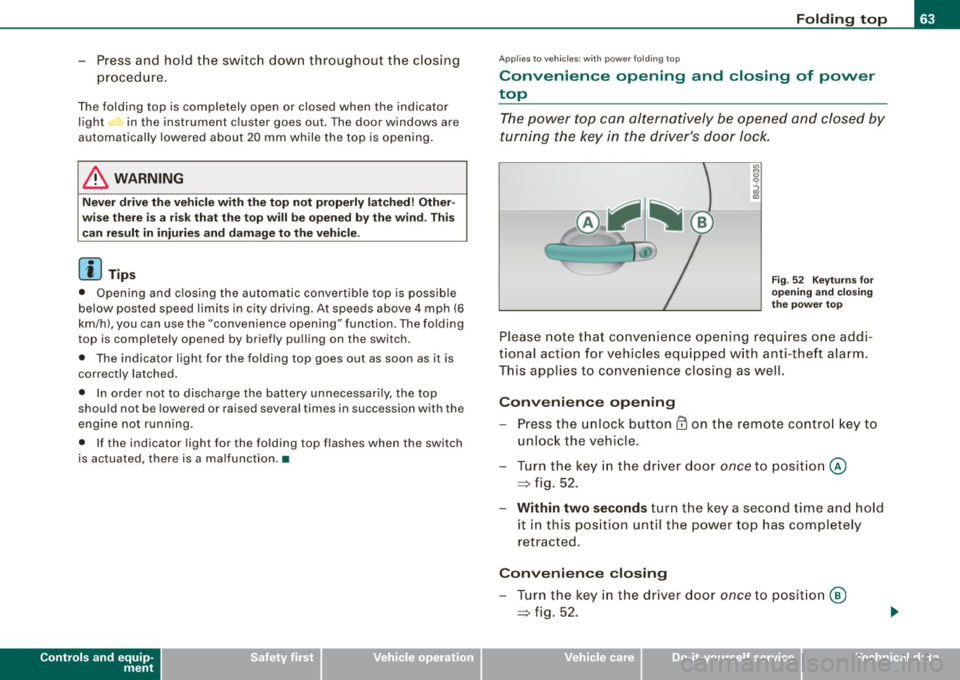
Fig. 52 Keyturns for
opening and closing
the power top
Please note that convenience opening requires one addi
tional action for vehicles equipped with anti-theft alarm.
This applies to convenience closing as well.
Convenience opening
-Press the unlock button CD on the remote control key to
unlock the vehicle.
- Turn the key in the driver door
once to position @
=> fig. 52.
- Within two seconds turn the key a second time and hold
it in this position until the power top has completely
retracted.
Convenience closing
- Turn the key in the driver door once to position @
=> fig. 52.
I • •
Page 71 of 316

Clear vision
Lights
Switching the headlights on and off ·'t!-·
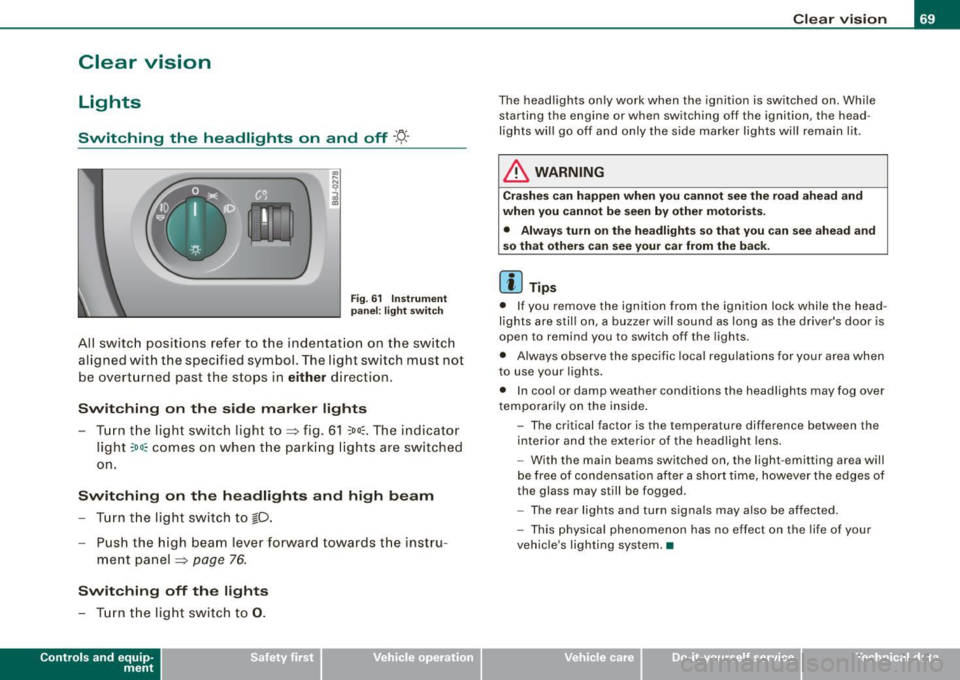
Fig. 6 1 Ins trum ent
p ane l: lig ht sw itch
All sw itc h positions refer to the indentat ion on the switch
aligned with the specified symbol. The light switch must not
be overturned past the stops in
either direction .
Switching on the side marker lights
-Tur n t he light switch ligh t to ==> fig. 61 ;oo; . The indi ca tor
light
; oo ~ comes o n when t he park ing lig hts are sw itched
on .
Switching on the headlights and high beam
- Turn t he light switch to lD.
- Push the high beam leve r fo rward towards t he instru -
ment panel ==> page
76.
Switching off the lights
-Tur n t he lig ht switch to 0 .
Con tro ls and eq uip
ment
Clear vision
The headlights only work when the ignition is switched on . While
starting the engine or when switching off the ignition, the head
lights will go off and only the side marker lights will remain lit .
& WARNING
Crashe s can happen when you cannot see the road ahead and
when you c annot be seen by other motori sts.
• Always tu rn on the headlight s so th at you can see ahead and
so that others can see your ca r from the ba ck.
[ i ] Tips
• I f you remove the ignition from the ignition lock wh ile the head
lights are still on, a buzzer will sound as long as the driver's doo r is
open to remind you to switch off the lights .
• Always observe the spec ific local regulations for your area when
to use your lights .
• I n coo l or damp weather conditions the headlights may fog over
tempo ra rily on the inside .
- The critical factor is the t emperature diff erence between the
interior and the ex te rior of the headlight lens .
- With the main beams switched on, the light -emitting area will
be free o f condensation after a short time, however the edges of
the glass may still be fogged .
- The rear lights and turn signa ls may also be affected.
- This physical phenomenon has no effect on the life of your
vehicle 's lighting system. •
Vehicle care I I irechnical data
Page 81 of 316

& WARN IN G ( continu ed)
• The light /ra in sens or* is only de signed to assist and support
the dri ver. It rem ain s e ntirely th e dr iver's re spon sibilit y to m onitor
out side weather cond it ions and to m anu ally activ ate the wipers a s
s oo n as rain or drizz le reduce s visibility t hroug h th e w indsh ield .
• The windshield mu st not be tr eated with w ater-r ep ellent mate
rial s. They c an in creas e glare u nder poor visibilit y cond ition s suc h
a s wetn ess, darkne ss, or when t he sun is low on the hori zon . In
a dditi on, they can cause the wi nd shield wipers to chatter.
0 Note
In freezing or near freezing conditions:
• Always check that the wiper blades are not frozen to the glass
before you turn the wipers on. Loosen a wiper blade which is frozen
in place before operating the wipers to prevent damage to the wiper
blade or the wiper motor.
• Do not use the wipers to clear a frosted window. Using the
wipers as a convenient ice scraper wil l destroy the wiper blades.
• Before you take your vehicle to an automatic car wash, make sure
you have the windshield wiper system switched off (lever in position
0), otherwise the windshield wiper system could get damaged in the
car wash if it should sudden ly come on .
[ i] Tips
• The rain sensor is pa rt of the interva l wiping system. Turning off
the ignition will also deactivate the rain sensor . To reactivate the
sensor, switch off the interva l wiping function, then switch it back
on again.
• Worn or dirty windshield wiper b lades cause smearing, which
can affect the operation of the light/rain sensor *. Check the condi
tion of your windshield wiper b lades regular ly .
• Applies to vehicles with light/rain sensor : When the wipers are
switched on manually and in rain conditions, the automatic head -
Controls and equip
ment
Cl ea r vision
lights * turn on~ page 70, "Sensor activated head and tail light
control" or off during the day when the wipers are n o longer oper
ating . The automatic headlights * function is available in this case
only when the light switch is in the "AUTO" position~
page 70,
fig. 62.
• Make sure the washer fluid reservoir in the engine compartment
is topped off before going on a long trip. Look up~
page 236 for
checking and filling the washer container.
• The wipers only operate with the hood completely closed .•
App lies to vehicles: with headlight washer system
Headlight washer system
The headlight washer system cleans the headlights.
Operate the winds hield wiper/washer system=> page 78,
fig. 72
© wit h the head lights turned on by holding the
lever for longer than one seco nd.
The washer jets extend forward out of the front bumper driven by
water pressure to spray the front head ligh ts with water.
You should inspect the head lights regular ly {for examp le when refu
e ling) and clean off any solid dirt or insects from the lenses .
To ensure the sys tem works proper ly in winter, keep the washer jets
free of snow and remove any ice using a de-icing spray.•
I • •