2008 AUDI TT ROADSTER mileage
[x] Cancel search: mileagePage 27 of 316
If, however, the Malfunction Indicator Lamp (MIU comes on,
always drive to your nearest authorized Audi dealer or qualified
workshop and have the vehicle checked.
For more information =>
page 216, "Refuelling".•
Service interval display
The service interval display reminds you when your next
service is due.
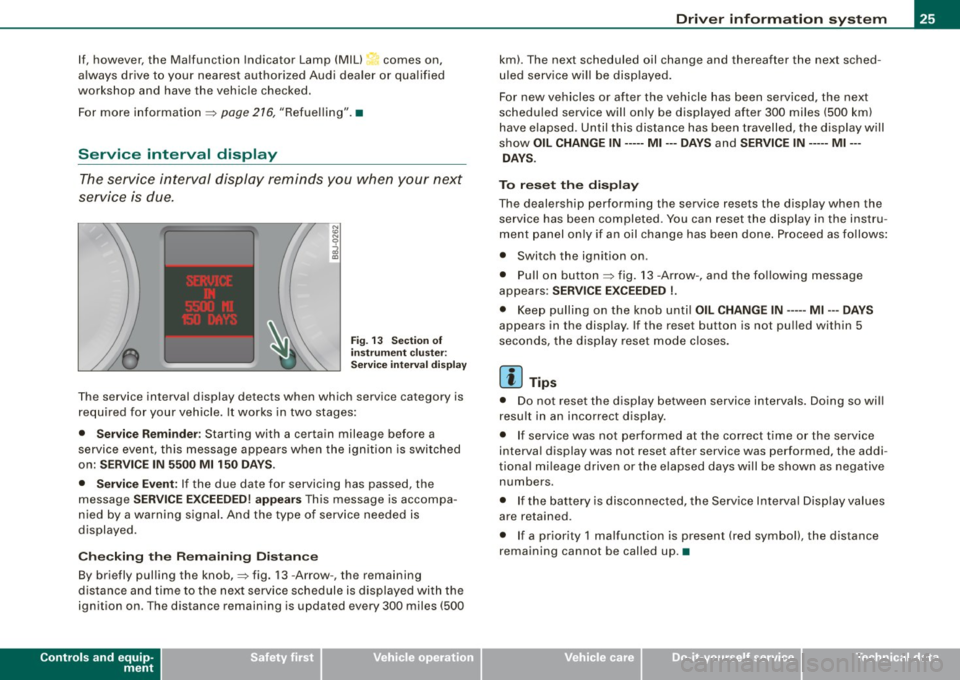
Fig. 13 Section of
instrument cluster:
Service interval display
The service interval display detects when which service category is
required for your vehicle. It works in two stages:
• Service Reminder : Starting with a certain mileage before a
service event, this message appears when the ignition is switched
on:
SERVICE IN 5500 Ml 150 DAYS.
• Service Event:
If the due date for servicing has passed, the
message
SERVICE EXCEEDED! appears This message is accompa
nied by a warning signal. And the type of service needed is
displayed.
Checking the Remaining Distance
By briefly pulling the knob,=> fig. 13 -Arrow -, the remaining
distance and time to the next service schedule is displayed with the
ignition on . The distance remaining is updated every 300 miles (500
Controls and equip
ment
Driver information system
km). The next scheduled oil change and thereafter the next sched
uled service will be displayed.
For new vehicles or after the vehicle has been serviced, the next
scheduled service will only be displayed after 300 miles (500 km)
have elapsed. Until this distance has been travelled, the display will
show
OIL CHANGE IN----- Ml ---DAYS and SERVICE IN----- Ml --
DAYS.
To reset the display
The dealership performing the service resets the display when the service has been completed . You can reset the display in the instru
ment panel only if an oil change has been done. Proceed as follows:
• Switch the ignition on .
• Pull on button=> fig.
13 -Arrow-, and the following message
appears:
SERVICE EXCEEDED !.
• Keep pulling on the knob until OIL CHANGE IN ---- -Ml ---DAYS
appears in the display. If the reset button is not pulled within 5
seconds, the display reset mode closes.
[ i] Tips
• Do not reset the display between service intervals. Doing so will
result in an incorrect display.
• If service was not performed at the correct time or the service
interval display was not reset after service was performed, the addi
tional mileage driven or the elapsed days will be shown as negative
numbers.
• If the battery is disconnected, the Service Interval Display values
are retained.
• If a priority 1 malfunction is present (red symbol), the distance
remaining cannot be called up. •
I • •
Page 41 of 316
To del ete maximum sp eed
-Turn off the ignition.
- Briefly press the button in the instrument cluste r
=>
page 38, fig . 24. The odometer and the digital clock are
now illuminated.
- Press the button for at leas t 2 seconds. T he curren tly
stored maximum speed appears in the display.
Press the rese t button in the w ipe r lever ®=>
page 38,
fig. 25 until the crossed out speed warni ng symbol fo r
warning threshold 2 appears in the d isplay.
A few seconds after the adjustment is comp leted, the illumination
for the odometer and the digital clock wi ll go out .
[ i J Tip s
This warning threshold can a lso be controlled through the trip
computer ~
page 28, "Navigating the menu". •
Contro ls and eq uip
ment
Dri ver in form ati on syst em
Trip computer
Introduction
The trip computer gives you inf ormation on current and
average fuel mileage, average speed, fuel range and
driving time .
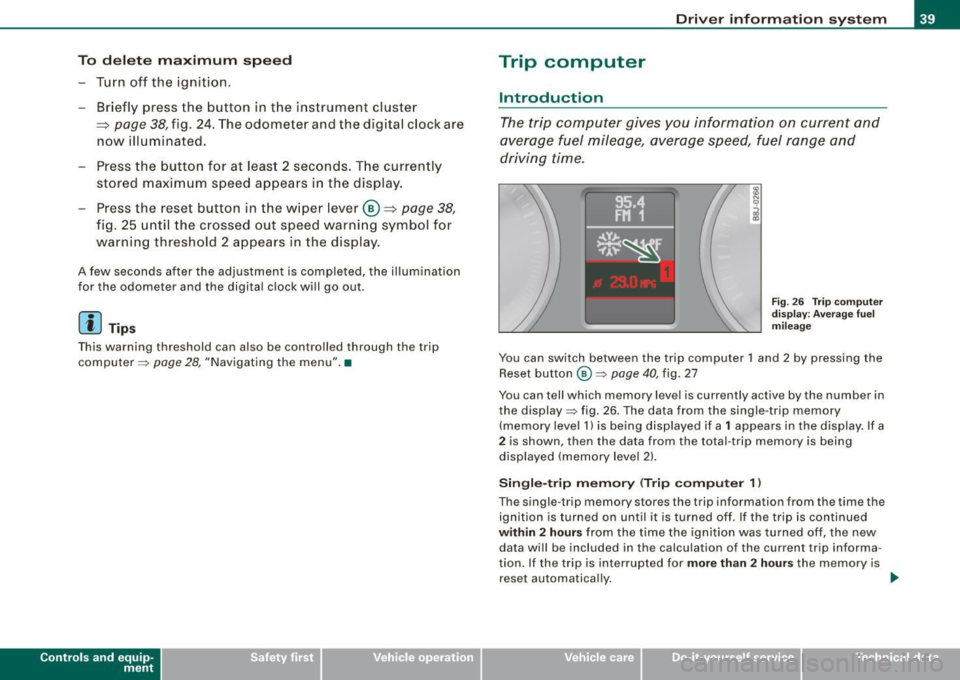
Fig . 2 6 Trip c omput er
di sp lay: Ave ra g e f uel
mi lea ge
You can switch between the trip computer 1 and 2 by pressing the
Reset button
@ ~ page 40 , fig. 27
You can tell which memory level is currently active by the number in
the display ~ fig . 26 . The data from the single -trip memory
(memory level 1) is being disp layed if a
1 appears in the display. If a
2 is shown, then the data from the total -trip memory is being
displayed (memory leve l 2) .
Sin gle -trip mem ory (Trip compute r 1)
The single -t r ip memory stores the trip information from the time the
ignition is turned on until it is turned off. If the trip is continued
within 2 hour s from the time the ignition was turned off, the new
data wi ll be included in the calcu lation of the current trip informa
tion. If the trip is interrup ted for
more than 2 hour s the memory is
reset automatica lly. _,.
Vehicle care I I irechnical data
Page 42 of 316
Driver inf ormation sy ste m
To ta l-tr ip mem ory ( Trip compu te r 2)
Unlike the single -trip memory, the total -tr ip memory is not reset
automatically . This permits you to evaluate your driving data for the
entire period between manua l resets.
Fu el r an ge
The estimated cruising range in miles (km) appears in the display.
This tells you how far your vehicle will be able to travel on the
current tank of fuel and with the same driving sty le . The display
changes in increments of 6 miles (10 km).
The cruising range is calculated based on the fuel consumption for
t he last 18 miles (30 km). If you drive conservatively, the cruising
range will increase .
Average fuel m ile ag e
The average fuel economy in MPG (1/100 km) since you last cleared
the memory appears in this display. You can use this display to
adjust your driving technique to achieve a desired mileage.
C ur rent fuel mil eage
The instantaneous fuel consumption in mi les per gallon (1/100 km)
is shown in th is d isplay. You can use this display to adjust your
driving technique to achieve a desired mileage.
Fue l consumption is recalcu la ted at intervals of 33 yards (30
meters). When the vehicle is stationary, the most recent fuel
consumption is d isplayed .
Average speed
The average speed in mph (km/h) s ince the last time the display was
reset appears in the display .
Elap se d time
The length of time that you have been driving since you last reset
the memory appears in this display.
Di stance
The elapsed distance since the last time the memory was cleared
appears in the display. The maximum distance that can be recorded
is 9,999 .9 miles (9,999 .9 kilometers).
[ i ] Tips
• Fuel consumptions (average and current), range and speed are
displayed in metric units on Canadian models.
• All stored values will be lost if the vehicle battery is
disconnected .•
Operation
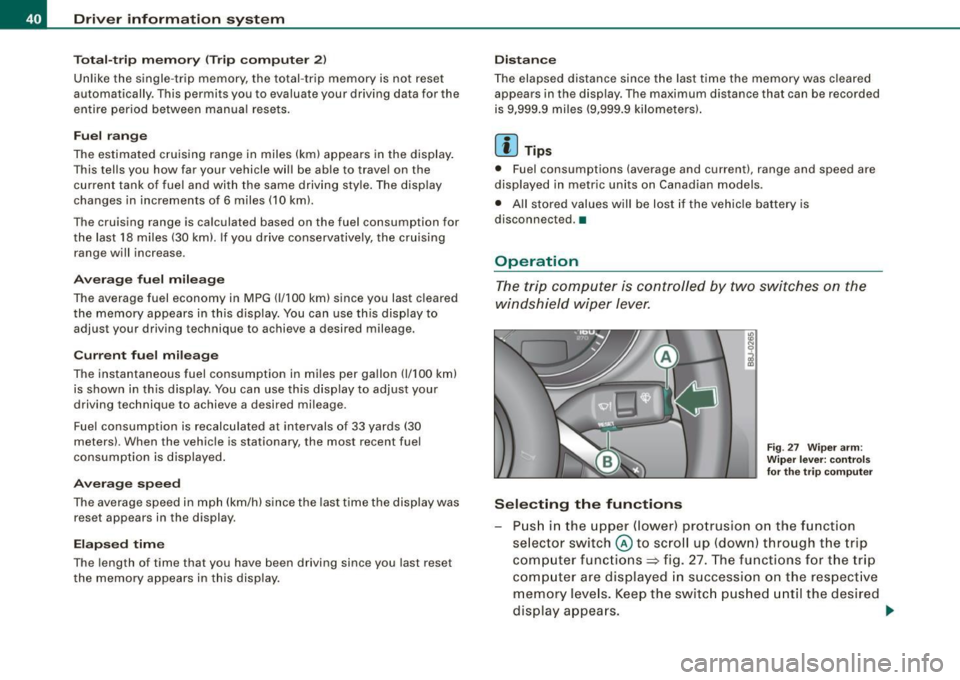
The trip computer is controlled by two switches on the
windshield wiper lever.
S ele cting th e fun ctions
Fig. 27 Wiper ar m:
W iper l ever: co ntrols
fo r th e tr ip com pute r
P u sh in the upper (lower) pro trusion o n the function
se lector switch @to scroll up (dow n) through the trip
computer functions~ fig. 27. The functions for the trip
comp uter are displayed in succession on the respect ive
memory leve ls. Keep the switc h pus hed until the desired
display appears . .-,,
Page 43 of 316
Switchin g bet w ee n m enu l ev els
- Tap the Rest button ® briefly to reach the various menu
levels one after the other ("Computer 1 ", "Computer 2",
"Navigation system"* and "Start menu") .
Rese ttin g th e fun ction to z ero
- Select the desired function.
- Push the reset button ® for at least two seco nds .
The trip computer only operates when the ignition is on. When you
turn on the ignition, the function that was in use when you last
turned the ignition off will be displayed .
In addition to the trip computer information (memory level 1 or 2)
and navigation information can be displayed. To switch the display
between the different systems, tap the Reset button
@ briefly .
You can reset the following va lues to zero using the reset button:
• driving time
• average mileage
• average speed
In addition,
a ll the values in the single -trip or the total-trip memory
can be de leted simu ltaneously .
[ i ] Tips
• If you hold down the reset button for longer than 2 seconds, the
current value (for example, average fuel consumption) will be reset
to zero .
• Malfunction displays in Auto -Check Control are shown even with
the display switched off.
• All stored values will be lost if the vehicle battery is
disconnected. •
Controls and equip
ment
Dri ver infor mat io n sy ste m
Tire pressure monitoring system
General notes
As an added safety feature, your vehicle has been equipped with a
tire pressure monitoring system (TPMS) that illuminates a low tire
pressure telltale when one or more of your tires is significant ly
under -inflated. The TPMS only provides a low tire pressure warning
and does not reinflate your tires.
Accordingly, when the low tire pressure tellta le illuminates, you
should stop and check your tires as soon as possib le, and inflate
them to the proper pressure. Driving on a significantly under
inflated t ire causes the tire to overheat and can lead to tire failure .
Under -inflation a lso reduces fuel efficiency and tire tread l ife, and
may affect the vehicle's handling and stopping ability.
(D Note
• Please note that the TPMS is not a substitute for proper tire
maintenance, and it is the driver's respons ib ility to maintain correct
tire pressure, even if under -inflation has not reached the level to
trigger illumination of the TPMS low tire pressure telltale .
• Each tire, including the spare, should be checked monthly when
cold and inflated to the inflat ion pressure recommended by the
vehic le manufacturer on the vehicle p lacard or tire inflation pres
s u re label. (If your vehicle has tires of a different size than the size
indicated on the vehicle placard or tire inflation pressure labe l, you
should determine the proper tire inflation pressure for those
tires.) •
TPMS malfunction indicator
Your vehic le has a lso been equipped with a TPMS malfunction indi
cator to indicate when the system is not operating proper ly . The
TPMS malfunction indicator is combined with the low tire pressure _.,
I • •
Page 196 of 316
___ D_ r_ iv _i_ n-' g"'""'- a_ n_d_ e_ n _ v_i_r _ o _n_ m_ e_ n_t _____________________________________________ _
- Lack of proper maintenance as well as improper use of the
vehicle will impair the function of the emission con trol system
and could lead to damage.
exhaust gas can have a su lfur -like exhaust gas smell under some
operating states . This depends on the su lfur content of the fuel
being used. Using a different brand of fuel may he lp, or filling the
tank with lead-free super grade gasoline. •
Avoid damaging the vehicle
When you are driving on poor roads, or over curbs, steep ramps,
etc., make certain that low-lying parts such as spoilers and exhaust
system parts do not bottom out and get damaged.
This is especially true for vehicles with low-slung chassis (sports
chassis) and fully loaded vehicles. •
Operate your vehicle economically
and minimize pollution
General
Your personal style of driving will determine the economy
of your vehicle, as well as exhaust and noise levels.
Fuel economy, environmental impact, and wear on your engine,
brakes and t ires largely depend on three factors:
• your personal driving style
• operating condit ions
• technical limitations If
you anticipate what you need to do next and drive economically,
you can easily cut your fuel consumption by 10-15 percent . This
section will give you some tips on how you can he lp the environ
ment and your pocketbook .
[ i ] Tips
The consumption estimates as published by ENVIRONMENTAL
PROTECTION AGENCY (EPA) and Transport Canada may not corre
spond to your actua l consumption on the road, which will vary
depend ing upon vehicle load and speed, road and weather condi
tions, trip length, etc. •
Drive smoothly and keep a lookout ahead
Vehicles use the most fuel when they are accelerating.
Avoid unnecessary accelerating and braking.
Vehicles use the most fue l when they are accelerating . If you antici
pate what is going to happen next, you will need to brake less and,
thus, accelerate less. Let the vehicle coast whenever possible -for
example when you see that the next traffic light is red. •
Avoid full throttle
Driving at moderate speeds saves fuel and improves your
mileage.
- Try and keep well below your car's maximum speed.
Acce lerating gently reduces fuel consumption, engine wear, and
does not disturb the environment.
Fuel consumption, exhaust emissions and engine noise increase
disproportionately at high speeds. If you drive at approximately
three quarters of top speed, fuel consumption wil l be reduced by
9J,,
Page 198 of 316
___ D_ r_iv _ in_... g"'- a_ n_ d_ e_ n_ v_i_r _ o _n_ m __ e_n _ t _______________________________________________ _
The engine and catalytic converter have to reach their optimal oper
ating temperature
to reduce fuel consumption and noxious emis
sions effectively.
• Just after starting, a cold engine in a mid -size car burns the fuel
at a poor rate of 6-8 miles per gallon (30-40 l/100kml. Half a mile
down the road, the mileage improves to 12 MPG (20 1/100 kml. It will
take the engine no less than
two and a half miles (4 km) of driving to
warm up to its proper operating temperature and operate at an
economic mileage. This explains why taking the car for short trips is
a rather wasteful convenience.
• The
outside temperature is also critical in this regard. Your car
consumes more fuel in the winter than in the summer.
Trailer towing
General information
Your Audi TT Roadster is not designed to tow a trailer.
Towing a trailer with your Audi TT Roadster is not recommended
and can cause damage to the car. Damaged caused by towing a
traile r is not covered by your Audi Warranty. •
Page 224 of 316

-Checking and filling P'll:I ---=---------------
© Jump start points(+) under a cover, ( -) bolt head
© Windshield/headlight washer container ( O ) .. ... .. .
& WARNING
Before you check anything in the engine compartment, always
read and heed all WARNINGS
~ & in "Wo rking in the engine
compartment" on page
220. •
Applies to v ehi cles: with 3,2 1 250 -h p eng in e
3 .21 250 -hp engine
279
236
These are the most important it ems that you can check.
Fig . 150 Engine compartment: 3.21 250-hp engine
G) Coolant expansion tank (J -) ..... ... .. ..... .. ... .
0 Engine oil dipstick (orange) . ... .. ...... ........ . .
© Engine oil filler cap (
228
224
225
230
© Jump start points(+) under a cover,( -) bo lt head ... .
© Windshield/headlight washer container (O ) .. .... . .
& WARNING
Before you check anything in the engine compartment, always
read and heed all WARNINGS
~ & in "Working in the engine
compartment" on page
220. •
Engine oil
Engine oil specifications
279
236
The engine oil used in your Audi needs the right kind of
oil.
The engine in your Audi is a sophisticated powerp lant that was built
to exacting specifications. This engine needs the right kind of
engine oil that meets specifications regarding quality and viscosity
so that it can run smoo thly and re liably. Choosing the right oil and
changing oil wi thin the time and mileage interva ls printed in your
vehic le's Maintenance
& Warranty booklet matters a lot more today
than it did years ago. Audi has developed a special quality standard
for engine oil that will help assure that your vehicle's engine will get
the lubrica tion it needs for proper operation.
Modern engine lubrication has taken a quantum leap in the last few
years. Many synthetic oils available today provide better engine
lubrication that can outlast traditional petroleum -based oils,
making them a smart choice for use throughout the life of your Audi.
Whether you use synthe tic or petro leum-based engine oil, the oil
that you use must conform to Audi's oil quality standard VW 502 00
to help keep your vehicle's engine running smoothly and help prevent the formation of harmful deposits, sometimes called
"sludge,' ' that over time can lead to expensive repairs. •
Page 308 of 316

__ _:._A..:.:l:.!: p :...:h..:.: a== b:..:e :...:t :.:..ic =-= a..:..l ..:.:in :..:..:: d:...:e :...:x-=-----------------------------------------------
Lights
Bi-Xenon headlights ... .... ...... .. 75
Coming-home/leaving-home-function 73
Emergency flasher . . . . . . . . . . . . . . . . 75
Front fog lights . . . . . . . . . . . . . . . . . . . 73
Headlights . . . . . . . . . . . . . . . . . . . . . . . 69
High beam . . . . . . . . . . . . . . . . . . . . 69, 76
High beam warning/indicator light ... 18
Instrument pane l illumination . ...... 74
Side marker lights . . . . . . . . . . . . . . . . . 69
Turn signals .. ..... ....... .... .... 76
Loading the luggage compartment 135
Locking Power locking switch . . . . . . . . . . . . . . 53
Rear lid/trunk lid .... .. ...... ... .. . 55
Remote control key . . . . . . . . . . . . . . . . 51
Using the key . .... .... .... ..... .. . 53
Luggage compartment Ligh t ........... .... .... ......... 77
Loading . . . . . . . . . . . . . . . . . . . . . . . . 135
Ski bag .. ... ..... .... .... ...... .. 93
Lumbar support ...... .... ........... 91
M
Maintenance ... .. ...... ...... .... .. 294
Malfunction Indicator Lamp (MIU 18 , 26
Manual folding top
closing ........ .... ..... ......... 61
Manual transmission ...... .... ...... 113
Maste r key . . . . . . . . . . . . . . . . . . . . . . . . . . 48
Battery replacement . . . . . . . . . . . . . . . 49
Menu button . . . . . . . . . . . . . . . . . . . . . . . . 28 Menu
display . . . . . . . . . . . . . . . . . . . . . . . . 27
Mileage Average .......... .... ....... .... 39
Instantaneous .. .... .. .... .... .... 39
Mirror Inside rearview mirror, manua l ...... 82
Mirrors Activa ting the digital compass . .... . 85
Anti-glare rearview mirror . ...... ... 82
Automatic d imming for the outs ide
mirrors .............. .... ..... .. 84
Automatically dimm ing inside mirror . 82
Manual glare dimming ... .... ...... 82
Outside mirrors .......... .... .... . 83
Monitoring the Advanced Airbag System
157
N
Natural leather 209
New tires and wh eels ... ... ... .... ... 249
NHTSA Contacting . . . . . . . . . . . . . . . . . . . . . . 136
Number of seats . . . . . . . . . . . . . . . . . . . . 137
0
Occupan t seating positions . . . . . . . . . . . 130
Octane rating .... .. . .. ... .... ... ... 214
Odometer . . . . . . . . . . . . . . . . . . . . . . . . . . . 14
Oil See Engine oil ....... ... .. ..... .. 222
Older children and safety belts . . . . . . . . 177 On-Board Diagnostic System (OBD)
Data Link Connec tor (DLC) . .... ..... 26
Electronic speed limiter ... ........ . 26
Malfunction Indicator Lamp (MIU .... 26
Open door or rear lid warning .. .... .... 24
Opening folding top
manually .. .... .... .... ...... ... .. 61
Operate your vehic le economically and mini-
mize pollution . ...... .... ..... .. 194
Optional equipment Marked with an asterisk .. ...... ..... 6
Outside mirrors ... ... .. .... .. ... .... . 83
Outside temperature display ... .... .. .. 23
Owner's manual How the Owner's Manual is organized . 6
p
Paint
Touch-up ......... .............. 205
Paint No. . . . ... ... .. .... .... .... ... 288
Parking ...... .... .... ........... .. . 108
Automatic transmission .... .... .. . 114
Parking brake . .. .. .. .... .... .... ... 108
Parking brake warn ing . ... .... .... ... . 30
Parking light
Defective . . . . . . . . . . . . . . . . . . . . . . . . . 36
Parking on a decline (downhil l) . ... .... 108
Parking on an incline (uphill) ...... .... 108
Parts replacement .... .... .... .... ... 296
PASSENGER AIR BAG OFF light .... .... 157
Passive safety system . . . . . . . . . . . . . . . 128