2008 AUDI TT ROADSTER homelink
[x] Cancel search: homelinkPage 123 of 316

HomeLink® -_______________ ___.
Homelink®
Universal remote control
Applies to veh icles: wit h Home link® unive rsa l rem ote cont rol
General information
The Homelink® feature can learn up to three radio
frequency codes for most current transmitters used for
operating garage doors, estate gates, home or outdoor
lighting systems, and other devices.
You must first program the Homelink® transmitter before you can
use the system~
page 121, "Programming the Homelink® trans
mitter" .
In order to program the Homelink® transmitte r for devices utili zing
rolling cod e, a second person on a ladder who can safely reach the
garage door opener motor is recommended. It is also necessary to
locate the "learn" button on your garage door opener motor . Refer
to the operating instructions for the opener, as the location and
color of this button may vary by manufacturer .
You can still use the original remote control for the device at any
time .
& WARNING
• Never use the Homelink"" transmitter with any garage door
opener that does have not the safety stop and reverse feature as
required by federal safety standards. This includes any garage
door opener model manufactured before April 1, 1982.
• A garage door opener which cannot detect an object, signaling
the door to stop and reverse does not meet current federal safety standards. Using a garage door opener without these features
increases risk of serious injury or death .
Con tro ls and eq uip
ment
& WARNING (continued)
• For safety reasons never release the parking brake or start the
engine while anyone is standing in front of the vehicle.
• A garage door or an estate gate may sometimes be set in
motion when the Homelink® remote control is being
programmed .
If the device is repeatedly activated, this can over
strain motor and damage its electrical components -an over
heated motor is a fire hazard!
• To avoid possible injuries or property damage, please always
make absolutely certain that no persons or objects are located in
the range of motion of any equipment being operated. •
Applies to vehi cles : wit h Home link ® un iv ers al re mote co ntrol
Programming the Homelink ® transmitter
The transmitter is programmed in two phases. For rolling
code transmitters, a third phase is also necessary.
0
Vehicle care I I
Fig. 115 Overhead
console: Homelink®
keypad ...
irechnical data
Page 124 of 316

-L_!H~o~m~ e~L:!!in~ k~®~------------------------------------------------
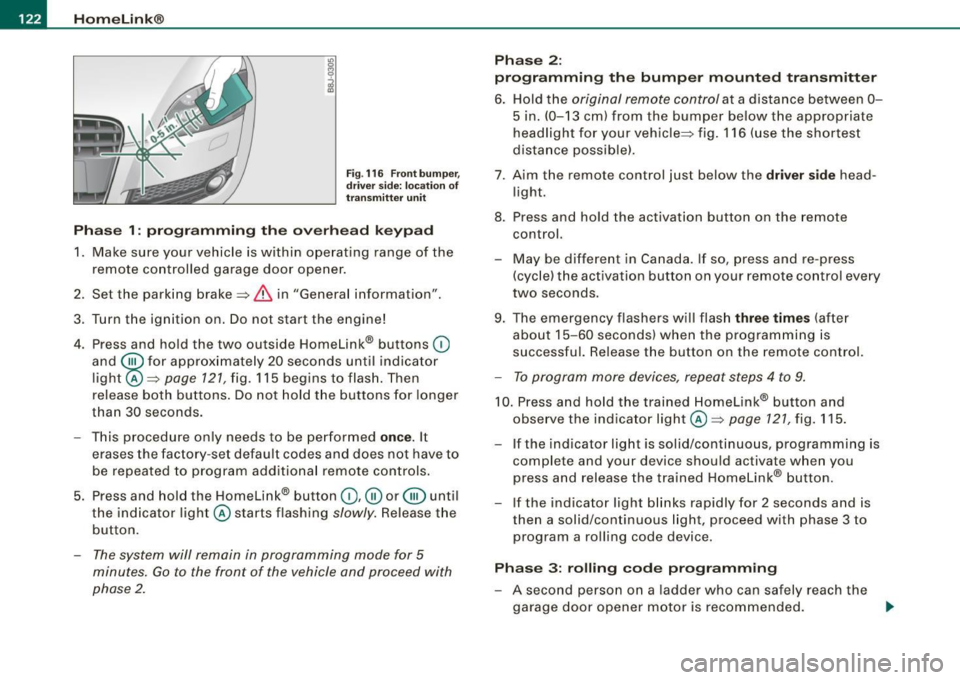
Fig . 116 Front bumper ,
driver side: location of
transmitter unit
Phase 1: programming the overhead keypad
1. Make sure your vehicle is within operating range of the
remote controlled garage door opener.
2. Set the parking brake::::,
& in "Genera l information".
3. Turn the ignition on. Do not start the engine!
4. Press and hold the two outside Homelink® buttons
(D
and @f or approxim~tely 20 sec_onds until indicator
light@::::,
page 121, fig. 115 begins to flash. Then
release both buttons. Do not hold the buttons for longer
than
30 seconds.
- This procedure only needs to be performed
once. It
erases the factory-set default codes and does not have to
be repeated to program additional remote controls.
5. Press and hold the Homelink® button
(D , ® or @ until
the indicator light@starts flashing
slowly. Release the
button.
- The system will remain in programming mode for 5
minutes.
Go to the front of the vehicle and proceed with
phase 2.
Phase 2:
programming the bumper mounted transmitter
6. Hold the original remote control at a distance between 0-
5 in. (0-13 cm) from the bumper below the appropriate
headlight for your vehicle::::, fig.
116 (use the shortest
distance possible).
7 . Aim the remote control just below the driver side head
light.
8. Press and hold the activation button on the remote control.
- May be different in Canada. If so, press and re-press
(cycle) the activation button on your remote control every
two seconds.
9. The emergency flashers will flash three times (after
about
15-60 seconds) when the programming is
successful. Release the button on the remote control.
- To program more devices, repeat steps 4 to 9.
10. Press and hold the trained Homelink® button and
observe the indicator light @::::,
page 121, fig. 115.
If the indicator light is solid/continuous, programming is
complete and your device should activate when you
press and release the trained Homelink® button.
- If the indicator light blinks rapidly for 2 seconds and is
then a solid/continuous light, proceed with phase 3 to
program a rolling code device.
Phase 3: rolling code programming
- A second person on a ladder who can safely reach the
garage door opener motor is recommended.
~
Page 125 of 316

Home Link® -_______________ ___.
11. Locate the "learn" button on the garage door opener
motor (refer to the operating instructions for the opener,
as the locat ion of this button may vary by manufacturer) .
12 . Press and release the learn button on the garage door
opener motor .
- Note : once the button is pressed, there are 30 se cond s in
wh ich to initiate the next step.
13. On the Homelink ® keypad inside the vehicle, firmly
press and hold the Homelink ® button prev iously
programmed in phases 1 and 2 for two seconds and
release . Repeat th is seque nce twi ce.
- Some vehicles may require the press/hold/re lease
sequence up to three times to complete the training
p rocess.
HomeLink ® should now activate your rolling code
equipped device.
If the 5 minut e tim e lim it is exceeded, the e mer gency flasher s will
flash o ne tim e to indicate that the process has been terminated. In
th is case , re p eat st eps 4 through 9.
If the emergency flashers do not flash
three times (after about 15-
60 se conds) , programming was not successful. In thi s case , repeat
steps 4 through 9.
Remo te con trol uni ts for garage door openers in Canada are set to
stop transm itting radio frequency signals aft er two seconds . Th is
time may not be sufficient for the Homelink® system to learn the
rad io frequency signal. P erform a ll oth er steps as described
above. •
Contro ls and eq uip
ment
A pp lies to veh ic les: wi th Homelin k® un iversa l rem ote contr ol
Operating the Homelink ® transmitter
The Homelink® transmitter works in the same manner as
the original handheld remote control that came with the
system.
~ ---- -------- ..... --- --Jlil 9
al ..... .. Cl) .: :: : :: •• •• • .• 1 , .. .• .. .. .. .. ~
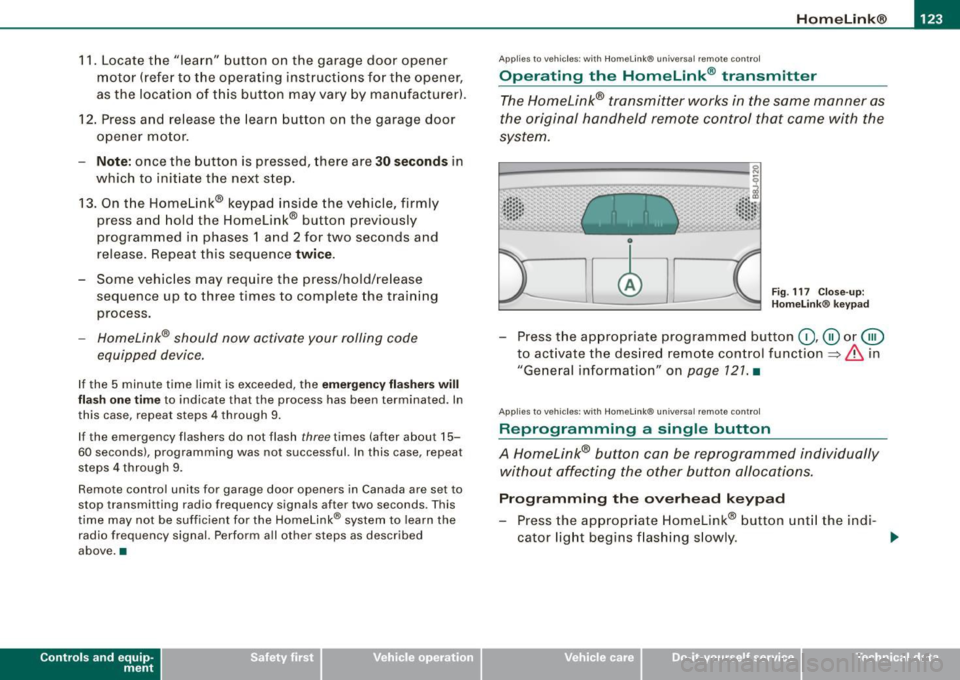
Fig . 117 C lose- up:
H ome link® key pad
- Press the appropr iate programmed button G) ,@ or @
to act ivate the des ired remote control function
~ & in
"General information " on
page 121 . •
A pplies to vehi cle s: w it h Homeli nk® univ ersa l re mote c ontro l
Reprogramming a single button
A Homelink® but ton can be reprogrammed individually
without affecting the other button allocations.
Progr amming th e ov erh ea d k eyp ad
- Press the appropriate Homelink® button unt il the ind i-
cator light begins flashing s lowly. _,.
Vehicle care I I irechnical data
Page 126 of 316

• .___H_ o_ m _ e _L_i _ n _k _® ____________________________________________________ _
Pr og ra mming th e bump er m ount ed tr ansmitt er
1. Hold the original remote control at a distance between 0-
5 in. (0 -13 cm ) from the bumper below the appropriate
headlight for your vehicle (use the shortest distance
poss ible).
2. Aim the remote control just below the
dr iver s ide head
l ight.
3. Press and hold the activation button on the remote control.
4. The emergency flashers will flash
three tim es (after
about
15-60 seconds) when the programming is
successful. Now release the button on the remote
co ntrol.
- If the dev ice utilizes a rol ling code, please f ollow phase 3
of ~
page 121, "Programming the Home Link® trans
m itter" for rolling code programming .
This pr oce dure w ill ca use the existing pr ogra mm ing on th e
H om eli nk® button to be eras ed ! •
A pplies to vehicl es: w ith H om eli nk® univ er sal re mot e con tro l
Erasing the programming of the HomeLink ®
transmitter
When you erase the programming, the programming on
all three of the transmitter channels with be lost!
- Perform steps 1 to 4 as described on~ page 122 , "Phase
1 : programming the overhead keypad".
When comp let ed, the Hom elink ® system will be in the program
ming mode and is then ready to learn the codes for remote
controlled devices.
[ i ] T ip s
• Programmed buttons cannot be erased ind ividua lly.
• For security reasons you are adv ised to erase the programming
of the Homelink ® system befo re you sell your vehic le. •
Applies to vehicle s: with Home link® univ er sa l re m ote con tro l
Information and accessories
If you wou ld like more information on Homelink ®, where to
pu rchase the Homelink ® compatib le products , or would li ke to
purchase the Homelink ® Home Lighting Package, please call tol l
free: 1 -800 -355 -3515.
[ i ] T ip s
• The Homelink ® universal transmitter complies with part 15 of
the FCC rules and RSS -2 10 of IC part 15. Operation is subject to th e
following conditions :
- this device may not cause harmful interference, and
- this device must accept any interference that may be received
including in terference that may cause undesired operation .
• Changes or modifications not express ly approved by the party
respons ible for compliance could void th e user 's authority to
operate the device (DOC : ISTC 1763 102 264 Pr ince MODEL/FCC ID :
CB2 V94800l. •
Page 127 of 316

HomeLink® -
----------------
Controls and equip
ment I • •
Page 307 of 316

______________________________________________ A_ l_,_ p _h_ a_ b_e _t_ic _ a _ l _in _ d_e _ x __ _
Heated
front seats (climate control) .... .... 104
rear window ...... ....... ..... ... 103
Heated outside mirrors ... .. .... .... .. 83
Heated seats .................. .... . 104
Seats ...... ...... .... ........ ... 104
Heated washer jets
Wiper and washer system . ......... 78
Heating .. .... ... .... .... ......... ... 98
High beam ...... ................. 69, 76
Warning/indicator lights ... ... .... .. 18
High voltage warning label ........... 288
Homelink® ... .. .... .... ........... 121
Homelink® universal remote control ... 121
Hood Opening .. ............... ... .... 219
Release lever .................... 219
Horn ......... ... .. .... .... ...... ... 11
How many airbags does my vehicle have? . .
153
How often should I check my tire pressures?
245
How safety belt tensioners work .... ... 144
Hydroplaning ........ .... .... .... ... 249
I
Igni tion key 106
Ignition lock ...... ...... .... ...... .. 106
Ignition lock positions ............... 106
Immobili zer ... ............. ..... ... . 14
Important things to do before driving .. 128
Controls and equip
ment Safety first
Improperly
worn safety belts ... .. ... .. 144 K
Indicator light
Airbag system ........ .... .... ... 157 Key .....
........ ........ ...... ... .. . 47
Audi magnetic ride ................ 17 Battery replacement ......
.... .... . 49
PASSENGER AIR BAG OFF ... ....... 157 Conven
ience opening and closing of pow-
Indicator lights .. ...... .... .... ...... 16
Infant seats ........ ...... ... .... ... 173
How do I properly insta ll an infant seat in
my vehicle? ....... ...... ....... 173
Safety instructions ......... ....... 173
Inside rearview mirror ......... ...... . 82
Installing child safety seats
Safety belts ...................... 177
Instrument cluster and controls . ...... . 12
Instrument panel
Illumination ......... ............. 74
Ins truments and controls
Genera l il lustration ................ 11
Interior lights ....... ..... ....... .... . 77 er top
... .... .... ... ............ 63
Convenience opening and closing of windows ............ .... ........ 58
Emergency key .. ...... ............ 47
Key replacement ......... .... ..... 47
Master key . ...... .... ...... .... .. 47
Valet key ... .. .... .... .... .... .... 47
Key less entry remote contro l .......... . 48
Kick-down Automatic transmission ........... 117
Knee airbags ........ ... .... ........ 161
Description . ...... .... ....... .... 161
How they work ................... 163
Important safety instructions ... .... 163
Luggage compartment .. ....... .... 77
L
J Launch Control Program ............. 117
Jump start location ........... ... .... 279
Jump starting ...................... 279
Jumper cables ... ..... ...... .... .... 279
Jump-starting . ........ .... ... .. .... 278 Leather ...
... .... ....... .... ...... . 209
Cleaning ...... .... ..... .. .... ... 210
Leaving -home-function ................ 73
Lifting jack ......................... 269
Lift ing vehicle .... .................. 283
Light sensor defective ........... ...... 36
Light sensor package Automatic headlight control .. ....... 70
Vehicle operation Vehicle care Do-it-yourself service Technical data
Page 309 of 316

______________________________________________ A_ l_,_ p _h_ a_ b_e _t_ic _ a _ l _in _ d_e _ x __ lll
Pass-through .. ..... .... ... .... .... .. 93 Proper safety belt position . ... .. ...... 142 Remote control ....... ... .. .. ... .. ... 48
Pedals ...... .... ... ........ .... .... 134 Proper seating position Resetting remote control ...... ... .. 52
Physical principles of a frontal collision 138
Polishing ...... .... .... ....... .... . 204
Pollen filter ......................... 99
Pollutant filter .. .... .... .... .... ... .. 99
Power locking switch ........... .... .. 53
Power locking system ... .... .... .... .. 50
Convenience close/open feature .... . 58
Locking and unlocking the vehicle from
inside .. .. .. .... .... ... .... .... . 53
Opening and closing the windows ... 58
Rear lid/trunk lid ..... .... .... .... . 55
Remote control ...... .... .... ... .. 48
Unlocking and locking vehicle . .... .. 51
Power seats
Adjusting the seatback ....... .... .. 91
Adjustment .. .... .... .... ...... ... 89
Power steering
See Electro -mechanical power assist 21,
190
Power top
Care and cleaning . ....... .... .... 203
Convenience close/open feature ... .. 63
Convenience opening/closing ... .... 63
Power window switches ...... ...... ... 57
Reactivating the system .... .... .... 59
Pregnant women
Special cons iderations when wearing a
safety belt . .... .... .... ... .... . 143 Front
passenger . ...... ........... 131
Occupants .. ...... ...... ... .. .... 130
a
Quartz clock .. ...... ..... .. .... .... .. 13
quattro®
See All Wheel Drive ............... 191
Question
R
What happens to unbelted occupants? .
139
Why safety belts? ... .. .... .... .... 137
Radiator fan .... .... ..... .. .... .... . 229
Rain sensor defective ................. 36
Reading lights ... ... ..... ... .... .... . 77
Rear lid ........ ....... ...... .... .... 55
Emergency release ......... ...... . 56
Rear light
Defective . ................... .... . 36
Rear spoiler . .... .... ....... ........ 187
Rear window defoggeir ............... 103
Rearview mirror Inside rearview mirror .. .... .... ... . 82
See also Mirrors ........... ....... . 82
Red symbols . ... .... .... .... .... ... . 31
Programming the Homelink® universal re- Refuelling ............... .... .... ... 216
mote contro l ... .... .... ... .... . 121 Release lever for hood .. .... .... .... . 219
Proper occupant seating positions .. ... 130 Remote
control garage door opener
(Homelink®l .... .... .... .... ... 121
Remote control key Unlocking and locking ..... .... .... . 51
Remo te master key
Battery replacement ...... .... .... . 48
Check light .. ....... .. ...... ...... 48
Remote rear lid release .... ... .. ...... . 55
Repair manuals ...... .... .... .... ... 294
Repairs Airbag system ................... 160
Replacement parts ... .... ... .... .... 296
Replacing Wheel rims .... .... ... ....... 249, 251
Replacing a fuse .. ...... .... .... .... 273
Replacing light bulbs .. ... .. . .... .. . . 277
Replacing tires and wheels ...... ..... 250
Reporting safety defects .. ... .... 136, 293
Reset button . .... ........ .... ... .... . 14
Resetting remote control ......... .... . 52
Retractor .......... .. .... ...... .... . 141
Reverse Automatic transmission .... ... .... 115
Rims Cas t alloy ..... .... .... .... .... ... 207
Replacing .... .... ....... ... . 249, 251
Stee l rims . .... ... .... ...... ... .. 206
Controls and equip
ment Safety first Vehicle operation
Vehicle care Do-it-yourself service Technical data
Page 312 of 316

__ _!:_A~l'.!:p~ h~ a~ b~e~ t~ic ~a..'.... l ~in~d~e ~x~ --------------------------------------------
Trip computer
Fuel consumption ................. 39
Mi leage .. ........ ........ .... ... 39
Trip odometer .. ...... .... ........ ... 14
What does it mean when dEF appears in the trip odometer display? ... ... .. 14
Trunk lid .... ........ ............. .. 55
Trunk escape handle ... .. .... .... 262
Turn signals ................. ....... 76
Warning/indicator lights ........... 19
u
Undercoating 207
Unfastening safety belts ...... ...... . 143
Unidirectional tires .................. 238
Uniform tire quality grading . ......... 253
Universal Radio- Frequency Remote Control (Homelink®) . . . . . . . . . . . . . . . . . . . 121
Un locking
Power locking switch . . . . . . . . . . . . . . 53
Rear lid/trunk lid ...... .... ...... .. 55
Remote control key ..... .. .... .... . 51
Using the key ... .. .... .... ...... .. 53
V
Vanity mirror ...... .. .... ........ .... 77
Vehic le electrical system .. ........ .... 19
Vehicle Identification Number (VIN) .... 288
Vehic le jack . . . . . . . . . . . . . . . . . . . . . . . . 269
Vehicle literature ............. ........ 5
Vehic le tool kit . . . . . . . . . . . . . . . . . . . . . 262 Vehicle-care products
...... ........ . 200 Power top cleaning ..... .. .... ... . 203
Venti lation ... ............ .... .... ... 98 with a power washer
....... .... ... 202
Waxing .......... .... .... ....... ... 203
w Wear indicator ..... ... ... .... ....... 248
Warning light
Tire pressure monitoring system 37
Warning lights ...................... 16 Weatherstrips
.... ....... .... .... ... 206
Weights ....... .. .... .... ...... .... 289
What happens if you wearyoursafety belt too loose? ..... .. .... .............. 142
Warning/Indicator light
Rear spoi ler ... ... .... ........ .... 18 What happens to unbelted occupants? .
139
What impairs driving safety? ... .... ... 129
Warning/indicator ligh1ts ... .. · · · · · · · · · 12 What should I do after changing a wheel? ..
Airbag system . . . . . . . . . . . . . . . . . . . . 19 245
Anti -lock brake system (ABS) · · · · · · · · 20 What shou ld I do after replacing whe els?
Brake system . . . . . . . . . . . . . . . . . . . . . 20 245
Cruise control . . . . . . . . . . . . . . . . . . . . 19
Electronic power control ........... 17
El ec tronic stabilization program (ESP) 18
Folding top ...... ... .. ... ... .. .... 18
Generator . . . . . . . . . . . . . . . . . . . . . . . . 19
High beam . . . . . . . . . . . . . . . . . . . . . . . 18
Malfunction Indicator Lamp (MIU .... 18
Parking brake . . . . . . . . . . . . . . . . . . . . . 20
Safety be lt . . . . . . . . . . . . . . . . . . . . . . . 19
Tire pressure monitoring system .... 17
Turn signals .. ....... ...... ....... 19
Warranty coverages .. ........ .... ... 293
Washer reservoir ..... .... ... ..... ... 236
Washing ........ ....... ...... .... .. 200
Automatic car wash ........... ... 201
by hand ......... ......... ... ... 201
Folding top cleaning ...... ... .. ... 203
General information ......... ..... 200 Wheel bolts
Torque ......................... 256
Wheels .............. ....... .... ... 238
Cast alloy .................... ... 207
Checking tire pressure ............ 244
Co ld tire inflation pressure ....... . 242
General notes .......... .......... 238
Glossary of tire and loading terminology .
239
New tires and whee ls .. ... .. ...... 249
Tires and vehicle load limits ... .... 246
Wheels/Tires Steel wheels ... .... .... ...... .... 206
When must the airbag system be inspected?
157
When should I adjust the tire pressures? 245
When should I check the tire pressures? 245