2008 AUDI TT ROADSTER door lock
[x] Cancel search: door lockPage 13 of 316

Cockpit
General illustration
G)
0
©
©
©
©
0
©
®
@
@
@
@
@
@
@
@
Power window switches
Door handle
Pow er lo cking switc h
Adjus te r contro l fo r ou tsid e mirro rs ...... .... ... . .
Air outlets ..... .. . ..... .... .... .. . .... .. . ..... .
Light switch .. ...... .... ... .... .... .... .... ... .
Turn signa l and high beam
Multifunc tion steering wheel with:
- Horn
- Driver's a irbag .... .... ... .... .... .... .... ... .
- Shift b uttons ... .. .... ... .... .... .... .... ... .
Instr um en t cluster . ...... ... .... .. ...... .. .. ... .
Switches for
- Windshield wipe r/wash er ... .... .. ....... .. ... .
- Menu d isplay ...... ... .. .. .... .... .... ... ... .
- Trip computer ..... .. .... .... ...... ....... .. .
Depending on options : Radio or navigation sys tem
G love compa rtmen t (loc kab le) ... .. .. .. ... .... ... .
Front passenger 's airbag .. ...... .. . .... .. .. .... .
Rear window defogger switch .... ..... .. .... .... .
Climate controls ..... .. .... .... ..... .. ... ... .. .
Ashtray wi th cigare tte lighter ....... ............ .
Gear sh ift l ever or s elector lever (automatic transmis -
sion) 57
53
83
102
69
76
150
119
1 2
78
27
39
96
150
10 3
98
94
- Manual transm ission . . . . . . . . . . . . . . . . . . . . . . . . . 113
- S tronic . . . . . . . . . . . . . . . . . . . . . . . . . . . . . . . . . . . . . 115
@ Switches for
- Aud i magnetic r ide
Controls and equip
ment
112
Co ckpit
- Electronic Stabilization Program (ESP) . .... .. ... .
- Emerge ncy flasher ... .. .. .. .... .... .... .. . ... .
- Retractab le r ear spoiler .... ...... .... .... .... . .
- Tire pressure mon itor ing system ..... .... .. . ... .
@ Sw itc h f or wind deflector .... .. ..... .. .... ... ... .
@) Switch for automatic folding top ..... .. .... ... ... .
@ Cup hold er ....... .. .. .. .... .... ....... ....... .
@ Parking brak e le ver ... .... ..... .. .... .... ..... . .
@ S teeri ng lock/igniti on/sta rter sw itch (in t he s teer ing
whee l column) ... .... ... ... ... .. .... .... ...... .
@ Adjus tab le steering co lu m n .. ...... ..... ... ... .. .
@ Cruise contro l .... ... .... .... .... .... .... ... ... .
@ Hood release ... .. .. .. ..... .. .... .... .... ...... .
@ Data Link Connect or (DLC) for On Boa rd Diag nostics
(OBD Ill .... ... .. ...... .... ... .... ... .. ... .... .
@ Daytim e running l ights (DRU* .... .... .... .... ... .
@ Instrumen t lighting ...... .... .... .... ... .... ... .
@ Switc hes f or
- Fue l filler flap release .... .. .... .... .... ... ... .
- Rea r lid r elease
[ i ] Tip s
A separate brochure is provided for your factory -insta lled audio
system and/or the Aud i Nav igation System .•
I • •
184
75
187
41
64
62
94
108
106
105
110
219
2 6
71
74
216
55
Page 17 of 316
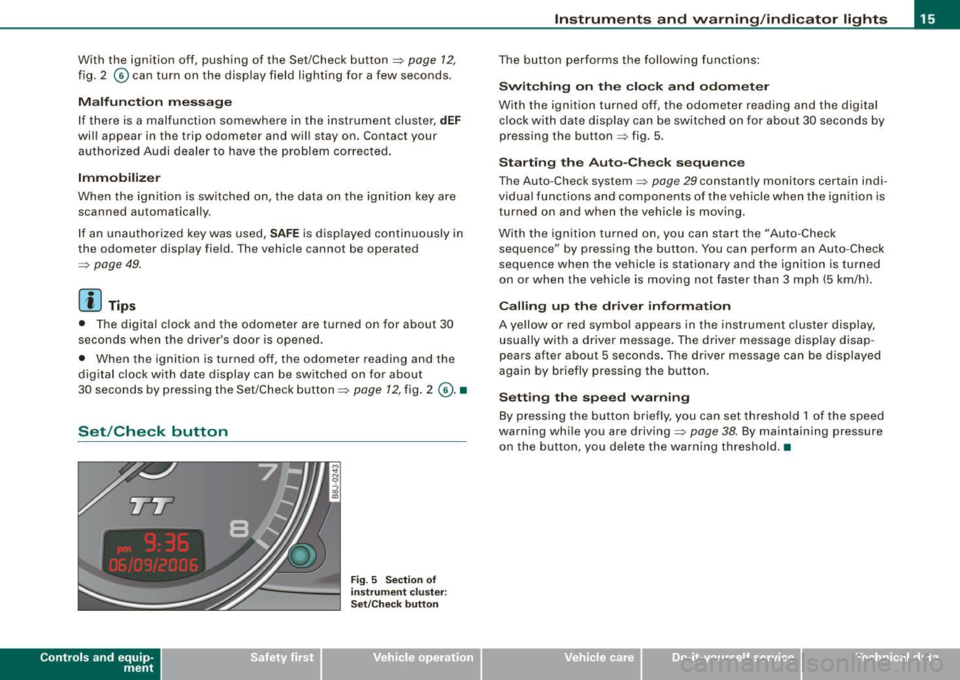
With the ignition off, pushing of the Set/Check button~ page 12,
fig. 2 © can turn on the display field lighting for a few seconds .
Malfunction message
If there is a malfunction somewhere in the instrument cluster, dEF
will appear in the trip odometer and will stay on. Contact your
authorized Audi dealer to have the problem corrected.
Immobilizer
When the ignition is switched on, the data on the ignition key are
scanned automatically.
If an unauthorized key was used, SAFE is displayed continuously in
the odometer display field. The vehicle cannot be operated
~ page 49.
[ i ] Tips
• The digital c lock and the odometer are turned on for about 30
seconds when the driver's door is opened.
• When the ignition is turned off, the odometer reading and the
digital clock with date display can be switched on for about
30 seconds by pressing the Set/Check button~
page 12, fig. 2 @ . •
Set /Check button
Con tro ls and eq uip
ment
Fig . 5 Section of
in strument cluster:
Set/Check button
Instruments and warning /indicator lights
The button performs the following functions:
Switching on the clock and odometer
With the ignition turned off, the odometer reading and the digital
clock with date display can be switched on for about 30 seconds by
pressing the button~ fig. 5 .
Starting the Auto -Check sequence
The Auto -Check system ~ page 29 constantly monitors certain indi
v idual functions and components of the vehicle when the ignition is
turned on and when the vehicle is moving.
With the ignition turned on, you can start the "Auto -Check
sequence" by pressing the button. You can perform an Auto-Check
sequence when the vehicle is stationary and the ignition is turned
on or when the vehicle is moving not faster than 3 mph (5 km/h).
Calling up the driver information
A yellow or red symbol appears in the instrument cluster display,
usually with a driver message. The driver message display disap
pears after about 5 seconds. The driver message can be displayed
again by briefly pressing the button.
Setting the speed warning
By press ing the button brief ly, you can set threshold 1 of the speed
warning while you are driving~
page 38. By maintaining pressure
on the button, you delete the warning threshold.•
Vehicle care I I irechnical data
Page 26 of 316
Driver inf ormation sy ste m
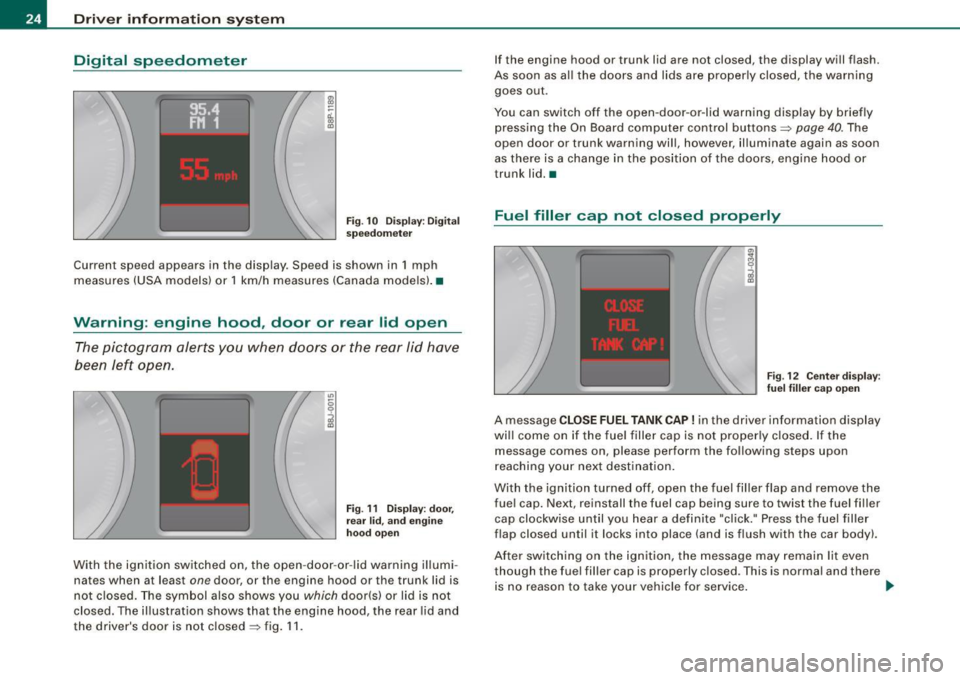
Digital speedometer
Fig. 1 0 Dis play: Dig ital
s pe edom ete r
Current speed appears in the disp lay . Speed is shown in 1 mph
measures (USA models) or 1 km/h measures (Canada mode ls) .•
Warning : engine hood , door or rear lid open
The pictogram alerts you when doors or the rear lid have
been left open .
Fig . 11 D ispl ay: door,
re ar
lid , and en gine
h oo d open
With the ignition switched on, the open -door -or -lid warning illumi
nates when at least
one door, or the engine hood or the trunk lid is
not c losed. The symbol also shows you which door(s) or lid is not
closed. The illustration shows that the engine hood, the rear lid and
the driver's door is not closed=> fig . 11 . If the engine hood or trunk lid are not closed, the display will flash.
As soon as al l the doors and lids are proper ly closed, the warning
goes out .
You can switch off the open -door -or -lid warning display by brief ly
pressing the On Board computer control buttons=>
page 40. The
open door or trunk warning wil l, however, illuminate again as soon
as there is a change in the position of the doors, eng ine hood or
trunk lid. •
Fuel filler cap not closed properly
Fig. 12 C ente r dis play :
fu el fi ller cap op en
A message CLOSE FUEL TANK CAP ! in the driver informa tion display
wi ll come on if the fuel f iller cap is not proper ly closed. If the
message comes on, please perform the following steps upon
r eaching your next destination.
With the ignition turned off , open the fuel fil ler f lap and remove the
fue l cap. Next, reinstall the fuel cap being sure to twist the fuel fi ller
cap clockwise until you hear a definite "cl ick." Press the fuel filler
flap closed until it locks into place (and is flush with the car body) .
Af ter sw itch ing on the ign ition, the message may remain lit even
though the fuel filler cap is properly c losed. This is normal and there
is no reason to take your vehicle for service . _,,
Page 29 of 316

& WARNING
Always observe the posted speed limits and adjust your speed to suit prevailing road, traffic and weather conditions. Never drive
your vehicle faster than the maximum speed rating of the tires
installed. •
Menu display
Introduction
0 ,...
"' 9 .., 00 m
Fig. 15 Wiper lever:
Controls for the menu
display
"'
"'
~ m
Fig . 16 Display: Start
menu
Some functions in your vehicle can be set, activated , and controlled
by
Menus (e.g. Acoustic Park Assist*). With these menus you can
Con tro ls and eq uip
ment
Driver information system
also select the information shown in the DIS display, which operates
only with the ignition switched on. Operation is controlled by the
I Reset) button and the rocker switch on the wiper lever::::, fig. 15.
The Start menu shows you the different display types:
Set
Check
Menu off
Each display type in the Start menu contains a submenu with addi
tional options.
Set
Check
Menu off Clock ::::, page 28
Lighting* => page 71, "Daytime
running lights (DRU
(USA
models)" =>
page 73
Computer ::::, page 28
Acoustic park assist* => page 109
Speed alarm (speed ::::, page 38
warning)
Language (6 languages) => page 28
Units (distance, fuel con-::::, page 28
sumption, temperature)
Wiper (service position) => page80
Window => page 58
Doors (Auto-lock) => page 50
Service ::::, page 25
Vehicle ID number* => page288
Engine oil temperature*
l! AII of the messages shown in vehicles without
menu display appear on the display screen.
•
Vehicle care I I Technical data
Page 49 of 316
Opening and closing
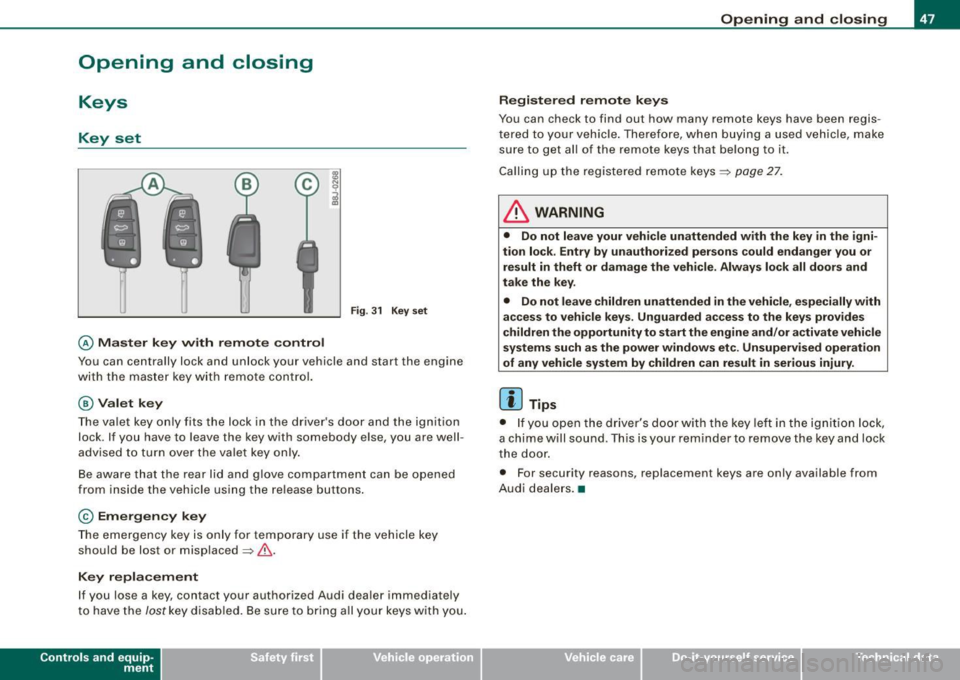
Keys
Key set
Fig. 31 Key set
© Master key with remote control
Y ou can centrally lock and unlock your vehicle and start the engin e
wi th the mas te r key wit h remote c ontr ol.
@ Valet key
The va let key only fits the lock in the driv er's d oor an d the ignition
lock . If you have to leave the key with somebody e lse, you are well
advised to turn over the vale t key o nly .
B e aware that t he rea r lid and glove co mpartme nt can be opened
from inside the vehicle usi ng the re lea se b uttons .
© Emergency key
The emerge ncy ke y is only fo r tempo rar y use if the vehicle key
should be lost or misplaced=> &.
Key replacement
If you lose a ke y, contact your authorized Audi dea ler immedia tely
t o have the
Jost k ey disa bled. Be s ure to br ing a ll yo ur k eys wit h you.
Con tro ls and eq uip
ment
Opening and closing
Registered remote keys
You can chec k to find out how many remote keys have been regi s
te re d to you r vehi cle. Th ere for e, wh en bu ying a used v ehicle , ma ke
su re to get a ll of t he remote keys that belong to it.
Ca lling up the registered remote ke ys =>
page 27.
& WARNING
• Do not leave your vehicle unattended with the key in the igni
tion lock . Entry by unauthorized persons could endanger you or
result in theft or damage the vehicle . Always lock all doors and
take the key .
• Do not leave children unattended
in the vehicle, especially with
access to vehicle keys . Unguarded access to the keys provides
children the opportunity to start the engine and/ or a ctivate vehicle
systems such as the power windows etc . Unsupervised operation
of any vehicle system by children can result in serious injury .
[ i ] Tips
• If y ou open the dri ver's doo r with the key left i n the ig nit ion loc k,
a chi me will sound . Thi s is your rem inde r to remove the ke y an d lock
t he door.
• F or security reasons, replacement keys are only available from
A udi deale rs.•
Vehicle care I I irechnical data
Page 52 of 316
Openin g a nd clo sin g
• Cana da mo dels: RSS-210 of Industry Canada .
Operation is subject to the following conditions:
• this device may not cause harmful interference, and
• this device must accept any interference received, including
interference that may cause undesired operation.
0 Note
The manufacturer is not responsible for ANY RADIO OR TV interfer ence caused by unauthorized modifications to this equipment.
Changes or modifications to this unit not express ly approved by the
party responsib le for comp liance could void the user's authority to
operate the equipment .•
Power locking system
General description
The power locking system Jocks or unlocks all doors
simultaneously.
The power locking system in your vehicle incorpora tes the following
functions:
• Central locking function
• Remote contro l feature
=> page 48 .
• Anti -Theft Alarm System
=> page 56.
You can lock and un lock the veh icle from outside either with the
k ey s or the remot e control transmitter inside the master key.
Act ivatin g the po wer loc king sy ste m lo ck s or unlo cks all doo rs
s im ult ane ously.
You can also open or close the windows when you lock or unlock the
driver's door using the key . For safety reasons, you cannot use the
remote contro l to open/close the windows . T
he selective unlock feature makes it possible to open just the
driver's door.
If the power locking system should malfunction, you can lock and
unlock each lock individually using the vehicle key.
A ut om atic lock ing*
The automatic locking feature locks all the vehicle doors and the rear lid when you drive faster than 9 mph (15 km/h) .
You can unlock the vehicle from the inside by:
• removing the key from the ignition switch (the vehicle wi ll auto
matically un lock itself) or
• pressing the unlock part of the power lock switch
oc:'i:l or
pulling the door handle (to open the door).
If you wish, you can have an authorized Audi dealer convert your
power door lock system to automatic loc king .
Unlo cking /locking t he vehi cle
When you unlo ck your vehicle:
• T he anti -theft alarm system is deactivated briefly .
• The vehicle interior lights illuminate for approximate ly 30
seconds.
When you
lo ck the vehicle:
• All doors are locked .
• The anti-theft alarm system is activated.
• The vehicle interior lights turn off.
• The anti-theft alarm system is activated . The horn of the anti
theft a larm system wi ll sound and the anti -theft alarm system readi
ness light, located in the center of the instrument panel below the
windshie ld on the right side of the air vent, will start to blink. .,_
Page 53 of 316
& WARNING
• When you lock your vehicle from outside, nobody -especially
children · should remain inside the vehicle. Remember, when you
lock the vehicle from the outside the windows cannot be opened
from the inside.
• When you leave the vehicle, always remove the ignition key and
take it with you. This will prevent passengers (children, for example) from accidentally being locked in the vehicle should they
accidentally press the power locking switch.
• Do not leave children inside the vehicle unsupervised. In an
emergency it would be impossible to open the doors from the
outside without the key.
[ i J Tips
• In the event of a crash with airbag deployment all locked doors
will be automatically unlocked to give access to the vehicle occu
pants from the outside .
• If the power locking system should malfunction, you can lock
each door individually using the vehicle key.
• If the power locking system should fail, you can still open the
fuel tank flap in an emergency=>
page 218.
• You are well advised not to keep valuables inside an unattended
vehicle, visible or not . Even a properly locked vehicle cannot provide
the security of a safe! •
Contro ls and eq uip
ment
Opening and closing
Unlocking and locking the vehicle with the
remote control
How the remote control works.
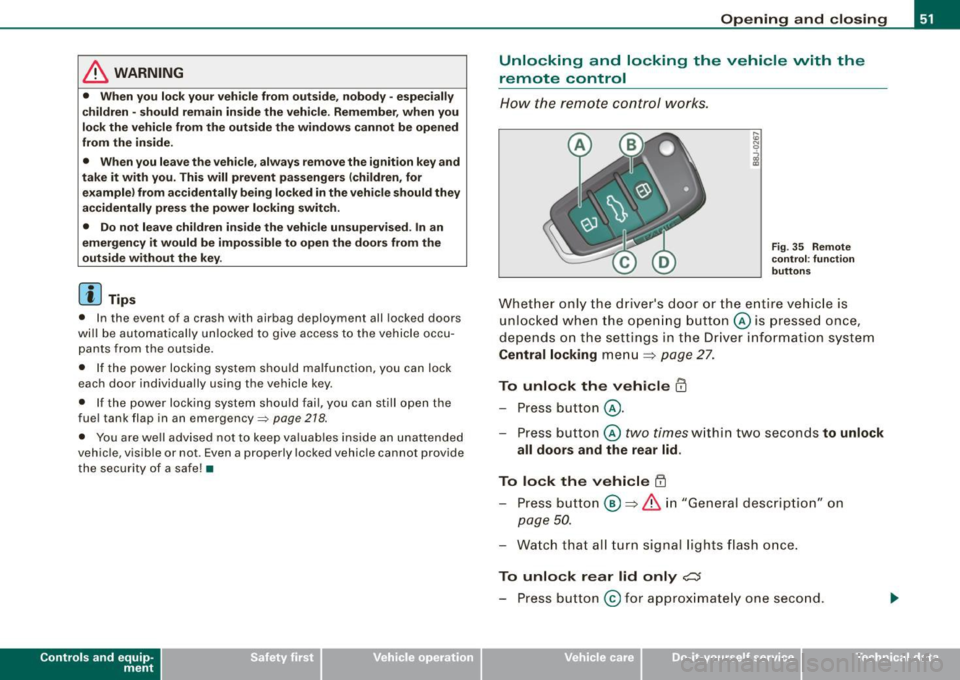
Fig. 35 Remote
control : function
buttons
Whether only the driver's door or the entire vehicle is
unlocked when the opening button@ is pressed once,
depends on the settings in the Driver information system
Central locking menu => page 27.
To unlock the vehicle m
-Press button @.
- Press button ©
two times within two seconds to unlock
all doors and the rear lid .
To lock the vehicle 63
-Press button @ => & in "General description" on
page 50.
-Watch that all turn signal lights flash once.
To unlock rear lid only e::5
-Press button @for approximately one second.
Vehicle care I I irechnical data
Page 54 of 316
Openin g a nd clo sin g
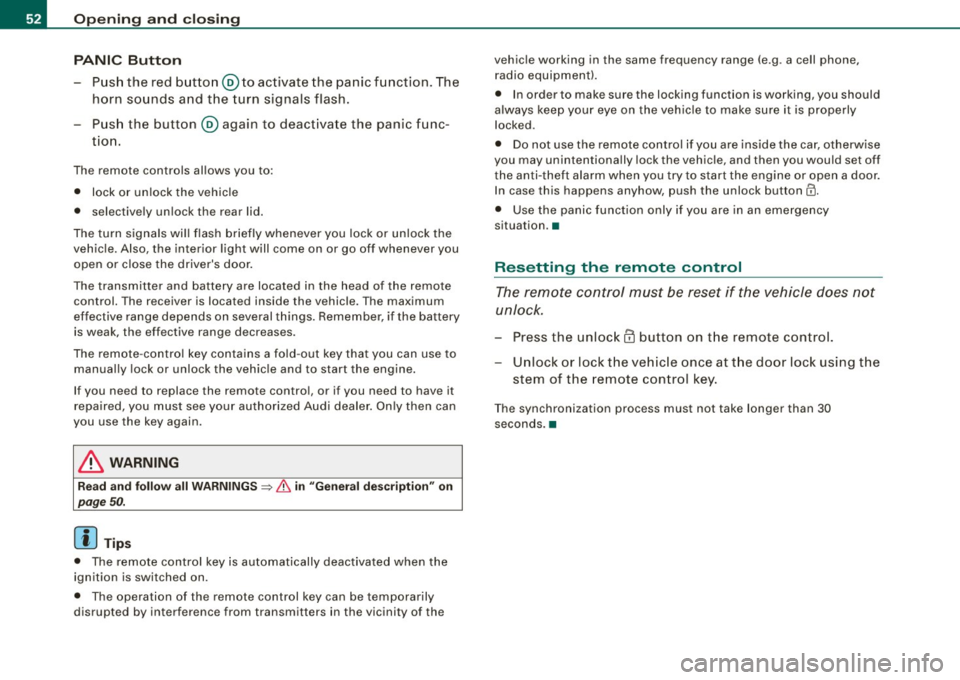
PANIC B utton
- Push the red button@to activate the panic function. The
horn sounds and the turn signals flash.
- Push the button ® again to deactivate the panic func-
tion.
The remote controls allows you to:
• lock or unlock the vehicle
• selectively unlock the rear lid.
The turn signals wi ll flash briefly whenever you lock or unlock the
vehic le. Also, the interior light will come on or go off whenever you
open or close the driver's door.
The transmitter and battery are located in the head of the remote control. The receiver is located inside the vehicle. The maximum
effective range depends on several things. Remember, if the battery
is weak, the effective range decreases.
The remote -contro l key contains a fo ld -out key that you can use to
manually lock or unlock the vehicle and to start the engine.
If you need to replace the remote contro l, or if you need to have it
repaired, you must see your authorized Audi dealer . On ly then can
you use the key again.
& WARNING
Re ad and follo w all WARNINGS ~ & in "General de scr iption " on
page 50 .
[ i J Tips
• The remote control key is automatically deactivated when the
ignition is switched on.
• The operation of the remote control key can be temporarily
disrupted by interference from transmitters in the vicinity of the vehic
le working in the same frequency range (e.g . a cell phone,
radio equipment).
• In order to make sure the locking function is working, you should
a lways keep your eye on the vehic le to make sure it is properly
locked .
• Do not use the remote control if you are inside the ca r, otherwise
you may unintentionally lock the vehicle, and then you would set off
the an ti-theft alarm when you try to start the engine or open a door.
I n case this happens anyhow, push the unlock button@.
• Use the panic func tion only if you are in an emergency
situation. •
Resetting the remote control
The remote con tr o l must be reset if the vehicle does not
unlock.
- Press the unlock
III button on the remote control.
- Unlock or lock the vehicle once at t he door lock using the
stem of the remote control key.
T he synchronization process must not take longer than 30
seco nds. •