2008 AUDI TT ROADSTER center console
[x] Cancel search: center consolePage 55 of 316
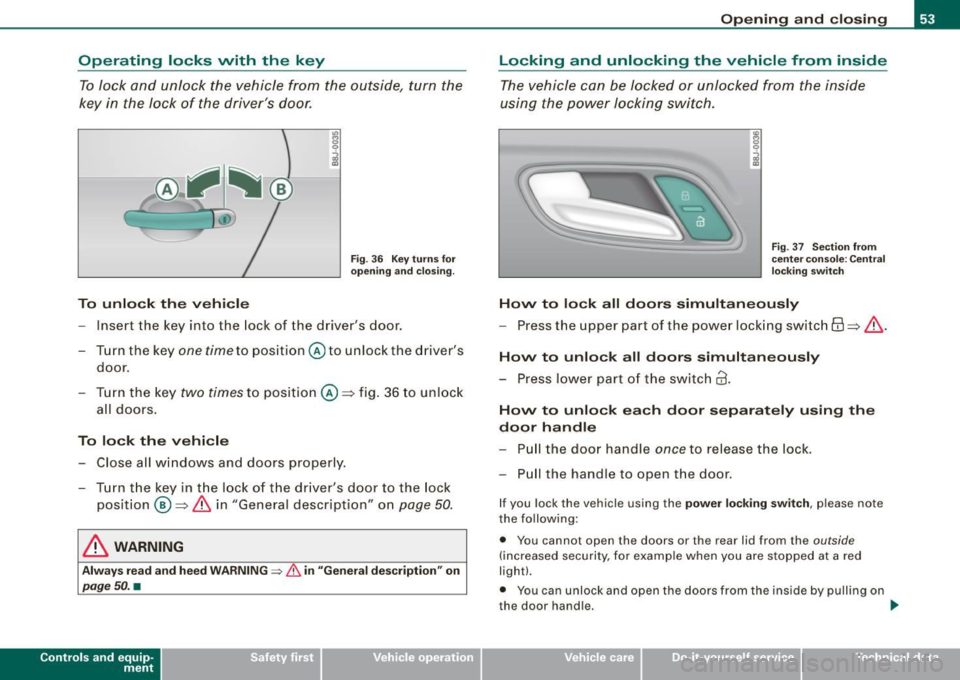
Operating locks vvith the key To lock and unlock the vehicle from the outside, turn the
key in the lock of the driver's door.
C
To unlock the vehicle
Fig . 36 Key turns for
opening and closing.
- Inse rt the key into the lock of the driver's door.
- Turn the key
one time to position @to unlock the driver's
door.
- Turn the key
two times to position @:::::, fig. 36 to unlock
all doors.
To lock the vehicle
- Close all windows and doors properly.
- Turn the key in the lock of the driver's door to the lock
position @:::::,
& in "General description" on page 50.
& WARNING
Always read and heed WARNING => & in "General description" on
page 50. •
Contro ls and eq uip
ment
Opening and closing
Locking and unlocking the vehicle from inside
The vehicle can be locked or unlocked from the inside
using the power locking switch.
Fig . 37 Section from
center console : Central
locking switch
Hovv to lock all doors simultaneously
-Press the upper part of the power locking switch 6:\:::::, & .
Hovv to unlock all doors simultaneously
- Press lower part of the switch@.
Hovv to unlock each door separately using the
door handle
-Pull the door handle once to release the lock.
- Pull the handle to open the door.
If you lock the vehicle using the power locking switch, please note
the following:
• You cannot open the doors or the rear lid from the
outside
(increased security, for example when you are stopped at a red
light).
• You can unlock and open the doors from the inside by pulling on
the door handle.
~
Vehicle care I I irechnical data
Page 66 of 316
Folding top
-Within two seconds turn the key a second time and hold
it in this position until the power top has completely
closed.
Opening or closing motion stops immediately as soon as you
release the key . For safety reasons, i t is not possible to activate the
convenience feature with the remote control.
& WARNING
When opening and closing the power top make sure to keep your
self and others clear of all moving parts. Risk of injury! •
Applies to vehi cles: w ith wind deflecto r
Wind Deflector
The wind deflector reduces turbulence in the passenger
compartment and makes driving more comfortable.
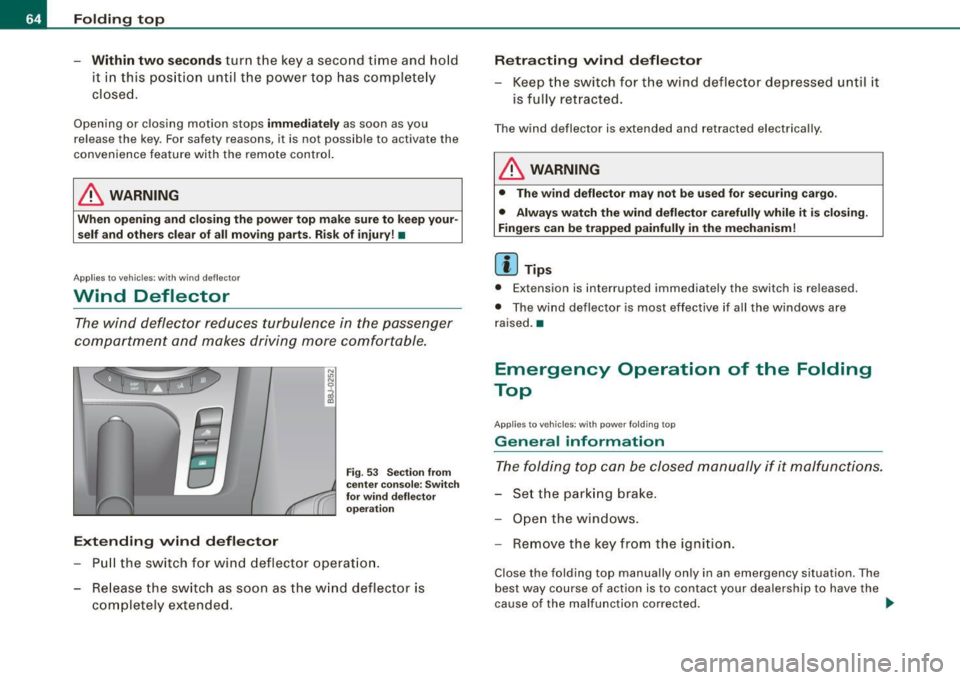
Extending wind deflector
N
"'
I
Fig . 53 Section from
center console: Switch
for wind deflector
operation
Pull the switch for wind deflector operation.
- Release the switch as soon as the wind deflector is
completely extended.
Retracting wind deflector
- Keep the switch for the wind deflector depressed until it
is fully retracted.
The wind deflector is extended and retracted electrically .
& WARNING
• The wind deflector may not be used for securing cargo.
• Always watch the wind deflector carefully while it is closing.
Fingers can be trapped painfully in the mechanism!
[ i ] Tips
• Extension is interrupted immediat ely the sw itch is releas ed.
• The wind deflector is most effective if all the windows are
raised. •
Emergency Operation of the Folding
Top
A pp lies to vehicles: wit h p owe r fo ld ing t op
General information
The folding top can be closed manually if it malfunctions.
- Set the parking brake.
- Open the windows.
- Remove the key from the ignition.
Close the folding top manually only in an emergency situation . The
best way course of act ion is to contact your dealership to have the
cause of the malfunction corrected. .,
Page 76 of 316

Clear vision
Coming home situation
In
darkness, the activated system will turn on the headlights, side
marker lights , rear side marker lights , tail lights, and rear license
plate light as soon as the driver's door is opened from inside.
As long as one of the doors or the rear lid remains open, the set of
external lights will keep burning for about four minutes maximum.
To provide light for departure, the set of vehicle lights will keep
burning for about another 30 seconds after all doors and the rear lid
have been closed.
The factory-set time of 30 seconds until the lights are switched off can be adjusted if you prefer a longer or shorter duration. Have the
adjustment done by your authorized Audi dealer or a qualified work
shop. The system can be adjusted to keep the lights burning for a
maximum of 60 seconds.
Leaving home situation
As soon as the vehicle is unlocked by pressing the
ti button on your
remot e control, the set of external l ights is switched on .
The external lights are switched off as soon as the driver's door is
opened from outside . Even if you had the system readjusted to keep
the lights burning for an extended time for coming home, the
external lights will be turned off if you do not open the driver's door
within 60 seconds after unlocking. See chapter "Opening and
Closing" in your Owner's Manual. If the lights are switched off
before you reach the driver's door, press the
a button once more to
turn them on again.
[ i] Tips
• Do not attach any stickers to the windshield in front of the two
light sensors, as this would interfere with both the automatic oper
ation of the headlights and the automatic dimming of the inside
mirror(s). • If
the vehicle is remotely unlocked and locked three times in
succession, leaving home will not turn on the lights a fourth time to
safeguard the battery and lights.
• If you wish to use the coming home/leaving home function regu
larly, you can leave it activated at all times without risking perma
nent strain on the electrical system. As the system is controlled by
light sensors, it will only be energized in darkness .
• Frequent use of the coming home/leaving home function for
approaching and departing a vehicle parked in the dark will strain
the battery. This applies particularly if only short distances are
driven between stops . Occasionally drive longer distances to make
sure the battery is recharged sufficiently.
• If the fog lights have been switched on by the coming
home/leaving home function, they will always be switched off when
you switch on the ignition. •
Instrument panel illumination
The illumination of the instruments, displays and the
center console can be adjusted.
Fig. 67 Instrument
panel illumination
You regulate the brightness of the instruments with the left
thumbwheel
C J=> fig. 67. ~
Page 77 of 316

Ignition ON , light swit ch at @ .
With the ignition switched ON, the g low of instrument needles can
be adjusted to appear brighter or dimmer.
Ignition ON , ligh t switch at :oo ; or io.
With the lights switched on , the brightness of instrument cluster
(i .e. needles, gauges and displays) and center conso le i llu m in ation
can be adjusted .
0 Note
The instrument c luster and center console illumination (gauges and
needles) comes on when you switch on the igni tion and the
vehicle
headlights are off .
Be aware of the followin g difference be tween
models built to US o r Canadian specifications :
• USA models : illumination of the in strument cluster (gauges and
needles), dash and center console around the gearshift lever is
controlled by a light sensor located in the instrument panel. The
instrument panel illum ination will automatically become dimmer
as the daylight fades away and eventually will go out completely
when outside light is very low . This is to remind you , the d river , to
s witch on the headlight s before it gets too dark.
• Canada models : instrument panel illum ination will stay br ight
regardle ss of the inten sity of ambient light . Always be aware of
c hanges in outside light conditions while you are driving . Respond
in time to fading dayli ght by turning the light switch to position
iD
(or "AUTO" if your car is equipped with this feature) to turn on your
headlights. •
Bi-Xenon headlights*
Afte r starting the engi ne, the b i- xeno n headlights are au tomatical ly
adjusted to the load and angle of the vehic le (for example, during
acce lera tion and braking). This prevents oncoming traffi c from
experiencing unnecessary headlight g lare from your bi -xenon head
lig hts .
Con tro ls and eq uip
ment
Clear vision
I f the system is not operating properly, a warning symbo l in the
Au to-Check C ontr ol is displayed
=> page 35 . •
Emergency flasher tfft,,.
T he e mergency flasher m akes other motor ists aware that
y o u or yo ur vehicle are i n an e merge ncy si tuation.
Fig . 68 Center
co nsole : emergency
fla sher sw itch
Press the sw itch ~=:,fig. 68, to s witch t he emergency
flasher on or off.
When the emergency flasher is on, all four turn signal blink at the
same time . The tu rn signal indi cato r lights
¢i Q in the instrument
c luster, as well as the light in the emergency flasher switch
J:&. b link
likewise.
The eme rgency flashe r will automat ically switch on i f you are in an
accident where the airbag has deployed .
[ i ] Tips
You should switch on the emergency flasher when:
• you are the last vehicle standing in a traffic jam so that any other
vehicles coming can see you, or when
• your vehicle has broken down or you are in an emergency s itua -
tion, o r when _,,,
Vehicle care I I irechnical data
Page 98 of 316
Seats and storage
& WARNING (continued)
when accelerating or when applying the brakes or when driving
around a corner.
• When you are driving make sure that anything you may have
placed in the center console or other storage locations cannot fall
out into the footwells . In case of sudden braking you would not be
able to brake, depress the clutch or accelerate. •
Glove compartment
The glove compartment is illuminated and can be locked .
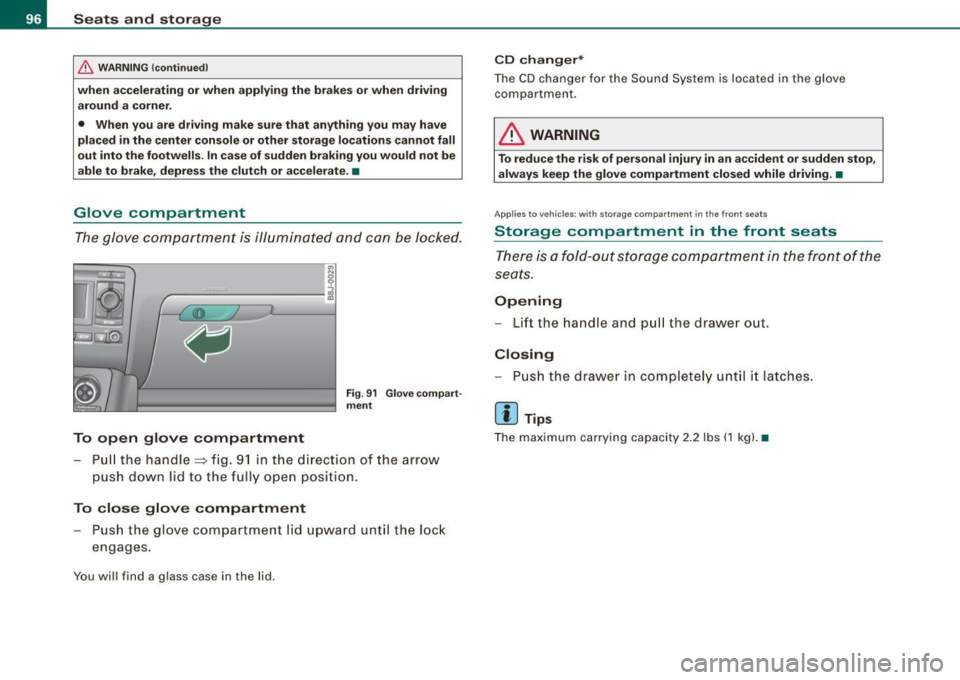
To open glove compartment
Fig. 91 Glove compart
ment
- Pull the handle=> fig. 91 in the direct ion of the arrow
push down lid to the fully open position.
To close glove compartment
Push the glove compartment lid upward until the lock
engages.
You will find a glass case in the lid .
CD changer*
The CD changer for the Sound System is located in the glove
compartmen t.
LJ}. WARNING
To reduce the risk of personal injury in an accident or sudden stop,
always keep the glove compartment closed while driving. •
App lies to veh icle s: w ith sto ra ge co mpart ment in the front seats
Storage compartment in the front seats
There is a fold-out storage compartment in the front of the
seats.
Opening
- Lift the handle and pull the drawer ou t.
Closing
- Push the drawer in completely until it latches.
[ i ] Tips
The maximum carrying capacity 2.2 lbs (1 kg). •
Page 110 of 316
• ..__O_ n_ t_h _ e_ r_ o_ a_ d ____________________________________________________ _
0 Note
Do not stop the engine immediately after hard or extended driving.
Keep the engine running for approximately two minutes to prevent
excessive heat build-up. •
Parking brake
Parking brake
When the parking brake is set, it prevents the vehicle from
rolling away unintentionally.
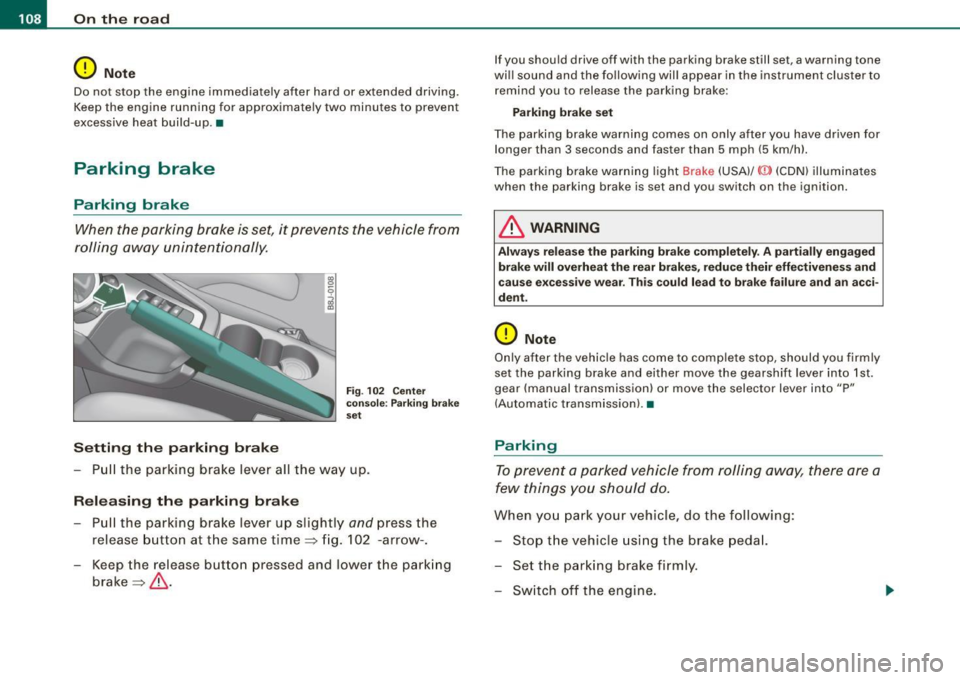
Setting the parking brake
Fig . 102 Center
console: Parking brake
set
- Pull the parking brake lever all the way up.
Releasing the parking brake Pull the parking brake lever up slightly
and press the
release button at the same time=> fig. 102 -arrow-.
Keep the release button pressed and lower the parking
brake=>
& -
If you should drive off with the parking brake still set, a warning tone
will sound and the following will appear in the instrument cluster to remind you to release the parking brake:
Parking brake set
The parking brake warning comes on only after you have driven for longer than 3 seconds and faster than 5 mph (5 km/h).
The parking brake warning light Brake (USA)/
{CD) (CON) illuminates
when the parking brake is set and you switch on the ignition.
& WARNING
Always release the parking brake completely . A partially engaged
brake will overheat the rear brakes, reduce their effectiveness and
cause excessive wear. This could lead to brake failure and an acci
dent.
0 Note
Only after the vehicle has come to complete stop, should you firmly
set the parking brake and either move the gearshift lever into 1st .
gear (manual transmission) or move the selector lever into "P"
(Automatic transmission). •
Parking
To prevent a parked vehicle from rolling away, there are a
few things you should do.
When you park your vehicle, do the following:
- Stop the vehicle using the brake pedal.
- Set the parking brake firmly.
- Switch off the engine.
Page 120 of 316
• ..__T_ ra_ n_s_ m_ i_ s _s_ i_ o _n ___________________________________________________ _
- With your right foot, step on the accelerator to the wide
open throttle position or Kickdown. The engine speed
settles at about 3,200 rpm (6-cylinder engine) or about
2,600 rpm (4-cylinder engine).
- Take your left foot off the brake.
The S tronic® in your vehicle is electronically controlled. A special
Launch Control Program provides the best acceleration from a
standing start .
& WARNING
• Always adapt your driving to the traffic flow.
• Only use Launch Control when road and traffic conditions allow
it and other drivers will not be endangered or annoyed by your
driving and the acceleration of the vehicle.
• Make sure that ESP remains enabled. With the ESP disabled,
the vehicle could brake away, particularly on a slick and slippery
road -risk of skidding!
• Once acceleration is finished, switch ASR on again by briefly
pushing the ESP button. •
Applies to vehicles: wi ths tronic®
tiptronic operation
Tiptronic allows the driver to shift gears manually.
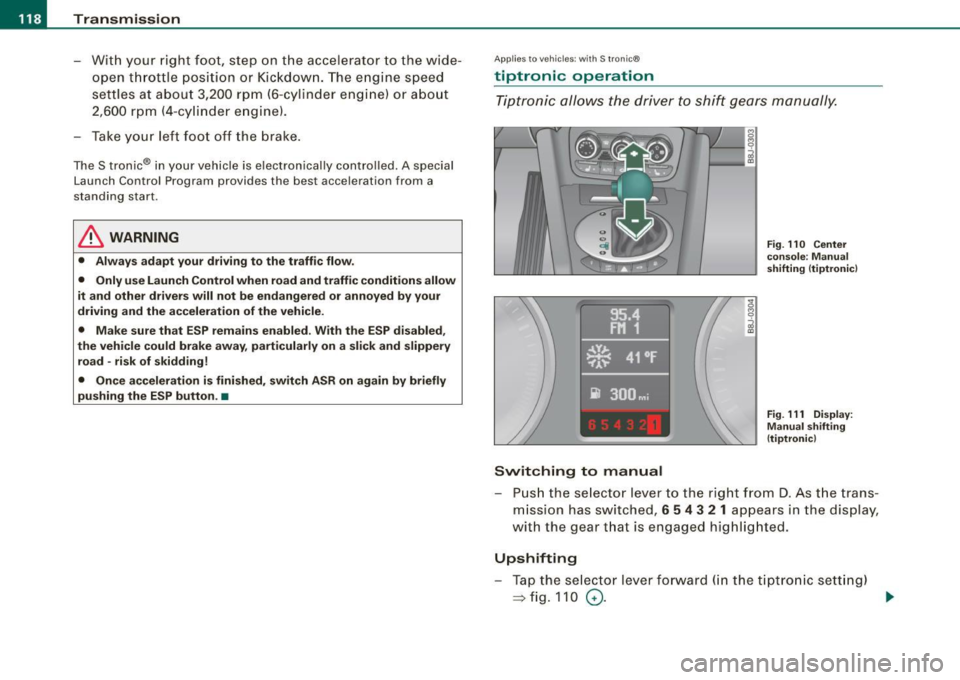
Switching to manual
Fig. 110 Center
console : Manual
shifting (tiptronicl
Fig . 111 Display:
Manual shifting
(tiptronicl
- Push the selector lever to the right from D. As the trans
mission has switched,
6 5 4 3 2 1 appears in the display,
with the gear that is engaged highlighted.
Upshifting
- Tap the selector lever forward (in the tiptronic setting)
=> fig. 110 0- ...
Page 121 of 316
_______________________________________________________ T_ r _a_ n_s_ m __ is_ s_ io_ n _ __.1111111
Downshifting
- Tap the selector lever backward (in the tiptronic setting)
o.
Switching to manual can be carried out with the vehicle stationary
as well as moving .
When accelerating, the transmission shifts into the next gear in
gears 1, 2, 3, 4 and 5 shortly before the maximum permissible
engine speed is reached.
If you have selected a lower gear than the current one, the transmis
sion wil l only shift down when the engine cannot be overspeeded.
If kick -down is actuated, the transmission shifts into a lower gear
independently of speed and engine rpm.•
Applies to vehicles: with S tron ic® and with T iptronic controls on the s tee ring wheel
Steering wheel with Tiptronic ® controls
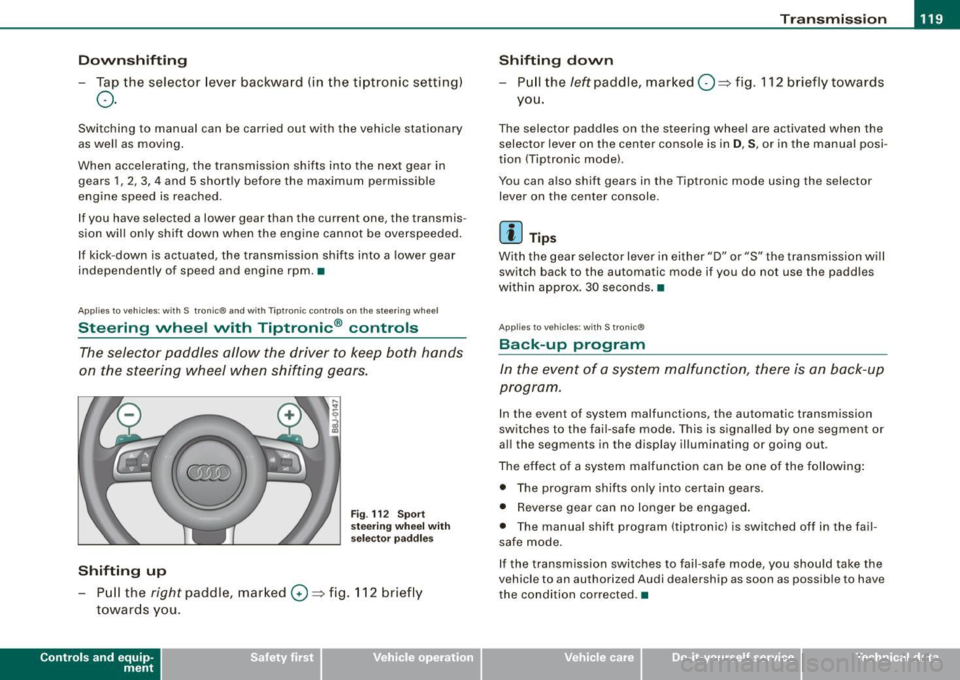
The selector paddles allow the driver to keep both hands
on the steering wheel when shifting gears.
Shifting up
F ig . 112 S port
stee ring w he el wi th
se lector paddl es
- Pu ll the right paddle, marked 0 => fig . 112 briefly
towards you .
Contro ls and eq uip
ment
Shifting d own
Pull the left paddle, marked O ::::> fig. 112 brief ly towards
you .
The selector paddles on the steering wheel are activated when the
selector lever on the center console is in
D, S, or in the manual posi
tion (Tiptronic model.
You can also shift gears in the Tiptronic mode using the selector
lever on the center console .
[ i ] Tips
With the gear se lector lever in either "D" or "S" the transmission wi ll
switch back to the automatic mode if you do not use the paddles
within approx . 30 seconds .•
App lies to vehic les: w ith S tronic®
Back -up program
In the event of a sys tem malfunction, there is an back-up
program .
In the event of system malfunctions, the automatic transmission
switches to the fai l-safe mode . This is signa lled by one segment or
al l the segments in the display illuminating or going out.
The effect of a system ma lfunction can be one of the fo llowing :
• The program shifts only into certain gears.
• Reverse gear can no longer be engaged .
• The manua l shift program (tiptronicl is switched off in the fail
safe mode.
If the transmission switches to fail-safe mode, you should take the
vehicle to an authorized Audi dea lership as soon as possible to have
the condition corrected .•
Vehicle care I I irechnical data