2008 AUDI S5 change time
[x] Cancel search: change timePage 126 of 294
Downloaded from www.Manualslib.com manuals search engine Driving 124The cruise control system allows you to drive at a constant speed of
30 km/h or higher.
A constant speed is maintained by adjusting the engine power or
braking the vehicle accordingly (while in cruise mode).
The cruise control system is set using the control lever ⇒page 123,
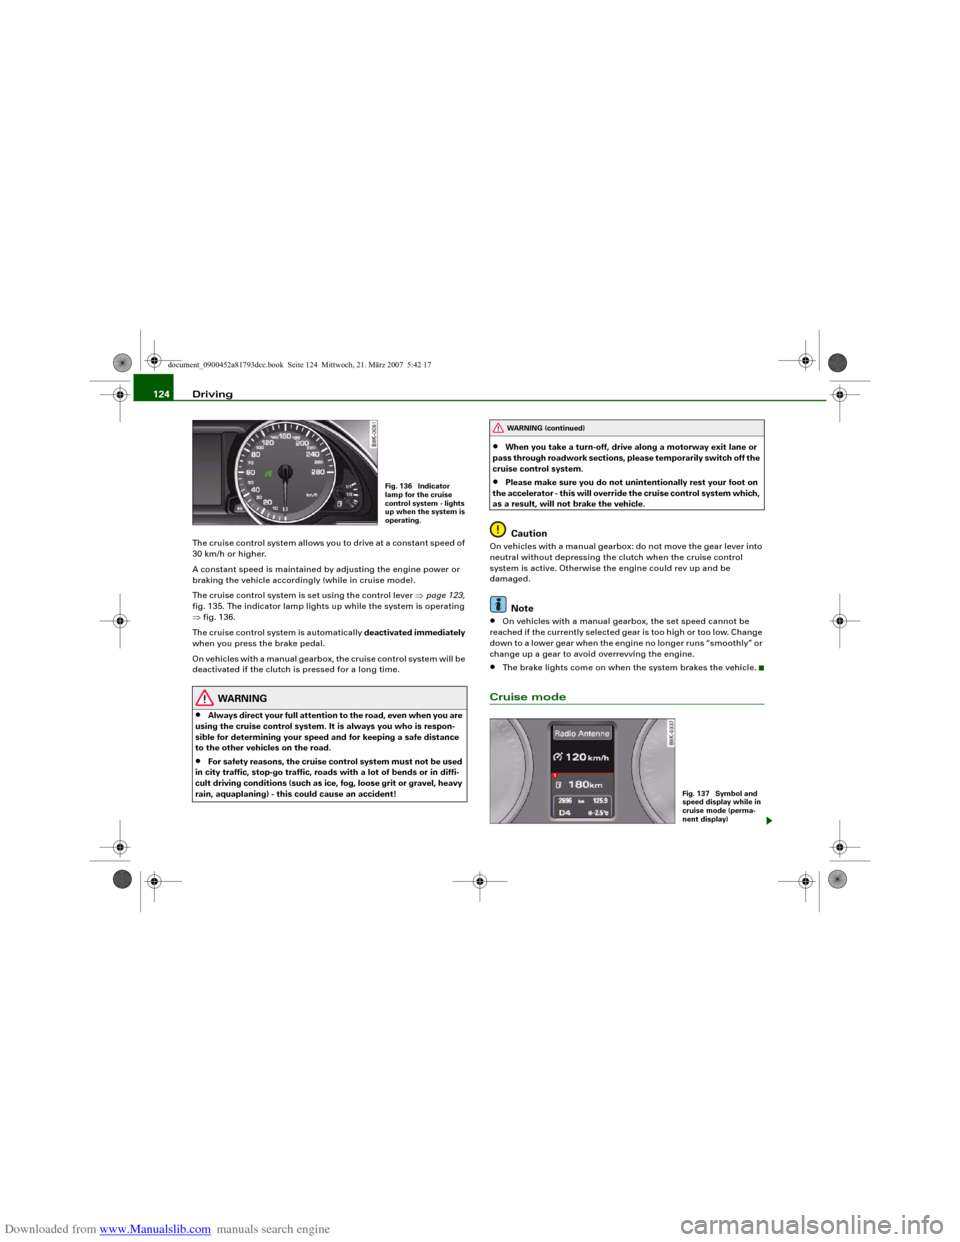
fig. 135. The indicator lamp lights up while the system is operating
⇒fig. 136.
The cruise control system is automatically deactivated immediately
when you press the brake pedal.
On vehicles with a manual gearbox, the cruise control system will be
deactivated if the clutch is pressed for a long time.
WARNING
•
Always direct your full attention to the road, even when you are
using the cruise control system. It is always you who is respon-
sible for determining your speed and for keeping a safe distance
to the other vehicles on the road.
•
For safety reasons, the cruise control system must not be used
in city traffic, stop-go traffic, roads with a lot of bends or in diffi-
cult driving conditions (such as ice, fog, loose grit or gravel, heavy
rain, aquaplaning) - this could cause an accident!
•
When you take a turn-off, drive along a motorway exit lane or
pass through roadwork sections, please temporarily switch off the
cruise control system.
•
Please make sure you do not unintentionally rest your foot on
the accelerator - this will override the cruise control system which,
as a result, will not brake the vehicle.Caution
On vehicles with a manual gearbox: do not move the gear lever into
neutral without depressing the clutch when the cruise control
system is active. Otherwise the engine could rev up and be
damaged.
Note
•
On vehicles with a manual gearbox, the set speed cannot be
reached if the currently selected gear is too high or too low. Change
down to a lower gear when the engine no longer runs “smoothly” or
change up a gear to avoid overrevving the engine.
•
The brake lights come on when the system brakes the vehicle.
Cruise mode
Fig. 136 Indicator
lamp for the cruise
control system - lights
up when the system is
operating.
WARNING (continued)
Fig. 137 Symbol and
speed display while in
cruise mode (perma-
nent display)
document_0900452a81793dcc.book Seite 124 Mittwoch, 21. März 2007 5:42 17
Page 133 of 294

Downloaded from www.Manualslib.com manuals search engine Audi parking system131
Controls
Safety
Driving tips
General maintenance
Self-help
Technical data reached the danger (collision) zone. The driver should then not
move backwards/forwards any further ⇒.
The graphic display in the MMI screen ⇒page 140 can be switched
off. The acoustic proximity warning will, however, remain activated.
The graphic display will be deactivated as soon as you press a func-
tion selector button on the MMI control console. The graphic
display will appear again the next time you park the vehicle. The
graphic display in the MMI screen can also be switched on again
manually using the switch
⇒page 129, fig. 141. For more infor-
mation on the MMI control console please refer to the MMI Oper-
ating Manual.
WARNING
•
The sensors have blind spots in which obstacles are not regis-
tered. It is particularly important to ensure that there are no small
children or animals near the vehicle, as the sensors may not
always be able to detect them.
•
The parking aid cannot replace the full concentration of the
driver. The driver is always responsible for safety during parking
and other manoeuvres. Always keep a close watch on the area
around the vehicle.
•
Please note that low obstacles detected by the system may no
longer be registered by the sensors as the car moves closer, so the
system will not give any further warning. Certain kinds of obsta-
cles (such as wire fences, chains, thin painted posts or trailer draw
bars, etc.) may not always be detected by the system (accident
risk).Note
•
There is a slight delay in the picture display.
•
You can change the settings for the graphic display in the MMI
⇒page 140.
•
To ensure that the acoustic parking aid works properly, the
sensors must be kept clean and free of snow and ice. Please observe
the additional notes on ⇒page 143.
•
Please refer to the notes on towing ⇒page 138.
parking system advancedApplies to vehicles: with parking system advancedParking aid (front and rear), with display and reversing camera
The parking aid gives an acoustic and visual warning if it
detects any obstacles in front of or behind the vehicle. The
reversing camera provides further assistance when
parking.
Fig. 1 43 Bo o t lid : Lo c a-
tion of reversing
camera
document_0900452a81793dcc.book Seite 131 Mittwoch, 21. März 2007 5:42 17
Page 135 of 294
Downloaded from www.Manualslib.com manuals search engine Audi parking system133
Controls
Safety
Driving tips
General maintenance
Self-help
Technical data displayed on the MMI screen. The warnings will then return to the
normal volume if the vehicle approaches the detected obstacle
again.
Graphic display
The segments in the MMI display indicate the distance between the
vehicle and an obstacle. The number of segments shown depends
on the obstacle in front of or behind the vehicle. The closer the
vehicle gets to the obstacle the closer the segments move towards
the vehicle in the graphic ⇒page 132, fig. 144. At the latest when
the penultimate segment is highlighted the vehicle has reached the
danger (collision) zone. The driver should then not move back-
wards/forwards any further ⇒.
The graphic display in the MMI screen ⇒page 140 can be switched
off. The acoustic proximity warning will, however, remain activated.
The graphic display will be deactivated as soon as you press a func-
tion selector button on the MMI control console. The graphic
display in the MMI screen can also be switched on again manually
using the switch
. For more information on the MMI control
console please refer to the MMI Operating Manual.
Reversing camera (Rear View)
The mirrored image of the picture supplied by the reversing camera
⇒page 136, fig. 149 is shown in the MMI display. The picture
supplied by the reversing camera also includes orientation lines
and area markings which are projected onto the image to assist you
when parking ⇒page 134. The red line in the picture ⇒page 134,
fig. 145/⇒page 134, fig. 146 shows the collision zone. From here at
the latest, the driver should not reverse any further ⇒.
If your vehicle is near an obstacle, the proximity graphic will also
appear in the reversing camera image. This superimposed graphic
helps the driver to localise the critical area of the vehicle.
If the MMI screen is showing the graphic display you can switch to
the image of the reversing camera by pressing the control button
for the function Rear View ⇒page 132, fig. 144.If the MMI screen is showing the image of the reversing camera you
can switch to the graphic display by pressing the control button for
the function Graphic ⇒page 136, fig. 149.
The image of the reversing camera in the MMI screen ⇒page 140
can be switched off. The acoustic proximity warning will, however,
remain activated.
The image of the reversing camera will be deactivated as soon as
you press a function selector button on the MMI control console.
The image of the reversing camera will be shown again the next
time you park the vehicle. The image of the reversing camera can
also be switched on again manually using the switch
. For more
information on the MMI control console please refer to the MMI
Operating Manual.
WARNING
•
The sensors have blind spots in which obstacles are not regis-
tered. It is particularly important to ensure that there are no small
children or animals near the vehicle, as the sensors may not
always be able to detect them.
•
The parking aid cannot replace the full concentration of the
driver. The driver is always responsible for safety during parking
and other manoeuvres. Always keep a close watch on the area
around the vehicle.
•
Please note that low obstacles detected by the system may no
longer be registered by the sensors as the car moves closer, so the
system will not give any further warning. Certain kinds of obsta-
cles (such as wire fences, chains, thin painted posts or trailer draw
bars, etc.) may not always be detected by the system (accident
risk).Note
•
There is a slight delay in the picture display.
•
You can change the settings for the graphic display and the
reversing camera in the MMI ⇒page 140.
document_0900452a81793dcc.book Seite 133 Mittwoch, 21. März 2007 5:42 17
Page 142 of 294
Downloaded from www.Manualslib.com manuals search engine Audi parking system 140Applies to vehicles: with parking system plusSwitching graphic display on and off
The settings for the graphic display can be selected on the
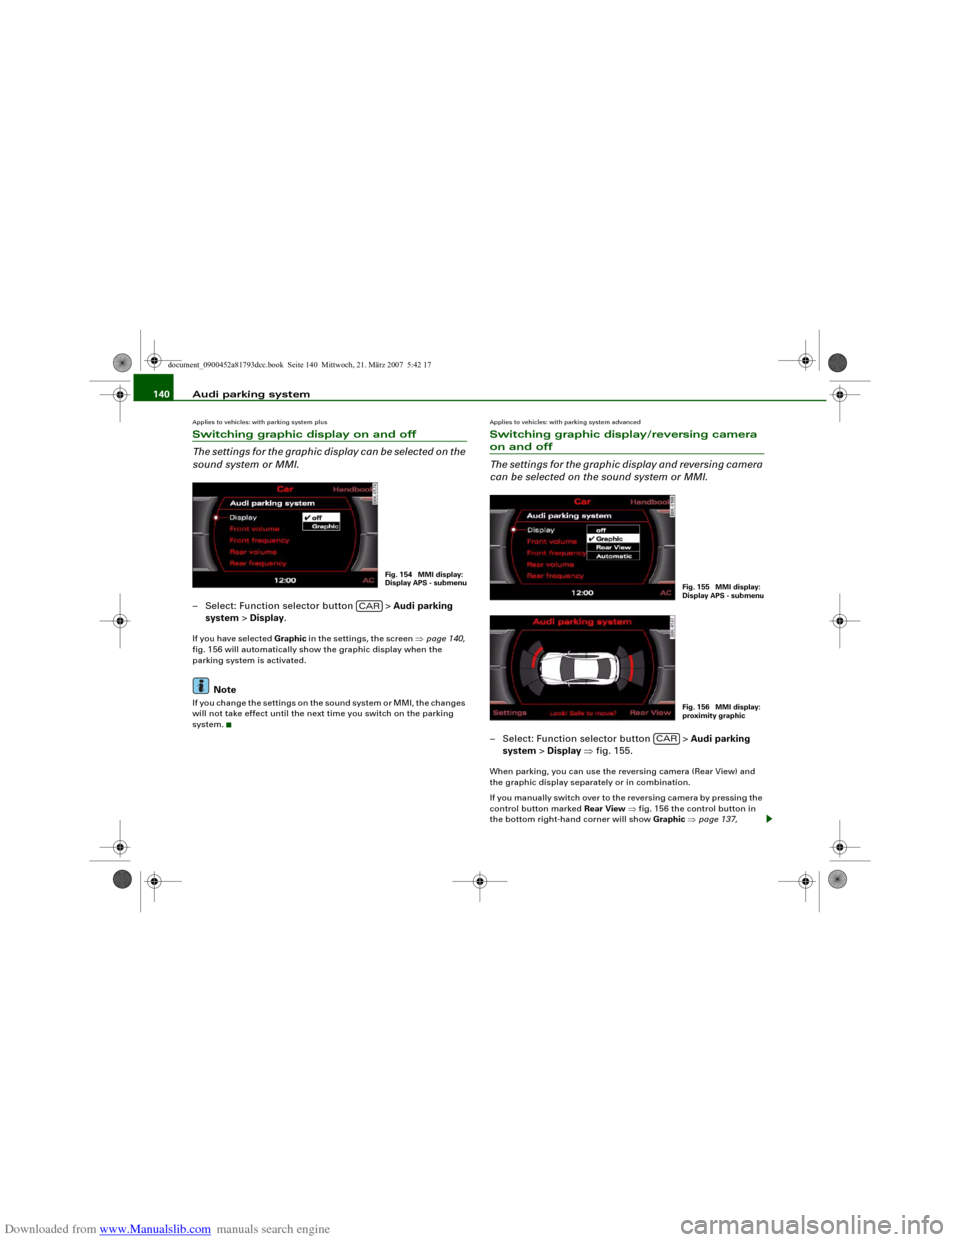
sound system or MMI.– Select: Function selector button > Audi parking
system > Display.If you have selected Graphic in the settings, the screen ⇒page 140,
fig. 156 will automatically show the graphic display when the
parking system is activated.
Note
If you change the settings on the sound system or MMI, the changes
will not take effect until the next time you switch on the parking
system.
Applies to vehicles: with parking system advancedSwitching graphic display/reversing camera on and off
The settings for the graphic display and reversing camera
can be selected on the sound system or MMI.– Select: Function selector button > Audi parking
system > Display ⇒fig. 155.When parking, you can use the reversing camera (Rear View) and
the graphic display separately or in combination.
If you manually switch over to the reversing camera by pressing the
control button marked Rear View ⇒fig. 156 the control button in
the bottom right-hand corner will show Graphic ⇒page 137,
Fig. 154 MMI display:
Display APS - submenu
CAR
Fig. 155 MMI display:
Display APS - submenuFig. 156 MMI display:
proximity graphic
CAR
document_0900452a81793dcc.book Seite 140 Mittwoch, 21. März 2007 5:42 17
Page 143 of 294
Downloaded from www.Manualslib.com manuals search engine Audi parking system141
Controls
Safety
Driving tips
General maintenance
Self-help
Technical data fig. 152. You can use the control buttons to switch between the Rear
View camera and Graphic display at any time as desired. The
settings selected on the sound system or MMI remain stored.
Setting “Graphic”:
If you have selected Graphic in the settings, the screen ⇒fig. 156
will automatically show the graphic display when the parking
system is activated.
Setting “Rear View”
If you have selected Rear View the reversing camera image
⇒page 136, fig. 150 will be displayed whenever you activate the
parking system (both when reversing and when driving forwards).
Setting “Automatic”:
If you have selected Automatic the screen will automatically show
the reversing camera image when you engage reverse gear and the
graphic display when you drive forwards.
Setting “Off”:
If you select off the reversing camera and graphic display are both
deactivated. The acoustic parking aid will, however, remain acti-
vated.
Note
If you change the settings on the sound system or MMI, the changes
will not take effect until the next time you switch on the parking
system.
Special parking situationsApplies to vehicles: with parking system advancedParking next to an obstacle
When parking next to an obstacle it is important to keep
sufficient distance at the side.When using “Parking mode 2” you can park your vehicle very close
to the kerb of the pavement ⇒page 134, fig. 146.
However, if you are parking, for example, next to a wall, you must
keep a greater distance to the side in order to avoid any collision
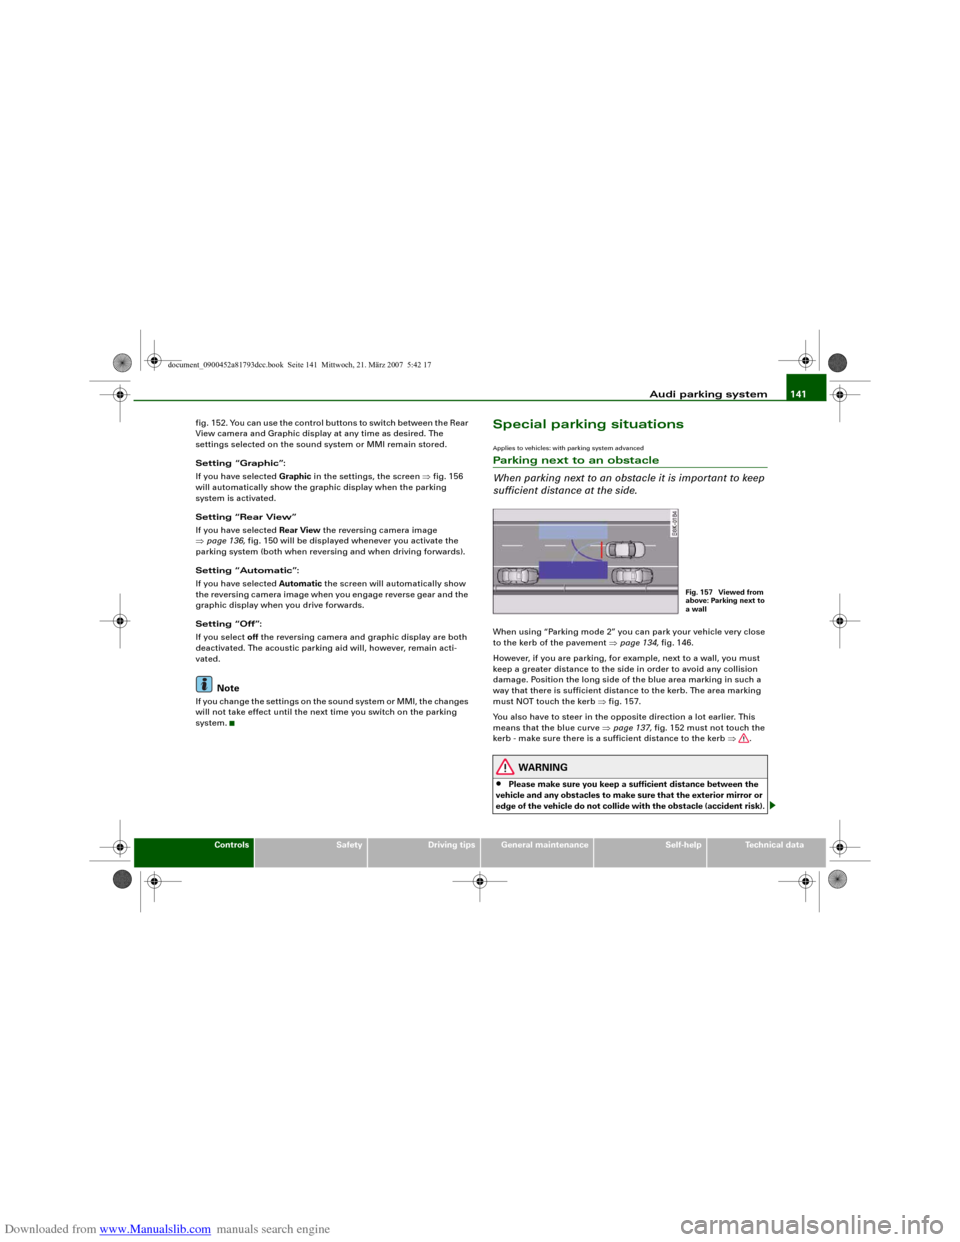
damage. Position the long side of the blue area marking in such a
way that there is sufficient distance to the kerb. The area marking
must NOT touch the kerb ⇒fig. 157.
You also have to steer in the opposite direction a lot earlier. This
means that the blue curve ⇒page 137, fig. 152 must not touch the
kerb - make sure there is a sufficient distance to the kerb ⇒.
WARNING
•
Please make sure you keep a sufficient distance between the
vehicle and any obstacles to make sure that the exterior mirror or
edge of the vehicle do not collide with the obstacle (accident risk).
Fig. 157 Viewed from
above: Parking next to
a wall
document_0900452a81793dcc.book Seite 141 Mittwoch, 21. März 2007 5:42 17
Page 198 of 294
Downloaded from www.Manualslib.com manuals search engine Your vehicle and the environment 196How to improve economy and minimise pollutionFuel economy, environmental impact and wear on the engine,
brakes and tyres depend largely on the way you drive the vehicle. By
adopting an economical driving style and anticipating the traffic
situation ahead, you can reduce fuel consumption by 10-15%. The
following section gives you some tips on lessening the impact on
the environment and reducing your operating costs at the same
time.
Anticipate well in advance
A car uses most fuel when accelerating. If you anticipate hazards
and speed changes well in advance, you will need to brake less and
thus accelerate less. Wherever possible, let the car slow down grad-
ually with a gear engaged, for instance when you can see that the
next traffic lights are red. This takes advantage of the engine
braking effect, reducing wear on the brakes and tyres. Emissions
and fuel consumption will drop to zero due to the overrun fuel cut-
off.
Change gear early to save fuel
An effective way of saving fuel is to change up quickly through the
gears. Running the engine at high rpm in the lower gears uses an
unnecessary amount of fuel.
Manual gearbox: Shift up to second gear as soon as possible. If
possible, we recommend shifting up to the next gear at approx.
2,000 rpm.
Automatic gearbox: Press the accelerator slowly and avoid using
the “kick-down” feature.
Avoid driving at high speed
Avoid travelling at top speed. Fuel consumption, exhaust emissions
and noise levels all increase very rapidly at higher speeds. Driving at
moderate speeds will help to save fuel.Do not let the engine idle for longer than necessary
It is worthwhile switching off the engine when waiting in a traffic
jam, at level crossings or at traffic lights with a long red phase. The
fuel saved after only 30 - 40 seconds is greater than the amount of
fuel needed to restart the engine.
The engine takes a very long time to warm up when it is running at
idling speed. Mechanical wear and pollutant emissions are also
especially high during this initial warm-up phase. It is therefore best
to drive off immediately after starting the engine. Avoid running the
engine at high speed.
Regular servicing
Regular servicing can establish a basis for good fuel economy
before you start driving. A well-serviced engine gives you the
benefit of improved fuel efficiency as well as maximum reliability
and an enhanced resale value. A badly tuned engine can consume
up to ten percent more fuel than necessary.
Avoid short trips
The engine and emission control system need to reach their proper
working temperature in order to minimise fuel consumption and
emissions.
A cold engine uses disproportionately more fuel. The engine only
reaches its working temperature after about four kilometres, when
fuel consumption will return to a normal level. This is the reason
why we recommend avoiding short trips wherever possible.
Maintain the correct tyre pressures
Always make sure the tyres are inflated to the correct pressures
⇒page 232 to save fuel. If the tyre pressures are just 0.5 bar too low,
this can increase the fuel consumption by as much as 5 %. Due to
the greater rolling resistance, under-inflation also increases tyre
wear and impairs handling.
Do not use winter tyres all through the year; they will increase fuel
consumption by up to 10 %.
document_0900452a81793dcc.book Seite 196 Mittwoch, 21. März 2007 5:42 17
Page 202 of 294
Downloaded from www.Manualslib.com manuals search engine Towing a trailer 200
WARNING
It is essential that you adjust your speed to suit the weather, road
and traffic conditions. Do not let the trailer stabilisation system
tempt you into taking any risks when driving – this can cause acci-
dents.•
The ESP and trailer stabilisation system cannot defy the laws
of physics. This should be kept in mind, particularly on slippery
and wet roads and when towing a trailer with a light load.
•
The trailer stabilisation system is functional, regardless of
whether the trailer has a mechanical overrun brake or not.
•
The trailer stabilisation system is not always able to detect
swaying of trailers with a light load and will therefore not inter-
vene.
•
A trailer can still “jack-knife” on slippery roads with little grip,
even if the towing vehicle is equipped with the trailer stabilisation
system.
•
Trailers with a high centre of gravity may even tip over before
they start to sway sideways.
•
If you are not towing a trailer, but the trailer socket is being
used (e.g. for an illuminated bicycle rack), the trailer stabilisation
system may be activated in extreme driving conditions.
•
Please note the additional information and warnings
⇒page 200.
Notes on towing
Driving with a trailer always requires extra care.Weight distribution
Try to avoid towing a loaded trailer with an unladen vehicle. If this
cannot be avoided, drive extra slowly to allow for the unbalanced
weight distribution.Speed
The stability of the car and trailer is reduced with increasing speed.
For this reason it is advisable not to drive at the maximum permis-
sible top speed in unfavourable road, weather or wind conditions.
This applies especially on a downhill gradient.
You should always reduce speed immediately if the trailer shows
the slightest sign of swaying. Never try to stop the swaying by accel-
erating further.
Always brake in good time. If the trailer has an overrun brake, apply
the brakes gently at first and then firmly. This will prevent the jerking
that can be caused by the trailer wheels locking. Change down in
good time before going down a steep hill so that you can use the
engine braking effect to slow down the vehicle.
Swaying and pitching can be reduced by stabiliser aids. We recom-
mend having stabiliser aids installed when towing trailers with a
high trailer weight. They can be purchased and installed at an Audi
dealer.
Overheating
When climbing long hills in hot weather with the engine running
fast in low gear, you should keep an eye on the coolant temperature
gauge ⇒page 11. Reduce speed immediately if the needle moves to
the top end of the scale. If the temperature warning lamp
in the
instrument cluster should start flashing, stop the car and let the
engine cool down by running it at idling speed for a few minutes.
document_0900452a81793dcc.book Seite 200 Mittwoch, 21. März 2007 5:42 17
Page 226 of 294
Downloaded from www.Manualslib.com manuals search engine Checking and topping up fluids 224Topping up the engine oil
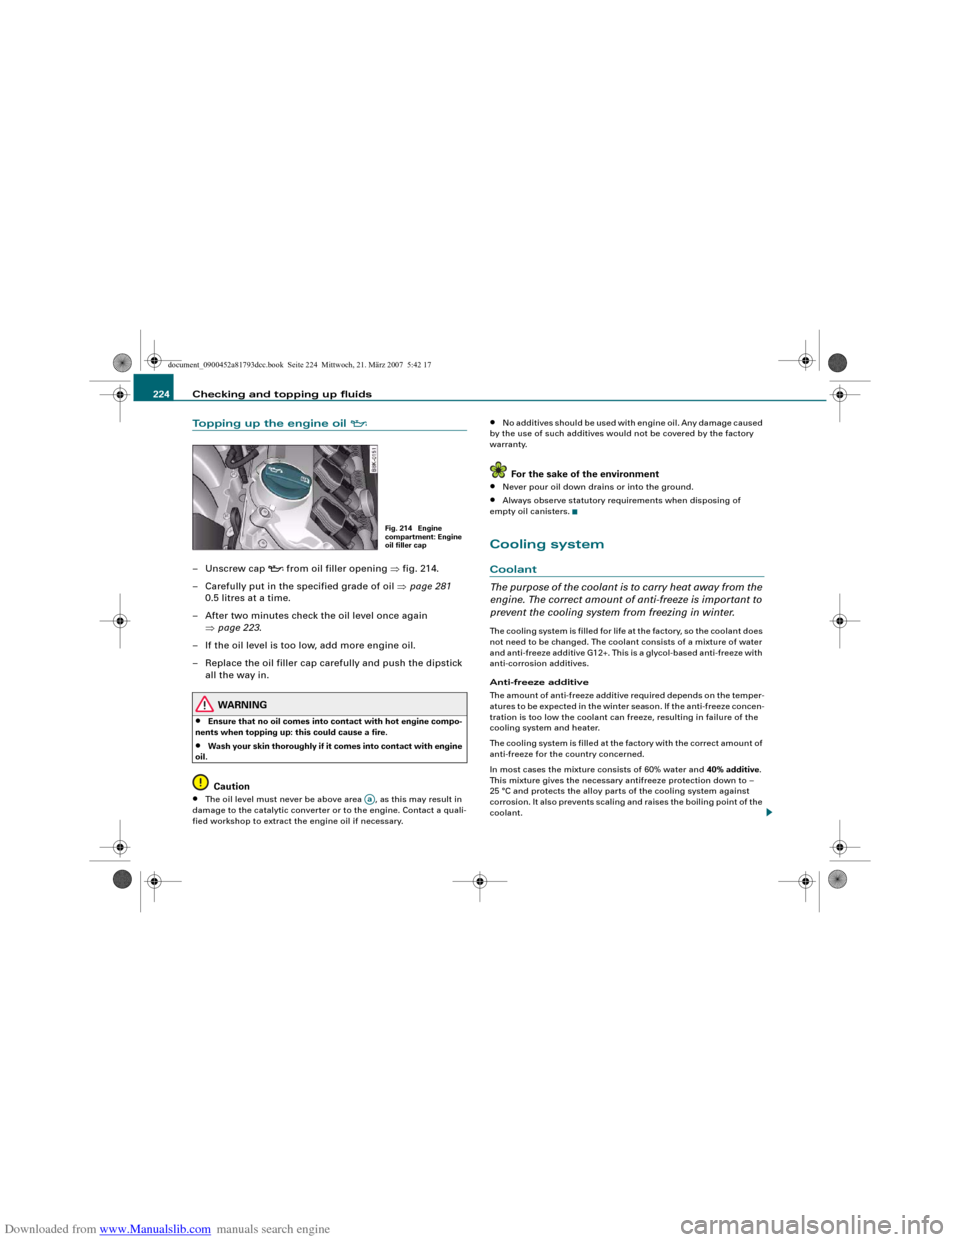
–Unscrew cap
from oil filler opening ⇒fig. 214.
– Carefully put in the specified grade of oil ⇒page 281
0.5 litres at a time.
– After two minutes check the oil level once again
⇒page 223.
– If the oil level is too low, add more engine oil.
– Replace the oil filler cap carefully and push the dipstick
all the way in.
WARNING
•
Ensure that no oil comes into contact with hot engine compo-
nents when topping up: this could cause a fire.
•
Wash your skin thoroughly if it comes into contact with engine
oil.Caution
•
The oil level must never be above area , as this may result in
damage to the catalytic converter or to the engine. Contact a quali-
fied workshop to extract the engine oil if necessary.
•
No additives should be used with engine oil. Any damage caused
by the use of such additives would not be covered by the factory
warranty.For the sake of the environment
•
Never pour oil down drains or into the ground.
•
Always observe statutory requirements when disposing of
empty oil canisters.
Cooling systemCoolant
The purpose of the coolant is to carry heat away from the
engine. The correct amount of anti-freeze is important to
prevent the cooling system from freezing in winter.The cooling system is filled for life at the factory, so the coolant does
not need to be changed. The coolant consists of a mixture of water
and anti-freeze additive G12+. This is a glycol-based anti-freeze with
anti-corrosion additives.
Anti-freeze additive
The amount of anti-freeze additive required depends on the temper-
atures to be expected in the winter season. If the anti-freeze concen-
tration is too low the coolant can freeze, resulting in failure of the
cooling system and heater.
The cooling system is filled at the factory with the correct amount of
anti-freeze for the country concerned.
In most cases the mixture consists of 60% water and 40% additive.
This mixture gives the necessary antifreeze protection down to –
25 °C and protects the alloy parts of the cooling system against
corrosion. It also prevents scaling and raises the boiling point of the
coolant.
Fig. 214 Engine
compartment: Engine
oil filler cap
Aa
document_0900452a81793dcc.book Seite 224 Mittwoch, 21. März 2007 5:42 17