2008 AUDI A4 tow
[x] Cancel search: towPage 4 of 342
Contents 2ContentsNotes on this Owner's
Manual
. . . . . . . . . . . . . . . . . . . . . .
Controls
. . . . . . . . . . . . . . . . . . . . .
Controls and displays
. . . . . . . . . .
Overview . . . . . . . . . . . . . . . . . . . . . .
Instruments and
warning/indicator lamps
. . . . . . .
Instruments . . . . . . . . . . . . . . . . . . . .
Fuel gauge . . . . . . . . . . . . . . . . . . . . .
Warning and indicator lamps . . . . .
Driver information system
. . . . . .
Introduction . . . . . . . . . . . . . . . . . . . .
On-board computer . . . . . . . . . . . . .
Speed warning function . . . . . . . . .
Auto-check control . . . . . . . . . . . . . .
Tyre pressure monitoring system .
Doors and windows
. . . . . . . . . . . .
Central locking system . . . . . . . . . .
Boot lid . . . . . . . . . . . . . . . . . . . . . . . .
Child-proof catches . . . . . . . . . . . . .
Electric windows . . . . . . . . . . . . . . .
Sun roof . . . . . . . . . . . . . . . . . . . . . . .
Lights and vision
. . . . . . . . . . . . . . .
Lights . . . . . . . . . . . . . . . . . . . . . . . . .
Interior lights . . . . . . . . . . . . . . . . . . .Clear vision . . . . . . . . . . . . . . . . . . . .
Windscreen wipers . . . . . . . . . . . . .
Rear-view mirrors . . . . . . . . . . . . . .
Digital compass . . . . . . . . . . . . . . . .
Seats and storage
. . . . . . . . . . . . .
Manual adjustment of front seats
Electric adjustment of front seats
Seat memory . . . . . . . . . . . . . . . . . .
Head restraints . . . . . . . . . . . . . . . .
Front armrest . . . . . . . . . . . . . . . . . .
Luggage compartment . . . . . . . . .
Roof carrier . . . . . . . . . . . . . . . . . . . .
Roof load . . . . . . . . . . . . . . . . . . . . .
Cup holders . . . . . . . . . . . . . . . . . . .
Ashtrays . . . . . . . . . . . . . . . . . . . . . .
Cigarette lighter and electrical
sockets . . . . . . . . . . . . . . . . . . . . . . .
On-board 230 Volt Euro socket . . .
Storage compartments . . . . . . . . .
Heating and cooling
. . . . . . . . . . .
Deluxe automatic air conditioner .
Deluxe automatic air conditioner -
basic settings . . . . . . . . . . . . . . . . . .
Deluxe automatic air conditioner
plus . . . . . . . . . . . . . . . . . . . . . . . . . .
Deluxe automatic air conditioner
plus - basic settings . . . . . . . . . . . .
Auxiliary heating and auxiliary
ventilation . . . . . . . . . . . . . . . . . . . . .
Seat heating . . . . . . . . . . . . . . . . . . .
Driving
. . . . . . . . . . . . . . . . . . . . . . . . .
Steering . . . . . . . . . . . . . . . . . . . . . . .
Ignition lock . . . . . . . . . . . . . . . . . . .
Starting and stopping the engine
with the advanced key . . . . . . . . . . Electro-mechanical parking brake
Cruise control system . . . . . . . . . . .
adaptive cruise control (ACC)
. .
Speed and distance control system
Driver messages . . . . . . . . . . . . . . .
System limitations . . . . . . . . . . . . . .
Audi braking guard . . . . . . . . . . . . .
Audi lane assist
. . . . . . . . . . . . . . . .
Audi lane assist . . . . . . . . . . . . . . . .
Audi side assist
. . . . . . . . . . . . . . . .
Lane change assist feature . . . . . .
Notes . . . . . . . . . . . . . . . . . . . . . . . . .
Audi drive select
. . . . . . . . . . . . . . .
Adjusting the vehicle set-up . . . . .
Automatic gearbox
. . . . . . . . . . . . .
multitronic®, tiptronic (6-speed
gearbox) . . . . . . . . . . . . . . . . . . . . . . .
Parking aid
. . . . . . . . . . . . . . . . . . . . .
General notes . . . . . . . . . . . . . . . . . .
Audi parking system . . . . . . . . . . . .
Audi parking system plus . . . . . . . .
Audi parking system advanced . . .
Switching display and acoustic
signals on and off . . . . . . . . . . . . . .
Towing bracket . . . . . . . . . . . . . . . . .
Error messages . . . . . . . . . . . . . . . . .
HomeLink
. . . . . . . . . . . . . . . . . . . . . .
Universal transmitter . . . . . . . . . . . . 5
7
9
9
11
11
14
15
21
21
25
28
30
39
42
42
51
53
53
55
57
57
6364
65
68
71
73
73
74
75
77
78
79
83
84
85
86
87
89
90
93
93
100
101
109
110
114
116
116
116
118121
125
128
128
134
140
142
145
145
149
149
156
159
159
162
162
169
169
169
170
171
177
177
178
179
179
document_0900452a81b1b9de.book Seite 2 Donnerstag, 26. Juli 2007 9:16 09
Page 5 of 342
Contents3
Controls
Safety
Driving tips
General maintenance
Self-help
Technical data
Safety
. . . . . . . . . . . . . . . . . . . . . . .
Safe driving
. . . . . . . . . . . . . . . . . . . .
General notes . . . . . . . . . . . . . . . . . .
Correct sitting positions . . . . . . . .
Pedal area . . . . . . . . . . . . . . . . . . . . .
Stowing luggage safely . . . . . . . . .
Seat belts
. . . . . . . . . . . . . . . . . . . . . .
Why is it so important to use seat
belts? . . . . . . . . . . . . . . . . . . . . . . . . .
Forces acting in a collision . . . . . .
How to wear seat belts properly .
Belt tensioners . . . . . . . . . . . . . . . . .
Airbag system
. . . . . . . . . . . . . . . . .
Description of airbag system . . . .
Front airbags . . . . . . . . . . . . . . . . . .
Side airbags . . . . . . . . . . . . . . . . . . .
Head-protection airbags
(sideguard) . . . . . . . . . . . . . . . . . . . .
Deactivating the front passenger's
airbag via the key-operated switch
Child safety
. . . . . . . . . . . . . . . . . . . .
Points to remember if children are
travelling in the car . . . . . . . . . . . . .
Child safety seats . . . . . . . . . . . . . .
Fitting child safety seats . . . . . . . .
Driving tips
. . . . . . . . . . . . . . . .
Intelligent technology
. . . . . . . . . .
Electronic stabilisation program
(ESP) . . . . . . . . . . . . . . . . . . . . . . . . . .
Brakes . . . . . . . . . . . . . . . . . . . . . . . . .
Power steering (servotronic) . . . . .
Four-wheel drive (quattro®) . . . . . .
Power management . . . . . . . . . . . .
Your vehicle and the
environment
. . . . . . . . . . . . . . . . . . .
Running in . . . . . . . . . . . . . . . . . . . . .
Emission control systems . . . . . . .
How to improve economy and
minimise pollution . . . . . . . . . . . . . .
Environmental compatibility . . . . .
Towing a trailer
. . . . . . . . . . . . . . . .
Driving the vehicle with a trailer or
caravan . . . . . . . . . . . . . . . . . . . . . . .
Removable towing bracket . . . . . .
General maintenance
. . .
Care of vehicle and cleaning
. . .
General notes . . . . . . . . . . . . . . . . . .
Care of exterior . . . . . . . . . . . . . . . . .
Care of interior . . . . . . . . . . . . . . . . .
Fuel and filling the tank
. . . . . . . .
Petrol . . . . . . . . . . . . . . . . . . . . . . . . . .
Diesel . . . . . . . . . . . . . . . . . . . . . . . . .
Filling the tank . . . . . . . . . . . . . . . . . .
Checking and topping up fluidsBonnet . . . . . . . . . . . . . . . . . . . . . . . .
Engine compartment layout . . . . . .
Engine oil . . . . . . . . . . . . . . . . . . . . . .
Cooling system . . . . . . . . . . . . . . . . .
Brake fluid . . . . . . . . . . . . . . . . . . . . .
Battery . . . . . . . . . . . . . . . . . . . . . . . .
Windscreen washer . . . . . . . . . . . . .Wheels and tyres
. . . . . . . . . . . . . . .
Wheels . . . . . . . . . . . . . . . . . . . . . . . .
Run flat tyres . . . . . . . . . . . . . . . . . . .
Accessories and modifications
to the vehicle
. . . . . . . . . . . . . . . . . . .
Accessories and replacement
parts . . . . . . . . . . . . . . . . . . . . . . . . . .
Modifications . . . . . . . . . . . . . . . . . .
Radio transmitters and business
equipment . . . . . . . . . . . . . . . . . . . . . 185
186
186
188
191
192
194
194
195
197
199
201
201
203
205
207
208
210
210
213
216221
222
222
224
225
226
226
229
229
229
229
231
232
232
235243
244
244
244
247
251
251
251
252
254
254
256
257
260
262
263
267
268
268
274
277
277
277
278
document_0900452a81b1b9de.book Seite 3 Donnerstag, 26. Juli 2007 9:16 09
Page 6 of 342
Contents 4Self-help
. . . . . . . . . . . . . . . . . . . . .
Self-help
. . . . . . . . . . . . . . . . . . . . . . . .
Warning triangle . . . . . . . . . . . . . . . .
First-aid kit . . . . . . . . . . . . . . . . . . . . .
Fire extinguisher . . . . . . . . . . . . . . . .
Tools and Tyre Mobility System . . .
Compact temporary spare wheel*
Tyre repairs . . . . . . . . . . . . . . . . . . . .
Changing a wheel . . . . . . . . . . . . . .
Jump-starting . . . . . . . . . . . . . . . . . .
Tow-starting and towing away . . .
Fuses and bulbs
. . . . . . . . . . . . . . . .
Fuses . . . . . . . . . . . . . . . . . . . . . . . . . .
Bulbs . . . . . . . . . . . . . . . . . . . . . . . . . .
Changing bulbs for headlights . . .
Changing bulb for front fog lights
Changing bulbs for rear lights in
side panel . . . . . . . . . . . . . . . . . . . . . .
Changing bulbs in boot lid . . . . . . .
Number plate light . . . . . . . . . . . . . .
Technical data
. . . . . . . . . . . .
General notes
. . . . . . . . . . . . . . . . . .
Explanation of technical data . . . .
Dimensions . . . . . . . . . . . . . . . . . . . .
Capacities . . . . . . . . . . . . . . . . . . . . .
Vehicle identification data . . . . . . .
Performance, weights and
dimensions
. . . . . . . . . . . . . . . . . . . .
Petrol engines . . . . . . . . . . . . . . . . .
Diesel engines . . . . . . . . . . . . . . . . .
Index
. . . . . . . . . . . . . . . . . . . . . . . . 281
282
282
282
283
283
284
285
288
293
295
300
300
304
306
310
311
314
315319
320
320
320
321
321
323
323
325
329
document_0900452a81b1b9de.book Seite 4 Donnerstag, 26. Juli 2007 9:16 09
Page 15 of 342
Instruments and warning/indicator lamps13
Controls
Safety
Driving tips
General maintenance
Self-help
Technical data The button has the following functions:
Activating clock, date, temperature and mileage
recorder displays
The display will appear for about 30 seconds if you press the
button ⇒page 12, fig. 3 when the ignition is switched off.
Starting check procedure (auto-check control)
The auto-check control checks important components and vehicle
systems. These background checks are run constantly, as long as
the ignition is switched on ⇒page 30.
You can start the “check procedure” manually by pressing the
button with the ignition switched on. This function check can be
started at road speeds up to 5 km/h.
Calling up driver messages again
A red or yellow symbol appearing in the instrument cluster display
is normally accompanied by a corresponding message. The
message will disappear from the display after about 5 seconds. If
required, you can call up the message again by briefly pressing the
button.
Setting speed warning
You can press the button briefly to set speed limit warning 1
while the vehicle is moving ⇒page 29. If you press and hold the
button, this will cancel the speed warning.
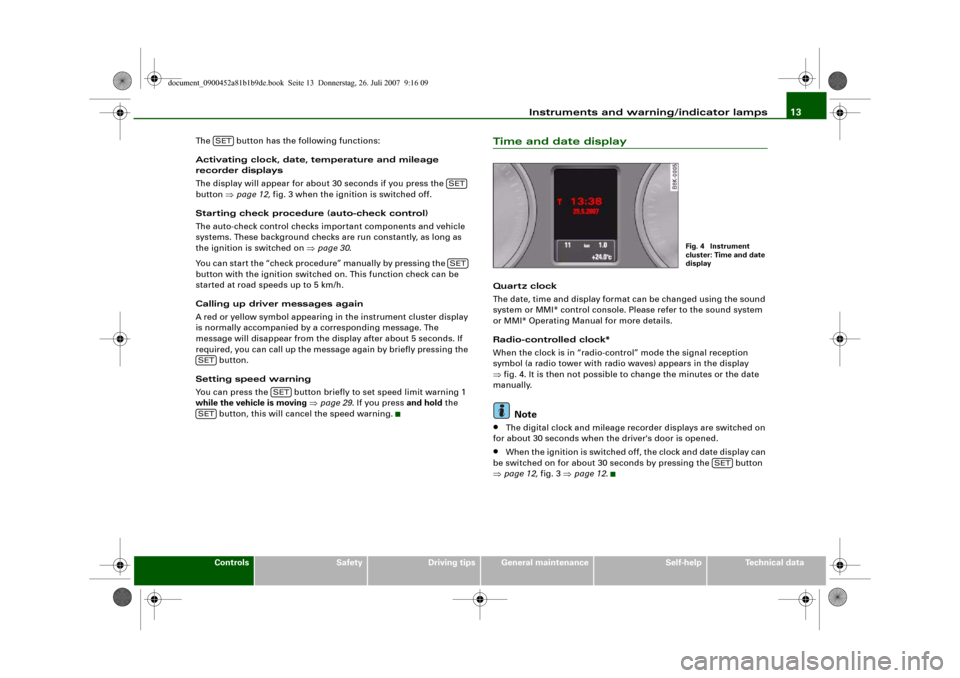
Time and date displayQuart z clock
The date, time and display format can be changed using the sound
system or MMI* control console. Please refer to the sound system
or MMI* Operating Manual for more details.
Radio-controlled clock*
When the clock is in “radio-control” mode the signal reception
symbol (a radio tower with radio waves) appears in the display
⇒fig. 4. It is then not possible to change the minutes or the date
manually.
Note
•
The digital clock and mileage recorder displays are switched on
for about 30 seconds when the driver's door is opened.
•
When the ignition is switched off, the clock and date display can
be switched on for about 30 seconds by pressing the button
⇒page 12, fig. 3 ⇒page 12.
SET
SETSET
SET
SET
SET
Fig. 4 Instrument
cluster: Time and date
display
SET
document_0900452a81b1b9de.book Seite 13 Donnerstag, 26. Juli 2007 9:16 09
Page 20 of 342
Instruments and warning/indicator lamps 18Turn signals
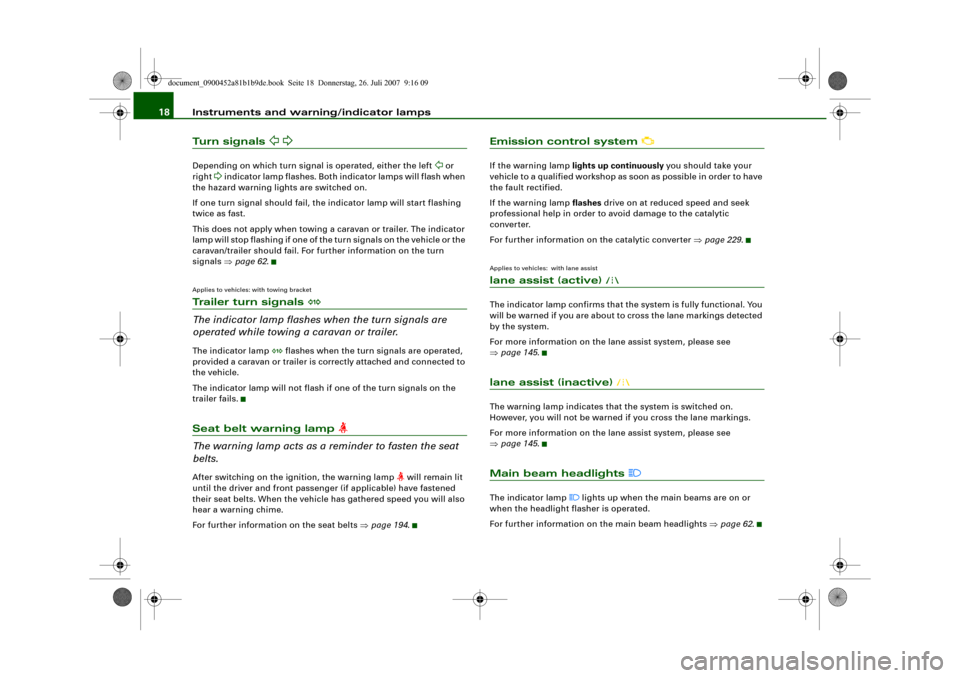
Depending on which turn signal is operated, either the left
or
right
indicator lamp flashes. Both indicator lamps will flash when
the hazard warning lights are switched on.
If one turn signal should fail, the indicator lamp will start flashing
twice as fast.
This does not apply when towing a caravan or trailer. The indicator
lamp will stop flashing if one of the turn signals on the vehicle or the
caravan/trailer should fail. For further information on the turn
signals ⇒page 62.
Applies to vehicles: with towing bracketTrailer turn signals
The indicator lamp flashes when the turn signals are
operated while towing a caravan or trailer.The indicator lamp
flashes when the turn signals are operated,
provided a caravan or trailer is correctly attached and connected to
the vehicle.
The indicator lamp will not flash if one of the turn signals on the
trailer fails.
Seat belt warning lamp
The warning lamp acts as a reminder to fasten the seat
belts.After switching on the ignition, the warning lamp
will remain lit
until the driver and front passenger (if applicable) have fastened
their seat belts. When the vehicle has gathered speed you will also
hear a warning chime.
For further information on the seat belts ⇒page 194.
Emission control system
If the warning lamp lights up continuously you should take your
vehicle to a qualified workshop as soon as possible in order to have
the fault rectified.
If the warning lamp flashes drive on at reduced speed and seek
professional help in order to avoid damage to the catalytic
converter.
For further information on the catalytic converter ⇒page 229.Applies to vehicles: with lane assistlane assist (active)
The indicator lamp confirms that the system is fully functional. You
will be warned if you are about to cross the lane markings detected
by the system.
For more information on the lane assist system, please see
⇒page 145.lane assist (inactive)
The warning lamp indicates that the system is switched on.
However, you will not be warned if you cross the lane markings.
For more information on the lane assist system, please see
⇒page 145.Main beam headlights
The indicator lamp
lights up when the main beams are on or
when the headlight flasher is operated.
For further information on the main beam headlights ⇒page 62.
document_0900452a81b1b9de.book Seite 18 Donnerstag, 26. Juli 2007 9:16 09
Page 25 of 342
Driver information system23
Controls
Safety
Driving tips
General maintenance
Self-help
Technical data
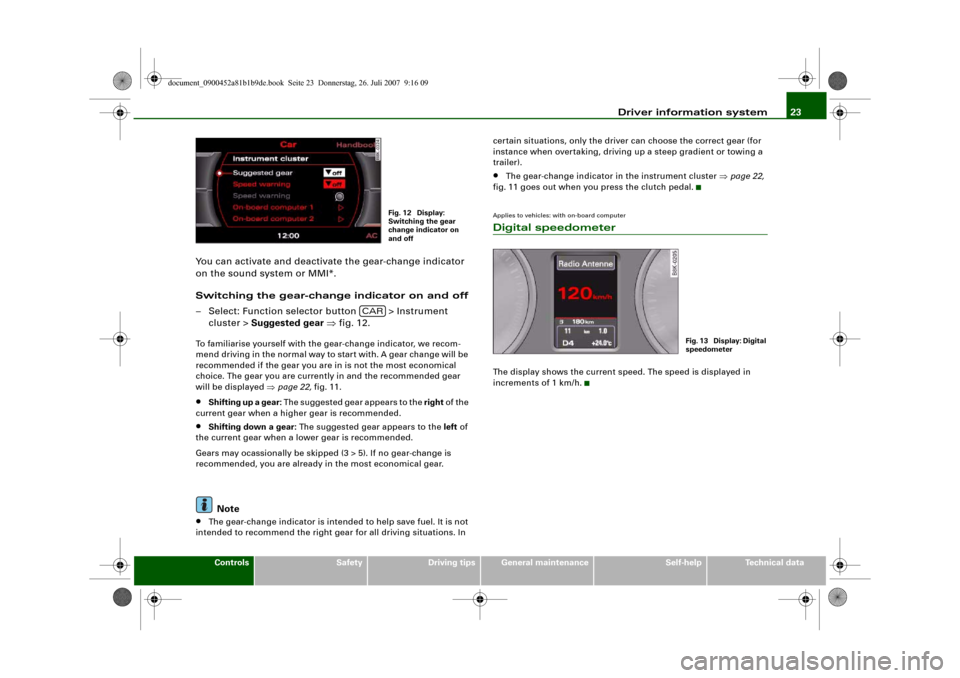
You can activate and deactivate the gear-change indicator
on the sound system or MMI*.
Switching the gear-change indicator on and off
– Select: Function selector button > Instrument
cluster > Suggested gear ⇒fig. 12.To familiarise yourself with the gear-change indicator, we recom-
mend driving in the normal way to start with. A gear change will be
recommended if the gear you are in is not the most economical
choice. The gear you are currently in and the recommended gear
will be displayed ⇒page 22, fig. 11.•
Shifting up a gear: The suggested gear appears to the right of the
current gear when a higher gear is recommended.
•
Shifting down a gear: The suggested gear appears to the left of
the current gear when a lower gear is recommended.
Gears may ocassionally be skipped (3 > 5). If no gear-change is
recommended, you are already in the most economical gear.Note
•
The gear-change indicator is intended to help save fuel. It is not
intended to recommend the right gear for all driving situations. In certain situations, only the driver can choose the correct gear (for
instance when overtaking, driving up a steep gradient or towing a
trailer).
•
The gear-change indicator in the instrument cluster ⇒page 22,
fig. 11 goes out when you press the clutch pedal.
Applies to vehicles: with on-board computerDigital speedometerThe display shows the current speed. The speed is displayed in
increments of 1 km/h.
Fig. 12 Display:
Switching the gear
change indicator on
and off
CAR
Fig. 13 Display: Digital
speedometer
document_0900452a81b1b9de.book Seite 23 Donnerstag, 26. Juli 2007 9:16 09
Page 36 of 342
Driver information system 34
will disappear after about 5 seconds, but you can call it up
again at any time by pressing the button:
Switch off engine and check oil level
– Stop the vehicle.
– Switch off the engine.
– Check the engine oil level ⇒page 258.
– Obtain professional assistance if necessary.If the engine oil level is too low
If the engine oil level is too low, add more oil ⇒page 259.
If the engine oil level is correct
If the
symbol flashes and the engine oil level is correct, obtain
professional assistance. Do not drive on. Do not continue to run the
engine, not even at idle speed.
Note
The oil pressure warning lamp
is not an indicator for the oil
level. The oil level should therefore be checked regularly.
Add engine oil immediately
WARNING! Please add oil immediately
If the symbol lights up, you must add oil immediately
⇒page 259.
Fault in the steering system
The steering wheel cannot be unlocked if there is a fault
in the electronic steering lock.If the symbol
flashes in the display, there is a malfunc-
tion in the electronic steering lock. The symbol is accompa-
nied by a driver message giving you more information
about the fault. This message will disappear after about
5 seconds, but you can call it up again at any time by
pressing the button:
Do not drive vehicle. Steering defective
– You should obtain professional assistance.
–Do not have the vehicle towed away.
WARNING
The vehicle must not be towed if there is a fault in the electronic
steering lock: the steering will be locked and the vehicle cannot be
steered. Towing a vehicle with locked steering can cause an acci-
dent.
Note
On some models the symbol may look slightly different.Ignition lock defective
A fault in the ignition lock must be rectified immediately.If the symbol
flashes in the display, there is a malfunc-
tion in the electronic ignition lock. The symbol is accompa-
nied by a driver message giving you more information
about the fault. This message will disappear after about
SET
SET
document_0900452a81b1b9de.book Seite 34 Donnerstag, 26. Juli 2007 9:16 09
Page 44 of 342
Doors and windows 42Doors and windowsCentral locking systemDescriptionThe vehicle can be locked and unlocked via the central locking
system. You can use any of the following:•
Remote control key ⇒page 47
•
Door handles in conjunction with advanced key* ⇒page 47
•
Lock on driver's door ⇒page 48
•
Interior central locking switch ⇒page 49
Unlocking one side of the vehicle only
When you lock the vehicle, the central locking system will lock the
doors and the boot lid. When you unlock the vehicle, the central
locking system will unlock either the driver's door only, or all the
locks on the vehicle, depending on the setting you have selected on
the sound system or MMI* ⇒page 50.
Automatic locking function (Auto Lock)
The Auto Lock function locks the doors and the boot lid when the
vehicle exceeds a speed of about 15 km/h.
The vehicle is unlocked again when the ignition key is removed.
Alternatively, the vehicle can also be unlocked via the central
locking switch or by pulling one of the inside door handles. The Auto
Lock function can be switched on and off on the sound system or
MMI* ⇒page 50.
In the event of an accident in which the airbags inflate, the doors
will be automatically unlocked to facilitate access and assistance.
Deadlock mechanism
The central locking system is combined with a deadlock mecha-
nism. Once the vehicle has been locked from the outside, the door handles on the inside are deactivated. This makes it more difficult
to break into the vehicle.
Anti-theft alarm system*
If the anti-theft alarm system senses interference with the vehicle it
triggers an audible and visible alarm.
The anti-theft alarm system switches on automatically when the
vehicle is locked. It switches off automatically if you unlock the
vehicle using the remote control.
If you unlock the vehicle by inserting the key in the driver's door, the
ignition must be switched on within 15 seconds, otherwise the
alarm will be triggered. On some export versions, the alarm is trig-
gered immediately when you open a door.
To deactivate the alarm, press the unlock button on the remote
control key or switch on the ignition. The alarm will also switch itself
off when it comes to the end of its cycle.
Switch off the interior monitor and tow-away protection if you wish
to prevent the alarm from being triggered accidentally ⇒page 50.
Turn signals
The turn signals will flash twice when the vehicle is unlocked and
once when the vehicle is locked. If the turn signals do not flash, one
of the doors, the bonnet or the boot lid is still open.
Accidental lock-out
The central locking system prevents you from being locked out of
the vehicle in the following situations:
•
When the driver's door is open, it cannot be locked together with
the other doors by pressing the central locking switch and then
closing the door ⇒page 49.
•
On vehicles with advanced key*, the boot lid will be released
again automatically if the remote control key that was last in use is
left inside the boot when the boot lid is closed ⇒page 51.
document_0900452a81b1b9de.book Seite 42 Donnerstag, 26. Juli 2007 9:16 09