2008 AUDI A4 key battery
[x] Cancel search: key batteryPage 5 of 342
Contents3
Controls
Safety
Driving tips
General maintenance
Self-help
Technical data
Safety
. . . . . . . . . . . . . . . . . . . . . . .
Safe driving
. . . . . . . . . . . . . . . . . . . .
General notes . . . . . . . . . . . . . . . . . .
Correct sitting positions . . . . . . . .
Pedal area . . . . . . . . . . . . . . . . . . . . .
Stowing luggage safely . . . . . . . . .
Seat belts
. . . . . . . . . . . . . . . . . . . . . .
Why is it so important to use seat
belts? . . . . . . . . . . . . . . . . . . . . . . . . .
Forces acting in a collision . . . . . .
How to wear seat belts properly .
Belt tensioners . . . . . . . . . . . . . . . . .
Airbag system
. . . . . . . . . . . . . . . . .
Description of airbag system . . . .
Front airbags . . . . . . . . . . . . . . . . . .
Side airbags . . . . . . . . . . . . . . . . . . .
Head-protection airbags
(sideguard) . . . . . . . . . . . . . . . . . . . .
Deactivating the front passenger's
airbag via the key-operated switch
Child safety
. . . . . . . . . . . . . . . . . . . .
Points to remember if children are
travelling in the car . . . . . . . . . . . . .
Child safety seats . . . . . . . . . . . . . .
Fitting child safety seats . . . . . . . .
Driving tips
. . . . . . . . . . . . . . . .
Intelligent technology
. . . . . . . . . .
Electronic stabilisation program
(ESP) . . . . . . . . . . . . . . . . . . . . . . . . . .
Brakes . . . . . . . . . . . . . . . . . . . . . . . . .
Power steering (servotronic) . . . . .
Four-wheel drive (quattro®) . . . . . .
Power management . . . . . . . . . . . .
Your vehicle and the
environment
. . . . . . . . . . . . . . . . . . .
Running in . . . . . . . . . . . . . . . . . . . . .
Emission control systems . . . . . . .
How to improve economy and
minimise pollution . . . . . . . . . . . . . .
Environmental compatibility . . . . .
Towing a trailer
. . . . . . . . . . . . . . . .
Driving the vehicle with a trailer or
caravan . . . . . . . . . . . . . . . . . . . . . . .
Removable towing bracket . . . . . .
General maintenance
. . .
Care of vehicle and cleaning
. . .
General notes . . . . . . . . . . . . . . . . . .
Care of exterior . . . . . . . . . . . . . . . . .
Care of interior . . . . . . . . . . . . . . . . .
Fuel and filling the tank
. . . . . . . .
Petrol . . . . . . . . . . . . . . . . . . . . . . . . . .
Diesel . . . . . . . . . . . . . . . . . . . . . . . . .
Filling the tank . . . . . . . . . . . . . . . . . .
Checking and topping up fluidsBonnet . . . . . . . . . . . . . . . . . . . . . . . .
Engine compartment layout . . . . . .
Engine oil . . . . . . . . . . . . . . . . . . . . . .
Cooling system . . . . . . . . . . . . . . . . .
Brake fluid . . . . . . . . . . . . . . . . . . . . .
Battery . . . . . . . . . . . . . . . . . . . . . . . .
Windscreen washer . . . . . . . . . . . . .Wheels and tyres
. . . . . . . . . . . . . . .
Wheels . . . . . . . . . . . . . . . . . . . . . . . .
Run flat tyres . . . . . . . . . . . . . . . . . . .
Accessories and modifications
to the vehicle
. . . . . . . . . . . . . . . . . . .
Accessories and replacement
parts . . . . . . . . . . . . . . . . . . . . . . . . . .
Modifications . . . . . . . . . . . . . . . . . .
Radio transmitters and business
equipment . . . . . . . . . . . . . . . . . . . . . 185
186
186
188
191
192
194
194
195
197
199
201
201
203
205
207
208
210
210
213
216221
222
222
224
225
226
226
229
229
229
229
231
232
232
235243
244
244
244
247
251
251
251
252
254
254
256
257
260
262
263
267
268
268
274
277
277
277
278
document_0900452a81b1b9de.book Seite 3 Donnerstag, 26. Juli 2007 9:16 09
Page 37 of 342
Driver information system35
Controls
Safety
Driving tips
General maintenance
Self-help
Technical data
5 seconds, but you can call it up again at any time by
pressing the button:
Ignition lock defective. Contact workshop!
–Do not switch off the engine.
– Drive the vehicle without delay to a qualified workshop
and have the fault repaired.The ignition cannot be switched off if there is a fault in the elec-
tronic ignition lock. For this reason, you should drive the vehicle
without delay to a qualified workshop and have the cause of the
fault repaired.
If the vehicle is equipped with the advanced key* feature, you
should not switch off the engine with the Stop/Start button because
it cannot be started again after the ignition has been switched off.
Note
On some models the symbol may look slightly different.Yellow symbols
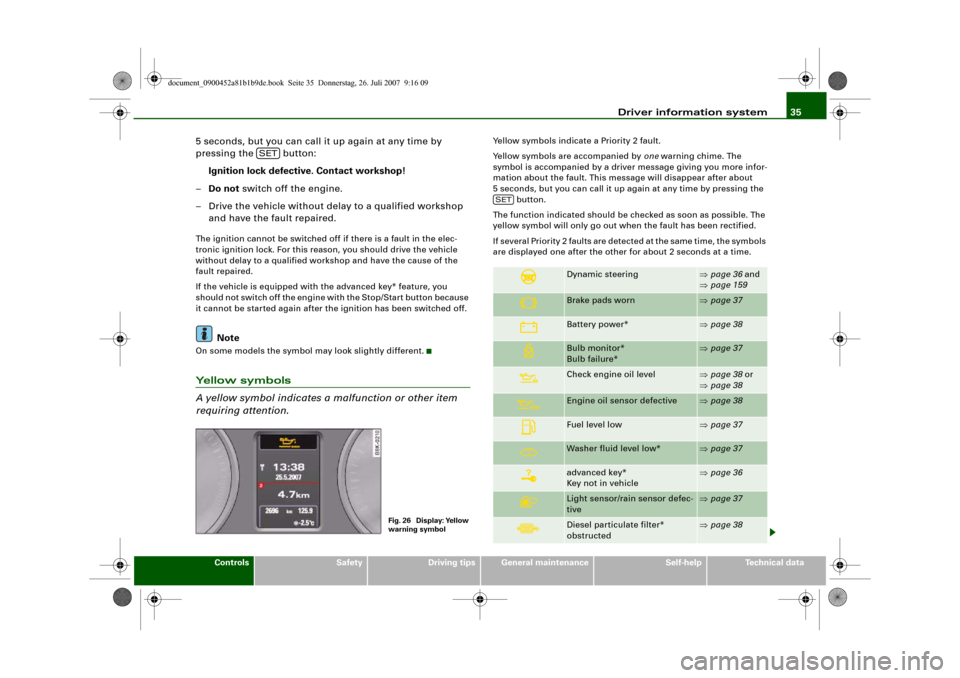
A yellow symbol indicates a malfunction or other item
requiring attention.
Yellow symbols indicate a Priority 2 fault.
Yellow symbols are accompanied by one warning chime. The
symbol is accompanied by a driver message giving you more infor-
mation about the fault. This message will disappear after about
5 seconds, but you can call it up again at any time by pressing the
button.
The function indicated should be checked as soon as possible. The
yellow symbol will only go out when the fault has been rectified.
If several Priority 2 faults are detected at the same time, the symbols
are displayed one after the other for about 2 seconds at a time.
SET
Fig. 26 Display: Yellow
warning symbol
Dynamic steering
⇒page 36 and
⇒page 159
Brake pads worn
⇒page 37
Battery power*
⇒page 38
Bulb monitor*
Bulb failure*
⇒page 37
Check engine oil level
⇒page 38 or
⇒page 38
Engine oil sensor defective
⇒page 38
Fuel level low
⇒page 37
Washer fluid level low*
⇒page 37
advanced key*
Key not in vehicle
⇒page 36
Light sensor/rain sensor defec-
tive
⇒page 37
Diesel particulate filter*
obstructed
⇒page 38
SET
document_0900452a81b1b9de.book Seite 35 Donnerstag, 26. Juli 2007 9:16 09
Page 38 of 342

Driver information system 36
NoteOn some models the speed limit warning 1
and speed limit
warning 2
will also be displayed as yellow symbols. These always
appear as a small symbol at the top of the display ⇒page 28.
Applies to vehicles: with Audi drive selectDynamic steering
Dynamic steering: system fault
This message and the
symbol will appear if a fault develops in the
system while the vehicle is moving. You can continue driving care-
fully at reduced speed to the next qualified workshop, however the
steering may feel heavier and its response may be more sensitive than usual. In addition, it is possible that the steering wheel will be
off centre when driving in a straight line.
Dynamic steering: initialising
If this message appears and the warning lamp
flashes in the
instrument cluster, this indicates that the dynamic steering is being
initialised. The steering wheel will move slightly after the engine is
started. The dynamic steering may be initialised if the steering
wheel was moved while the vehicle was stopped. The warning lamp
will go out when the initialisation has been completed.
WARNING
Have the system malfunction in the dynamic steering repaired by
a qualified workshop as soon as possible – risk of accident.
Note
The stabilisation functions of the dynamic steering ⇒page 222 are
not available in the event of a system malfunction.Applies to vehicles: with advanced keyKey not in vehicle
Key not in vehicle
This message will appear together with the symbol
if the remote
control key is removed from the vehicle while the engine is running.
This is to remind you not to continue driving without the key (for
example if you change drivers).
If the remote control key is not in the vehicle you will not be able to
switch on the ignition or restart the engine after it has been
switched off. You will also not be able to lock the vehicle from the
outside.
Dynamic headlight range con-
trol* defective
⇒page 39
Battery in remote control key
⇒page 44
Electro-mechanical
parking brake
⇒page 123
adaptive light* defective
⇒page 39
Ignition lock defective
⇒page 39
Windscreen wiper defective
⇒page 39
Suspension control
⇒page 39
TPMS
Tyre pressure monitoring sys-
tem
⇒page 39
document_0900452a81b1b9de.book Seite 36 Donnerstag, 26. Juli 2007 9:16 09
Page 46 of 342
Doors and windows 44Data stored on remote control key
Data related to the service and maintenance of the vehicle are
stored continuously on your remote control key. Your Audi dealer
can read out the data and will then be able to tell you what service
work is required. This also applies to vehicles with advanced key.
Personal convenience settings
If two people use the same car regularly, it is a good idea for each
person to have his or her “own” remote control key. When you
switch off the ignition or lock the vehicle, your personal settings for
the following convenience features are stored and assigned to the
remote control key:•
Air conditioner
•
Central locking system
•
Windows
•
parking system*
•
adaptive cruise control*
•
Audi drive select*
•
Seat memory*
The stored settings are then recalled automatically the next time the
vehicle is unlocked, the doors are opened or the ignition is switched
on.
WARNING
•
Always take the key with you when leaving the vehicle - even if
you only intend to be gone for a short time. This is especially
important if children are left in the car. They might otherwise be
able to start the engine or use power-operated equipment such as
the electric windows - this could lead to injuries.
•
Wait for the vehicle to come to a standstill before removing the
ignition key from the lock. Otherwise the steering lock could
engage suddenly, causing an accident.
Note
The function of the remote control key may be impaired by interfer-
ence from other nearby radio signals (for example from a mobile
telephone or TV transmitter) if these are in the same frequency
range.Indicator lamp on remote control key
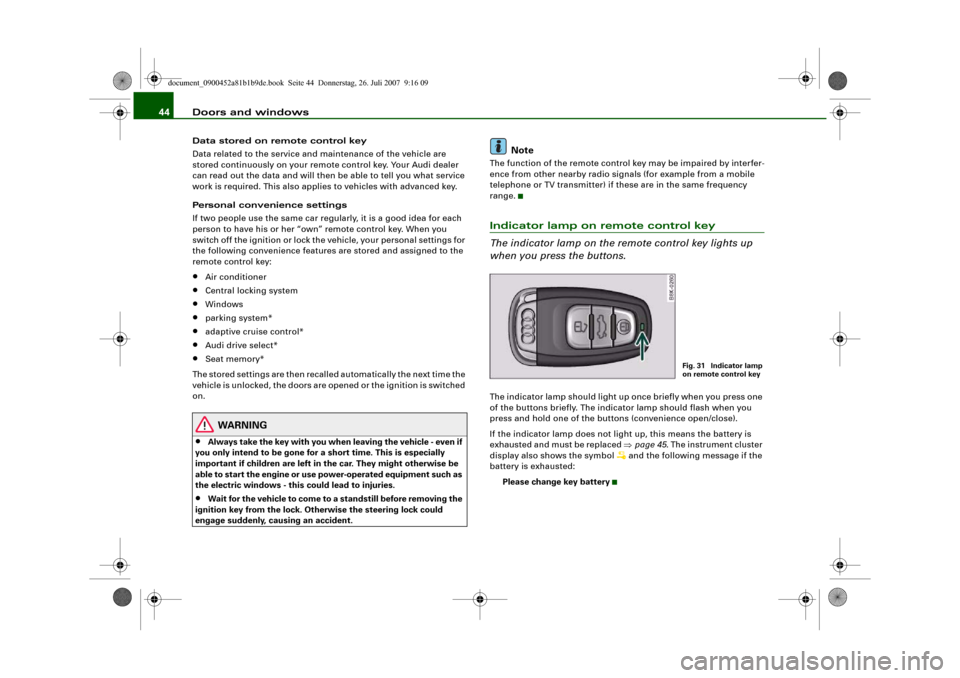
The indicator lamp on the remote control key lights up
when you press the buttons.The indicator lamp should light up once briefly when you press one
of the buttons briefly. The indicator lamp should flash when you
press and hold one of the buttons (convenience open/close).
If the indicator lamp does not light up, this means the battery is
exhausted and must be replaced ⇒page 45. The instrument cluster
display also shows the symbol
and the following message if the
battery is exhausted:
Please change key battery
Fig. 31 Indicator lamp
on remote control key
document_0900452a81b1b9de.book Seite 44 Donnerstag, 26. Juli 2007 9:16 09
Page 47 of 342
Doors and windows45
Controls
Safety
Driving tips
General maintenance
Self-help
Technical data
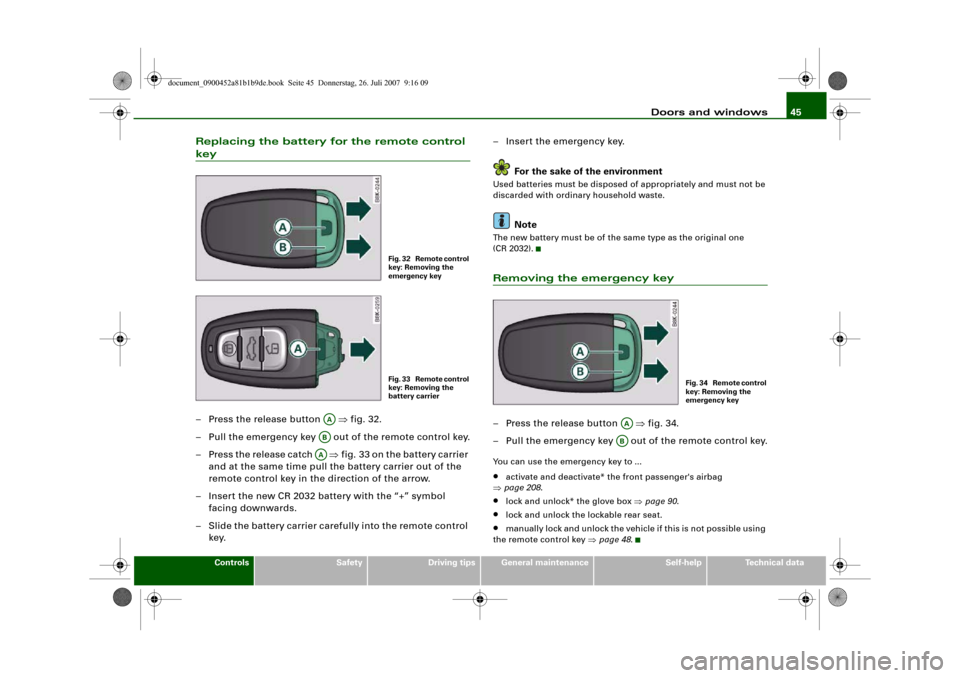
Replacing the battery for the remote control key– Press the release button ⇒fig. 32.
– Pull the emergency key out of the remote control key.
– Press the release catch ⇒fig. 33 on the battery carrier
and at the same time pull the battery carrier out of the
remote control key in the direction of the arrow.
– Insert the new CR 2032 battery with the “+” symbol
facing downwards.
– Slide the battery carrier carefully into the remote control
key.– Insert the emergency key.
For the sake of the environment
Used batteries must be disposed of appropriately and must not be
discarded with ordinary household waste.
Note
The new battery must be of the same type as the original one
(CR 2032).Removing the emergency key– Press the release button ⇒fig. 34.
– Pull the emergency key out of the remote control key.You can use the emergency key to ...•
activate and deactivate* the front passenger's airbag
⇒page 208.
•
lock and unlock* the glove box ⇒page 90.
•
lock and unlock the lockable rear seat.
•
manually lock and unlock the vehicle if this is not possible using
the remote control key ⇒page 48.
Fig. 32 Remote control
key: Removing the
emergency keyFig. 33 Remote control
key: Removing the
battery carrier
AAABAA
F i g . 3 4 R e m o t e c o n t r o l
key: Removing the
emergency key
AAAB
document_0900452a81b1b9de.book Seite 45 Donnerstag, 26. Juli 2007 9:16 09
Page 48 of 342
Doors and windows 46Emergency release for ignition key
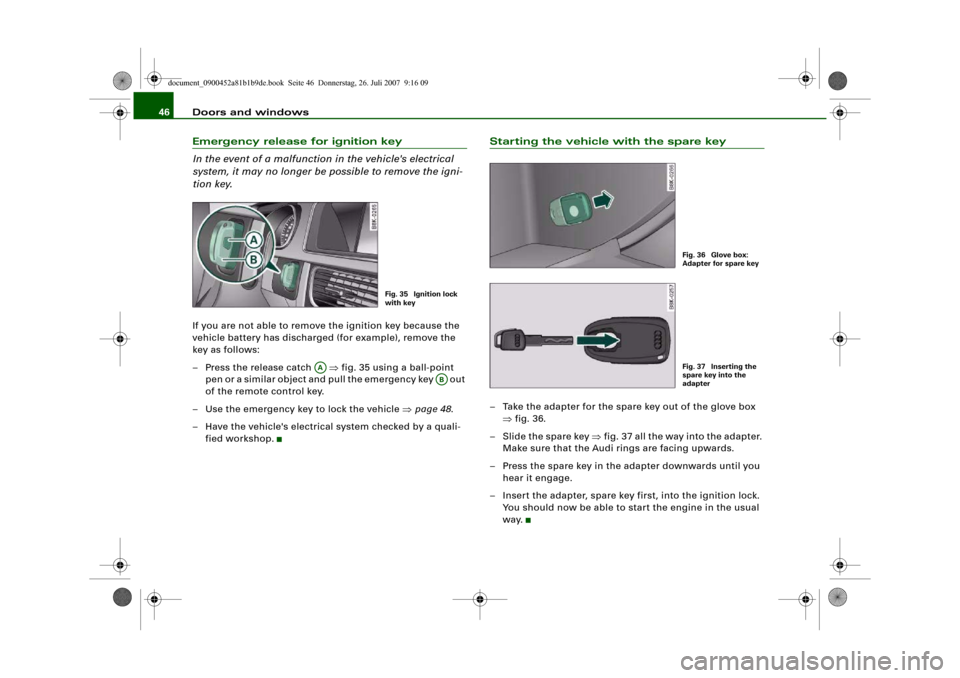
In the event of a malfunction in the vehicle's electrical
system, it may no longer be possible to remove the igni-
tion key.If you are not able to remove the ignition key because the
vehicle battery has discharged (for example), remove the
key as follows:
– Press the release catch ⇒fig. 35 using a ball-point
pen or a similar object and pull the emergency key out
of the remote control key.
– Use the emergency key to lock the vehicle ⇒page 48.
– Have the vehicle's electrical system checked by a quali-
fied workshop.
Starting the vehicle with the spare key– Take the adapter for the spare key out of the glove box
⇒fig. 36.
– Slide the spare key ⇒fig. 37 all the way into the adapter.
Make sure that the Audi rings are facing upwards.
– Press the spare key in the adapter downwards until you
hear it engage.
– Insert the adapter, spare key first, into the ignition lock.
You should now be able to start the engine in the usual
way.
Fig. 35 Ignition lock
with key
AA
AB
Fig. 36 Glove box:
Adapter for spare keyFig. 37 Inserting the
spare key into the
adapter
document_0900452a81b1b9de.book Seite 46 Donnerstag, 26. Juli 2007 9:16 09
Page 50 of 342
Doors and windows 48
Locking the vehicle
– Move the selector lever to position P (automatic
gearbox), otherwise it will not be possible to lock the
vehicle.
– Touch the sensor on the door handle once to lock the
vehicle ⇒.
– Touch the sensor a second time within 2 seconds to lock
the vehicle without activating the deadlock mechanism.The vehicle can be locked and unlocked from any of the doors. The
driver's door will always be unlocked as well when the passenger's
door is unlocked. The remote control key has to be within a range of
about 1.5 metres of the relevant door or the boot lid. It does not
matter where you carry the key, for instance whether it is in your
jacket pocket or in a briefcase.
The unlocking function may be affected if the sensor area on the
door handle is touched while the vehicle is being unlocked.
The locking function may be affected if you grasp the door handle
while the vehicle is being locked.
Once the doors have been locked, they cannot be opened again
immediately. This will enable you to check that the doors are prop-
erly closed.
The system will either unlock all the doors or one door only,
depending on the settings you have chosen on the sound system or
MMI* ⇒page 50.
WARNING
Do not leave anyone (especially children) in the car if it is locked
from the outside and the deadlock mechanism is activated: the
doors and windows cannot then be opened from the inside.
Locked doors could delay assistance in an emergency, potentially
putting lives at risk.
Note
Please note the following points if the vehicle is left parked for long
periods:•
To save electrical power, the proximity sensors are switched off
after a few days. You will then need to pull the door handle once to
unlock the vehicle, and a second time to open it.
•
To prevent the battery from becoming discharged and thus
maintain the vehicle's starting ability for as long as possible, the
power management system will gradually switch off convenience
functions that are not required. In this case you may not be able to
unlock the vehicle with this convenience function.
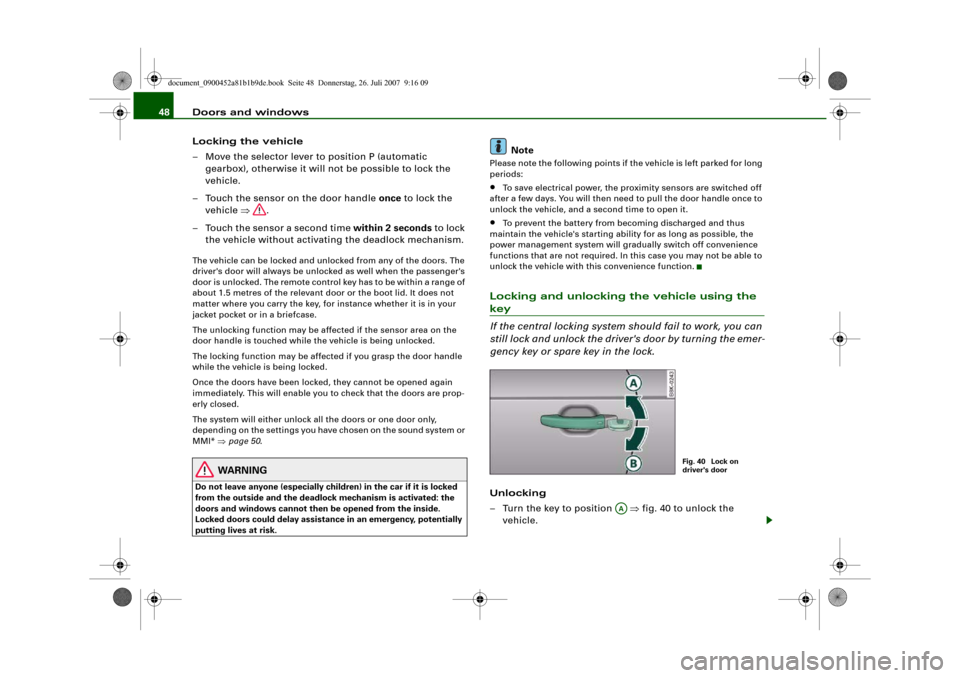
Locking and unlocking the vehicle using the key
If the central locking system should fail to work, you can
still lock and unlock the driver's door by turning the emer-
gency key or spare key in the lock.Unlocking
– Turn the key to position ⇒fig. 40 to unlock the
vehicle.
Fig. 40 Lock on
driver's door
AA
document_0900452a81b1b9de.book Seite 48 Donnerstag, 26. Juli 2007 9:16 09
Page 65 of 342
Lights and vision63
Controls
Safety
Driving tips
General maintenance
Self-help
Technical data
Caution
Do not use the main beam headlights or the headlight flasher if this
would dazzle oncoming traffic.Interior lightsFront interior lights
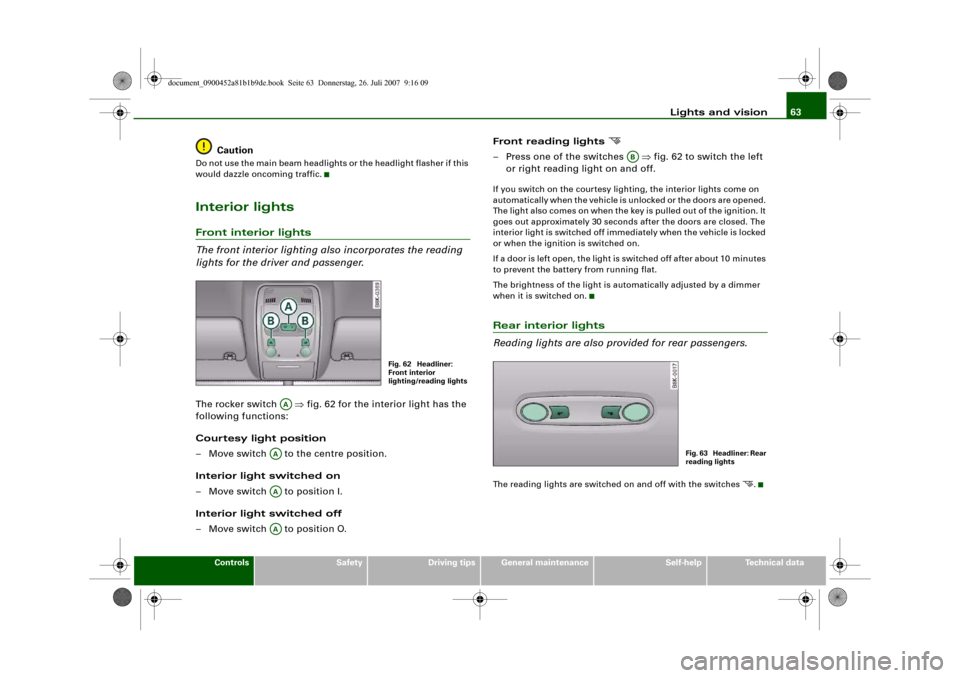
The front interior lighting also incorporates the reading
lights for the driver and passenger.The rocker switch ⇒fig. 62 for the interior light has the
following functions:
Courtesy light position
– Move switch to the centre position.
Interior light switched on
– Move switch to position I.
Interior light switched off
– Move switch to position O.Front reading lights
– Press one of the switches ⇒fig. 62 to switch the left
or right reading light on and off.If you switch on the courtesy lighting, the interior lights come on
automatically when the vehicle is unlocked or the doors are opened.
The light also comes on when the key is pulled out of the ignition. It
goes out approximately 30 seconds after the doors are closed. The
interior light is switched off immediately when the vehicle is locked
or when the ignition is switched on.
If a door is left open, the light is switched off after about 10 minutes
to prevent the battery from running flat.
The brightness of the light is automatically adjusted by a dimmer
when it is switched on.Rear interior lights
Reading lights are also provided for rear passengers.The reading lights are switched on and off with the switches
.
Fig. 62 Headliner:
Front interior
lighting/reading lights
AA
AAAAAA
AB
Fig. 63 Headliner: Rear
reading lights
document_0900452a81b1b9de.book Seite 63 Donnerstag, 26. Juli 2007 9:16 09