2008 AUDI A4 fog light
[x] Cancel search: fog lightPage 6 of 342
Contents 4Self-help
. . . . . . . . . . . . . . . . . . . . .
Self-help
. . . . . . . . . . . . . . . . . . . . . . . .
Warning triangle . . . . . . . . . . . . . . . .
First-aid kit . . . . . . . . . . . . . . . . . . . . .
Fire extinguisher . . . . . . . . . . . . . . . .
Tools and Tyre Mobility System . . .
Compact temporary spare wheel*
Tyre repairs . . . . . . . . . . . . . . . . . . . .
Changing a wheel . . . . . . . . . . . . . .
Jump-starting . . . . . . . . . . . . . . . . . .
Tow-starting and towing away . . .
Fuses and bulbs
. . . . . . . . . . . . . . . .
Fuses . . . . . . . . . . . . . . . . . . . . . . . . . .
Bulbs . . . . . . . . . . . . . . . . . . . . . . . . . .
Changing bulbs for headlights . . .
Changing bulb for front fog lights
Changing bulbs for rear lights in
side panel . . . . . . . . . . . . . . . . . . . . . .
Changing bulbs in boot lid . . . . . . .
Number plate light . . . . . . . . . . . . . .
Technical data
. . . . . . . . . . . .
General notes
. . . . . . . . . . . . . . . . . .
Explanation of technical data . . . .
Dimensions . . . . . . . . . . . . . . . . . . . .
Capacities . . . . . . . . . . . . . . . . . . . . .
Vehicle identification data . . . . . . .
Performance, weights and
dimensions
. . . . . . . . . . . . . . . . . . . .
Petrol engines . . . . . . . . . . . . . . . . .
Diesel engines . . . . . . . . . . . . . . . . .
Index
. . . . . . . . . . . . . . . . . . . . . . . . 281
282
282
282
283
283
284
285
288
293
295
300
300
304
306
310
311
314
315319
320
320
320
321
321
323
323
325
329
document_0900452a81b1b9de.book Seite 4 Donnerstag, 26. Juli 2007 9:16 09
Page 39 of 342
Driver information system37
Controls
Safety
Driving tips
General maintenance
Self-help
Technical data
Light sensor / rain sensor defective
Automatic headlights / automatic wipers defective
If the symbol appears, this means that the light sensor / rain
sensor is not functioning.For safety reasons, the dipped beam head-
lights will then be switched on permanently when the light switch
is set to the AUTO position. However, you can still switch the lights
on and off in the normal way with the light switch. If the rain sensor
is defective, the functions operated via the windscreen wiper lever
will still be available. You should have the light sensor / rain sensor
checked by a qualified workshop as soon as possible.
Brake pads worn
Brake pads!
If the symbol lights up, have the front brake pads (and, for
safety's sake the rear pads as well) inspected by a qualified
workshop.
Applies to vehicles: with bulb monitorBulb monitor
The bulb monitor checks whether the lights on the vehicle
are working.The bulb monitor checks whether the lights on the vehicle are
working. If it detects a defective bulb on the vehicle it will show a
yellow warning symbol together with a message indicating which
light is not working.
Bulb failure
If the symbol
lights up, this means that one of the turn signals
(front or rear), headlights, brake lights, rear lights, fog lights or the
rear fog light is not working.
WARNING
•
Bulbs are sensitive to pressure. The glass can break when you
touch the bulb, causing injury.
•
Incorrect handling of the high-voltage element of xenon gas-
discharge bulbs* can have potentially fatal consequences.Note
Have the components repaired or replaced by a qualified
workshop.Applies to vehicles: with washer fluid warning systemWasher fluid level low
Please top up washer fluid
If the symbol lights up, top up the fluid for the windscreen
washer and headlight washer system* ⇒page 267.
Fuel level low
Please refuel
When this symbol
comes on for the first time, there are about
8 litres of fuel left in the tank. You should fill up as soon as possible
⇒page 252.
If this warning symbol lights up although the fuel tank is sufficiently
filled, there is a malfunction in the fuel tank system. The display will
also show the driver message Tank system malfunction ! Contact
workshop. Please contact a qualified workshop.
document_0900452a81b1b9de.book Seite 37 Donnerstag, 26. Juli 2007 9:16 09
Page 59 of 342
Lights and vision57
Controls
Safety
Driving tips
General maintenance
Self-help
Technical data
Lights and visionLightsSwitching lights on and off
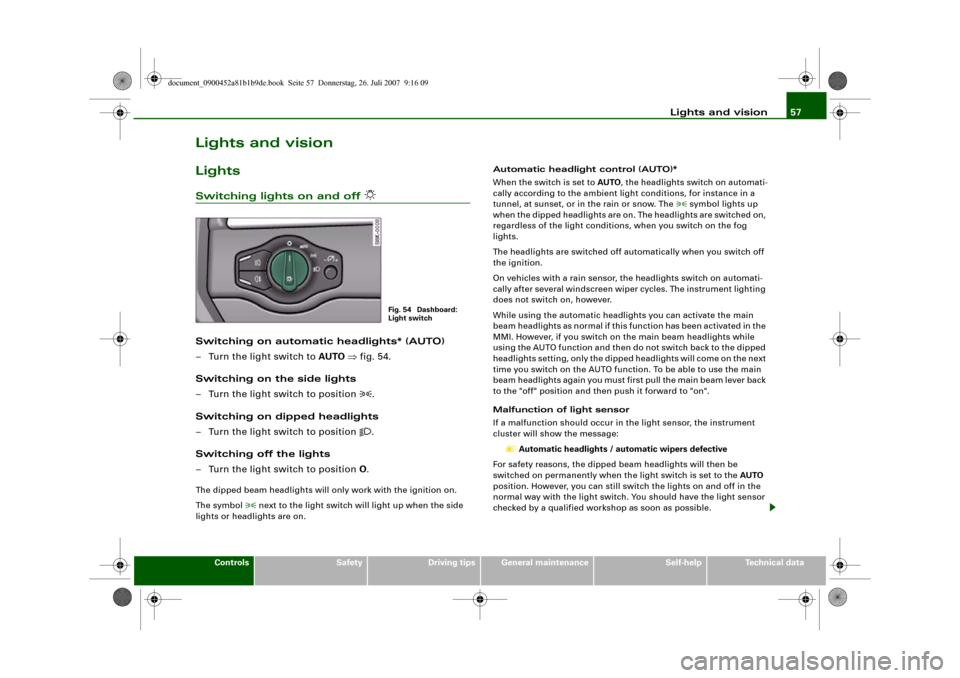
Switching on automatic headlights* (AUTO)
– Turn the light switch to AUTO ⇒fig. 54.
Switching on the side lights
– Turn the light switch to position
.
Switching on dipped headlights
– Turn the light switch to position
.
Switching off the lights
– Turn the light switch to position O.
The dipped beam headlights will only work with the ignition on.
The symbol
next to the light switch will light up when the side
lights or headlights are on.Automatic headlight control (AUTO)*
When the switch is set to AUTO, the headlights switch on automati-
cally according to the ambient light conditions, for instance in a
tunnel, at sunset, or in the rain or snow. The
symbol lights up
when the dipped headlights are on. The headlights are switched on,
regardless of the light conditions, when you switch on the fog
lights.
The headlights are switched off automatically when you switch off
the ignition.
On vehicles with a rain sensor, the headlights switch on automati-
cally after several windscreen wiper cycles. The instrument lighting
does not switch on, however.
While using the automatic headlights you can activate the main
beam headlights as normal if this function has been activated in the
MMI. However, if you switch on the main beam headlights while
using the AUTO function and then do not switch back to the dipped
headlights setting, only the dipped headlights will come on the next
time you switch on the AUTO function. To be able to use the main
beam headlights again you must first pull the main beam lever back
to the "off" position and then push it forward to "on".
Malfunction of light sensor
If a malfunction should occur in the light sensor, the instrument
cluster will show the message:
Automatic headlights / automatic wipers defective
For safety reasons, the dipped beam headlights will then be
switched on permanently when the light switch is set to the AUTO
position. However, you can still switch the lights on and off in the
normal way with the light switch. You should have the light sensor
checked by a qualified workshop as soon as possible.
Fig. 54 Dashboard:
Light switch
document_0900452a81b1b9de.book Seite 57 Donnerstag, 26. Juli 2007 9:16 09
Page 60 of 342
Lights and vision 58
WARNING
The automatic headlights are only intended to assist the driver.
The driver must always ensure that the headlights are used when
required, and may have to switch the m o n m a n u a l l y when the light
conditions or visibility are poor. For example, the light sensors are
not able to detect fog. Therefore, you should always switch on the
headlights
in these conditions and when driving after dark.
Note
•
The light sensor for automatic headlight control is located in the
mounting for the interior mirror. Do not affix any stickers on this
section of the windscreen to avoid malfunctioning of the sensor.
•
Some of the settings for the exterior lighting can be adjusted
⇒page 59.
•
If the lights are left on after the key has been taken out of the
ignition lock, a buzzer sounds when the driver's door is opened.
•
The use of the lighting described here is subject to the relevant
statutory requirements.
•
The coming home/leaving home function is active only when the
light switch is set to AUTO.
Fog lights
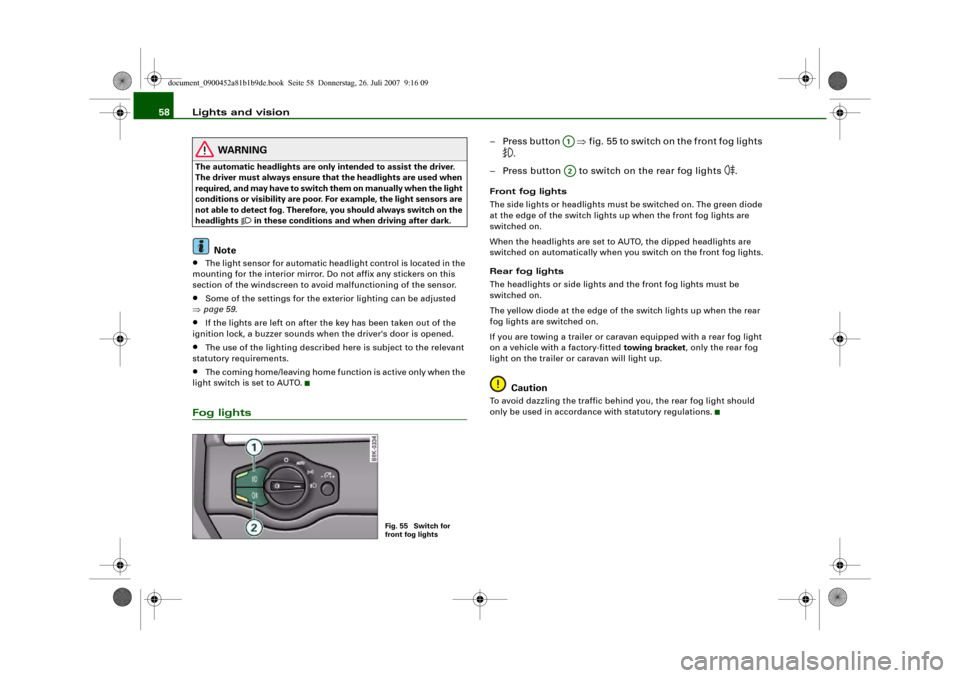
– Press button ⇒fig. 55 to switch on the front fog lights
.
– Press button to switch on the rear fog lights
.
Front fog lights
The side lights or headlights must be switched on. The green diode
at the edge of the switch lights up when the front fog lights are
switched on.
When the headlights are set to AUTO, the dipped headlights are
switched on automatically when you switch on the front fog lights.
Rear fog lights
The headlights or side lights and the front fog lights must be
switched on.
The yellow diode at the edge of the switch lights up when the rear
fog lights are switched on.
If you are towing a trailer or caravan equipped with a rear fog light
on a vehicle with a factory-fitted towing bracket, only the rear fog
light on the trailer or caravan will light up.
Caution
To avoid dazzling the traffic behind you, the rear fog light should
only be used in accordance with statutory regulations.
Fig. 55 Switch for
front fog lights
A1A2
document_0900452a81b1b9de.book Seite 58 Donnerstag, 26. Juli 2007 9:16 09
Page 128 of 342
Driving 126
– Pull the lever to position ⇒page 125, fig. 134 to
switch on the system.
– Drive at the speed you wish to set the system to.
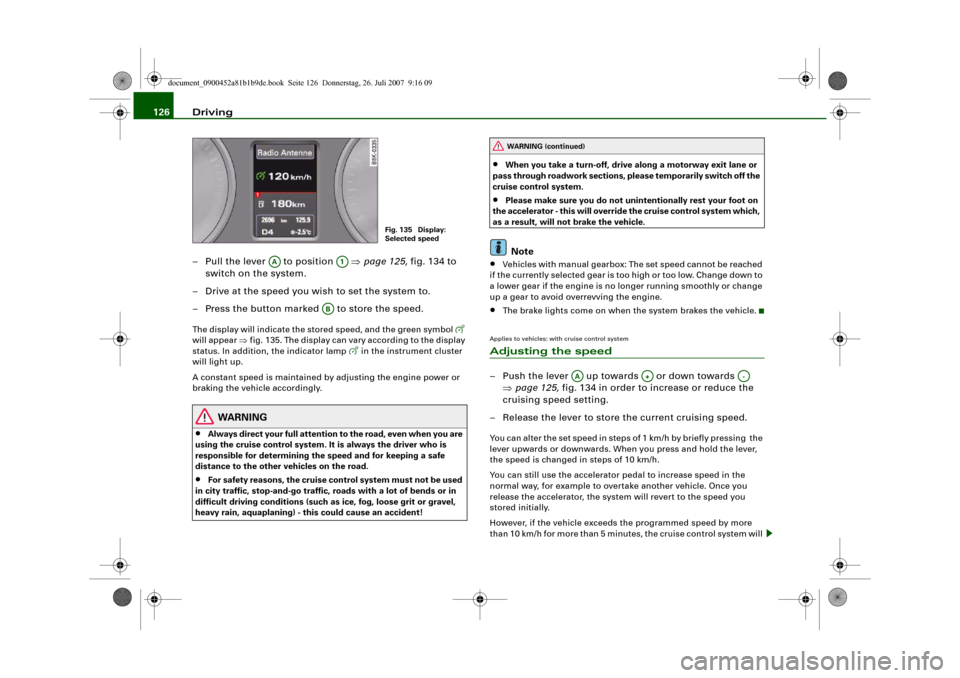
– Press the button marked to store the speed.The display will indicate the stored speed, and the green symbol
will appear ⇒fig. 135. The display can vary according to the display
status. In addition, the indicator lamp
in the instrument cluster
will light up.
A constant speed is maintained by adjusting the engine power or
braking the vehicle accordingly.
WARNING
•
Always direct your full attention to the road, even when you are
using the cruise control system. It is always the driver who is
responsible for determining the speed and for keeping a safe
distance to the other vehicles on the road.
•
For safety reasons, the cruise control system must not be used
in city traffic, stop-and-go traffic, roads with a lot of bends or in
difficult driving conditions (such as ice, fog, loose grit or gravel,
heavy rain, aquaplaning) - this could cause an accident!
•
When you take a turn-off, drive along a motorway exit lane or
pass through roadwork sections, please temporarily switch off the
cruise control system.
•
Please make sure you do not unintentionally rest your foot on
the accelerator - this will override the cruise control system which,
as a result, will not brake the vehicle.Note
•
Vehicles with manual gearbox: The set speed cannot be reached
if the currently selected gear is too high or too low. Change down to
a lower gear if the engine is no longer running smoothly or change
up a gear to avoid overrevving the engine.
•
The brake lights come on when the system brakes the vehicle.
Applies to vehicles: with cruise control systemAdjusting the speed– Push the lever up towards or down towards
⇒page 125, fig. 134 in order to increase or reduce the
cruising speed setting.
– Release the lever to store the current cruising speed.You can alter the set speed in steps of 1 km/h by briefly pressing the
lever upwards or downwards. When you press and hold the lever,
the speed is changed in steps of 10 km/h.
You can still use the accelerator pedal to increase speed in the
normal way, for example to overtake another vehicle. Once you
release the accelerator, the system will revert to the speed you
stored initially.
However, if the vehicle exceeds the programmed speed by more
than 10 km/h for more than 5 minutes, the cruise control system will
Fig. 135 Display:
Selected speed
AA
A1
AB
WARNING (continued)
AA
A+
A-
document_0900452a81b1b9de.book Seite 126 Donnerstag, 26. Juli 2007 9:16 09
Page 195 of 342
Safe driving193
Controls
Safety
Driving tips
General maintenance
Self-help
Technical data inside. In this case the child would be unable to get out of the
vehicle without help. This could have fatal consequences.
•
Never allow children to play in or around the vehicle. Always
close and lock the boot lid and all the doors when you leave the
vehicle.
•
Never let passengers ride in the luggage compartment. All
occupants must be properly restrained by the seat belts at all
times ⇒page 194.Note
•
Air circulation in the vehicle helps reduce fogging of the
windows. Used air escapes through ventilation slots in the rear of
the vehicle. Make sure that these ventilation slots are not
obstructed.
•
Suitable belts for securing loads to the fastening rings* are
commercially available.
Applies to vehicles: with fastening ringsFastening rings
Unsecured loads are a hazard to all vehicle occupants.There are fastening rings in the luggage compartment
which can be used to secure luggage and other objects
⇒page 79.
– Use the fastening rings to secure items safely in the
luggage compartment ⇒ in “Loading the luggage
compartment” on page 79.During a collision or an accident, even small and light objects can
possess so much energy that they can cause very severe injuries.
The amount of this “kinetic energy” depends on the speed of the vehicle and the weight of the object. The most significant factor,
however, is the speed of the vehicle.
An example: An object weighing 4.5 kg is lying unsecured in the
vehicle. During a frontal collision at a speed of 50 km/h, this object
generates a force corresponding to 20 times its weight. That means
that the effective weight of the object increases to about 90 kg. You
can imagine the severity of the injuries which might be sustained if
this “projectile” strikes an occupant as it flies through the
passenger compartment.
WARNING
If items of luggage or other objects are secured to the fastening
rings with inappropriate or damaged retaining cords, injuries
could result in the event of sudden braking or a collision.•
To prevent pieces of luggage or other objects from flying
forward, always use appropriate retaining cords which are prop-
erly secured to the fastening rings.
•
Never secure a child seat on the fastening rings.
WARNING (continued)
document_0900452a81b1b9de.book Seite 193 Donnerstag, 26. Juli 2007 9:16 09
Page 306 of 342
Fuses and bulbs 304BulbsChanging bulbs
Changing bulbs requires a certain degree of practical
skill.You can change the following bulbs for exterior lights yourself:•
Halogen headlights: Bulb for dipped headlights
•
Halogen headlights: Bulb for main beam headlights
•
Bulb for fog light
•
Bulbs for rear lights in boot lid
•
Bulbs for rear lights in side panel
•
Bulbs for number plate light
The following bulbs should only be changed by a qualified work-
shop:
•
Halogen headlights: Bulb for turn signals
•
Halogen headlights: Bulb for side lights
•
Xenon headlights*: Bulb for turn signals
•
Xenon headlights*: Light source for daytime running
lights/parking lights
•
Bulb for headlights: Bi-xenon lights ⇒
•
Light source for turn signal in exterior mirror housing
•
Light source for high-level brake light
As a rule, you require a certain degree of practical skill to change
defective bulbs. This applies in particular to those bulbs which are
only accessible from the engine compartment.
If in doubt, we recommend that you have defective bulbs changed
by a qualified workshop or qualified mechanic.
If you do decide to change bulbs in the engine compartment your-
self, be aware of the safety risks involved ⇒page 255 ⇒.
Types of bulbs
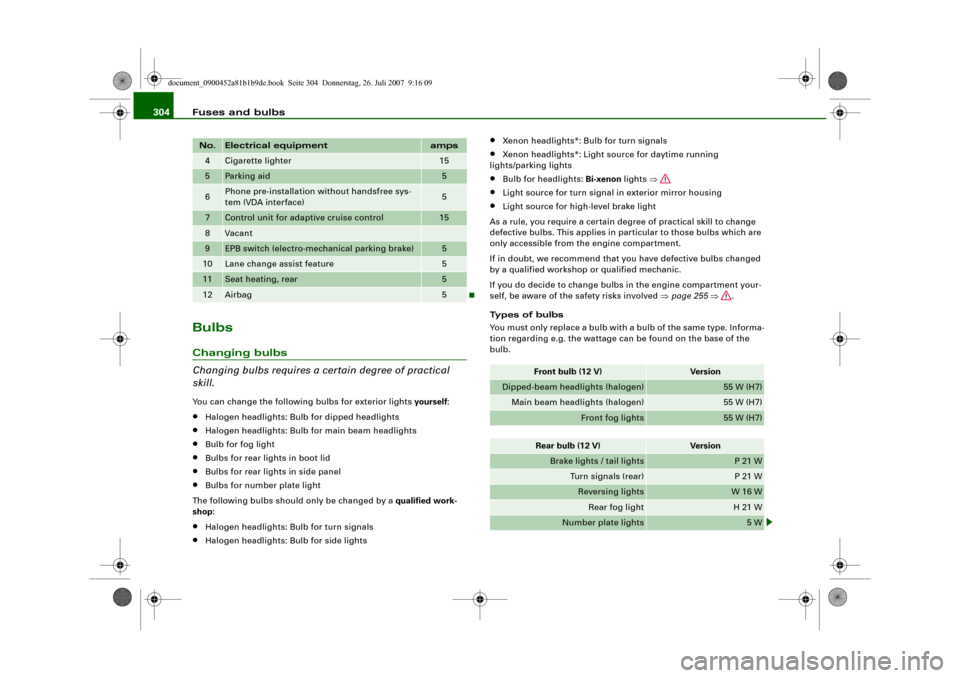
You must only replace a bulb with a bulb of the same type. Informa-
tion regarding e.g. the wattage can be found on the base of the
bulb.
4
Cigarette lighter
15
5
Parking aid
5
6
Phone pre-installation without handsfree sys-
tem (VDA interface)
5
7
Control unit for adaptive cruise control
15
8
Vacant
9
EPB switch (electro-mechanical parking brake)
5
10
Lane change assist feature
5
11
Seat heating, rear
5
12
Airbag
5
No.
Electrical equipment
amps
Front bulb (12 V)
Vers io n
Dipped-beam headlights (halogen)
55 W (H7)
Main beam headlights (halogen)
55 W (H7)
Front fog lights
55 W (H7)
Rear bulb (12 V)
Vers io n
Brake lights / tail lights
P 21 W
Turn signals (rear)
P 21 W
Reversing lights
W 16 W
Rear fog light
H 21 W
Number plate lights
5 W
document_0900452a81b1b9de.book Seite 304 Donnerstag, 26. Juli 2007 9:16 09
Page 312 of 342
Fuses and bulbs 310
– Press the connector in the direction of the arrow
⇒page 309, fig. 297 until the bulb engages.
– Check that the bulb is securely seated in the bulb
housing.
–Fit the cover.
– Install the headlight ⇒page 306.
– Check whether the new bulb is working.
– Have the headlight settings checked.Changing bulb for front fog lightsApplies to vehicles: with halogen main beam headlightsPreparations
The description for changing the bulb refers to the right fog
light; in principle the same procedure applies to the left fog
light.
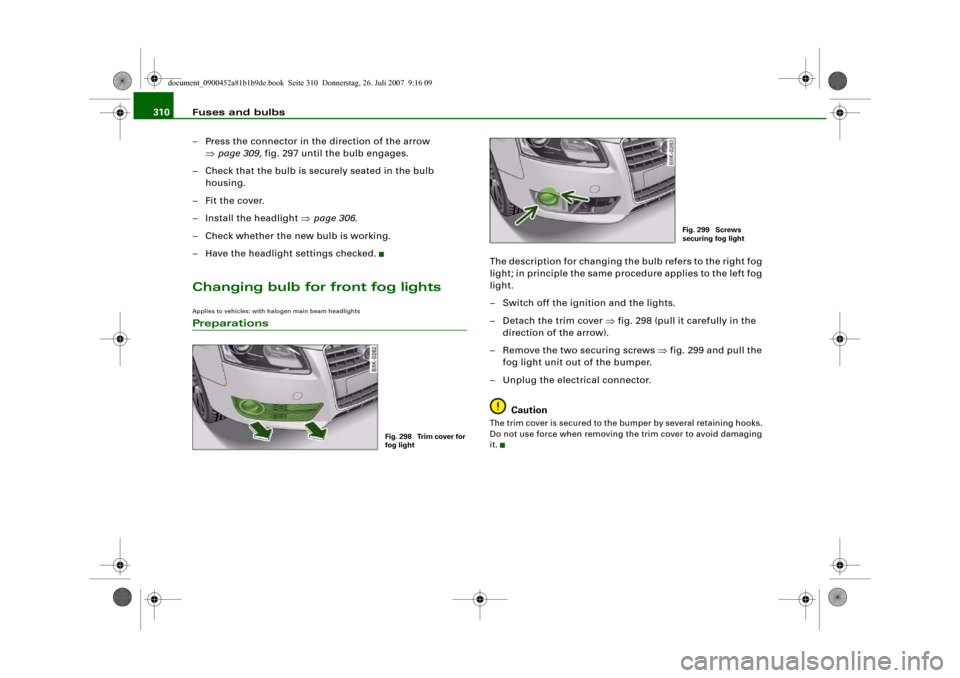
– Switch off the ignition and the lights.
– Detach the trim cover ⇒fig. 298 (pull it carefully in the
direction of the arrow).
– Remove the two securing screws ⇒fig. 299 and pull the
fog light unit out of the bumper.
– Unplug the electrical connector.
CautionThe trim cover is secured to the bumper by several retaining hooks.
Do not use force when removing the trim cover to avoid damaging
it.
Fig. 298 Trim cover for
fog light
Fig. 299 Screws
securing fog light
document_0900452a81b1b9de.book Seite 310 Donnerstag, 26. Juli 2007 9:16 09