2008 AUDI A4 key
[x] Cancel search: keyPage 77 of 342
Seats and storage75
Controls
Safety
Driving tips
General maintenance
Self-help
Technical data
Adjusting contour of lumbar support
– Press the front or rear of switch to increase or
decrease the curvature of the lumbar support as
required.
Adjusting height of lumbar support
– Press the top or bottom of adjuster switch to move the
lumbar support upwards or downwards as required.
Moving seat backwards or forwards
– Press switch ⇒page 74, fig. 76 forwards or back-
wards.
Adjusting seat height
– Press switch up or down.
Raising/lowering seat at front
– Press the front of switch up or down.
Raising/lowering seat at rear
– Press the rear of switch up or down.
Adjusting backrest angle
– Press switch forwards or backwards.
Extending or shortening the thigh support*
– Lift the control below the seat cushion. The front seat
cushion will spring forward.
– Slide the seat cushion back to the normal position after
each use.
WARNING
•
Never adjust the driver's seat when the vehicle is moving - this
could lead to an accident.
•
The electrical seat adjustment also works when the ignition is
off and when the key is not in the ignition. To avoid accidental inju-
ries, never leave children unattended in the vehicle.
•
Be careful when adjusting the seat height. Careless or uncon-
trolled use of the height adjustment can cause injuries.
•
Do not drive with the backrests of the front seats reclined too
far as otherwise the seat belt and airbag could fail to restrain the
wearer properly in an accident, possibly leading to injury.
Seat memoryMemory for driver's seat
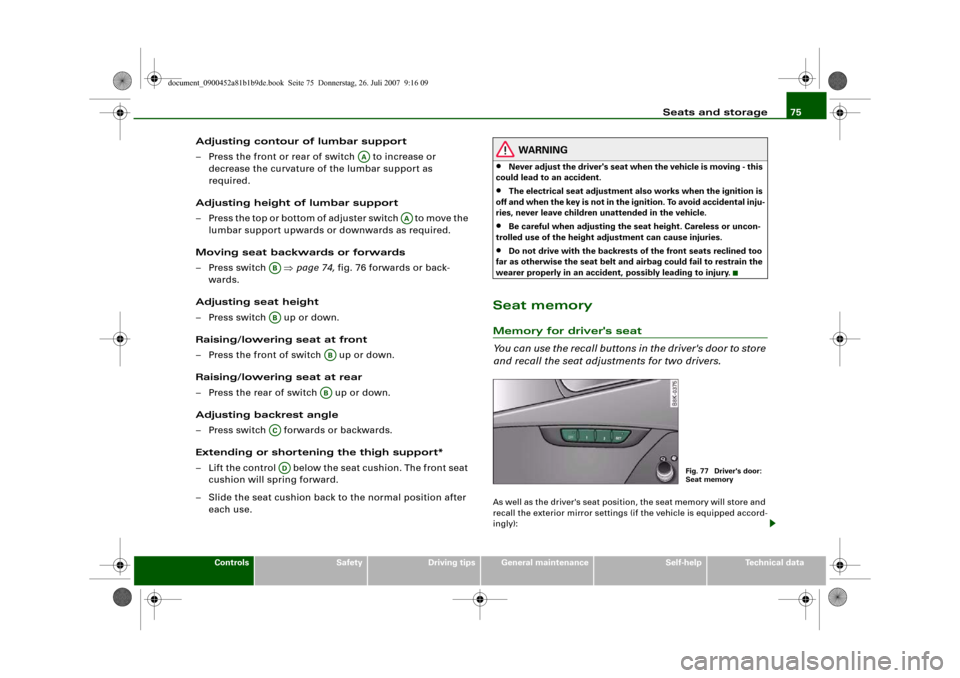
You can use the recall buttons in the driver's door to store
and recall the seat adjustments for two drivers.As well as the driver's seat position, the seat memory will store and
recall the exterior mirror settings (if the vehicle is equipped accord-
ingly):
AA
AA
ABAB
ABAB
ACAD
Fig. 77 Driver's door:
Seat memory
document_0900452a81b1b9de.book Seite 75 Donnerstag, 26. Juli 2007 9:16 09
Page 78 of 342
Seats and storage 76Storing and recalling settings
You can store and recall the settings for two different drivers using
the recall buttons 1 and 2 ⇒page 75, fig. 77 ⇒page 76.
In addition, the current settings are automatically stored when you
lock the vehicle and assigned to the remote control key that is being
used. When you unlock the vehicle, the system automatically recalls
the settings stored on that remote control key.
Switching seat memory on and off
The seat memory will be out of action if the switch has been
pressed and the diode in the switch is lit. In this case, the setting
cannot be stored.
The stored settings will all remain in the memory. However, the seat
can now only be adjusted using the conventional electrical
adjustment.Applies to vehicles: with seat memoryStoring and recalling settingsStoring settings
– Adjust the driver's seat as required.
– Adjust both exterior mirrors.
– Press the button. The diode in the switch will light
up to indicate that it is ready to store the settings. Now
press the desired recall button for at least a second.
– Release the button. The setting is now stored on the
selected recall button.
Recalling settings
– If the driver's door is open, press the desired recall
button briefly.– If the driver's door is closed, press and hold down the
desired recall button until the programmed settings are
reached.
A tone will sound and the diode in the button ⇒page 75,
fig. 77 will light up to confirm that the settings have been stored.
When you lock the vehicle the current settings are automatically
stored and assigned to the remote control key. However, the
settings assigned to the remote control key will not overwrite the
settings stored on recall buttons 1 and 2. The settings stored on the
recall buttons can be called up at any time. When you unlock the
vehicle, the settings assigned to the remote control key are recalled
automatically.
If your vehicle is also driven by other persons using your remote
control key, it is advisable to store your personal settings on one of
the recall buttons. You can then recall your own settings at any time
simply by pressing the corresponding recall button. When you lock
the vehicle these settings are then stored automatically and
assigned once again to the remote control key.
WARNING
•
For safety reasons, never recall seat settings when the vehicle
is moving - this could lead to an accident.
•
In an emergency the recall function can be stopped at any time
by pressing the switch, or by briefly pressing any of the
recall buttons.
OFF
SET
SET
ON/OFF
document_0900452a81b1b9de.book Seite 76 Donnerstag, 26. Juli 2007 9:16 09
Page 79 of 342
Seats and storage77
Controls
Safety
Driving tips
General maintenance
Self-help
Technical data
Applies to vehicles: with seat memoryActivating memory for remote control key
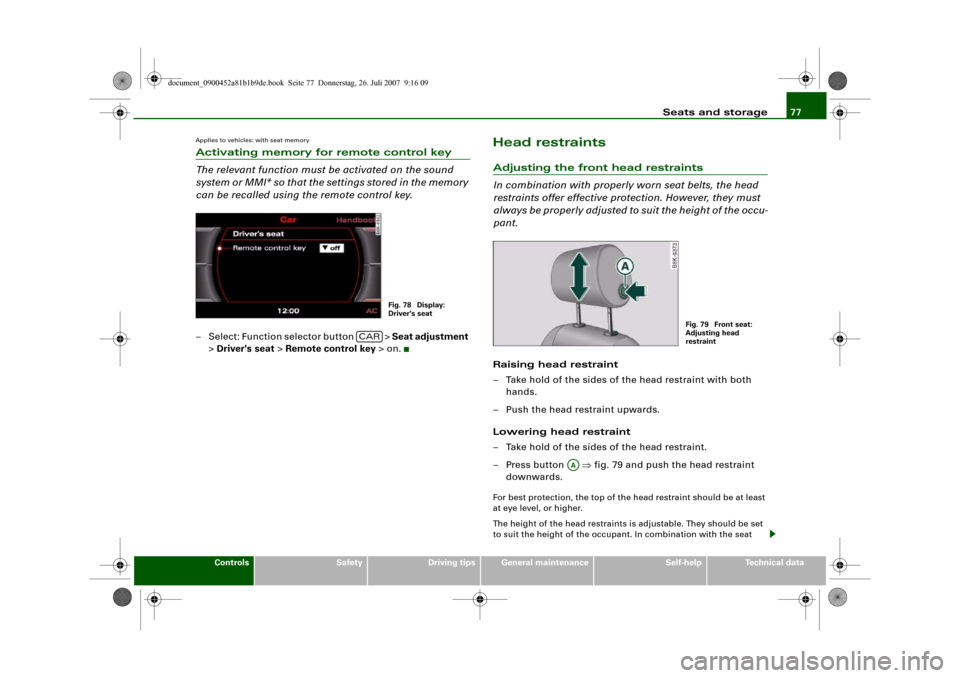
The relevant function must be activated on the sound
system or MMI* so that the settings stored in the memory
can be recalled using the remote control key.– Select: Function selector button > Seat adjustment
> Driver's seat > Remote control key > on.
Head restraintsAdjusting the front head restraints
In combination with properly worn seat belts, the head
restraints offer effective protection. However, they must
always be properly adjusted to suit the height of the occu-
pant.Raising head restraint
– Take hold of the sides of the head restraint with both
hands.
– Push the head restraint upwards.
Lowering head restraint
– Take hold of the sides of the head restraint.
– Press button ⇒fig. 79 and push the head restraint
downwards.For best protection, the top of the head restraint should be at least
at eye level, or higher.
The height of the head restraints is adjustable. They should be set
to suit the height of the occupant. In combination with the seat
Fig. 78 Display:
Driver's seat
CAR
Fig. 79 Front seat:
Adjusting head
restraint
AA
document_0900452a81b1b9de.book Seite 77 Donnerstag, 26. Juli 2007 9:16 09
Page 83 of 342
Seats and storage81
Controls
Safety
Driving tips
General maintenance
Self-help
Technical data
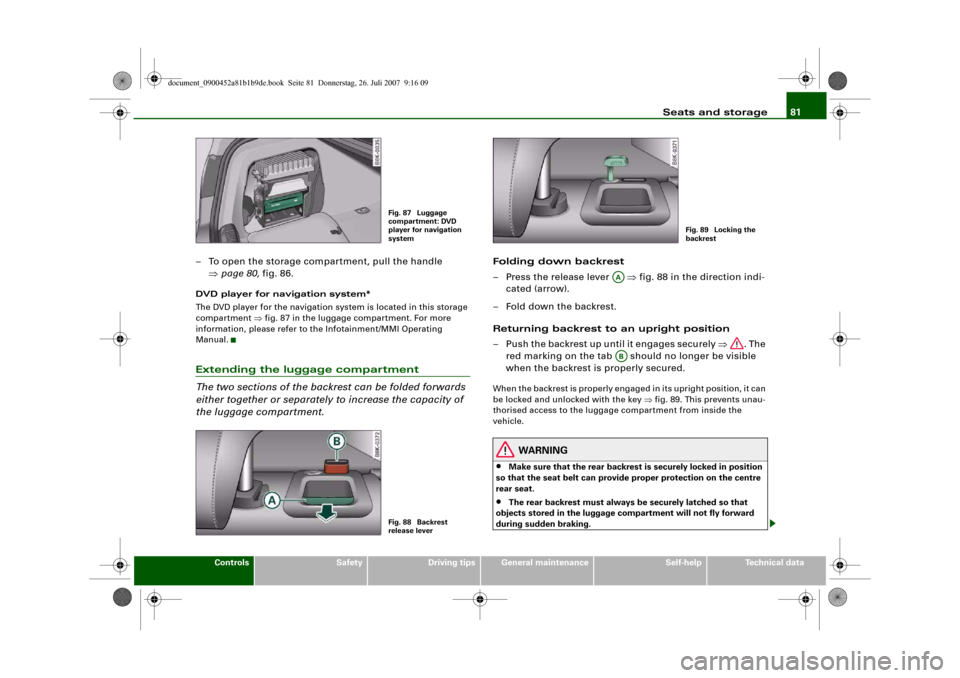
– To open the storage compartment, pull the handle
⇒page 80, fig. 86.DVD player for navigation system*
The DVD player for the navigation system is located in this storage
compartment ⇒fig. 87 in the luggage compartment. For more
information, please refer to the Infotainment/MMI Operating
Manual.Extending the luggage compartment
The two sections of the backrest can be folded forwards
either together or separately to increase the capacity of
the luggage compartment.
Folding down backrest
– Press the release lever ⇒fig. 88 in the direction indi-
cated (arrow).
– Fold down the backrest.
Returning backrest to an upright position
– Push the backrest up until it engages securely ⇒. The
red marking on the tab should no longer be visible
when the backrest is properly secured.When the backrest is properly engaged in its upright position, it can
be locked and unlocked with the key ⇒fig. 89. This prevents unau-
thorised access to the luggage compartment from inside the
vehicle.
WARNING
•
Make sure that the rear backrest is securely locked in position
so that the seat belt can provide proper protection on the centre
rear seat.
•
The rear backrest must always be securely latched so that
objects stored in the luggage compartment will not fly forward
during sudden braking.
Fig. 87 Luggage
compartment: DVD
player for navigation
systemFig. 88 Backrest
release lever
Fig. 89 Locking the
backrest
AAAB
document_0900452a81b1b9de.book Seite 81 Donnerstag, 26. Juli 2007 9:16 09
Page 89 of 342
Seats and storage87
Controls
Safety
Driving tips
General maintenance
Self-help
Technical data
Cigarette lighter and electrical
socketsCigarette lighterUsing cigarette lighter
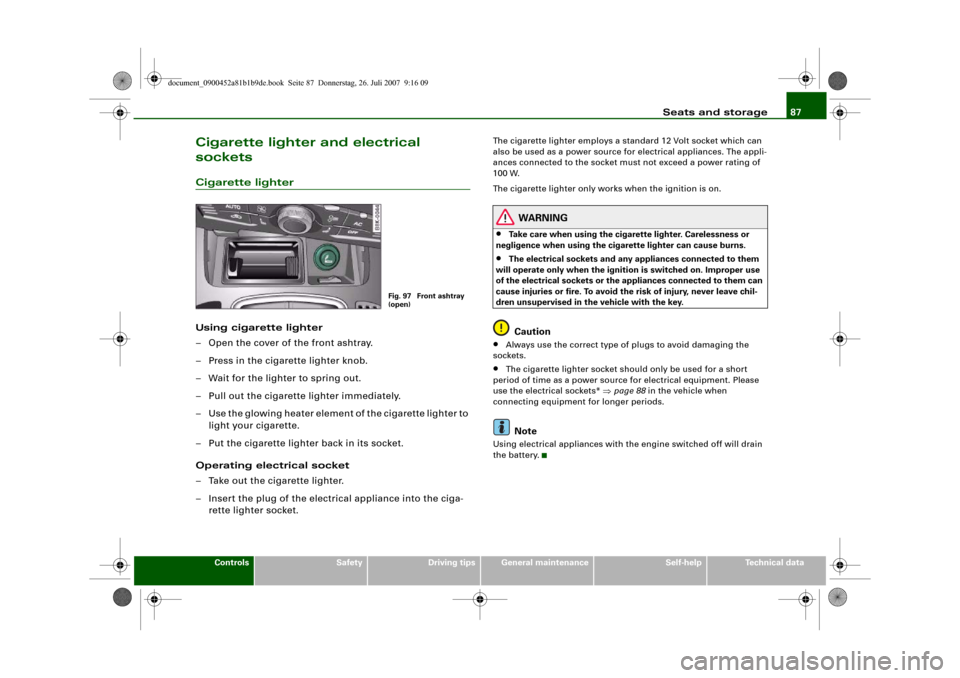
– Open the cover of the front ashtray.
– Press in the cigarette lighter knob.
– Wait for the lighter to spring out.
– Pull out the cigarette lighter immediately.
– Use the glowing heater element of the cigarette lighter to
light your cigarette.
– Put the cigarette lighter back in its socket.
Operating electrical socket
– Take out the cigarette lighter.
– Insert the plug of the electrical appliance into the ciga-
rette lighter socket.
The cigarette lighter employs a standard 12 Volt socket which can
also be used as a power source for electrical appliances. The appli-
ances connected to the socket must not exceed a power rating of
100 W.
The cigarette lighter only works when the ignition is on.
WARNING
•
Take care when using the cigarette lighter. Carelessness or
negligence when using the cigarette lighter can cause burns.
•
The electrical sockets and any appliances connected to them
will operate only when the ignition is switched on. Improper use
of the electrical sockets or the appliances connected to them can
cause injuries or fire. To avoid the risk of injury, never leave chil-
dren unsupervised in the vehicle with the key.Caution
•
Always use the correct type of plugs to avoid damaging the
sockets.
•
The cigarette lighter socket should only be used for a short
period of time as a power source for electrical equipment. Please
use the electrical sockets* ⇒page 88 in the vehicle when
connecting equipment for longer periods.Note
Using electrical appliances with the engine switched off will drain
the battery.
Fig. 97 Front ashtray
(open)
document_0900452a81b1b9de.book Seite 87 Donnerstag, 26. Juli 2007 9:16 09
Page 90 of 342
Seats and storage 88Applies to vehicles: with 12 Volt sockets12 Volt sockets
Electrical equipment can be connected to both 12 Volt
sockets.Electrical socket in luggage compartment and
front centre console
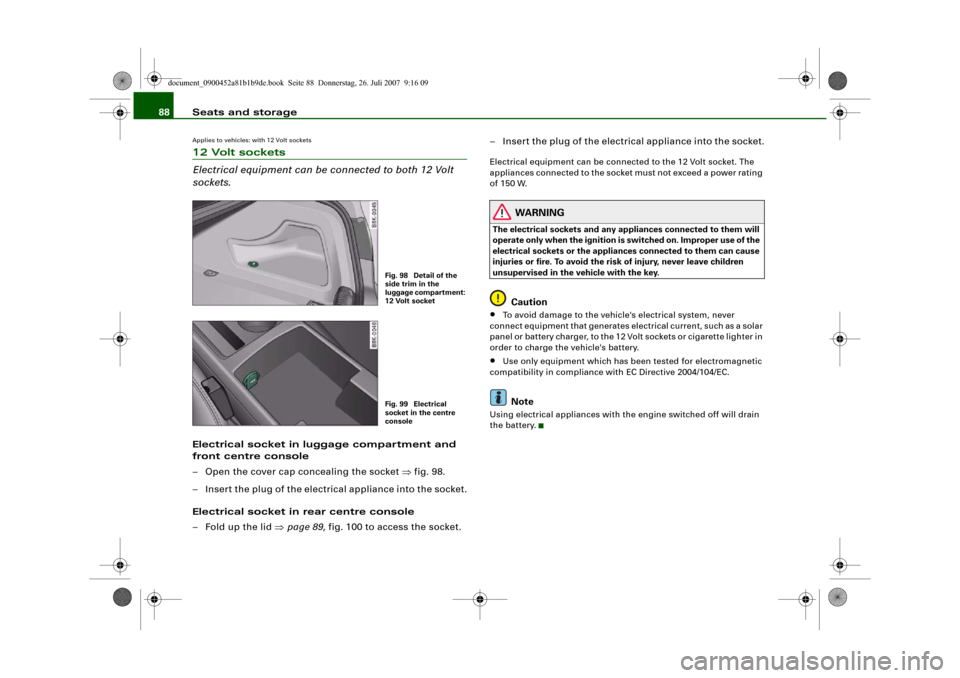
– Open the cover cap concealing the socket ⇒fig. 98.
– Insert the plug of the electrical appliance into the socket.
Electrical socket in rear centre console
– Fold up the lid ⇒page 89, fig. 100 to access the socket.– Insert the plug of the electrical appliance into the socket.
Electrical equipment can be connected to the 12 Volt socket. The
appliances connected to the socket must not exceed a power rating
of 150 W.
WARNING
The electrical sockets and any appliances connected to them will
operate only when the ignition is switched on. Improper use of the
electrical sockets or the appliances connected to them can cause
injuries or fire. To avoid the risk of injury, never leave children
unsupervised in the vehicle with the key.
Caution
•
To avoid damage to the vehicle's electrical system, never
connect equipment that generates electrical current, such as a solar
panel or battery charger, to the 12 Volt sockets or cigarette lighter in
order to charge the vehicle's battery.
•
Use only equipment which has been tested for electromagnetic
compatibility in compliance with EC Directive 2004/104/EC.Note
Using electrical appliances with the engine switched off will drain
the battery.
Fig. 98 Detail of the
side trim in the
luggage compartment:
12 Volt socketFig. 99 Electrical
socket in the centre
console
document_0900452a81b1b9de.book Seite 88 Donnerstag, 26. Juli 2007 9:16 09
Page 93 of 342
Seats and storage91
Controls
Safety
Driving tips
General maintenance
Self-help
Technical data
Opening glove box
– Pull the catch on the lid in the direction indicated (arrow)
⇒page 90, fig. 101 and open the lid.
Closing glove box
– Close the lid and push it in until it engages.The glove box lid has separate holders for a pen and a note pad.
On the right-hand side of the glove box there is a holder with a key
shell. In order to start the engine with the spare key, it has to be
clipped into this shell.
WARNING
To avoid the risk of injuries, always keep the glove box lid closed
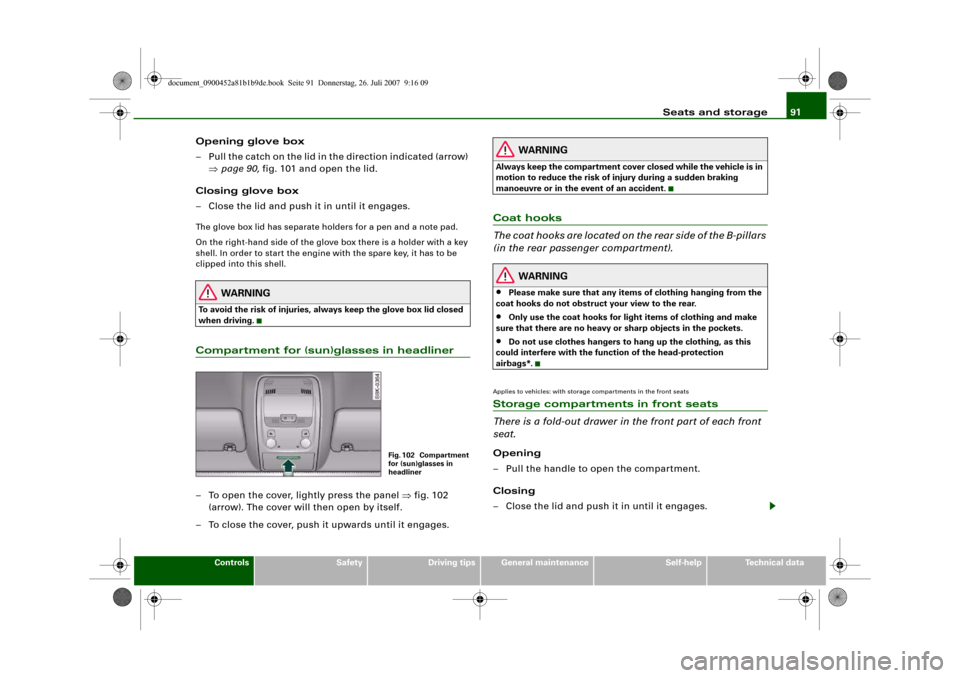
when driving.Compartment for (sun)glasses in headliner– To open the cover, lightly press the panel ⇒fig. 102
(arrow). The cover will then open by itself.
– To close the cover, push it upwards until it engages.
WARNING
Always keep the compartment cover closed while the vehicle is in
motion to reduce the risk of injury during a sudden braking
manoeuvre or in the event of an accident.Coat hooks
The coat hooks are located on the rear side of the B-pillars
(in the rear passenger compartment).
WARNING
•
Please make sure that any items of clothing hanging from the
coat hooks do not obstruct your view to the rear.
•
Only use the coat hooks for light items of clothing and make
sure that there are no heavy or sharp objects in the pockets.
•
Do not use clothes hangers to hang up the clothing, as this
could interfere with the function of the head-protection
airbags*.
Applies to vehicles: with storage compartments in the front seatsStorage compartments in front seats
There is a fold-out drawer in the front part of each front
seat.Opening
– Pull the handle to open the compartment.
Closing
– Close the lid and push it in until it engages.
Fig. 102 Compartment
for (sun)glasses in
headliner
document_0900452a81b1b9de.book Seite 91 Donnerstag, 26. Juli 2007 9:16 09
Page 95 of 342
Heating and cooling93
Controls
Safety
Driving tips
General maintenance
Self-help
Technical data
Heating and coolingDeluxe automatic air conditionerApplies to vehicles: with deluxe automatic air conditionerDescription
The air conditioner can be used to set a comfortable inte-
rior temperature in the vehicle.The air conditioner provides heating and ventilation and also cools
and dehumidifies the air inside the vehicle.
The air conditioner is fully automatic and will maintain the desired
temperature at a constant level. To achieve this, the temperature of
the air supplied to the interior, the blower speed (volume of air
delivery) and the air distribution are regulated automatically. The
system also allows for the effect of strong sunlight, so there is no
need for manual adjustment. For these reasons it is advisable to use
the automatic mode for the comfort of all the passengers in virtually
all conditions throughout the year ⇒page 95.
Please note:
The humidity of the air is automatically reduced when the system
cools the interior of the vehicle. This helps to prevent condensation
on the windows.
If the humidity and temperature outside the vehicle are high,
condensation can drip off the evaporator in the air cooling system
and form a pool underneath the vehicle. This is normal and does not
indicate a leak.
If the outside temperature is low, the blower normally only switches
to a higher speed once the coolant has warmed up sufficiently (this
does not apply to the defrost setting).
In order to achieve maximum engine power, the air conditioner
compressor is temporarily switched off when pulling away from a
standstill with full throttle.The compressor also switches off if the coolant temperature is
excessively high, to ensure adequate engine cooling under extreme
loads.
Pollution filter
The pollution filter (a particle filter) serves as a barrier against impu-
rities in the outside air, including dust and pollen, and odours. The
air is also filtered when the air recirculation mode is activated.
For the air conditioner to work with maximum efficiency, the pollu-
tion filter element must be replaced at the intervals specified in the
Service Schedule.
If the vehicle is driven in areas with a high level of air pollution and
the filter is no longer fully effective, it may be necessary to change
the filter element more frequently.
Key-coded settings
The currently selected air conditioner settings are automatically
stored and assigned to the remote control key.
Power management
To prevent the battery from becoming discharged and to maintain
the necessary power level, the system will temporarily shut off the
electrical components that are using a lot of power, or reduce the
current they are consuming ⇒page 226. Heating systems in partic-
ular use a large amount of electrical power. If you notice, for
instance, that the rear window heater is not working, it may have
been temporarily switched off by the power management function,
or regulated to a lower heat output. These systems will be available
again as soon as sufficient electrical power is available.
WARNING
For safety reasons it is important that all the windows are kept
free of ice, snow and condensation. These can cause poor visibility
document_0900452a81b1b9de.book Seite 93 Donnerstag, 26. Juli 2007 9:16 09