2008 AUDI A4 key
[x] Cancel search: keyPage 146 of 342
adaptive cruise control (ACC) 144The message will also appear if the system is unavailable due to an
error or if you switch the ESP off ⇒page 222. In this state, the
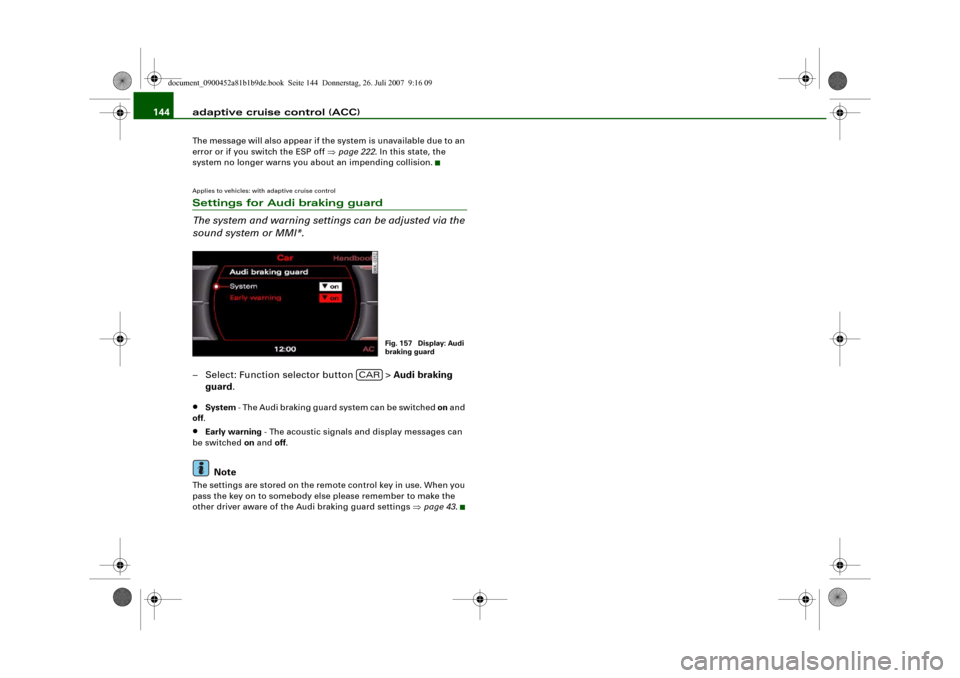
system no longer warns you about an impending collision.Applies to vehicles: with adaptive cruise controlSettings for Audi braking guard
The system and warning settings can be adjusted via the
sound system or MMI*.– Select: Function selector button > Audi braking
guard.•
System - The Audi braking guard system can be switched on and
off.
•
Early warning - The acoustic signals and display messages can
be switched on and off.Note
The settings are stored on the remote control key in use. When you
pass the key on to somebody else please remember to make the
other driver aware of the Audi braking guard settings ⇒page 43.
Fig. 157 Display: Audi
braking guard
CAR
document_0900452a81b1b9de.book Seite 144 Donnerstag, 26. Juli 2007 9:16 09
Page 150 of 342
Audi lane assist 148driving on a straight section. On narrow roads, the system will give
off warnings later than on wide roads.
late: In this setting, the driver will be warned when a wheel crosses
a lane marking.
Setting steering wheel vibration
You can set the steering vibration to low, medium or strong. The
steering wheel will vibrate so that you can check your selection.
Note
•
The lane assist is not active while you are changing the setting;
the brief vibration of the steering wheel is only intended to help you
make the desired setting.
•
Your personal settings are stored automatically and assigned to
the remote control key which is being used.
document_0900452a81b1b9de.book Seite 148 Donnerstag, 26. Juli 2007 9:16 09
Page 157 of 342
Audi side assist155
Controls
Safety
Driving tips
General maintenance
Self-help
Technical data quickly. The warning lamp on the exterior mirror does not light up
⇒ in “Safety notes” on page 157.
Warning lamp on exterior mirror does not light up
If you operate the turn signal in situation , the warning lamp on
the exterior mirror will still not give any warning ⇒ in “Safety
notes” on page 157.
Applies to vehicles: with side assistAdjusting brightness of warning lamp on exterior mirror
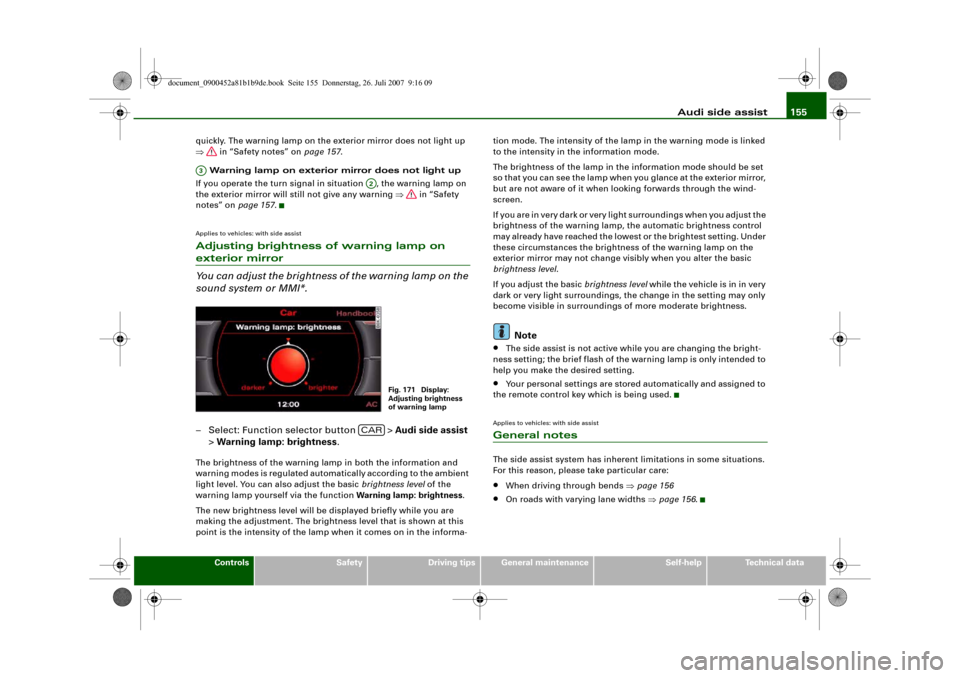
You can adjust the brightness of the warning lamp on the
sound system or MMI*.– Select: Function selector button > Audi side assist
> Warning lamp: brightness.The brightness of the warning lamp in both the information and
warning modes is regulated automatically according to the ambient
light level. You can also adjust the basic brightness level of the
warning lamp yourself via the function Warning lamp: brightness.
The new brightness level will be displayed briefly while you are
making the adjustment. The brightness level that is shown at this
point is the intensity of the lamp when it comes on in the informa-tion mode. The intensity of the lamp in the warning mode is linked
to the intensity in the information mode.
The brightness of the lamp in the information mode should be set
so that you can see the lamp when you glance at the exterior mirror,
but are not aware of it when looking forwards through the wind-
screen.
If you are in very dark or very light surroundings when you adjust the
brightness of the warning lamp, the automatic brightness control
may already have reached the lowest or the brightest setting. Under
these circumstances the brightness of the warning lamp on the
exterior mirror may not change visibly when you alter the basic
brightness level.
If you adjust the basic brightness level while the vehicle is in in very
dark or very light surroundings, the change in the setting may only
become visible in surroundings of more moderate brightness.
Note
•
The side assist is not active while you are changing the bright-
ness setting; the brief flash of the warning lamp is only intended to
help you make the desired setting.
•
Your personal settings are stored automatically and assigned to
the remote control key which is being used.
Applies to vehicles: with side assistGeneral notesThe side assist system has inherent limitations in some situations.
For this reason, please take particular care:•
When driving through bends ⇒page 156
•
On roads with varying lane widths ⇒page 156.
A3
A2
Fig. 171 Display:
Adjusting brightness
of warning lamp
CAR
document_0900452a81b1b9de.book Seite 155 Donnerstag, 26. Juli 2007 9:16 09
Page 163 of 342
Audi drive select161
Controls
Safety
Driving tips
General maintenance
Self-help
Technical data
WARNING
Always keep an eye on the traffic when using the Audi drive select
controls - Risk of accident!
Note
If you remove the ignition key, the AUTO mode will be selected auto-
matically the next time you switch on the ignition.Applies to vehicles: with MMI and Audi drive selectSettings for INDIVIDUAL driving mode
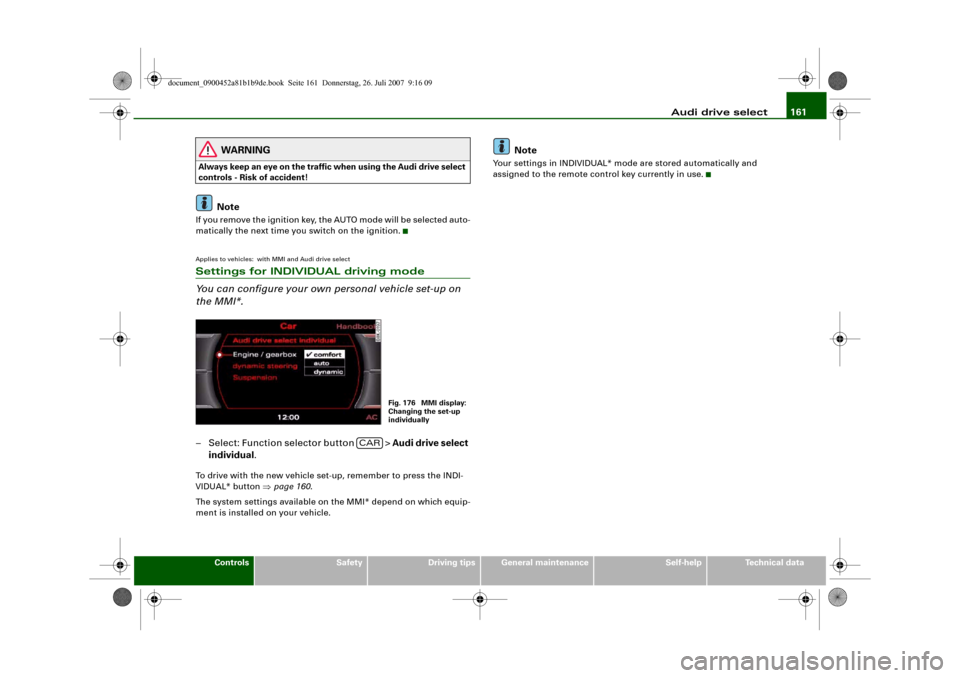
You can configure your own personal vehicle set-up on
the MMI*.– Select: Function selector button > Audi drive select
individual.To drive with the new vehicle set-up, remember to press the INDI-
VIDUAL* button ⇒page 160.
The system settings available on the MMI* depend on which equip-
ment is installed on your vehicle.
Note
Your settings in INDIVIDUAL* mode are stored automatically and
assigned to the remote control key currently in use.
Fig. 176 MMI display:
Changing the set-up
individually
CAR
document_0900452a81b1b9de.book Seite 161 Donnerstag, 26. Juli 2007 9:16 09
Page 167 of 342
Automatic gearbox165
Controls
Safety
Driving tips
General maintenance
Self-help
Technical data
Applies to vehicles: with multitronic® or tiptronicSelector lever lock
The selector lever lock prevents gears from being
engaged inadvertently, so that the vehicle is not set in
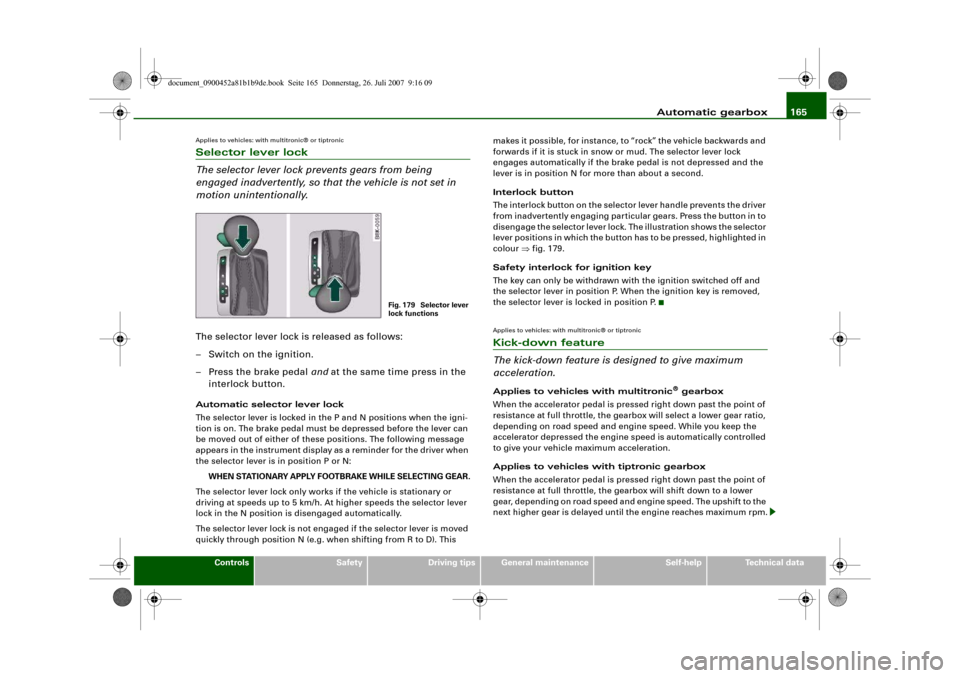
motion unintentionally.The selector lever lock is released as follows:
– Switch on the ignition.
– Press the brake pedal and at the same time press in the
interlock button.Automatic selector lever lock
The selector lever is locked in the P and N positions when the igni-
tion is on. The brake pedal must be depressed before the lever can
be moved out of either of these positions. The following message
appears in the instrument display as a reminder for the driver when
the selector lever is in position P or N:
WHEN STATIONARY APPLY FOOTBRAKE WHILE SELECTING GEAR.
The selector lever lock only works if the vehicle is stationary or
driving at speeds up to 5 km/h. At higher speeds the selector lever
lock in the N position is disengaged automatically.
The selector lever lock is not engaged if the selector lever is moved
quickly through position N (e.g. when shifting from R to D). This makes it possible, for instance, to “rock” the vehicle backwards and
forwards if it is stuck in snow or mud. The selector lever lock
engages automatically if the brake pedal is not depressed and the
lever is in position N for more than about a second.
Interlock button
The interlock button on the selector lever handle prevents the driver
from inadvertently engaging particular gears. Press the button in to
disengage the selector lever lock. The illustration shows the selector
lever positions in which the button has to be pressed, highlighted in
colour ⇒fig. 179.
Safety interlock for ignition key
The key can only be withdrawn with the ignition switched off and
the selector lever in position P. When the ignition key is removed,
the selector lever is locked in position P.
Applies to vehicles: with multitronic® or tiptronicKick-down feature
The kick-down feature is designed to give maximum
acceleration.Applies to vehicles with multitronic
® gearbox
When the accelerator pedal is pressed right down past the point of
resistance at full throttle, the gearbox will select a lower gear ratio,
depending on road speed and engine speed. While you keep the
accelerator depressed the engine speed is automatically controlled
to give your vehicle maximum acceleration.
Applies to vehicles with tiptronic gearbox
When the accelerator pedal is pressed right down past the point of
resistance at full throttle, the gearbox will shift down to a lower
gear, depending on road speed and engine speed. The upshift to the
next higher gear is delayed until the engine reaches maximum rpm.
Fig. 179 Selector lever
lock functions
document_0900452a81b1b9de.book Seite 165 Donnerstag, 26. Juli 2007 9:16 09
Page 170 of 342
Automatic gearbox 168
– Briefly pull the left-hand paddle lever to change down
to a lower gear.
– Briefly pull the right-hand paddle lever to change up
to a higher gear.The paddle levers are activated when the selector lever is in position
D or S, or the position for the manual shift programme (tiptronic).
The manual shift programme can, of course, still be operated using
the selector lever in the centre console.Applies to vehicles: with multitronic® or tiptronicManual release of selector lever
The selector lever can be released manually if the elec-
trical power supply should fail.
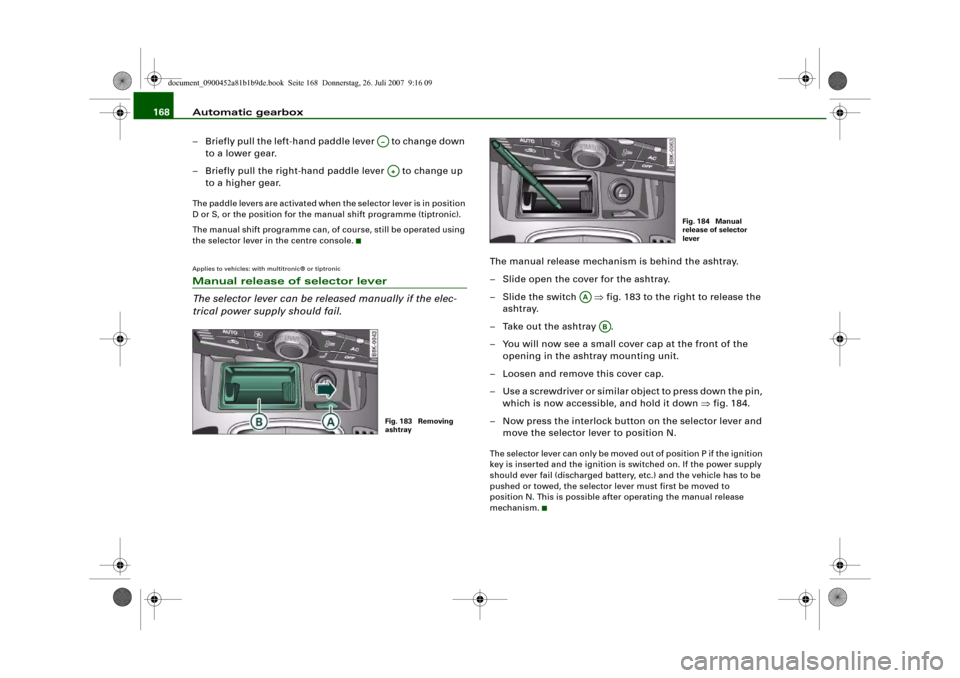
The manual release mechanism is behind the ashtray.
– Slide open the cover for the ashtray.
–Slide the switch ⇒fig. 183 to the right to release the
ashtray.
– Take out the ashtray .
– You will now see a small cover cap at the front of the
opening in the ashtray mounting unit.
– Loosen and remove this cover cap.
– Use a screwdriver or similar object to press down the pin,
which is now accessible, and hold it down ⇒fig. 184.
– Now press the interlock button on the selector lever and
move the selector lever to position N.The selector lever can only be moved out of position P if the ignition
key is inserted and the ignition is switched on. If the power supply
should ever fail (discharged battery, etc.) and the vehicle has to be
pushed or towed, the selector lever must first be moved to
position N. This is possible after operating the manual release
mechanism.
A–A+Fig. 183 Removing
ashtray
Fig. 184 Manual
release of selector
lever
AA
AB
document_0900452a81b1b9de.book Seite 168 Donnerstag, 26. Juli 2007 9:16 09
Page 179 of 342
Parking aid177
Controls
Safety
Driving tips
General maintenance
Self-help
Technical data
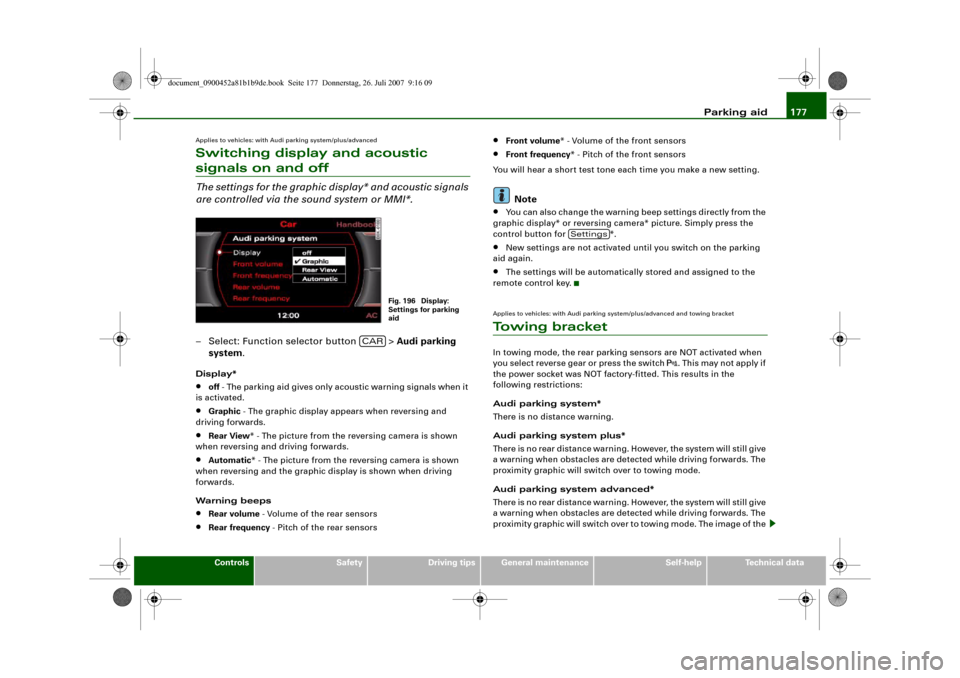
Applies to vehicles: with Audi parking system/plus/advancedSwitching display and acoustic signals on and offThe settings for the graphic display* and acoustic signals
are controlled via the sound system or MMI*.– Select: Function selector button > Audi parking
system.Display*•
off - The parking aid gives only acoustic warning signals when it
is activated.
•
Graphic - The graphic display appears when reversing and
driving forwards.
•
Rear View* - The picture from the reversing camera is shown
when reversing and driving forwards.
•
Automatic* - The picture from the reversing camera is shown
when reversing and the graphic display is shown when driving
forwards.
Warning beeps
•
Rear volume - Volume of the rear sensors
•
Rear frequency - Pitch of the rear sensors
•
Front volume* - Volume of the front sensors
•
Front frequency* - Pitch of the front sensors
You will hear a short test tone each time you make a new setting.Note
•
You can also change the warning beep settings directly from the
graphic display* or reversing camera* picture. Simply press the
control button for *.
•
New settings are not activated until you switch on the parking
aid again.
•
The settings will be automatically stored and assigned to the
remote control key.
Applies to vehicles: with Audi parking system/plus/advanced and towing bracketTo w i n g b r a c k e tIn towing mode, the rear parking sensors are NOT activated when
you select reverse gear or press the switch
. This may not apply if
the power socket was NOT factory-fitted. This results in the
following restrictions:
Audi parking system*
There is no distance warning.
Audi parking system plus*
There is no rear distance warning. However, the system will still give
a warning when obstacles are detected while driving forwards. The
proximity graphic will switch over to towing mode.
Audi parking system advanced*
There is no rear distance warning. However, the system will still give
a warning when obstacles are detected while driving forwards. The
proximity graphic will switch over to towing mode. The image of the
Fig. 196 Display:
Settings for parking
aid
CAR
Settings
document_0900452a81b1b9de.book Seite 177 Donnerstag, 26. Juli 2007 9:16 09
Page 191 of 342
Safe driving189
Controls
Safety
Driving tips
General maintenance
Self-help
Technical data too far back. The airbag system and seat belts can only provide
proper protection when the backrest is in an upright position and
the driver is wearing the seat belt in the correct position. The
further the backrest is tilted back, the greater the risk of injury due
to incorrect positioning of the belt webbing or an incorrect sitting
position.
•
Adjust the head restraint properly so that it can give maximum
protection.
Correct sitting position for front passenger
The front seat passenger must sit at least 25 cm away
from the dash panel so that the airbag has enough room
to inflate and give maximum protection in an accident.For your own safety and to reduce the risk of injury in the
event of an accident, we recommend adjusting the front
passenger's seat as follows:
– Move the front passenger's seat as far back as possible
⇒.
– Adjust the backrest to an upright position so that your
back remains in contact with the upholstery.
– Adjust the head restraint so that the top of the head
restraint is level with the top of your head ⇒page 190.
– Keep both feet in the footwell in front of the seat.
– Fasten your seat belt correctly ⇒page 197.In exceptional cases you can disable the front passenger's airbag
via the key-operated switch* ⇒page 208.
For detailed information on how to adjust the front passenger's
seat, see ⇒page 73, “Seats and storage”.
WARNING
A passenger who is not sitting in the correct position or who is not
wearing a seat belt can be fatally injured if the airbag is triggered.•
Adjust the front passenger's seat so there is a distance of at
least 25 cm between your breastbone and the dash panel.
•
Always keep your feet on the floor when the vehicle is moving;
never rest them on the instrument panel, out of the window or on
the seat. If you sit in an incorrect position, you increase your risk
of injury in the event of sudden braking or an accident. If the airbag
is triggered, you could sustain potentially fatal injuries by sitting
out of position.
•
To reduce the risk of injury to the front passenger in the case of
sudden braking or an accident, the passenger should never travel
in a moving vehicle with the backrest reclined. The airbag system
and seat belt can only provide proper protection when the back-
rest is in an upright position and the passenger is wearing the seat
belt in the correct position. The further the backrest is tilted back,
the greater the risk of injury due to incorrect positioning of the belt
webbing or an incorrect sitting position.
•
Always adjust the head restraints properly for maximum
protection.
Correct sitting position for passengers in the rear
Rear seat passengers should sit upright with both feet on
the floor and wear their seat belts properly whenever the
vehicle is moving.To reduce any risk of injury in the event of sudden braking
or an accident, passengers in the rear seats must observe
the following:
WARNING (continued)
document_0900452a81b1b9de.book Seite 189 Donnerstag, 26. Juli 2007 9:16 09