2008 AUDI A4 overheating
[x] Cancel search: overheatingPage 17 of 342
Instruments and warning/indicator lamps15
Controls
Safety
Driving tips
General maintenance
Self-help
Technical data
Caution
Never run the tank completely dry. The irregular supply of fuel can
cause misfiring, which would allow unburnt fuel to enter the
exhaust system. This can lead to overheating and damage to the
catalytic converter.Warning and indicator lampsOverview
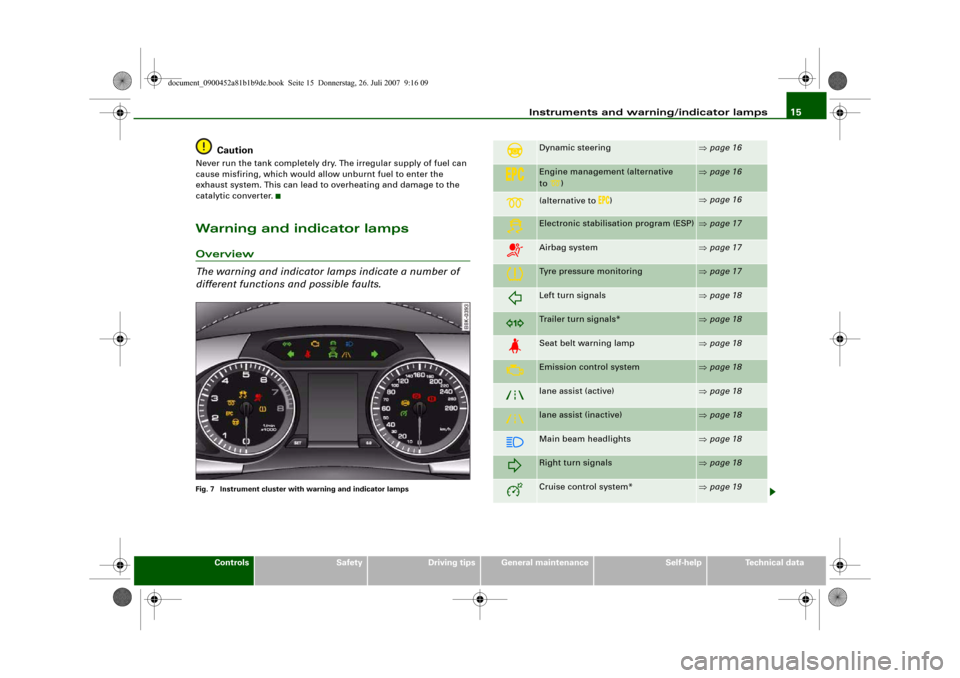
The warning and indicator lamps indicate a number of
different functions and possible faults.Fig. 7 Instrument cluster with warning and indicator lamps
Dynamic steering
⇒page 16
Engine management (alternative
to)
⇒page 16
(alternative to
)
⇒page 16
Electronic stabilisation program (ESP)
⇒page 17
Airbag system
⇒page 17
Tyre pressure monitoring
⇒page 17
Left turn signals
⇒page 18
Trailer turn signals*
⇒page 18
Seat belt warning lamp
⇒page 18
Emission control system
⇒page 18
lane assist (active)
⇒page 18
lane assist (inactive)
⇒page 18
Main beam headlights
⇒page 18
Right turn signals
⇒page 18
Cruise control system*
⇒page 19
document_0900452a81b1b9de.book Seite 15 Donnerstag, 26. Juli 2007 9:16 09
Page 22 of 342
Instruments and warning/indicator lamps 20When the vehicle has been stationary for an extended period, Audi
hold assist will automatically apply the parking brake. In this case,
the green symbol
will change to red
.
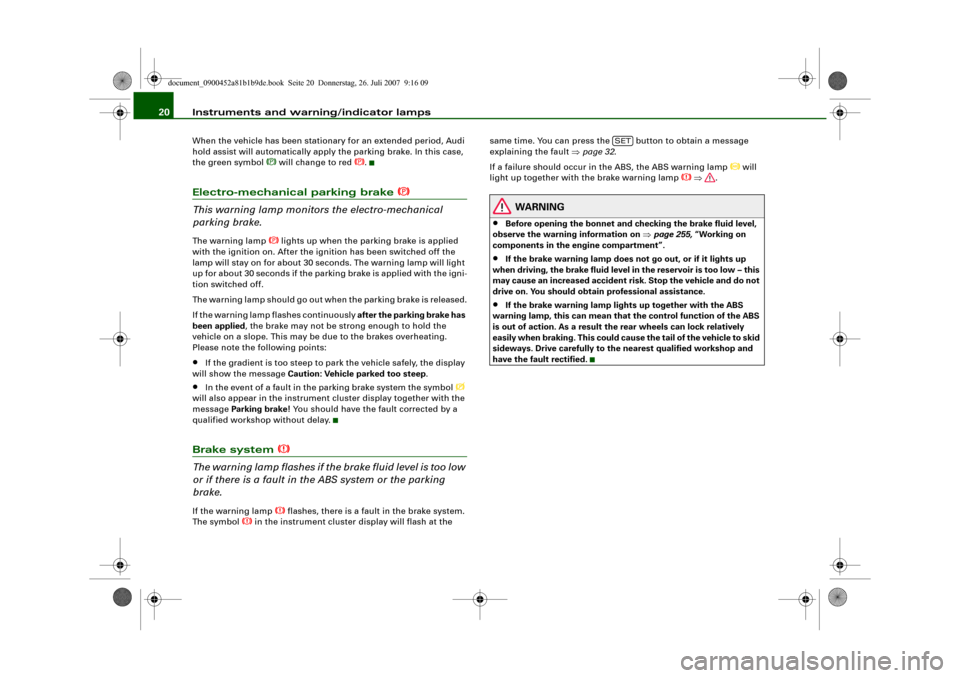
Electro-mechanical parking brake
This warning lamp monitors the electro-mechanical
parking brake.The warning lamp
lights up when the parking brake is applied
with the ignition on. After the ignition has been switched off the
lamp will stay on for about 30 seconds. The warning lamp will light
up for about 30 seconds if the parking brake is applied with the igni-
tion switched off.
The warning lamp should go out when the parking brake is released.
If the warning lamp flashes continuously after the parking brake has
been applied, the brake may not be strong enough to hold the
vehicle on a slope. This may be due to the brakes overheating.
Please note the following points:
•
If the gradient is too steep to park the vehicle safely, the display
will show the message Caution: Vehicle parked too steep.
•
In the event of a fault in the parking brake system the symbol
will also appear in the instrument cluster display together with the
message Parking brake! You should have the fault corrected by a
qualified workshop without delay.
Brake system
The warning lamp flashes if the brake fluid level is too low
or if there is a fault in the ABS system or the parking
brake.If the warning lamp
flashes, there is a fault in the brake system.
The symbol
in the instrument cluster display will flash at the same time. You can press the button to obtain a message
explaining the fault ⇒page 32.
If a failure should occur in the ABS, the ABS warning lamp
will
light up together with the brake warning lamp
⇒.
WARNING
•
Before opening the bonnet and checking the brake fluid level,
observe the warning information on ⇒page 255, “Working on
components in the engine compartment”.
•
If the brake warning lamp does not go out, or if it lights up
when driving, the brake fluid level in the reservoir is too low – this
may cause an increased accident risk. Stop the vehicle and do not
drive on. You should obtain professional assistance.
•
If the brake warning lamp lights up together with the ABS
warning lamp, this can mean that the control function of the ABS
is out of action. As a result the rear wheels can lock relatively
easily when braking. This could cause the tail of the vehicle to skid
sideways. Drive carefully to the nearest qualified workshop and
have the fault rectified.
SET
document_0900452a81b1b9de.book Seite 20 Donnerstag, 26. Juli 2007 9:16 09
Page 35 of 342
Driver information system33
Controls
Safety
Driving tips
General maintenance
Self-help
Technical data easily when braking. This could cause the tail of the vehicle to skid
sideways. Drive carefully to the nearest qualified workshop and
have the fault rectified.
Note
The warning lamp
in the instrument cluster will start flashing as
well if there is a fault in the brake system.
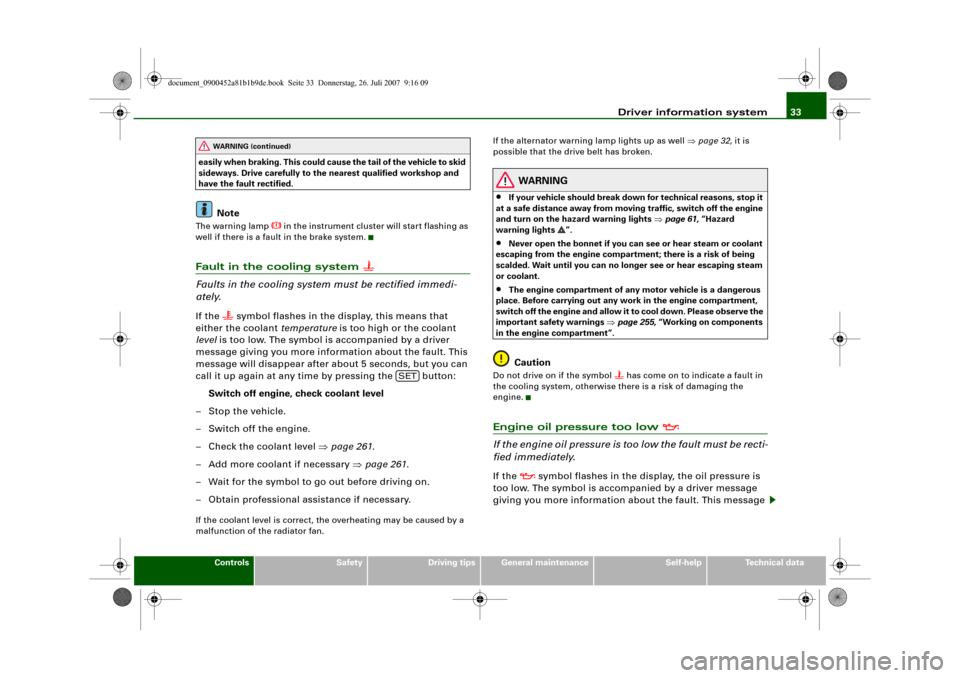
Fault in the cooling system
Faults in the cooling system must be rectified immedi-
ately.If the
symbol flashes in the display, this means that
either the coolant temperature is too high or the coolant
level is too low. The symbol is accompanied by a driver
message giving you more information about the fault. This
message will disappear after about 5 seconds, but you can
call it up again at any time by pressing the button:
Switch off engine, check coolant level
–Stop the vehicle.
– Switch off the engine.
– Check the coolant level ⇒page 261.
– Add more coolant if necessary ⇒page 261.
– Wait for the symbol to go out before driving on.
– Obtain professional assistance if necessary.
If the coolant level is correct, the overheating may be caused by a
malfunction of the radiator fan.If the alternator warning lamp lights up as well ⇒page 32, it is
possible that the drive belt has broken.
WARNING
•
If your vehicle should break down for technical reasons, stop it
at a safe distance away from moving traffic, switch off the engine
and turn on the hazard warning lights ⇒page 61, “Hazard
warning lights ”.
•
Never open the bonnet if you can see or hear steam or coolant
escaping from the engine compartment; there is a risk of being
scalded. Wait until you can no longer see or hear escaping steam
or coolant.
•
The engine compartment of any motor vehicle is a dangerous
place. Before carrying out any work in the engine compartment,
switch off the engine and allow it to cool down. Please observe the
important safety warnings ⇒page 255, “Working on components
in the engine compartment”.Caution
Do not drive on if the symbol
has come on to indicate a fault in
the cooling system, otherwise there is a risk of damaging the
engine.
Engine oil pressure too low
If the engine oil pressure is too low the fault must be recti-
fied immediately.If the
symbol flashes in the display, the oil pressure is
too low. The symbol is accompanied by a driver message
giving you more information about the fault. This message
WARNING (continued)
SET
document_0900452a81b1b9de.book Seite 33 Donnerstag, 26. Juli 2007 9:16 09
Page 91 of 342
Seats and storage89
Controls
Safety
Driving tips
General maintenance
Self-help
Technical data
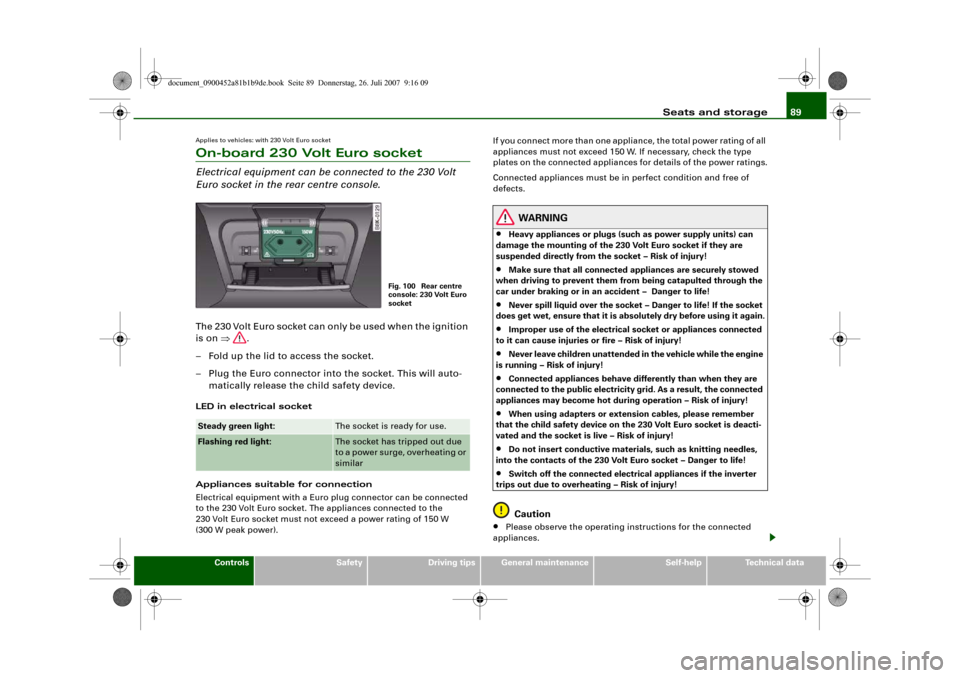
Applies to vehicles: with 230 Volt Euro socketOn-board 230 Volt Euro socketElectrical equipment can be connected to the 230 Volt
Euro socket in the rear centre console.The 230 Volt Euro socket can only be used when the ignition
is on ⇒.
– Fold up the lid to access the socket.
– Plug the Euro connector into the socket. This will auto-
matically release the child safety device.LED in electrical socket
Appliances suitable for connection
Electrical equipment with a Euro plug connector can be connected
to the 230 Volt Euro socket. The appliances connected to the
230 Volt Euro socket must not exceed a power rating of 150 W
(300 W peak power).If you connect more than one appliance, the total power rating of all
appliances must not exceed 150 W. If necessary, check the type
plates on the connected appliances for details of the power ratings.
Connected appliances must be in perfect condition and free of
defects.
WARNING
•
Heavy appliances or plugs (such as power supply units) can
damage the mounting of the 230 Volt Euro socket if they are
suspended directly from the socket – Risk of injury!
•
Make sure that all connected appliances are securely stowed
when driving to prevent them from being catapulted through the
car under braking or in an accident – Danger to life!
•
Never spill liquid over the socket – Danger to life! If the socket
does get wet, ensure that it is absolutely dry before using it again.
•
Improper use of the electrical socket or appliances connected
to it can cause injuries or fire – Risk of injury!
•
Never leave children unattended in the vehicle while the engine
is running – Risk of injury!
•
Connected appliances behave differently than when they are
connected to the public electricity grid. As a result, the connected
appliances may become hot during operation – Risk of injury!
•
When using adapters or extension cables, please remember
that the child safety device on the 230 Volt Euro socket is deacti-
vated and the socket is live – Risk of injury!
•
Do not insert conductive materials, such as knitting needles,
into the contacts of the 230 Volt Euro socket – Danger to life!
•
Switch off the connected electrical appliances if the inverter
trips out due to overheating – Risk of injury!Caution
•
Please observe the operating instructions for the connected
appliances.
Steady green light:
The socket is ready for use.
Flashing red light:
The socket has tripped out due
to a power surge, overheating or
similar
Fig. 100 Rear centre
console: 230 Volt Euro
socket
document_0900452a81b1b9de.book Seite 89 Donnerstag, 26. Juli 2007 9:16 09
Page 224 of 342
Intelligent technology 222Intelligent technologyElectronic stabilisation program (ESP)DescriptionESP increases the car's stability. It reduces the tendency to skid and
improves the stability and roadholding of the vehicle. ESP detects
critical handling situations, such as understeer, oversteer and
wheelspin on the driven wheels. It stabilises the vehicle by braking
individual wheels or by reducing the engine torque. The warning
lamp
in the instrument cluster starts flashing as soon as the ESP
intervenes.
The ESP incorporates the functions of the anti-lock brake system
(ABS), the traction control system (ASR), the electronic differential
lock (EDL) and the dynamic steering*.
Anti-lock brake system (ABS)
ABS prevents the wheels from locking up under braking until the
vehicle has reached a virtual standstill. You can continue to steer the
vehicle even when the brakes are on full. Keep your foot on the brake
pedal and do not pump the brakes. You will feel the brake pedal
pulsate while the anti-lock brake system is working.
Brake assist system
The brake assist system can speed up the braking process and
shorten the braking distance. It automatically boosts the braking
force if you press the brake pedal quickly in an emergency. On vehi-
cles with adaptive cruise control*, the brake assist system will build
up a small amount of pressure in the hydraulic brake system if it
senses that you are too close to the vehicle in front.
Traction control system (ASR)
In the event of wheelspin, the traction control system reduces the
engine torque to match the amount of grip available. This helps the
car to start moving, accelerate or climb a gradient.Electronic differential lock (EDL)
When the EDL detects wheelspin, it brakes the spinning wheel and
directs the power to the other driven wheel (or wheels on quattro*
versions). This function is active up to about 100 km/h.
To prevent the disc brake of the braked wheel from overheating, the
EDL cuts out automatically if subjected to excessive loads. The
vehicle can still be driven. The EDL will switch on again automati-
cally when the brake has cooled down.
Dynamic steering*
On vehicles with dynamic steering*, the ESP can also intervene in
the steering to stabilise the vehicle in critical situations.
WARNING
•
The grip provided by the ESP, ABS, ASR, EDL and dynamic
steering* systems is still subject to the physical limits of adhesion.
Always bear this in mind, especially on wet or slippery roads. If
you notice the systems cutting in, you should reduce your speed
immediately to suit the road and traffic conditions. Do not let the
extra safety provided tempt you into taking any risks when driving
– this can cause accidents.
•
Please remember that the accident risk always increases if you
drive fast, especially in corners or on a slippery road, or if you
follow too close behind the vehicle in front of you. Please bear in
mind that even ESP, ABS, brake assist, EDL, ASR and dynamic
steering* cannot compensate for the increased accident risk.
•
When accelerating on a uniformly slippery surface (for instance
all four wheels on ice or snow), press the accelerator gradually and
carefully. The driven wheels may otherwise start to spin (in spite
of the integrated control systems), which would impair the car's
stability and could lead to an accident.
document_0900452a81b1b9de.book Seite 222 Donnerstag, 26. Juli 2007 9:16 09
Page 231 of 342
Your vehicle and the environment229
Controls
Safety
Driving tips
General maintenance
Self-help
Technical data
Your vehicle and the environmentRunning inA new vehicle should be run in over a distance of 1,500 km. For the
first 1,000 km the engine speed should not exceed 2/3 of the
maximum permissible engine speed – do not use full throttle and do
not tow a trailer or caravan. From 1,000 to 1,500 km you can gradu-
ally increase the engine rpm and road speed.
During its first few hours of running, the internal friction in the
engine is greater than later on when all the moving parts have
bedded down.
How the vehicle is driven for the first 1,500 km also influences the
engine quality. After the first 1,500 km you should continue driving
at moderate engine speeds, in particular when the engine is cold.
This helps to reduce wear and tear on the engine and increases the
potential mileage which can be covered by the engine.
You should also avoid driving with the engine speed too low.
Change down to a lower gear when the engine no longer runs
“smoothly”. Excessively high engine speeds are prevented by an
automatic rev limiter.Emission control systemsCatalytic converter
Applies to vehicles with petrol engine: The vehicle must only be
used with unleaded petrol, otherwise the catalytic converter will be
destroyed.
Never run the tank completely dry. The irregular fuel supply can
cause misfiring, which would allow unburnt fuel to enter the
exhaust system, which could cause overheating and damage the
catalytic converter.Diesel particulate filter
Applies to vehicles with diesel engine: The diesel particulate filter
can filter out almost all soot particles contained in the exhaust gas.
In normal driving conditions the filter is self-cleaning. Should the
self-cleaning function of the filter not be able to operate, e.g. when
the vehicle is continuously used only for short trips, the filter
becomes obstructed with soot and the symbol
for the diesel
particulate filter lights up ⇒page 38.
WARNING
•
Because of the high temperatures which can occur in the emis-
sion control system (catalytic converter or diesel particulate
filter), do not park the vehicle where the exhaust can come into
contact with flammable materials under the car (e.g. on grass or
at the forest edge). - Fire hazard!
•
Do not apply any underseal agents in the area around the
exhaust system - fire hazard!
How to improve economy and minimise pollutionFuel economy, environmental impact and wear on the engine,
brakes and tyres depend largely on the way you drive the vehicle. By
adopting an economical driving style and anticipating the traffic
situation ahead, you can reduce fuel consumption by 10-15%. The
following section gives you some tips on lessening the impact on
the environment and reducing your operating costs at the same
time.
document_0900452a81b1b9de.book Seite 229 Donnerstag, 26. Juli 2007 9:16 09
Page 236 of 342
Towing a trailer 234•
The trailer overrun brake must be set correctly. This is important
to ensure that the trailer can be braked correctly, to avoid the vehicle
and trailer “jack-knifing” and to prevent excess braking of the trailer.
•
At low outside temperatures, both the towing vehicle and the
trailer should be fitted with winter tyres.
WARNING
It is essential that you adjust your speed to suit the weather, road
and traffic conditions. Do not let the trailer stabilisation system
tempt you into taking any risks when driving – this can cause acci-
dents.•
The ESP and trailer stabilisation system cannot defy the laws
of physics. This should be kept in mind, particularly on slippery
and wet roads and when towing a trailer with a light load.
•
The trailer stabilisation system is functional, regardless of
whether the trailer has a mechanical overrun brake or not.
•
The trailer stabilisation system is not always able to detect
swaying of trailers with a light load and will therefore not inter-
vene.
•
A trailer can still “jack-knife” on slippery roads with little grip,
even if the towing vehicle is equipped with the trailer stabilisation
system.
•
Trailers with a high centre of gravity may even tip over before
they start to sway sideways.
•
If you are not towing a trailer, but the trailer socket is being
used (e.g. for an illuminated bicycle rack), the trailer stabilisation
system may be activated in extreme driving conditions.
•
Please note the additional information and warnings
⇒page 234.
Notes on towing
Driving with a trailer always requires extra care.Weight distribution
Try to avoid towing a loaded trailer with an unladen vehicle. If this
cannot be avoided, drive extra slowly to allow for the unbalanced
weight distribution.
Speed
The stability of the car and trailer is reduced with increasing speed.
For this reason it is advisable not to drive at the maximum permis-
sible top speed in unfavourable road, weather or wind conditions.
This applies especially on a downhill gradient.
You should always reduce speed immediately if the trailer shows
the slightest sign of swaying. Never try to stop the swaying by accel-
erating further.
Always brake in good time. If the trailer has an overrun brake, apply
the brakes gently at first and then firmly. This will prevent the jerking
that can be caused by the trailer wheels locking. Change down in
good time before going down a steep hill so that you can use the
engine braking effect to slow down the vehicle.
Swaying and pitching can be reduced by stabiliser aids. We recom-
mend having stabiliser aids installed when towing trailers with a
high trailer weight. They can be purchased and installed at an Audi
dealer.
Overheating
When climbing long hills in hot weather with the engine running
fast in low gear, you should keep an eye on the coolant temperature
gauge ⇒page 11. Reduce speed immediately if the needle moves to
the top end of the scale. If the temperature warning lamp
in the
instrument cluster should start flashing, stop the car and let the
engine cool down by running it at idling speed for a few minutes.
document_0900452a81b1b9de.book Seite 234 Donnerstag, 26. Juli 2007 9:16 09
Page 263 of 342
Checking and topping up fluids261
Controls
Safety
Driving tips
General maintenance
Self-help
Technical data
•
The coolant additive G12++ can be mixed only with additives
G12+ and G12.
Checking coolant level
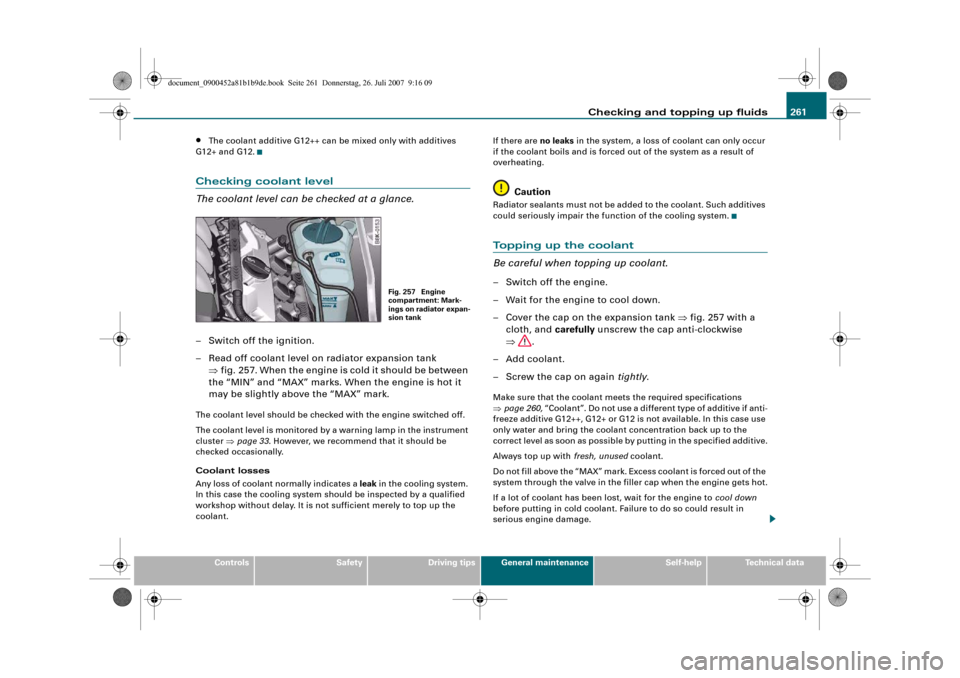
The coolant level can be checked at a glance.– Switch off the ignition.
– Read off coolant level on radiator expansion tank
⇒fig. 257. When the engine is cold it should be between
the “MIN” and “MAX” marks. When the engine is hot it
may be slightly above the “MAX” mark.The coolant level should be checked with the engine switched off.
The coolant level is monitored by a warning lamp in the instrument
cluster ⇒page 33. However, we recommend that it should be
checked occasionally.
Coolant losses
Any loss of coolant normally indicates a leak in the cooling system.
In this case the cooling system should be inspected by a qualified
workshop without delay. It is not sufficient merely to top up the
coolant.If there are no leaks in the system, a loss of coolant can only occur
if the coolant boils and is forced out of the system as a result of
overheating.
Caution
Radiator sealants must not be added to the coolant. Such additives
could seriously impair the function of the cooling system.Topping up the coolant
Be careful when topping up coolant.– Switch off the engine.
– Wait for the engine to cool down.
– Cover the cap on the expansion tank ⇒fig. 257 with a
cloth, and carefully unscrew the cap anti-clockwise
⇒.
– Add coolant.
– Screw the cap on again tightly.Make sure that the coolant meets the required specifications
⇒page 260, “Coolant”. Do not use a different type of additive if anti-
freeze additive G12++, G12+ or G12 is not available. In this case use
only water and bring the coolant concentration back up to the
correct level as soon as possible by putting in the specified additive.
Always top up with fresh, unused coolant.
Do not fill above the “MAX” mark. Excess coolant is forced out of the
system through the valve in the filler cap when the engine gets hot.
If a lot of coolant has been lost, wait for the engine to cool down
before putting in cold coolant. Failure to do so could result in
serious engine damage.
Fig. 257 Engine
compartment: Mark-
ings on radiator expan-
sion tank
document_0900452a81b1b9de.book Seite 261 Donnerstag, 26. Juli 2007 9:16 09