2008 AUDI A4 key
[x] Cancel search: keyPage 206 of 342
Airbag system 204Important safety notes on the front airbag system
There are a number of safety points concerning the airbag
system which you should remember. This will help to
reduce the risk of injury in an accident.
WARNING
•
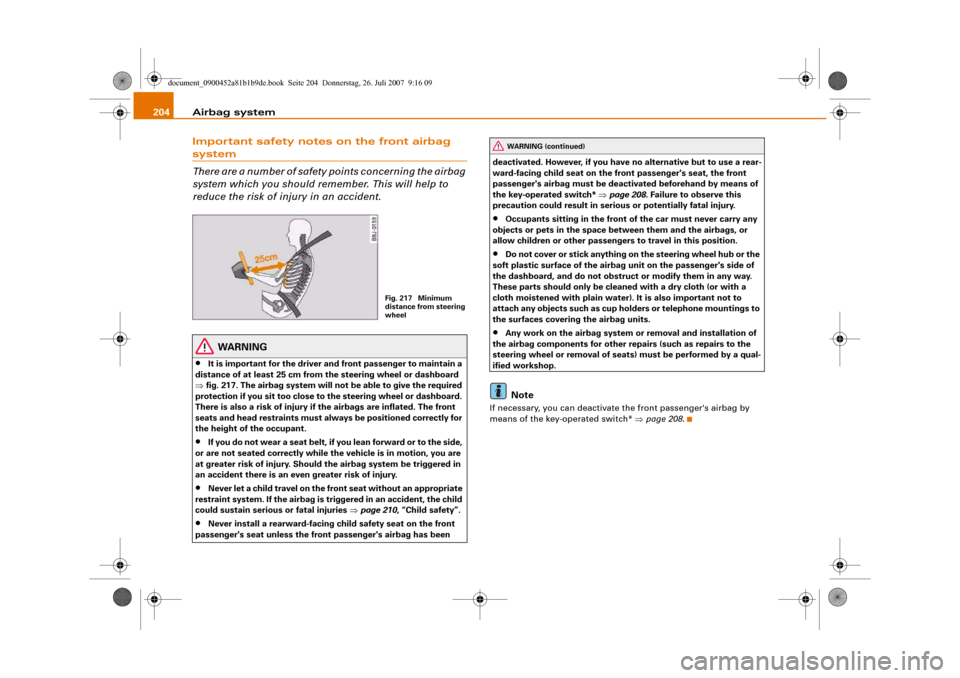
It is important for the driver and front passenger to maintain a
distance of at least 25 cm from the steering wheel or dashboard
⇒fig. 217. The airbag system will not be able to give the required
protection if you sit too close to the steering wheel or dashboard.
There is also a risk of injury if the airbags are inflated. The front
seats and head restraints must always be positioned correctly for
the height of the occupant.
•
If you do not wear a seat belt, if you lean forward or to the side,
or are not seated correctly while the vehicle is in motion, you are
at greater risk of injury. Should the airbag system be triggered in
an accident there is an even greater risk of injury.
•
Never let a child travel on the front seat without an appropriate
restraint system. If the airbag is triggered in an accident, the child
could sustain serious or fatal injuries ⇒page 210, “Child safety”.
•
Never install a rearward-facing child safety seat on the front
passenger's seat unless the front passenger's airbag has been deactivated. However, if you have no alternative but to use a rear-
ward-facing child seat on the front passenger's seat, the front
passenger's airbag must be deactivated beforehand by means of
the key-operated switch* ⇒page 208. Failure to observe this
precaution could result in serious or potentially fatal injury.
•
Occupants sitting in the front of the car must never carry any
objects or pets in the space between them and the airbags, or
allow children or other passengers to travel in this position.
•
Do not cover or stick anything on the steering wheel hub or the
soft plastic surface of the airbag unit on the passenger's side of
the dashboard, and do not obstruct or modify them in any way.
These parts should only be cleaned with a dry cloth (or with a
cloth moistened with plain water). It is also important not to
attach any objects such as cup holders or telephone mountings to
the surfaces covering the airbag units.
•
Any work on the airbag system or removal and installation of
the airbag components for other repairs (such as repairs to the
steering wheel or removal of seats) must be performed by a qual-
ified workshop.Note
If necessary, you can deactivate the front passenger's airbag by
means of the key-operated switch* ⇒page 208.
Fig. 217 Minimum
distance from steering
wheel
WARNING (continued)
document_0900452a81b1b9de.book Seite 204 Donnerstag, 26. Juli 2007 9:16 09
Page 210 of 342
Airbag system 208second). The airbag releases a fine dust when it inflates. This is quite
normal and does not mean there is a fire in the vehicle.Important safety notes on the head-protection airbags
There are a number of safety points concerning the airbag
system which you should remember. This will help to
reduce the risk of injury in an accident.
WARNING
•
It is important to ensure that the area around the openings for
the head-protection airbags remains unobstructed at all times, so
that the airbags can inflate properly if needed.
•
The built-in coat hooks should only be used for lightweight
clothing. Do not leave any heavy or sharp-edged objects in the
pockets. When using the coat hooks, do not hang the clothes on
coat hangers.
•
The space between the passengers and the head-protection
airbags must never be occupied by children, other passengers or
pets. Passengers should never lean out or put a hand or arm out of
the window while the vehicle is in motion.
•
Do not move the sun visors out to cover the side windows if
there is anything attached to them (such as pens or a remote
control for the garage door). These objects could cause injury if the
head-protection airbag is triggered.
•
The sensors for the airbags are located in the front doors. You
must therefore not make any modifications to the doors or door
trim (e.g. retrofitting loudspeakers), as this could impair the func-
tion of the side airbags. Any damage to the front doors could lead
to faults in the system. Repairs or any other work on the front
doors must therefore always be carried out by a qualified work-
shop.
•
Where sun blinds are fitted on the rear doors, these must not
obstruct or impair the airbags in any way.
•
If unsuitable accessories are installed near the head-protection
airbag, the protection afforded by the airbag can be seriously
impaired if the system is triggered. When the head-protection
airbag opens, parts of these accessories could be thrown into the
vehicle and injure passengers ⇒page 277.
•
Any work involving the head-protection airbags, or removal
and installation of the airbag components for other repairs (such
as repairs to the roof liner), must always be performed by a quali-
fied workshop. Otherwise the airbag system may fail to work
properly.
Applies to vehicles: with key-operated switch for front passenger's airbagDeactivating the front passenger's airbag via the key-operated switchIf an airbag has been deactivated, it should be reactivated
as soon as possible so that it can continue to give the
required protection.
WARNING (continued)
Fig. 222 Key-operated
switch in glove box for
deactivating front
passenger's airbag
document_0900452a81b1b9de.book Seite 208 Donnerstag, 26. Juli 2007 9:16 09
Page 211 of 342

Airbag system209
Controls
Safety
Driving tips
General maintenance
Self-help
Technical data
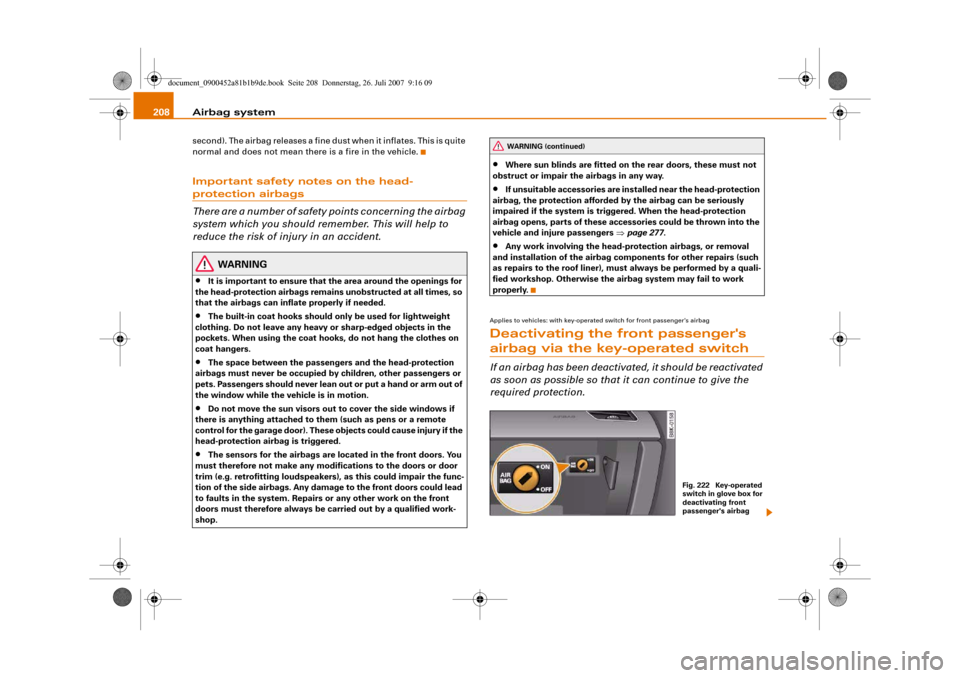
The key-operated switch for deactivating the front
passenger's airbag is located in the glove box ⇒fig. 222.
– To deactivate the front passenger's airbag, insert the
ignition key into the switch and turn it to position .
– The front passenger's airbag can be reactivated by
turning the key to position .Deactivating front passenger's airbag when a child
safety seat is in use
If you have no alternative but to install a rearward-facing child safety
seat on the front passenger's seat you must deactivate the front
passenger's airbag beforehand.
We recommend, however, that child seats should be only fitted on
the rear seat so that the front passenger's airbag can remain func-
tional and provide protection in an accident ⇒page 210.
Monitoring of airbag system
The airbag warning lamp will light up for a few seconds every time
the ignition is switched on.
If the front passenger's airbag has been deactivated via the key-
operated switch, the indicator lamp “PASSENGER AIRBAG OFF” will
light up constantly as a reminder ⇒page 209, fig. 223. Please refer
also to the description of the
warning lamp in the instrument
cluster ⇒page 17.When the front passenger's airbag is deactivated using the key-
operated switch, the seat belt warning lamp for the front passenger
⇒page 18 is also switched off.
WARNING
•
If you have no alternative but to install a rearward-facing child
seat on the front passenger's seat, the front passenger's airbag
must be deactivated beforehand. Potentially fatal injuries to the
child can result if the front passenger's airbag is not deactivated!
⇒page 211, “Using a child safety seat on the front passenger's
seat”
•
If you have deactivated the front passenger's airbag, reactivate
it as soon as the child seat is no longer needed so that the airbag
can continue to give the required protection.
•
It is the driver's responsibility to ensure that the key-operated
switch is set to the correct position.Note
All the other airbags in the car will remain functional if the front
passenger's airbag has been deactivated with the key-operated
switch.
Fig. 223 Lamp indi-
cates that front
passenger's airbag has
been deactivated via
key-operated switch
AOFF
AON
document_0900452a81b1b9de.book Seite 209 Donnerstag, 26. Juli 2007 9:16 09
Page 213 of 342
Child safety211
Controls
Safety
Driving tips
General maintenance
Self-help
Technical data
•
If children lean forward or are otherwise out of position when
the car is moving, they are at greater risk of injury in an accident.
This is particularly the case if the child is travelling on the front
passenger's seat and the airbag system is triggered in an accident.
There is then a risk of serious or potentially fatal injury.
•
To ensure proper protection, it is important to wear the seat
belts in the correct position ⇒page 197, “How to wear seat belts
properly”. Always check that the belt is properly positioned
according to the instructions provided by the manufacturer of the
child safety seat. Incorrectly worn seat belts can give rise to inju-
ries even in a minor collision.
•
Never install a rearward-facing child safety seat on the front
passenger's seat if the front passenger's airbag has not been deac-
tivated ⇒page 211.
•
Extra caution is advised if you are installing a child safety seat
using the same mounting bolts as the existing car seat belts. The
bolts must be screwed in all the way to the full depth of the
mounting holes and tightened to a torque of 50 Nm. Failure to
observe this precaution could result in potentially fatal injury. We
recommend having the installation performed by a qualified
workshop.
Using a child safety seat on the front passenger's seat
Whenever possible, child safety seats should always be
installed on the rear seat.For safety reasons, we recommend that child safety seats should be
installed on the rear seats whenever possible. However, if you have
to use a child seat on the front passenger's seat when there is no
other alternative, it is most important to note the following warn-
ings:
WARNING
•
Do not use a rearward-facing child safety seat on the front
passenger's seat unless the front passenger's airbag has been
deactivated. The child seat would be directly in the path of the
airbag as it inflates, and the child could sustain serious or fatal
injuries if the airbag were to be deployed.
•
However, if you have no alternative but to use a rearward-
facing child seat on the front passenger's seat, the front
passenger's airbag must be deactivated beforehand by means of
the key-operated switch* ⇒page 208. Failure to observe this
precaution could result in serious or potentially fatal injury.
•
Make sure that the front passenger's airbag is reactivated by
means of the key-operated switch* as soon as the child seat is no
longer needed on the front passenger's seat.
•
When using a child safety seat of the type which faces in the
direction of travel, the front passenger's seat must be moved back
to the rearmost position.
WARNING (continued)
document_0900452a81b1b9de.book Seite 211 Donnerstag, 26. Juli 2007 9:16 09
Page 229 of 342
Intelligent technology227
Controls
Safety
Driving tips
General maintenance
Self-help
Technical data current even when the ignition is off. In some cases there may not
be enough power available to start the engine.
Your vehicle is equipped with an intelligent power management
system to control the distribution of electrical energy. This signifi-
cantly improves reliability when starting the engine, and also
prolongs the life of the battery.
The main functions incorporated in the power management system
are battery diagnosis, residual current management and dynamic
power management.
Battery diagnosis
The battery diagnosis function constantly registers the condition of
the battery. Sensors detect the battery voltage, battery current and
battery temperature. This enables the system to calculate the
current power level and charge condition of the battery.
Residual current management
The residual current management reduces power consumption
while the vehicle is parked. It controls the supply of power to the
various electrical components while the ignition is switched off. The
system takes the battery diagnosis data into consideration.
Depending on the power level of the battery, the individual electrical
components are switched off one after the other to prevent the
battery from losing too much charge and to ensure that the engine
can be started reliably.
Dynamic power management
While the vehicle is moving, this function distributes the available
power to the various electrical components and systems according
to their requirements. The power management ensures that on-
board systems do not consume more electrical power than the
alternator can supply, and thus maintains the maximum possible
battery power level.
Note
•
The power management system is not able to overcome the
given physical limits. Please remember that the power and life of
the battery are limited.
•
A warning message will appear ⇒page 228, “Driver message in
the instrument cluster display” if the battery power has dropped to
a level where reliable starting is impaired.
Points to remember
Starting ability has first priority.Short trips, city traffic and low temperatures all place a heavy load
on the battery. In these conditions a large amount of power is
consumed, but only a small amount is supplied. The situation is also
critical if electrical equipment is in use when the engine is not
running. In this case power is consumed when none is being gener-
ated.
In these situations you will be aware that the power management
system is intervening to control the distribution of electrical power.
When the vehicle is parked for long periods
If you do not drive your vehicle for a period of several days or weeks,
the power management will gradually shut off the on-board
systems one by one, or reduce the amount of current they are using.
This limits the amount of power consumed and helps to ensure reli-
able starting even after a long period.
Please note that certain convenience features, such as the Audi
advanced key*, the remote control key or the electrical seat adjust-
ment may not be available when you unlock the vehicle. These func-
tions will be restored when you switch on the ignition and start the
engine.
document_0900452a81b1b9de.book Seite 227 Donnerstag, 26. Juli 2007 9:16 09
Page 235 of 342
Towing a trailer233
Controls
Safety
Driving tips
General maintenance
Self-help
Technical data additional mirrors fitted. Both exterior mirrors should be mounted
on hinged extension brackets. Adjust the mirrors to give sufficient
vision to the rear.
Headlights
Before starting a journey, check the headlight beam settings with
the trailer hitched up. If necessary, alter the height of the headlight
beams by means of the headlight range control ⇒page 60.
Power supply
When you remove the ignition key the power supply to the trailer is
interrupted.
Removable ball joint coupling
Vehicles with a factory-fitted towing bracket are equipped with a
removable ball joint coupling. It is carried under the floor panel on
the left-hand side of the luggage compartment and is secured by a
strap.
Note
We recommend having the car serviced between the normal inspec-
tion intervals if it used frequently for towing a trailer.Applies to vehicles: with towing bracketTrailer stabilisation system
Trailer stabilisation helps to reduce the risk of the vehicle
skidding when towing a trailer.The trailer stabilisation system is operational only when the ESP is
switched on and there is no malfunction in the ESP ⇒page 17.
When is the trailer stabilisation system activated?
Trailer stabilisation is active when the following requirements are
met:•
The ESP must NOT be switched off ⇒page 222,
•
The trailer connector must be properly secured in the vehicle
socket.
•
Vehicle speed must be higher than approx. 60 km/h.
How trailer stabilisation works:
In many cases, the driver can stabilise a swaying trailer by manually
braking the vehicle.
However, if the ESP detects that the trailer is swaying and this is
affecting the towing vehicle, it will automatically brake the vehicle
to stabilise the trailer by slowing it down. The warning lamp
will
light up in the instrument cluster. If possible, do not turn the
steering wheel at this stage.
In order to warn traffic behind you, the brake lights will come on
during this automatic braking operation.
A trailer weighing less than 70% of the kerb weight of the towing
vehicle may sway quite considerably without the trailer stabilisation
system intervening. This can happen when the swaying movements
of the light-weight trailer are not or hardly passed on to the towing
vehicle and are therefore not detected by the ESP.
If the system for activating the trailer brake lights is defective, this
will be indicated in the instrument cluster display ⇒page 37, “Bulb
monitor ”.
Requirements for correct functioning of the trailer
stabilisation system
If these conditions are not met in full, the trailer stabilisation system
will only intervene to a limited extent or not at all ⇒.
•
The electrical connection between the towing vehicle and the
trailer must be functioning correctly, without any defects.
•
The load on the trailer must be properly secured.
•
The tyre pressures on both the vehicle and the trailer must be
adapted to the load that is being carried.
•
Where possible, operate the trailer with the maximum permitted
draw bar weight.
document_0900452a81b1b9de.book Seite 233 Donnerstag, 26. Juli 2007 9:16 09
Page 239 of 342
Towing a trailer237
Controls
Safety
Driving tips
General maintenance
Self-help
Technical data
– Also check the shaft section of the ball joint and its asso-
ciated mechanical parts to make sure they are clean and
undamaged.Continued ⇒page 237, “Fitting the ball joint (step 2)”.
WARNING
It is important to keep the mounting fixture clean. Otherwise the
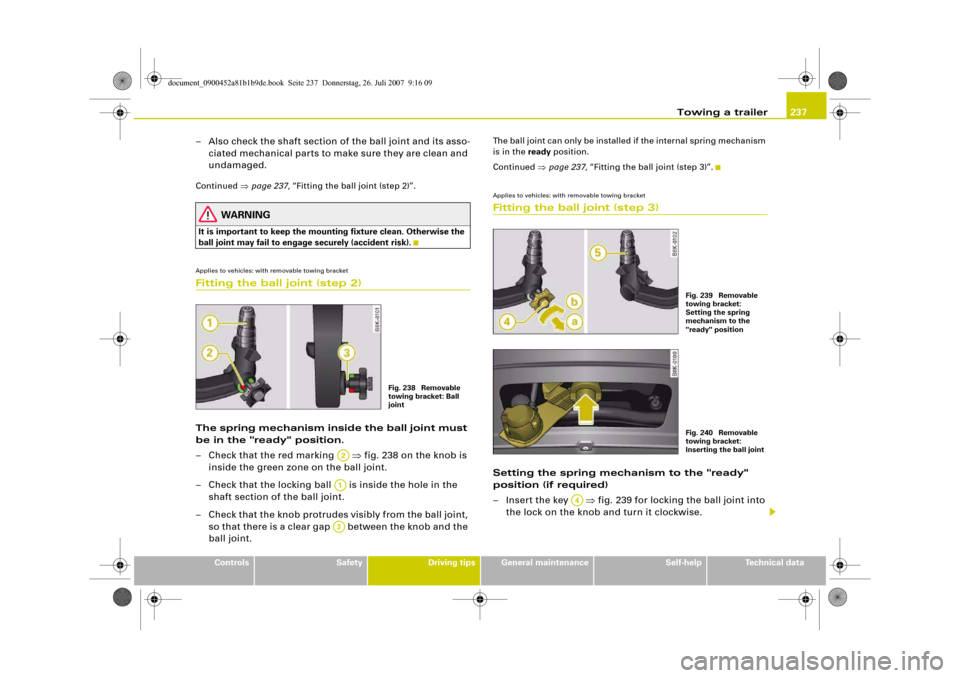
ball joint may fail to engage securely (accident risk).Applies to vehicles: with removable towing bracketFitting the ball joint (step 2)The spring mechanism inside the ball joint must
be in the "ready" position.
– Check that the red marking ⇒fig. 238 on the knob is
inside the green zone on the ball joint.
– Check that the locking ball is inside the hole in the
shaft section of the ball joint.
– Check that the knob protrudes visibly from the ball joint,
so that there is a clear gap between the knob and the
ball joint.
The ball joint can only be installed if the internal spring mechanism
is in the ready position.
Continued ⇒page 237, “Fitting the ball joint (step 3)”.Applies to vehicles: with removable towing bracketFitting the ball joint (step 3)Setting the spring mechanism to the "ready"
position (if required)
– Insert the key ⇒fig. 239 for locking the ball joint into
the lock on the knob and turn it clockwise.
Fig. 238 Removable
towing bracket: Ball
joint
A2A1A3
Fig. 239 Removable
towing bracket:
Setting the spring
mechanism to the
"ready" positionFig. 240 Removable
towing bracket:
Inserting the ball joint
A4
document_0900452a81b1b9de.book Seite 237 Donnerstag, 26. Juli 2007 9:16 09
Page 240 of 342
Towing a trailer 238
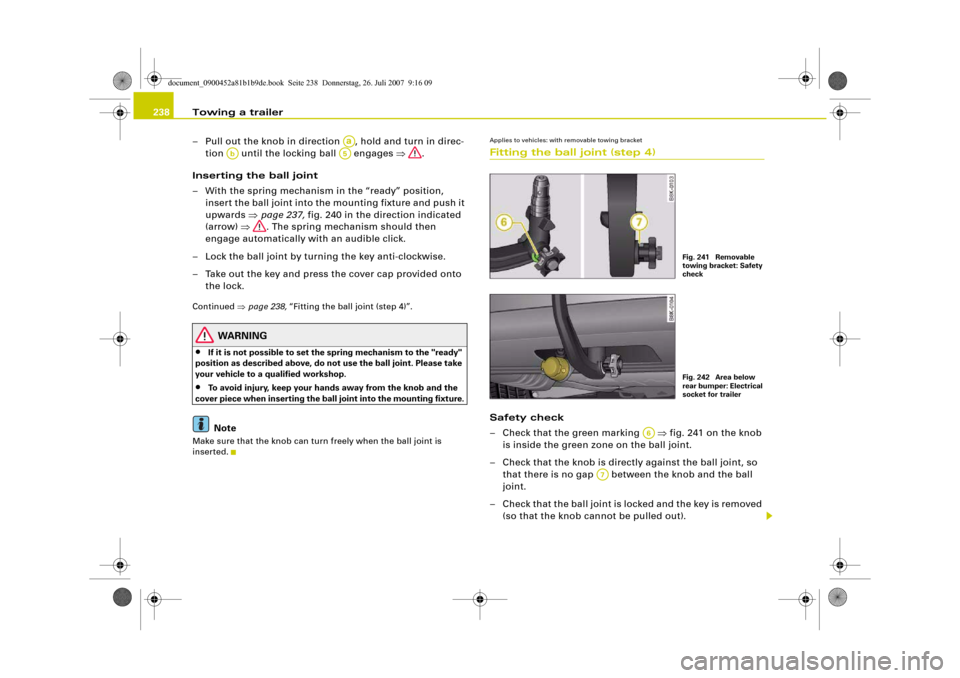
– Pull out the knob in direction , hold and turn in direc-
tion until the locking ball engages ⇒.
Inserting the ball joint
– With the spring mechanism in the “ready” position,
insert the ball joint into the mounting fixture and push it
upwards ⇒page 237, fig. 240 in the direction indicated
(arrow) ⇒. The spring mechanism should then
engage automatically with an audible click.
– Lock the ball joint by turning the key anti-clockwise.
– Take out the key and press the cover cap provided onto
the lock.Continued ⇒page 238, “Fitting the ball joint (step 4)”.
WARNING
•
If it is not possible to set the spring mechanism to the "ready"
position as described above, do not use the ball joint. Please take
your vehicle to a qualified workshop.
•
To avoid injury, keep your hands away from the knob and the
cover piece when inserting the ball joint into the mounting fixture.Note
Make sure that the knob can turn freely when the ball joint is
inserted.
Applies to vehicles: with removable towing bracketFitting the ball joint (step 4)Safety check
– Check that the green marking ⇒fig. 241 on the knob
is inside the green zone on the ball joint.
– Check that the knob is directly against the ball joint, so
that there is no gap between the knob and the ball
joint.
– Check that the ball joint is locked and the key is removed
(so that the knob cannot be pulled out).
Aa
Ab
A5
Fig. 241 Removable
towing bracket: Safety
checkFig. 242 Area below
rear bumper: Electrical
socket for trailer
A6
A7
document_0900452a81b1b9de.book Seite 238 Donnerstag, 26. Juli 2007 9:16 09