Page 25 of 72

3-9
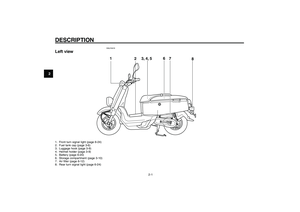
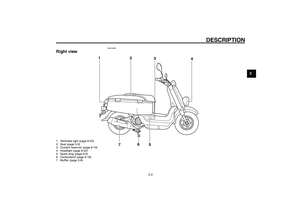
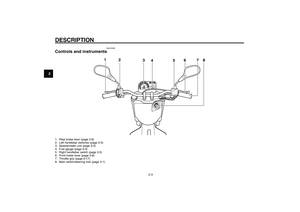
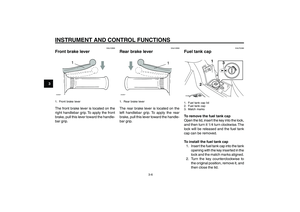
1
2
3
4
5
6
7
8
9
INSTRUMENT AND CONTROL FUNCTIONS
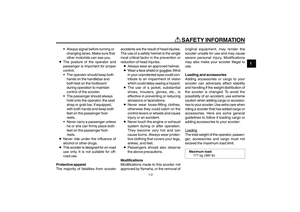
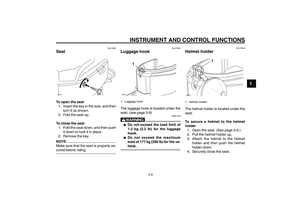
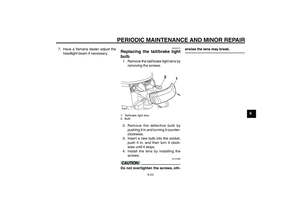
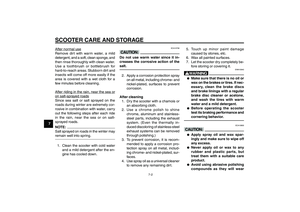
Seat
Luggage hook
Helmet holder
EAUT2050
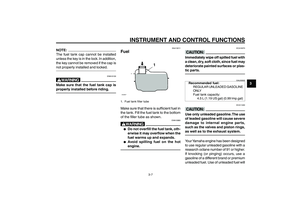
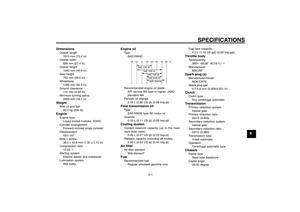
Luggage hookZAUM00**
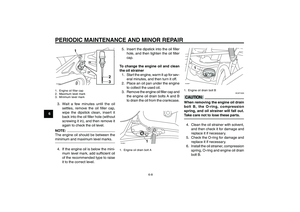
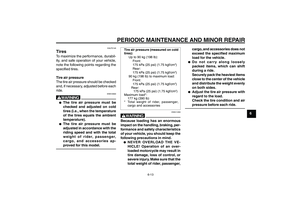
1
1. Luggage hookThe luggage hook is located under the
seat. (see page 3-9)
EWAT1030
w● ●● ●
●
Do not exceed the load limit of
1.0 kg (2.2 lb) for the luggage
hook.
● ●● ●
●
Do not exceed the maximum
load of 177 kg (390 lb) for the ve-
hicle.
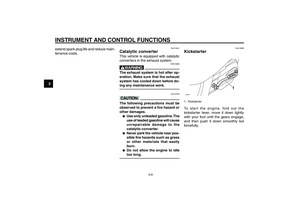
EAUT2040
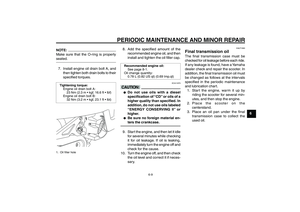
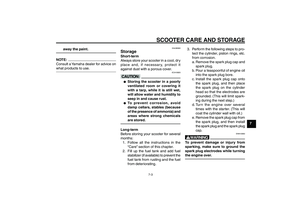
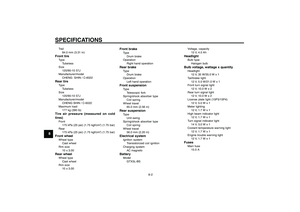
Helmet holderZAUM00**
1
1. Helmet holderThe helmet holder is located under the
seat.
To secure a helmet to the helmet
holder
1. Open the seat. (See page 3-9.)
2. Pull the helmet holder up.
3. Attach the helmet to the helmet
holder and then push the helmet
holder down.
4. Securely close the seat.
EAU13891
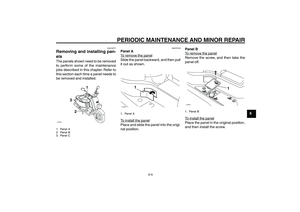
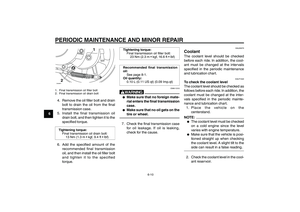
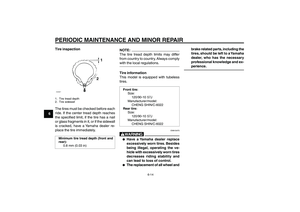
SeatZAUM00**To open the seat
1. Insert the key in the lock, and then
turn it as shown.
2. Fold the seat up.
To close the seat
1. Fold the seat down, and then push
it down to lock it in place.
2. Remove the key.NOTE:
Make sure that the seat is properly se-
cured before riding.
15P-F8199-E0_ch3.pmd2007/06/20, 14:21 9
Page 26 of 72

3-10
1
2
3
4
5
6
7
8
9
INSTRUMENT AND CONTROL FUNCTIONS
partment, be sure to wrap them in a
plastic bag so that they will not get wet.
When washing the vehicle, be careful
not to let any water enter the storage
compartment.
EAU14451
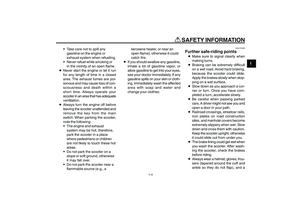
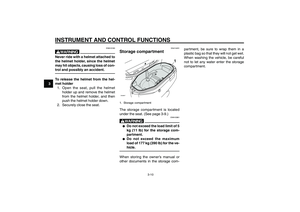
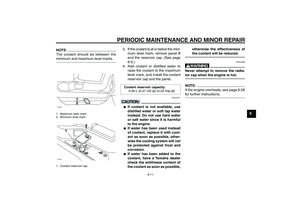
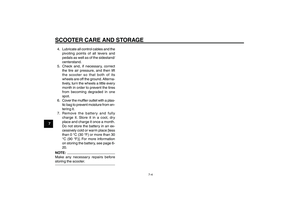
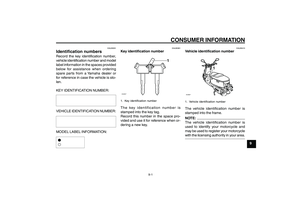
Storage compartmentZAUM00**
1
1. Storage compartmentThe storage compartment is located
under the seat. (See page 3-9.)
EWA10961
w● ●● ●
●
Do not exceed the load limit of 5
kg (11 lb) for the storage com-
partment.
● ●● ●
●
Do not exceed the maximum
load of 177 kg (390 lb) for the ve-
hicle.
When storing the owner’s manual or
other documents in the storage com- Storage compar tment
EWA10160
wNever ride with a helmet attached to
the helmet holder, since the helmet
may hit objects, causing loss of con-
trol and possibly an accident.To release the helmet from the hel-
met holder
1. Open the seat, pull the helmet
holder up and remove the helmet
from the helmet holder, and then
push the helmet holder down.
2. Securely close the seat.
15P-F8199-E0_ch3.pmd2007/06/20, 14:21 10
Page 27 of 72
4-1
1
2
3
4
5
6
7
8
9
PRE-OPERATION CHECKS
EAU15580
PRE-OPERATION CHECKS
EAU15593
The condition of a vehicle is the owner’s responsibility. Vital components can start to deteriorate quickly and unexpectedly,
even if the vehicle remains unused (for example, as a result of exposure to the elements). Any damage, fluid leakage or loss
of tire air pressure could have serious consequences. Therefore, it is very important, in addition to a thorough visual
inspection, to check the following points before each ride.NOTE:
Pre-operation checks should be made each time the vehicle is used. Such an inspection can be accomplished in a very
short time; and the added safety it assures is more than worth the time involved.
EWA11150
wIf any item in the Pre-operation check list is not working properly, have it inspected and repaired before operating
the vehicle.
15P-F8199-E0_ch4.pmd2007/06/13, 11:16 1
Page 28 of 72

4-2
1
2
3
4
5
6
7
8
9
PRE-OPERATION CHECKS
EAU15605
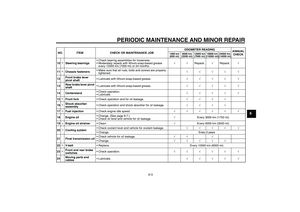
Pre-operation check listPre-operation check list
ITEM CHECKS PAGE
Fuel• Check fuel level in fuel tank.
• Refuel if necessary.
• Check fuel line for leakage.3-7
Engine oil• Check oil level in engine.
• If necessary, add recommended oil to specified level.
• Check vehicle for oil leakage.6-7
Final transmission oil• Check vehicle for oil leakage. 6-9
Coolant• Check coolant level in reservoir
• If necessary, add recommended coolant to specified level.
• Check cooling system for leakage.6-10
Front brake• Check operation.
• Lubricate cable if necessary.
• Check lever free play.
• Adjust if necessary.6-15,6-16
Rear brake• Check operation.
• Lubricate cable if necessary.
• Check lever free play.
• Adjust if necessary.6-16
~6-17
Throttle grip• Make sure that operation is smooth.
• Check cable free play.
• If necessary, have Yamaha dealer adjust cable free play and lubricate cable and
grip housing.6-17
Wheels and tires• Check for damage.
• Check tire condition and tread depth.
• Check air pressure.
• Correct if necessary.6-13~6-15
Brake levers• Make sure that operation is smooth.
• Lubricate lever pivoting points if necessary.6-1
7
15P-F8199-E0_ch4.pmd2007/06/13, 11:16 2
Page 29 of 72
4-3
1
2
3
4
5
6
7
8
9
PRE-OPERATION CHECKS
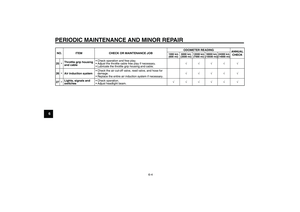
Centerstand• Make sure that operation is smooth.
• Lubricate pivots if necessary.6-18
Chassis fasteners• Make sure that all nuts, bolts and screws are properly tightened.
• Tighten if necessary.-
Instruments, lights, signals
and switches• Check operation.
• Correct if necessary.3-2,3-5 ITEM CHECKS PAGE
15P-F8199-E0_ch4.pmd2007/06/13, 11:16 3
Page 30 of 72

5-1
1
2
3
4
5
6
7
8
9
OPERATION AND IMPORTANT RIDING POINTS
EAU15942
OPERATION AND IMPORTANT RIDING POINTS
EAU15980
EWA10870
w● ●● ●
●
Become thoroughly familiar with
all operating controls and their
functions before riding. Consult
a Yamaha dealer regarding any
control or function that you do
not thoroughly understand.
● ●● ●
●
Never start the engine or oper-
ate it in a closed area for any
length of time. Exhaust fumes
are poisonous, and inhaling
them can cause loss of con-
sciousness and death within a
short time. Always make sure
that there is adequate ventila-
tion.
● ●● ●
●
For safety, always start the en-
gine with the centerstand down.
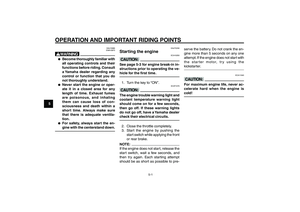
Starting the engine
EAUT2250
Starting the engine
ECA10250
cCSee page 5-3 for engine break-in in-
structions prior to operating the ve-
hicle for the first time.1. Turn the key to “ON”.
ECAT1070
cCThe engine trouble warning light and
coolant temperature warning light
should come on for a few seconds,
then go off. If these warning lights
do not go off, have a Yamaha dealer
check their electrical circuits.2. Close the throttle completely.
3. Start the engine by pushing the
start switch while applying the front
or rear brake.NOTE:
If the engine does not start, release the
start switch, wait a few seconds, and
then try again. Each starting attempt
should be as short as possible to pre-serve the battery. Do not crank the en-
gine more than 5 seconds on any one
attempt. If the engine does not start with
the starter motor, try using the
kickstarter.
ECA11040
cCFor maximum engine life, never ac-
celerate hard when the engine is
cold!
15P-F8199-E0_ch5.pmd2007/06/13, 11:17 1
Page 31 of 72

5-2
1
2
3
4
5
6
7
8
9
OPERATION AND IMPORTANT RIDING POINTS
EAU16760
Starting offNOTE:
Before starting off, allow the engine to
warm up.1. While pulling the rear brake lever
with your left hand and holding the
grab bar with your right hand, push
the scooter off the centerstand.
2. Sit astride the seat, and then ad-
just the rear view mirrors.
3. Switch the turn signal on.
4. Check for oncoming traffic, and
then slowly turn the throttle grip (on
the right) in order to take off.
5. Switch the turn signal off. Starting off
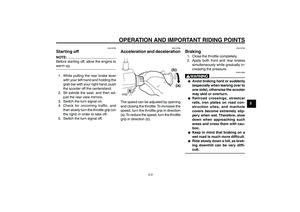
Acceleration and deceleration
Braking
EAU16780
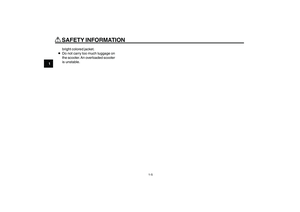
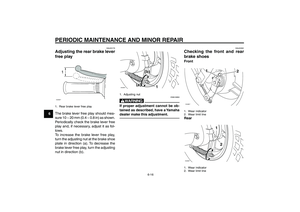
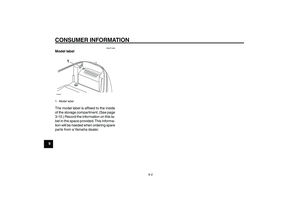
Acceleration and decelerationZAUM00**
(a) (b)
The speed can be adjusted by opening
and closing the throttle. To increase the
speed, turn the throttle grip in direction
(a). To reduce the speed, turn the throttle
grip in direction (b).
EAU16792
Braking1. Close the throttle completely.
2. Apply both front and rear brakes
simultaneously while gradually in-
creasing the pressure.
EWA10300
w● ●● ●
●
Avoid braking hard or suddenly
(especially when leaning over to
one side), otherwise the scooter
may skid or overturn.
● ●● ●
●
Railroad crossings, streetcar
rails, iron plates on road con-
struction sites, and manhole
covers become extremely slip-
pery when wet. Therefore, slow
down when approaching such
areas and cross them with cau-
tion.
● ●● ●
●
Keep in mind that braking on a
wet road is much more difficult.
● ●● ●
●
Ride slowly down a hill, as brak-
ing downhill can be very diffi-
cult.
15P-F8199-E0_ch5.pmd2007/06/13, 11:17 2
Page 32 of 72

5-3
1
2
3
4
5
6
7
8
9
OPERATION AND IMPORTANT RIDING POINTS
EAU17212
ParkingWhen parking, stop the engine, and
then remove the key from the main
switch.
EWA10310
w● ●● ●
●
Since the engine and exhaust
system can become very hot,
park in a place where pedestri-
ans or children are not likely to
touch them.
● ●● ●
●
Do not park on a slope or on soft
ground, otherwise the vehicle
may overturn.
ECA10380
cCNever park in an area where there are
fire hazards such as grass or other
flammable materials.
Engine break-in
Parking
EAU16830
Engine break-inThere is never a more important period
in the life of your engine than the period
between 0 and 1000 km (600 mi). For
this reason, you should read the follow-
ing material carefully.
Since the engine is brand new, do not
put an excessive load on it for the first
1000 km (600 mi). The various parts in
the engine wear and polish themselves
to the correct operating clearances.
During this period, prolonged full-throttle
operation or any condition that might
result in engine overheating must be
avoided.
EAU16950
0 ~ 150 km (0 ~ 90 mi)
Avoid prolonged operation above 1/3
throttle.
After every hour of operation, stop the
engine, and then let it cool for five to
ten minutes.
Vary the engine speed from time to time.
Do not operate the engine at one set
throttle position.150 ~ 500 km (90 ~ 300 mi)
Avoid prolonged operation above 1/2
throttle.
Rev the engine freely through the gears,
but do not use full throttle at any time.
500 ~ 1000 km (300 ~ 600 mi)
Avoid prolonged operation above 3/4
throttle.
ECA10350
cCAfter 1000 km (600 mi) of operation,
the engine oil must be changed and
the oil strainer cleaned.1000 km (600 mi) and beyond
Avoid prolonged full-throttle operation.
Vary the speed occasionally.
ECA10270
cCIf any engine trouble should occur
during the engine break-in period,
immediately have a Yamaha dealer
check the vehicle.
15P-F8199-E0_ch5.pmd2007/06/13, 11:17 3