Page 2615 of 3000
BRAKE – BRAKE BOOSTERBR–19
BR
ON-VEHICLE INSPECTION
1. INSPECT BRAKE BOOSTER
(a) Air tightness check.
(1) Start the engine and stop it after 1 or 2 minutes.
Depress the brake pedal several times slowly.
HINT:
If the pedal goes down farthest at the 1st time,
and gradually rises at the 2nd or 3rd time, the
booster is airtight.
(2) Depress the brake pedal while the engine is
running, and stop the engine with the pedal
depressed.
HINT:
If there is no change in the pedal reserve
distance after holding the pedal for 30 seconds,
the booster is airtight.
(b) Operating check.
(1) Depress the brake pedal several times with the
ignition switch OFF and check that there is no
change in the pedal reserve distance.
(2) Depress the brake pedal and start the engine.
HINT:
If the pedal goes down slightly, the operation is
normal.
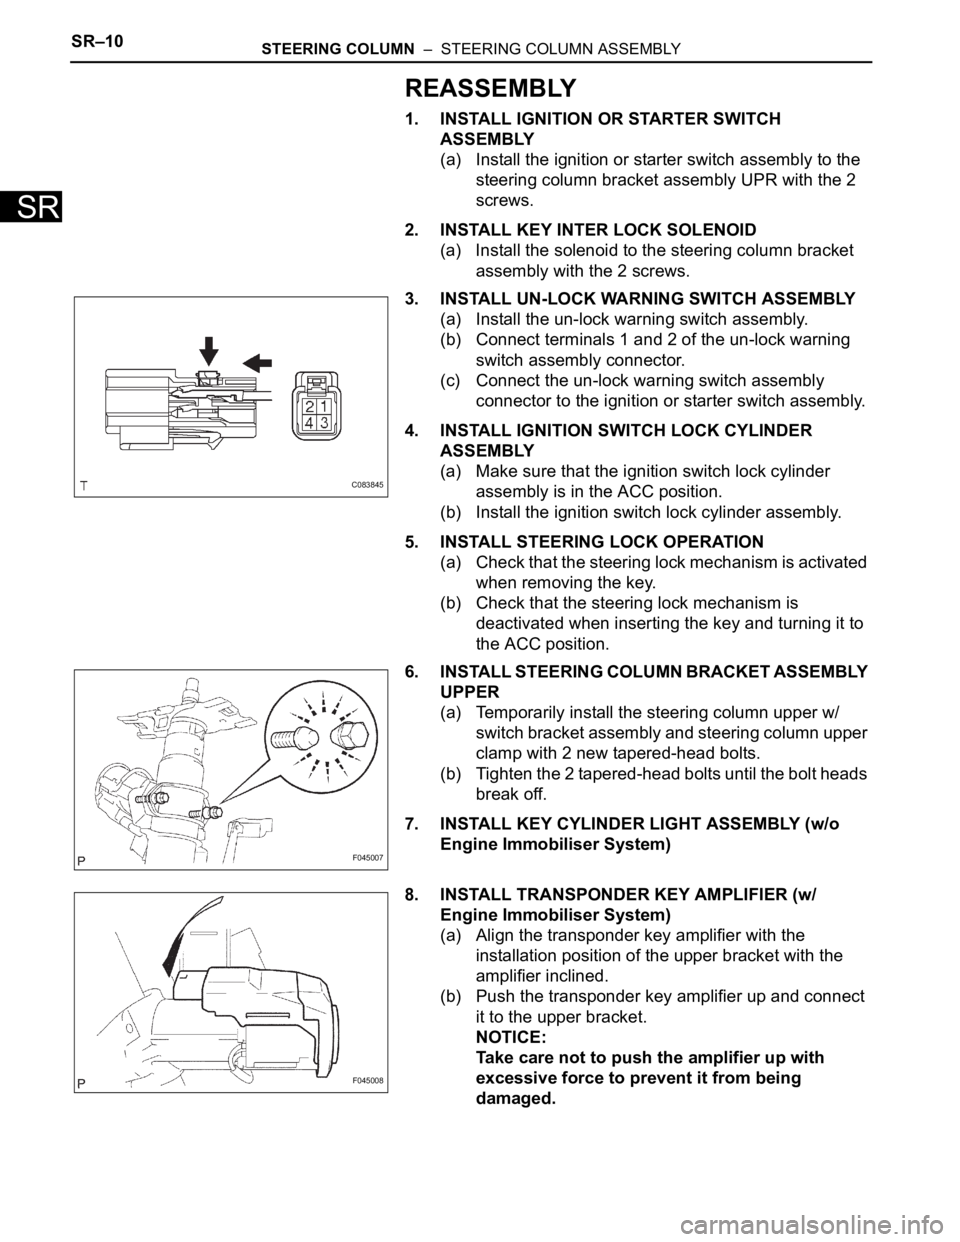
BR02238E12
Page 2674 of 3000

SR–10STEERING COLUMN – STEERING COLUMN ASSEMBLY
SR
REASSEMBLY
1. INSTALL IGNITION OR STARTER SWITCH
ASSEMBLY
(a) Install the ignition or starter switch assembly to the
steering column bracket assembly UPR with the 2
screws.
2. INSTALL KEY INTER LOCK SOLENOID
(a) Install the solenoid to the steering column bracket
assembly with the 2 screws.
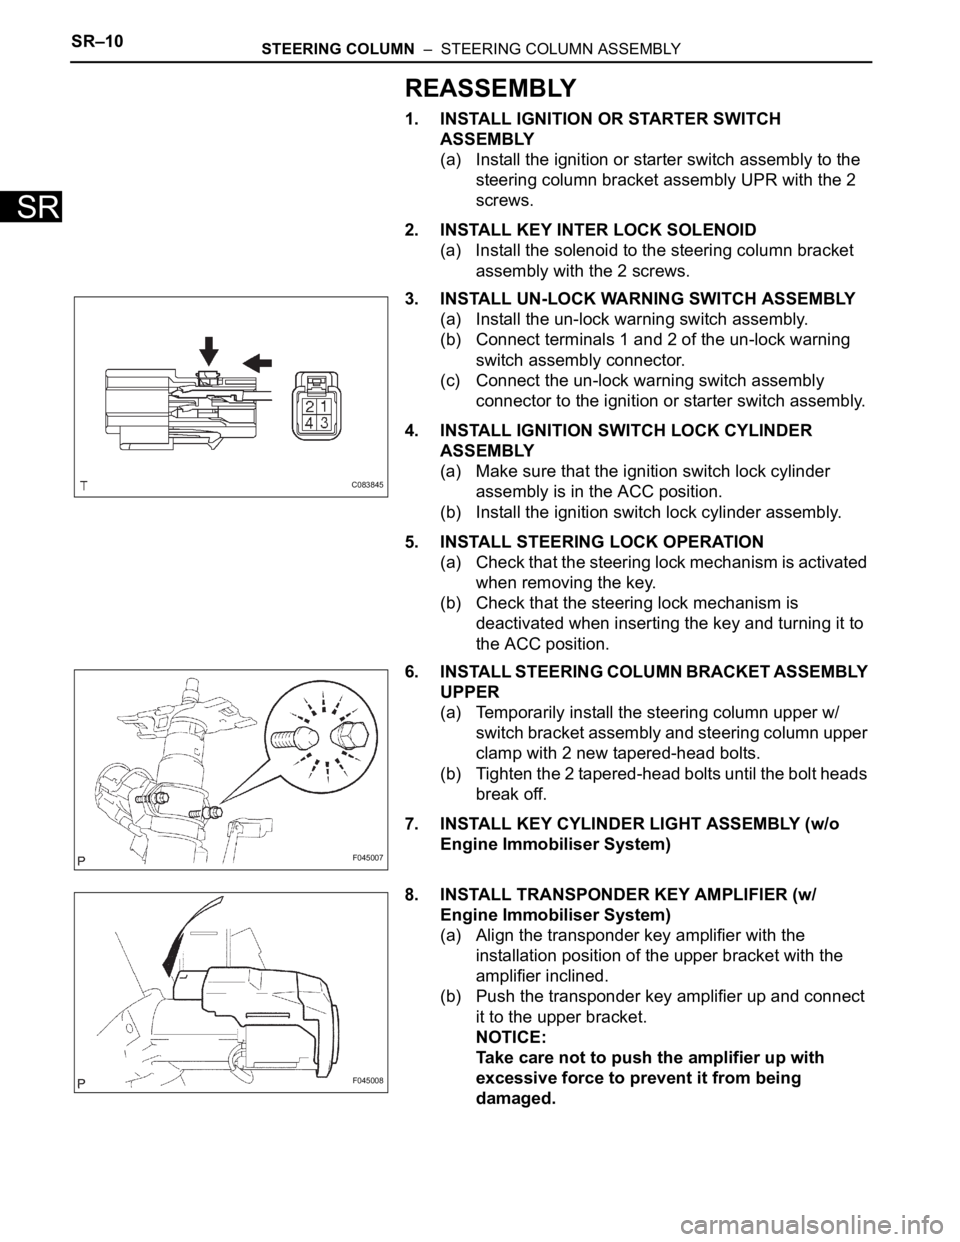
3. INSTALL UN-LOCK WARNING SWITCH ASSEMBLY
(a) Install the un-lock warning switch assembly.
(b) Connect terminals 1 and 2 of the un-lock warning
switch assembly connector.
(c) Connect the un-lock warning switch assembly
connector to the ignition or starter switch assembly.
4. INSTALL IGNITION SWITCH LOCK CYLINDER
ASSEMBLY
(a) Make sure that the ignition switch lock cylinder
assembly is in the ACC position.
(b) Install the ignition switch lock cylinder assembly.
5. INSTALL STEERING LOCK OPERATION
(a) Check that the steering lock mechanism is activated
when removing the key.
(b) Check that the steering lock mechanism is
deactivated when inserting the key and turning it to
the ACC position.
6. INSTALL STEERING COLUMN BRACKET ASSEMBLY
UPPER
(a) Temporarily install the steering column upper w/
switch bracket assembly and steering column upper
clamp with 2 new tapered-head bolts.
(b) Tighten the 2 tapered-head bolts until the bolt heads
break off.
7. INSTALL KEY CYLINDER LIGHT ASSEMBLY (w/o
Engine Immobiliser System)
8. INSTALL TRANSPONDER KEY AMPLIFIER (w/
Engine Immobiliser System)
(a) Align the transponder key amplifier with the
installation position of the upper bracket with the
amplifier inclined.
(b) Push the transponder key amplifier up and connect
it to the upper bracket.
NOTICE:
Take care not to push the amplifier up with
excessive force to prevent it from being
damaged.
C083845
F045007
F045008
Page 2683 of 3000

SR–10STEERING COLUMN – STEERING COLUMN ASSEMBLY
SR
REASSEMBLY
1. INSTALL IGNITION OR STARTER SWITCH
ASSEMBLY
(a) Install the ignition or starter switch assembly to the
steering column bracket assembly UPR with the 2
screws.
2. INSTALL KEY INTER LOCK SOLENOID
(a) Install the solenoid to the steering column bracket
assembly with the 2 screws.
3. INSTALL UN-LOCK WARNING SWITCH ASSEMBLY
(a) Install the un-lock warning switch assembly.
(b) Connect terminals 1 and 2 of the un-lock warning
switch assembly connector.
(c) Connect the un-lock warning switch assembly
connector to the ignition or starter switch assembly.
4. INSTALL IGNITION SWITCH LOCK CYLINDER
ASSEMBLY
(a) Make sure that the ignition switch lock cylinder
assembly is in the ACC position.
(b) Install the ignition switch lock cylinder assembly.
5. INSTALL STEERING LOCK OPERATION
(a) Check that the steering lock mechanism is activated
when removing the key.
(b) Check that the steering lock mechanism is
deactivated when inserting the key and turning it to
the ACC position.
6. INSTALL STEERING COLUMN BRACKET ASSEMBLY
UPPER
(a) Temporarily install the steering column upper w/
switch bracket assembly and steering column upper
clamp with 2 new tapered-head bolts.
(b) Tighten the 2 tapered-head bolts until the bolt heads
break off.
7. INSTALL KEY CYLINDER LIGHT ASSEMBLY (w/o
Engine Immobiliser System)
8. INSTALL TRANSPONDER KEY AMPLIFIER (w/
Engine Immobiliser System)
(a) Align the transponder key amplifier with the
installation position of the upper bracket with the
amplifier inclined.
(b) Push the transponder key amplifier up and connect
it to the upper bracket.
NOTICE:
Take care not to push the amplifier up with
excessive force to prevent it from being
damaged.
C083845
F045007
F045008
Page 2713 of 3000

POWER STEERING – POWER STEERING SYSTEMPS–3
PS
(b) With the engine stopped, check the fluid level in the
fluid reservoir.
If necessary, add fluid.
Fluid:
ATF DEXRON II or III, or equivalent
HINT:
If the fluid is hot, check that the fluid level is within
the HOT range on the fluid reservoir. If the fluid is
cold, check that the fluid level is within the COLD
range.
(c) Start the engine and run it at idle.
(d) Turn the steering wheel from lock to lock several
times to raise fluid temperature.
Fluid temperature:
75 to 80
C (167 to 176F)
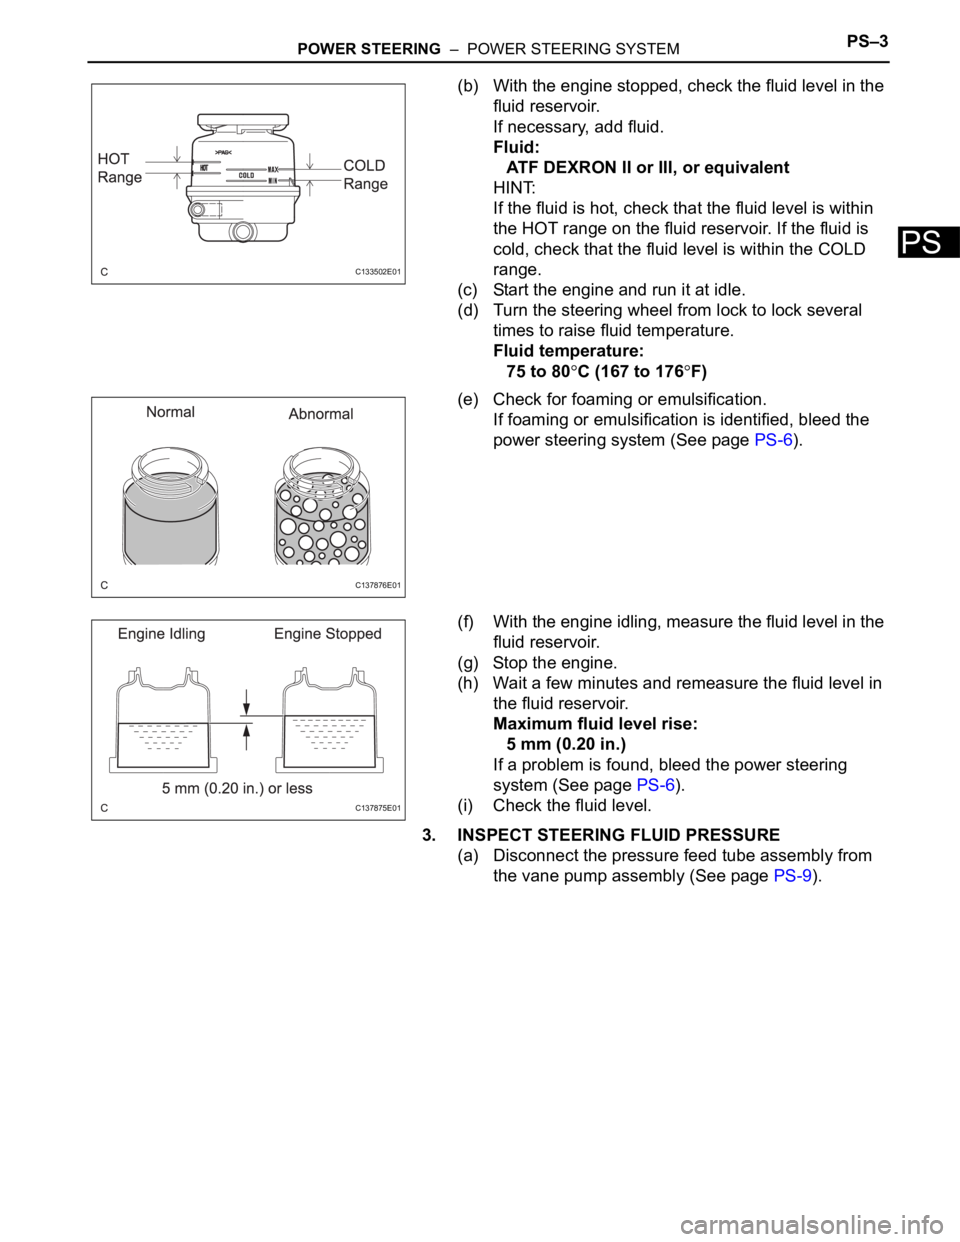
(e) Check for foaming or emulsification.
If foaming or emulsification is identified, bleed the
power steering system (See page PS-6).
(f) With the engine idling, measure the fluid level in the
fluid reservoir.
(g) Stop the engine.
(h) Wait a few minutes and remeasure the fluid level in
the fluid reservoir.
Maximum fluid level rise:
5 mm (0.20 in.)
If a problem is found, bleed the power steering
system (See page PS-6).
(i) Check the fluid level.
3. INSPECT STEERING FLUID PRESSURE
(a) Disconnect the pressure feed tube assembly from
the vane pump assembly (See page PS-9).
C133502E01
C137876E01
C137875E01
Page 2714 of 3000
PS–4POWER STEERING – POWER STEERING SYSTEM
PS
(b) Connect SST as shown in the illustration.
SST 09640-10010 (09641-01010, 09641-01060,
09641-01030)
NOTICE:
Check that the valve of SST is in the open
position.
(c) Bleed the power steering system (See page PS-6).
(d) Start the engine and run it at idle.
(e) Turn the steering wheel from lock to lock several
times to raise fluid temperature.
Fluid temperature:
75 to 80
C (167 to 176F)
(f) With the engine idling, close the valve of SST and
observe the reading on SST.
Standard fluid pressure:
7,800 to 8,300 kPa (79.5 to 84.6 kgf/cm
2, 1,131
to 1,204 psi)
NOTICE:
• Do not keep the valve closed for more than 10
seconds.
• Do not allow the fluid temperature to become
too high.
C133506E01
C162083E01
Page 2715 of 3000

POWER STEERING – POWER STEERING SYSTEMPS–5
PS
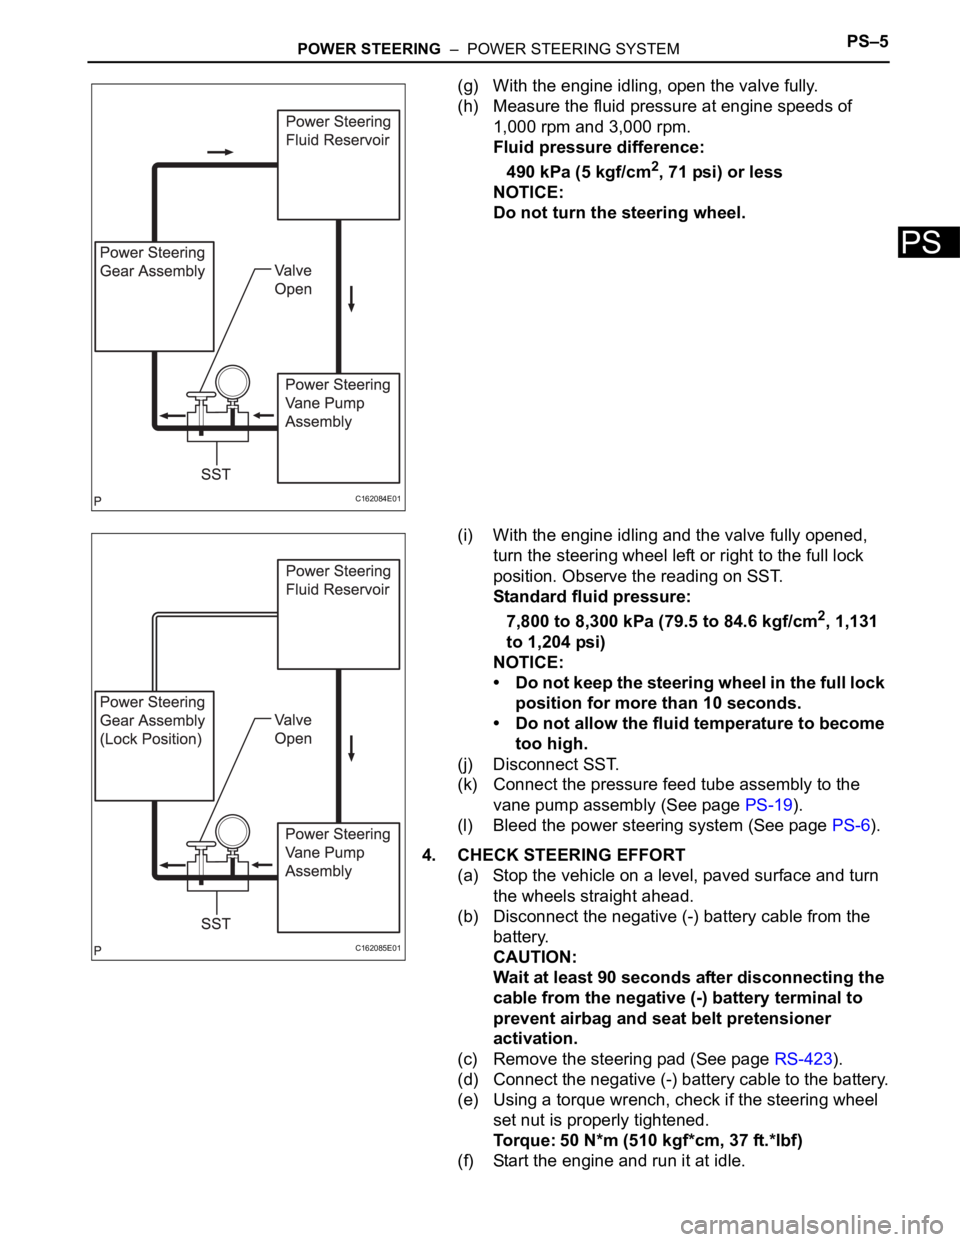
(g) With the engine idling, open the valve fully.
(h) Measure the fluid pressure at engine speeds of
1,000 rpm and 3,000 rpm.
Fluid pressure difference:
490 kPa (5 kgf/cm
2, 71 psi) or less
NOTICE:
Do not turn the steering wheel.
(i) With the engine idling and the valve fully opened,
turn the steering wheel left or right to the full lock
position. Observe the reading on SST.
Standard fluid pressure:
7,800 to 8,300 kPa (79.5 to 84.6 kgf/cm
2, 1,131
to 1,204 psi)
NOTICE:
• Do not keep the steering wheel in the full lock
position for more than 10 seconds.
• Do not allow the fluid temperature to become
too high.
(j) Disconnect SST.
(k) Connect the pressure feed tube assembly to the
vane pump assembly (See page PS-19).
(l) Bleed the power steering system (See page PS-6).
4. CHECK STEERING EFFORT
(a) Stop the vehicle on a level, paved surface and turn
the wheels straight ahead.
(b) Disconnect the negative (-) battery cable from the
battery.
CAUTION:
Wait at least 90 seconds after disconnecting the
cable from the negative (-) battery terminal to
prevent airbag and seat belt pretensioner
activation.
(c) Remove the steering pad (See page RS-423).
(d) Connect the negative (-) battery cable to the battery.
(e) Using a torque wrench, check if the steering wheel
set nut is properly tightened.
Torque: 50 N*m (510 kgf*cm, 37 ft.*lbf)
(f) Start the engine and run it at idle.
C162084E01
C162085E01
Page 2717 of 3000
PS–6POWER STEERING – POWER STEERING FLUID
PS
POWER STEERING FLUID
BLEEDING
1. BLEED POWER STEERING SYSTEM
(a) Check the fluid level (See page PS-2).
(b) Jack up the front of the vehicle and support it with
stands.
(c) Turn the steering wheel.
(1) With the engine stopped, turn the steering
wheel slowly from lock to lock several times.
(d) Lower the vehicle.
(e) Start the engine.
(1) Run the engine at idle for a few minutes.
(f) Turn the steering wheel.
(1) With the engine idling, turn the steering wheel
left or right to the full lock position and keep it in
that position for 2 to 3 seconds, then turn the
steering wheel to the opposite full lock position
and keep it there for 2 to 3 seconds.
(2) Repeat this procedure several times.
(g) Stop the engine.
(h) Check for foaming or emulsification.
HINT:
If the system has to be bled twice because of
forming or emulsification, be sure to check for fluid
leaks in the system.
(i) Check the fluid level (See page PS-2).
C137876E01
Page 2791 of 3000
AC–48AIR CONDITIONING – AIR CONDITIONING SYSTEM (for Automatic Air Conditioning Sys-
tem)
AC
SYSTEM DESCRIPTION
The ECM sends an engine speed signal to the A/C amplifier via CAN communication and BEAN
communication.
The A/C amplifier reads the difference between compressor speed and engine speed. When the
difference becomes too large, the A/C amplifier determines that the compressor locks, and turns the
magnetic clutch off.
WIRING DIAGRAM
INSPECTION PROCEDURE
(a) Use the intelligent tester to check if the CAN
communication system is functioning normally.
DTC B1422/22 Compressor Lock Sensor Circuit
DTC No. DTC Detection Condition Trouble Area
B1422/22 Open or short in compressor lock sensor circuit• A/C compressor (A/C lock sensor)
• Compressor drive belt
• Harness or connector between compressor and
magnetic clutch (A/C lock sensor)
• A/C amplifier
• CAN communication system
• Multiplex communication system (BEAN)
1CHECK CAN COMMUNICATION SYSTEM
E147293E02