Page 97 of 172

95
OVERVIEW REPAIRS OPERATIONCONTROLS DATA INDEX
LOADING CARGO ROOF-MOUNTED LUGGAGE RACK
*
Always position and secure the load
as described above. If you do not, it
can pose a danger to the passengers during
braking and evasive maneuvers, for exam-
ple.
Do not exceed the permissible gross weight
and axle load, refer to page151 ff; other-
wise the vehicle's operating safety is no
longer assured and it will not be in compli-
ance with the certification regulations.
Do not stow heavy or hard objects in the
passenger compartment without first
securing them. Otherwise they would be
thrown around during braking and evasive
maneuvers and endanger the occupants.<
When loading a roof-mounted lug-
gage rack on the MINI, make sure
that there is sufficient space for the move-
ment of the glass sunroof and that no
objects protrude into the swiveling area of
the tailgate; otherwise damage can occur.
Do not secure the roof-mounted luggage
rack to the MINI's trim strips or to the MINI
Convertible top. Otherwise, the lack of a
secure hold could lead to damage or acci-
dents.<
Special roof-mounted luggage racks
for your MINI are available as acces-
sories from your MINI Dealer.<
Page 98 of 172
Page 99 of 172
OVERVIEW
CONTROLS
OPERATION, CARE, MAINTENANCE
OWNER SERVICE PROCEDURES
INDEX TECHNICAL DATA
97
OVERVIEW REPAIRSOPERATIONCONTROLS DATA INDEX
Operation
Page 100 of 172

98
BREAK-IN PROCEDURES GENERAL DRIVING NOTESMoving parts need to be given some time
until they can interact smoothly with one
another. To ensure that your vehicle pro-
vides maximum economy throughout a
long service life, we request that you com-
ply with the following information:EngineComply with the local speed limits.
Up to 1,250 miles/2,000 km:
Drive at varying engine and road speeds,
but do not exceed the following:
4,500 rpm or
95 mph / 150 km/h.
Absolutely avoid putting the accelerator in
full-throttle or kickdown position.
After 1,250 miles/2,000 km:
Engine and road speeds can be gradually
increased.
TiresDue to technical factors associated with
their manufacture, tires do not achieve
their full traction potential until after an
initial break-in period. Therefore drive care-
fully during the first 200 miles/300 km.Brake systemApprox. 300 miles/500 km must be driven
before the brake pads and rotors achieve
the optimum pad-surface and wear pat-
terns required for trouble-free operation
and an extended service life.ClutchRoughly 300 miles/500 km must be driven
before the clutch starts to operate at opti-
mum efficiency. Remember to engage the
clutch carefully during this initial period.After a part replacementYou should again comply with these break-
in procedures if parts mentioned above
have to be replaced later in the vehicle's
life.
Interior mirror, automatic dimming*While the vehicle is being driven forward,
these mirrors dim light through an infi-
nitely variable range depending on the
light's incidence. Two photocells in the
interior rearview mirror serve this purpose.
One is positioned on the underside of the
mirror frame, while the other is slightly off-
set on the back of the mirror.
In order for the photocells to work opti-
mally, keep them clean and do not cover
the area between the interior rearview mir-
ror and the windshield. Do not place stick-
ers or toll tags on the windshield in front of
the mirror.
Page 101 of 172

99
OVERVIEW REPAIRSOPERATIONCONTROLS DATA INDEX
GENERAL DRIVING NOTESSafe braking Your vehicle is equipped with ABS as a stan-
dard feature. If you are in a situation which
requires full braking, it is best to brake
using maximum brake pressure. Since the
vehicle remains maneuverable, you can still
go around any obstacles with the smallest
possible steering movements.
The pulsation of the brake pedal, together
with the sound of hydraulic regulation,
indicates to you that ABS is actively taking
effect.
Wet roads:
It is a good idea to periodically dry the
brakes with a gentle application when driv-
ing in rain and on wet roads. Monitor traffic
conditions to ensure that this maneuver
does not hinder other road users. The
resulting heat dries brake rotors and pads.
Then if the braking force is needed, it is
immediately available.
Driving downhill:
To prevent overheating and the
resulting reduced efficiency of the
brake system, drive down extended or
steep mountain gradients in the gear
which requires the least brake applications.
Otherwise, even light but consistent pres-
sure on the brake can lead to high tempera-
tures, brake wear and possibly even brake
failure.<
The braking effect of the engine can be
increased by downshifting in the manual
mode of the automatic transmission, to
first gear if necessary, refer to page58. This
protects the brakes from excessive loads.
Do not coast with the clutch
depressed, the transmission in idle or
the engine switched off. Otherwise, the
engine provides no braking effect, and
there is no power-assist for braking or
steering.
Make sure that there are no floor mats,
floor carpets or other objects in the vicinity
of the pedals; otherwise pedal function
could be impeded.<
Corrosion on the brake rotors:
When the vehicle is driven only occasion-
ally, during extended periods when the
vehicle is not used at all, and in operating
conditions where brake applications are
less frequent, there is an increased ten-
dency for corrosion of the brake rotors and
accumulation of contamination on the
brake pads. This occurs because the mini-
mal pressure that must be exerted by the
pads to clean the rotors by brake applica-
tions is not reached.
Corrosion on brake rotors is signaled by a
running or pulsation during braking; even
extended subsequent braking will not cure
this phenomenon.Brake pads
Sensors in the left front and right
rear brake pads monitor pad condi-
tion. When the brake pads have
worn to the permissible limit, this is indi-
cated by the brake wear warning light,
refer to page18.
Hydroplaning
When driving on wet or slushy roads,
reduce road speed. If you do not, a
wedge of water can form between tires
and road surface. This phenomenon is char-
acterized by a partial or complete loss of
contact between the tires and the road sur-
face. The ultimate results are loss of steer-
ing and braking control.<
Page 102 of 172

100
GENERAL DRIVING NOTESMobile communications in the vehicle
The manufacturer of your MINI rec-
ommends that you do not use mobile
devices, e.g. mobile phones, inside the vehi-
cle without directly connecting them to an
outside antenna. Otherwise, interference
between the vehicle electronics and the
mobile device cannot be ruled out. In addi-
tion, it is not ensured that the radiation
emitted during mobile transmission will be
directed outside of the vehicle.<
Driving through water
Do not drive through water on the
road if it is deeper than 1 ft/30 cm,
and then only at walking speed at the
most. Otherwise, the vehicle's engine, the
electrical systems and the transmission
may be damaged.<
Use the parking brake on inclines
Do not hold the vehicle in place on
slopes by slipping or 'riding' the
clutch. Use the parking brake instead. Oth-
erwise, a high degree of clutch wear could
result.<
Clothes hooks
When suspending clothing from the
hooks, ensure that they will not
obstruct the driver's vision. Do not hang
heavy objects on the hooks. If you do, they
could injure the occupants during braking
or evasive maneuvers.<
Hot exhaust system
High temperatures occur in every
vehicle's exhaust system. Do not
remove the heat protection plates fitted in
the area of the exhaust system and do not
apply body-cavity protectant to this area.
When driving, standing at idle, and parking
the vehicle, take care to avoid contact
between the hot exhaust system and flam-
mable materials, e.g. hay, grass, leaves, etc.
Such contact could lead to a fire resulting in
serious personal injury and property dam-
age. Do not touch hot exhaust pipes. Other-
wise there is a risk of burns.<
Parking the vehicleCondensation forms in the air conditioning
system during operation, and then exits
under the vehicle. Traces of condensed
water on the ground are therefore normal.
Close the tailgate
Drive the vehicle only when the tail-
gate is completely closed. Otherwise,
exhaust fumes could penetrate the interior
of the vehicle.<
Should it be absolutely necessary to drive
with the tailgate open:
1. Close all windows as well as the glass
sunroof or the sliding sunroof of the
MINI Convertible
2. Sharply increase the air supply for the
heater, the air conditioning or the auto-
matic climate control, refer to page79
or82.
Page 103 of 172

101
OVERVIEW REPAIRSOPERATIONCONTROLS DATA INDEX
REFUELING
Always switch off the engine before
refueling; otherwise no fuel can be
added to the tank and the SERVICE ENGINE
SOON lamp may come on.<
1. Open the fuel filler door
2. Turn the gas cap counterclockwise
3. Put the gas cap in the bracket attached
to the fuel filler door.
Always observe all applicable precau-
tionary measures and regulations
when handling fuels. Do not carry any
spare fuel containers in the vehicle. They
can leak and cause an explosion or fire in
the event of an accident.<
Observe the following when refueling
Always observe all safety precautions
posted at the service station when
handling fuel.<
When refueling, insert the filler nozzle
completely into the filler pipe. Pulling the
nozzle out of the pipe during refueling:
>Results in premature pump shutoff
>Will reduce the effect of the fuel vapor
recovery system on the pump.
As long as the filler nozzle is used properly,
the fuel tank is full whenever the nozzle
shuts off the first time.
Closing the gas cap1. Insert gas cap
2. Turn gas cap clockwise until it clicks
3. Close fuel filler door.
Insert the cap and turn it clockwise
until it audibly clicks.
Do not jam the strap between the gas cap
and the vehicle. The following message is
displayed if the cap is loose or missing.<
US models only:
The warning lamp
* comes on.
The gas cap is not correctly closed
or missing. Check if the gas cap is
correctly closed.
Fuel tank volumeApprox. 13.2 gallons/50 liters, of which
approx. 2.1 gallons/8 liters are reserve
capacity.
Do not drive until the fuel tank is
totally empty. Otherwise engine
operations are not guaranteed and damage
could occur.
Do not fill the tank with leaded gaso-
line; otherwise the catalytic con-
verter will be permanently damaged. Do
not fill the tank with E85, i.e. fuel contain-
ing 85 % ethanol, nor with flex fuel. Other-
wise the engine and fuel supply system will
be damaged.<
Required fuelSuper Premium gasoline/AKI 91
Page 104 of 172

102
REFUELINGThis gasoline is highly recommended.
However, you may also use gasoline with
less AKI. The minimum AKI rating is 87.
If you use gasoline with this minimum AKI
rating, the engine may produce knocking
sounds when starting at high outside tem-
peratures. This has no effect on the engine
life.Use high-quality brandsField experience has indicated significant
differences in fuel quality: volatility, com-
position, additives, etc., among gasolines
offered for sale in the United States and
Canada. Fuels containing up to and includ-
ing 10 % ethanol or other oxygenates with
up to 2.8 % oxygen by weight, that is, 15 %
MTBE or 3 % methanol plus an equivalent
amount of co-solvent, will not void the
applicable warranties with respect to
defects in materials or workmanship.
The use of poor-quality fuels may
result in driveability, starting and
stalling problems especially under certain
environmental conditions such as high
ambient temperature and high altitude.
Should you encounter driveability prob-
lems which you suspect could be related to
the fuel you are using, we recommend that
you respond by switching to a recognized
high-quality brand such as gasoline that is
advertised as Top Tier Detergent Gasoline.
Failure to comply with these recommenda-
tions may result in unscheduled mainte-
nance.<
Manual release with the MINIIn the event of an electrical malfunction,
the fuel filler door can be unlocked manu-
ally.
1. Remove the side trim panel on the left-
hand side of the luggage compartment
2. Pull the white lever toward the rear.
The fuel filler door is released
3. Open the fuel filler door.
 1
1 2
2 3
3 4
4 5
5 6
6 7
7 8
8 9
9 10
10 11
11 12
12 13
13 14
14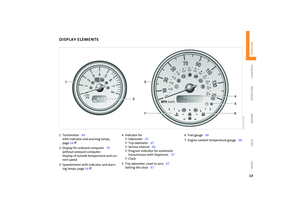 15
15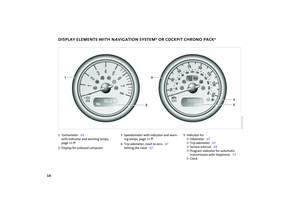 16
16 17
17 18
18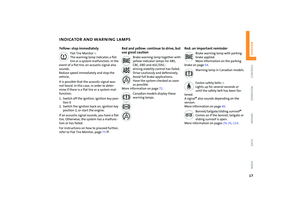 19
19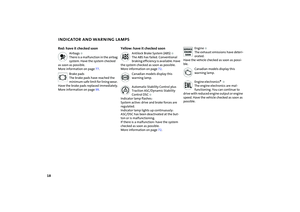 20
20 21
21 22
22 23
23 24
24 25
25 26
26 27
27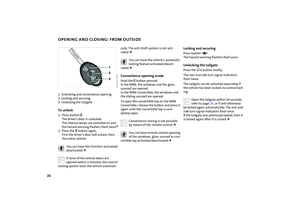 28
28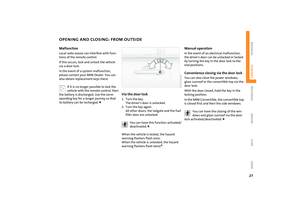 29
29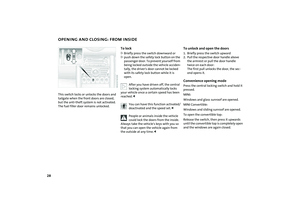 30
30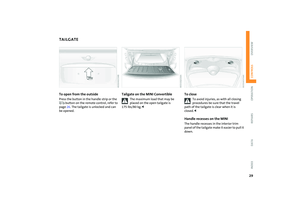 31
31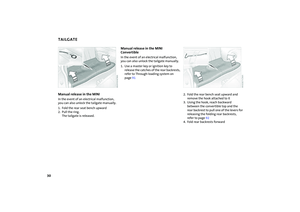 32
32 33
33 34
34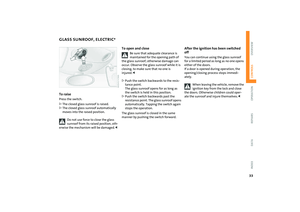 35
35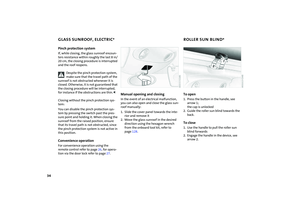 36
36 37
37 38
38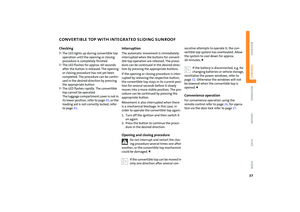 39
39 40
40 41
41 42
42 43
43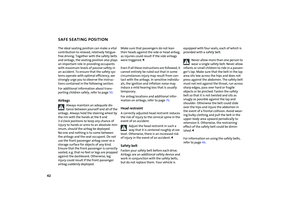 44
44 45
45 46
46 47
47 48
48 49
49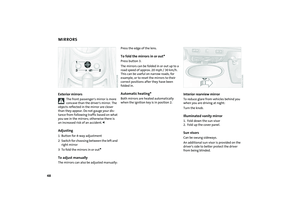 50
50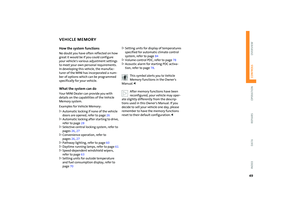 51
51 52
52 53
53 54
54 55
55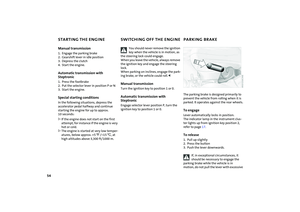 56
56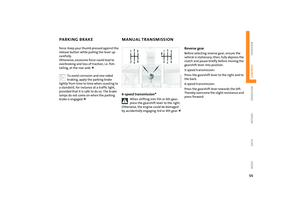 57
57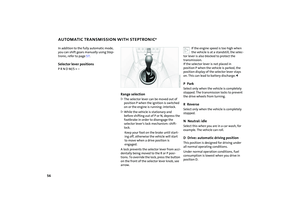 58
58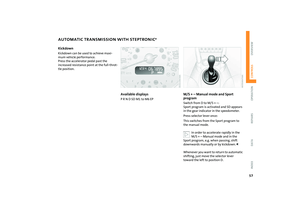 59
59 60
60 61
61 62
62 63
63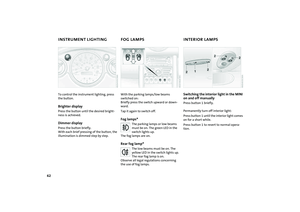 64
64 65
65 66
66 67
67 68
68 69
69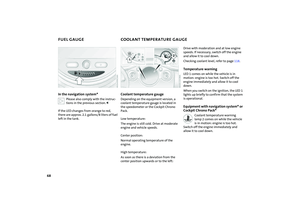 70
70 71
71 72
72 73
73 74
74 75
75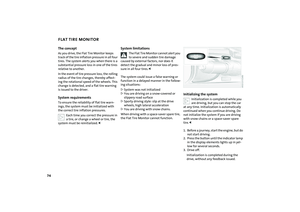 76
76 77
77 78
78 79
79 80
80 81
81 82
82 83
83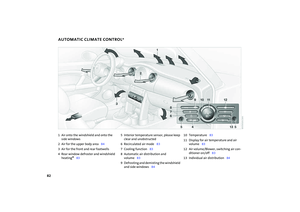 84
84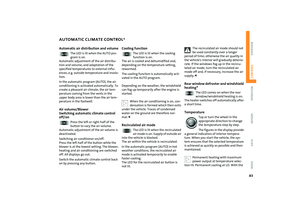 85
85 86
86 87
87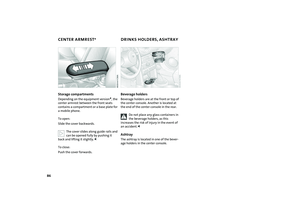 88
88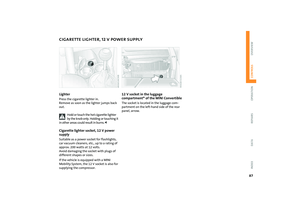 89
89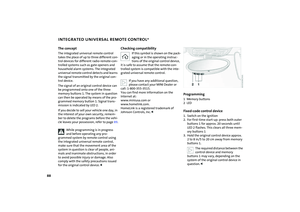 90
90 91
91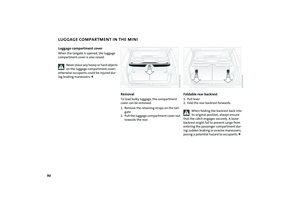 92
92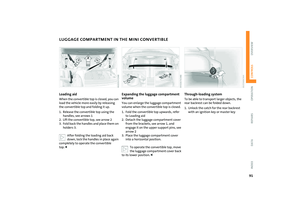 93
93 94
94 95
95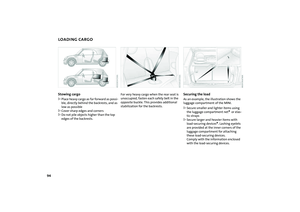 96
96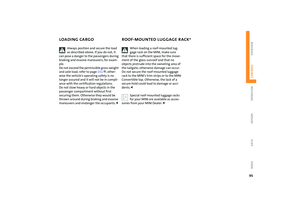 97
97 98
98 99
99 100
100 101
101 102
102 103
103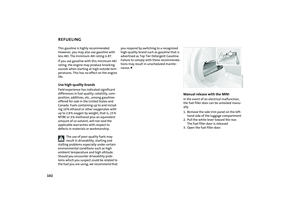 104
104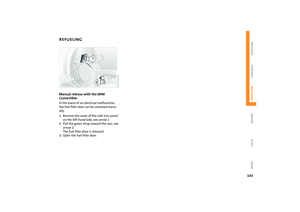 105
105 106
106 107
107 108
108 109
109 110
110 111
111 112
112 113
113 114
114 115
115 116
116 117
117 118
118 119
119 120
120 121
121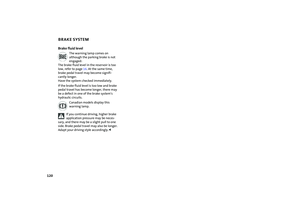 122
122 123
123 124
124 125
125 126
126 127
127 128
128 129
129 130
130 131
131 132
132 133
133 134
134 135
135 136
136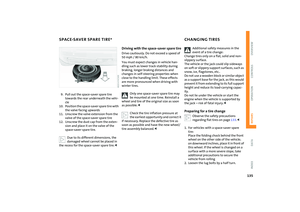 137
137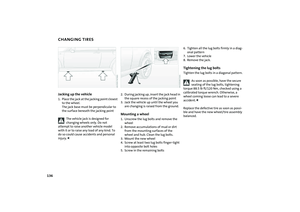 138
138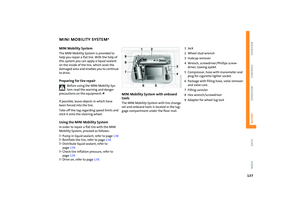 139
139 140
140 141
141 142
142 143
143 144
144 145
145 146
146 147
147 148
148 149
149 150
150 151
151 152
152 153
153 154
154 155
155 156
156 157
157 158
158 159
159 160
160 161
161 162
162 163
163 164
164 165
165 166
166 167
167 168
168 169
169 170
170 171
171
