Page 65 of 172

63
OVERVIEW REPAIRS OPERATIONCONTROLS DATA INDEX
INTERIOR LAMPS WASHER/WIPER SYSTEMSwitching the interior light in the MINI
Convertible on and off manuallyPress button 1 briefly.
Permanently turn off interior light:
Press button 1 until the interior light comes
on for a short while.
Press button 1 to revert to normal opera-
tion.Switching the reading lamps on and
off Press button 2.
0 Wipers parked
1 Intermittent operation or rain sensor
2 Normal wiper speed
3 Fast wiper speed
4Brief wipe
5 Clean windshield and headlampsIntermittent operationNot on vehicles with rain sensor.
The interval time for the wipers is depen-
dent on the vehicle speed.Rain sensor* The rain sensor is located on the wind-
shield, directly in front of the interior rear-
view mirror.
When the rain sensor is activated, the
windshield wipers are automatically con-
trolled depending on the amount of mois-
ture, including snow, on the windshield.
To activate the rain sensor:
Lever in position 1.
The wipers will move once across the wind-
shield.
To deactivate the rain sensor:
Lever in position 0.
Switch the rain sensor off when pass-
ing through an automatic car wash.
Failure to do so could result in damage
caused by undesired wiper activation.
switch automatically to intermittent wip-
ing.
You can have this function activated/
deactivated.
switch automatically to normal wiper
speed.
Page 66 of 172

64
WASHER/WIPER SYSTEM WASHER FLUID
You can have this function activated/
deactivated.<
Cleaning windshield and headlamps∗The system sprays washer fluid against the
windshield. The wipers are automatically
activated for a brief period.
When the vehicle lighting is on, the head-
lamps are also cleaned at appropriate inter-
vals.
Do not use the washers if there is any
danger that the fluid will freeze on
the windshield. For this reason, use anti-
freeze, refer to page65.
Do not use the washers if the fluid reservoir
is empty, as the washer pump will other-
wise be damaged.
automatically when the ignition key is in
position 2.
Rear window wiper*6 Intermittent mode:
Turn the cap to position 6.
The rear window wiper moves across the
window a number of times before
switching to intermittent operationCleaning the rear window*7 During intermittent mode:
Turn the cap to position 7 and keep it
there
8 Wipers in neutral position:
Turn the cap to position 8 and keep it
there.
Headlamp* and window washer
systemsThe capacity of the headlamp washer sys-
tem is approx. 2.6 quarts/2.5 liters, that of
the windshield and rear window washer
system approx. 2.4 quarts/2.3 liters.
Fill with water and, if necessary, with anti-
freeze, according to manufacturer's recom-
mendations.
We recommend that you mix the
washer fluid before filling either res-
ervoir.<
Antifreeze agent for the washer sys-
tems is flammable. Always keep it
well away from sparks and open flames,
and store it in tightly closed original con-
tainers well out of the reach of children.
Page 67 of 172
65
OVERVIEW REPAIRS OPERATIONCONTROLS DATA INDEX
WASHER FLUID CRUISE CONTROL
*
Always observe the instructions on the con-
tainers.<
Washer fluid levelThe yellow LED in the wiper control lever
lights up when the washer fluid level is too
low.
In the following situations, the LED flashes
for approx. 10 seconds when the washer
fluid level has dropped to a minimum:
>When cleaning the windshield and head-
lamps by pulling the wiper control lever
>When the ignition is switched on
>When starting the engine
On the multifunction sports steering
wheelAbove approx. 20 mph / 30 km/h the cruise
control maintains and stores any desired
speed.
Do not use cruise control when unfa-
vorable conditions make it inadvis-
able to drive at a constant speed. Other-
wise, the vehicle could go out of control
and an accident could be caused. Unfavor-
able conditions include, for example, twist-
ing roads, high traffic density, or adverse
road conditions such as snow, rain, ice, or
loose surfaces.<
Page 68 of 172

66
CRUISE CONTROL
*
To activate via the multifunction
sports steering wheel
1. Start the engine
2. Press button 2.
The indicator lamp in the instrument clus-
ter lights up.
Cruise control is active.To deactivatePress button 2 repeatedly until the indica-
tor lamp goes out.
The cruise control is deactivated when the
ignition key is turned to position 0.
The stored speed is cleared.To maintain, store and increase speedPress button 3.
The system maintains and stores the cur-
rent vehicle speed. Every time you tap the
button, the speed increases by approx.
1mph/ 2km/h.
Press and hold button 3.
The vehicle accelerates without pressure
on the accelerator pedal. When you release
the button, the system maintains and
stores the current speed.
If, on a downhill grade, the engine
braking effect is not sufficient, the
controlled speed can be exceeded. Speed
can drop on uphill grades if the engine out-
put is insufficient.
If you are already driving with active cruise
control, the speed is decreased by approx.
1 mph / 2 km/h every time you tap the but-
ton.
Press and hold button 4.
With the cruise control active, the system
automatically reduces the throttle opening
to slow the vehicle. When you release the
button, the system maintains and stores
the current speed.
To cancel the cruise controlThe cruise control is automatically can-
celed:
>When the brakes are applied
>When the clutch is depressed
>If the cruising speed is either exceeded or
not met for an extended length of time,
for example if you press the accelerator
pedal and exceed the stored speed
>When ASC or DSC is in action.
The indicator lamp stays lit.
You can use the cruise control again as
required.
On the multifunction steering wheel, the
cruise control can be interrupted manually:
When the system is activated, press
button 2.To continue cruise controlPress button 1.
The vehicle accelerates to and maintains
the last speed stored.
Page 69 of 172

67
OVERVIEW REPAIRS OPERATIONCONTROLS DATA INDEX
ODOMETER CLOCK FUEL GAUGE 1 Trip odometer/clock
2OdometerTrip odometer/clockTo switch between the trip odometer and
the clock:
Press the button.
To reset the trip odometer to zero:
Press the button until the trip odometer
shows zero.
To set the clock, refer to the information
below.OdometerWhen the ignition key is not in the ignition
lock, you can activate the displays shown in
the illustration by pressing the button in
the display elements.
Setting The clock must be shown on the display.
1. If necessary, press button 1 to display
the clock
2. Press button 1 for approx. 5 seconds to
activate the clock-setting mode
3. Press button 1 to select 12-hour or
24-hour mode
4. Wait approx. 5 seconds until the hours
display is shown
5. Press button 1 to set the hour
6. Wait approx. 5 seconds until the min-
utes display is shown
7. Press button 1 to set the minute.
The time entered is stored automatically
after approx. 1 minute.
In the speedometer or Cockpit Chrono
Pack*If the LED begins to be lit continuously,
there are approx. 2.1 gallons/8 liters of fuel
left in the tank.
Fuel tank capacity:
Approx. 13.2 gallons/50 liters.
When you switch on the ignition, the LED
lights up briefly to confirm that the system
is operational.
If the angle of the vehicle varies, for exam-
ple when you are driving in mountainous
areas, the needle may fluctuate slightly.
Refill the gas tank early. If you drive
to the last drop of fuel, engine func-
tions are not guaranteed and damage can
occur.<
Page 70 of 172

68
FUEL GAUGE COOLANT TEMPERATURE GAUGE In the navigation system*
Please also comply with the instruc-
tions in the previous section.<
If the LED changes from orange to red,
there are approx. 2.1 gallons/8 liters of fuel
left in the tank.
Coolant temperature gaugeDepending on the equipment version, a
coolant temperature gauge is located in
the speedometer or the Cockpit Chrono
Pack.
Low temperature:
The engine is still cold. Drive at moderate
engine and vehicle speeds.
Center position:
Normal operating temperature of the
engine.
High temperature:
As soon as there is a deviation from the
center position upwards or to the left:
Drive with moderation and at low engine
speeds. If necessary, switch off the engine
and allow it to cool down.
Checking coolant level, refer to page118.Temperature warning LED 1 comes on while the vehicle is in
motion: engine is too hot. Switch off the
engine immediately and allow it to cool
down.
When you switch on the ignition, the LED 1
lights up briefly to confirm that the system
is operational.Equipment with navigation system* or
Cockpit Chrono Pack*
Coolant temperature warning
lamp 2 comes on while the vehicle
is in motion: engine is too hot.
Switch off the engine immediately and
allow it to cool down.
Page 71 of 172

69
OVERVIEW REPAIRS OPERATIONCONTROLS DATA INDEX
TACHOMETER SERVICE INTERVAL DISPLAYDo not operate the engine with the needle
in the red overspeed zone of the gauge.
To protect the engine, the power is reduced
when you approach a certain engine speed
in this sector.
Remaining distance for serviceWith the ignition key in position 1 or
higher, the distance remaining before the
next scheduled service is displayed in miles
for a short period. The display also indicates
whether an engine oil service and/or an
inspection is due.
The remaining distance is calculated on the
basis of the preceding driving style. The dis-
play counts backwards in steps of 35 miles/
50 km to the next service. A flashing mes-
sage and a minus sign in front of the dis-
play that again begins counting forwards
mean that the service interval has been
exceeded.
Please schedule an appointment with your
MINI Dealer or a workshop that has spe-
cially trained personnel working in accor-
dance with the specifications of your MINI
manufacturer.
For more information on the service inter-
val display, refer to page121.
Page 72 of 172

70
ONBOARD COMPUTER
*
Mode selection
You can use the button in the turn signal
indicator lever to retrieve information from
the onboard computer for display in the
tachometer. By pressing the button briefly,
you can call up a new function for display.
The order of the displays:
Outside temperature, range, average con-
sumption and current consumption, aver-
age speed and current speed.
If the vehicle is equipped with a navi-
gation system, you will find more
information on the onboard computer in
the Owner's Manual for Navigation Sys-
tem.<
Outside temperature If the vehicle is not equipped with an
onboard computer, only the outside tem-
perature is displayed.
Press the button in the turn indicator lever
to switch the display from outside temper-
ature to current speed and vice versa.
You can have the unit of measure set
to7 or6.
377, the onboard computer automati-
cally switches to the outside temperature
display.
In addition, a signal sounds and the display
flashes.
Black ice can occur at temperatures
above +36/377 as well. You
should therefore drive carefully on bridges
and shaded roads, for example; otherwise
there is an increased risk of an accident.<
With navigation system:
The temperature is displayed in the status
line of the navigation system, refer to the
Owner's Manual for Navigation System.
Current vehicle speedIf the vehicle is not equipped with an
onboard computer, only the current speed
is displayed.
Press the button in the turn indicator lever
to switch the display from outside temper-
ature to current speed and vice versa.RangeThe display shows a range estimate based
on the available fuel. The amount of fuel
remaining in the tank is measured, and the
range is estimated from your driving style
over the last 20 miles/30 km.
If the range displayed is less than
35 miles/50 km, be sure to refuel;
otherwise engine functions are not guaran-
teed and damage could occur.<
 1
1 2
2 3
3 4
4 5
5 6
6 7
7 8
8 9
9 10
10 11
11 12
12 13
13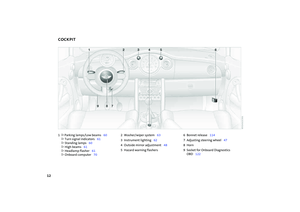 14
14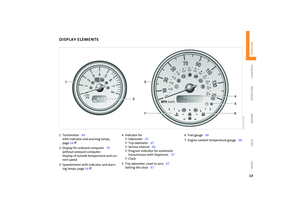 15
15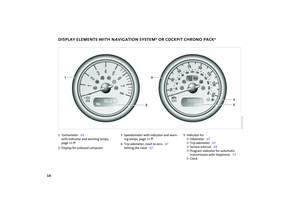 16
16 17
17 18
18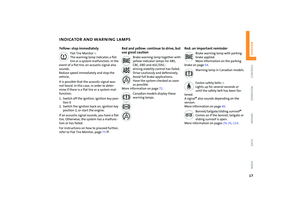 19
19 20
20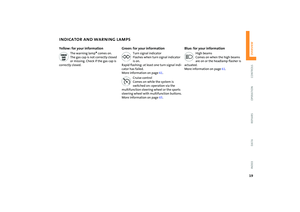 21
21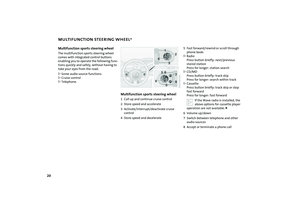 22
22 23
23 24
24 25
25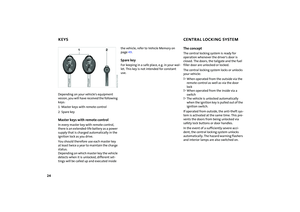 26
26 27
27 28
28 29
29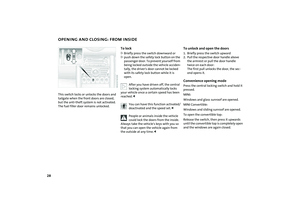 30
30 31
31 32
32 33
33 34
34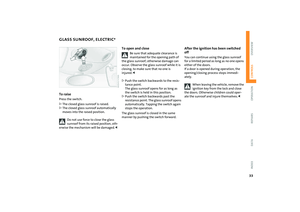 35
35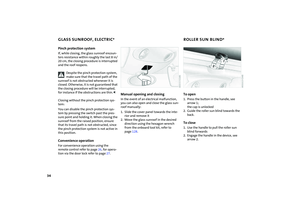 36
36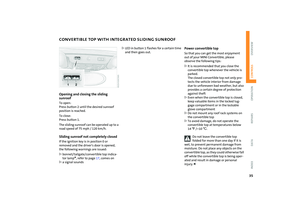 37
37 38
38 39
39 40
40 41
41 42
42 43
43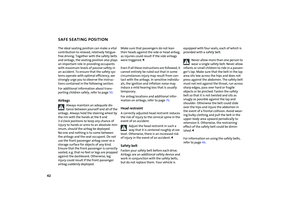 44
44 45
45 46
46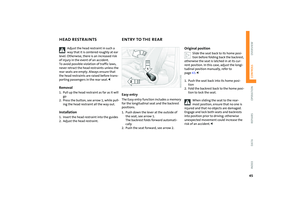 47
47 48
48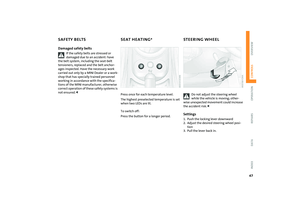 49
49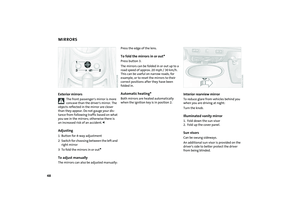 50
50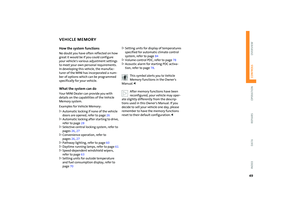 51
51 52
52 53
53 54
54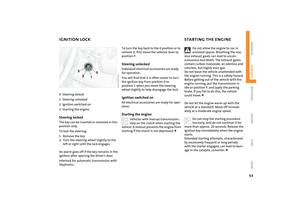 55
55 56
56 57
57 58
58 59
59 60
60 61
61 62
62 63
63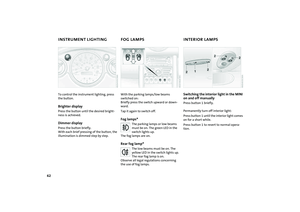 64
64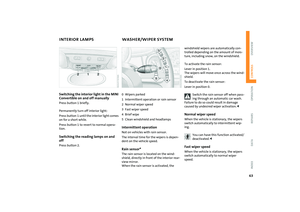 65
65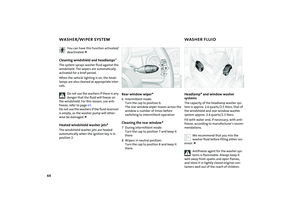 66
66 67
67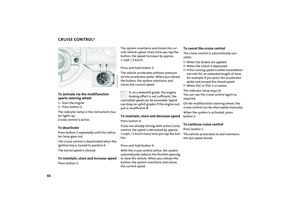 68
68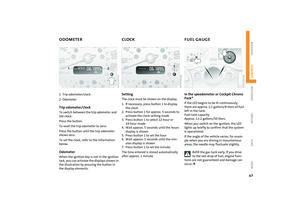 69
69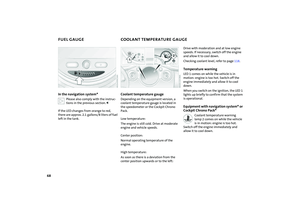 70
70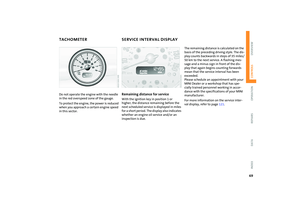 71
71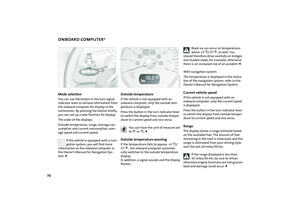 72
72 73
73 74
74 75
75 76
76 77
77 78
78 79
79 80
80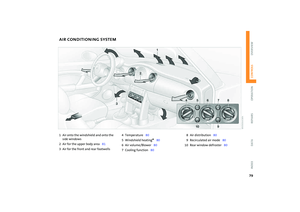 81
81 82
82 83
83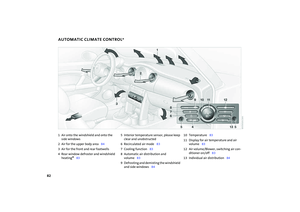 84
84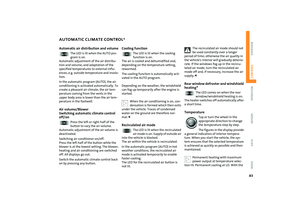 85
85 86
86 87
87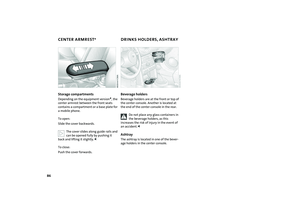 88
88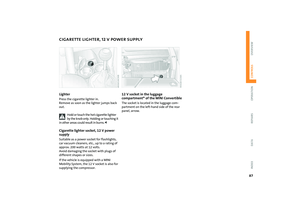 89
89 90
90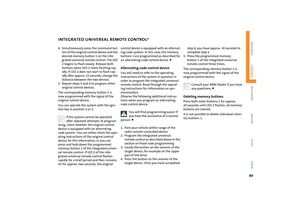 91
91 92
92 93
93 94
94 95
95 96
96 97
97 98
98 99
99 100
100 101
101 102
102 103
103 104
104 105
105 106
106 107
107 108
108 109
109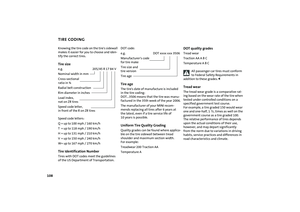 110
110 111
111 112
112 113
113 114
114 115
115 116
116 117
117 118
118 119
119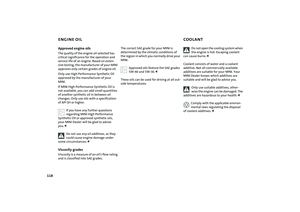 120
120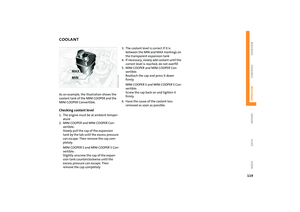 121
121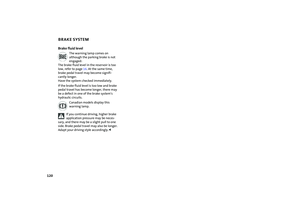 122
122 123
123 124
124 125
125 126
126 127
127 128
128 129
129 130
130 131
131 132
132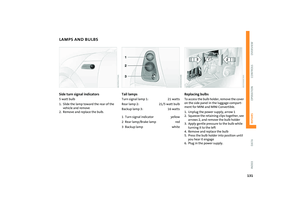 133
133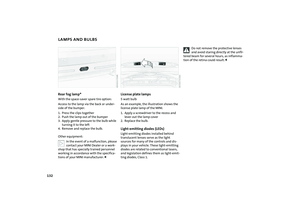 134
134 135
135 136
136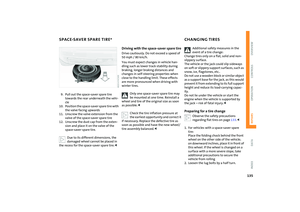 137
137 138
138 139
139 140
140 141
141 142
142 143
143 144
144 145
145 146
146 147
147 148
148 149
149 150
150 151
151 152
152 153
153 154
154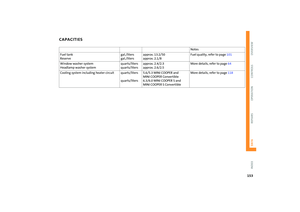 155
155 156
156 157
157 158
158 159
159 160
160 161
161 162
162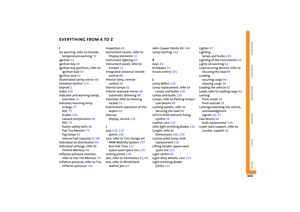 163
163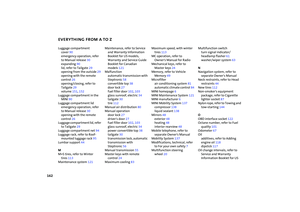 164
164 165
165 166
166 167
167 168
168 169
169 170
170 171
171